Step-by-step guide to building your first app with Microsoft PowerApps

The Dynamics 365 Partner community focus this month is on Microsoft PowerApps and Microsoft Flow. Read the introductory blog post, and if you missed our partner call on April 11, you can watch it on demand.
As a companion to the call, we've created a step-by-step guide that will help you build your first app for Microsoft Dynamics 365 using Microsoft PowerApps. This app lets you view and update account information from Microsoft Dynamics 365 for Sales.
Before you start...
- Set up a PowerApps account using your organization email address
- You will need a valid Microsoft Dynamics 365 for Sales instance under the same organization
- Download and install the PowerApps Studio application from the Windows Store
Create the PowerApps connection to Dynamics 365
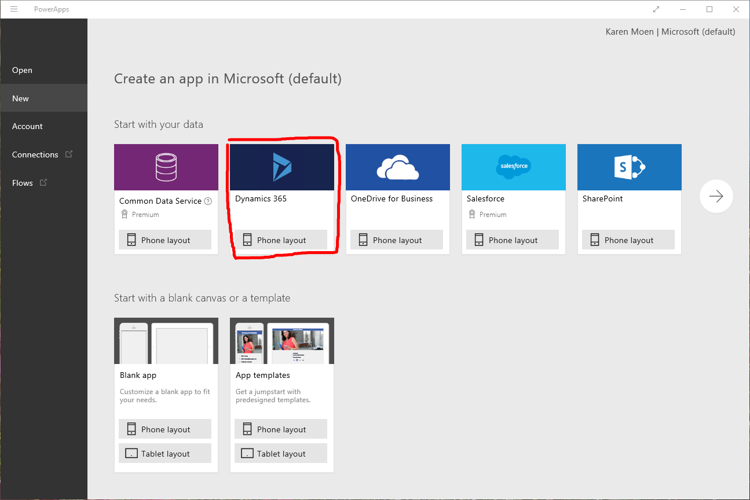
Open PowerApp Studio and select Dynamics 365 Phone layout to create a new app with Dynamics 365 data.
Connect to your Dynamics 365 tenant by selecting +New connection.
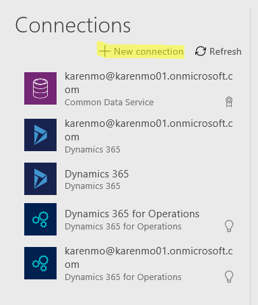
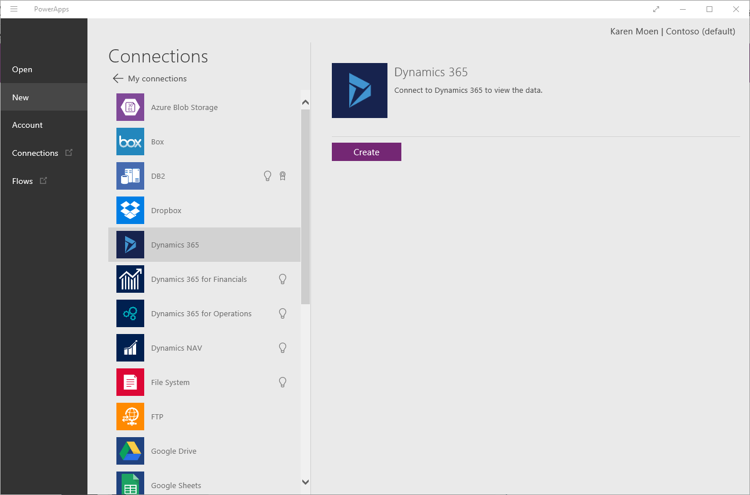
Select Dynamics 365 from the list of Connections and click Create to make connection.
Select your Dynamics 365 Connection and select the instance from the Choose a dataset list.

Select Accounts from the list under Choose and click Connect.

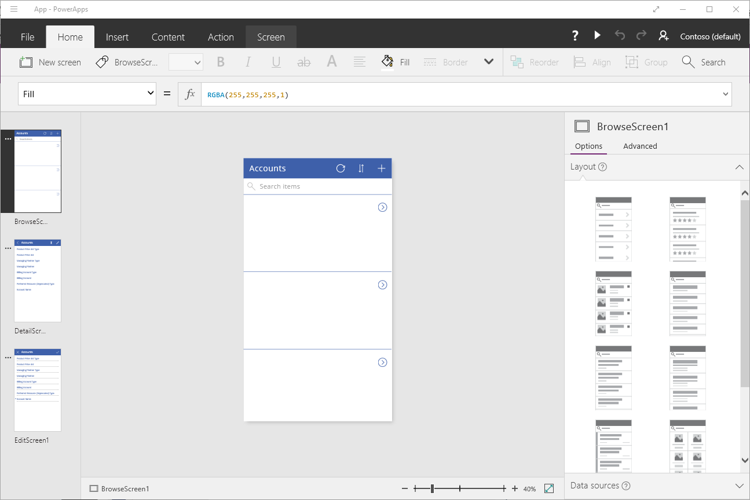
PowerApps will connect to Dynamics 365 and build an application based on the Account entity.
As you can see from the screen shown below, the new app includes three screens:
- A screen to list accounts
- A screen to see account details
- A screen to edit account information
While it is helpful to have PowerApps automatically create this application, it does not quite provide the functionality we need.
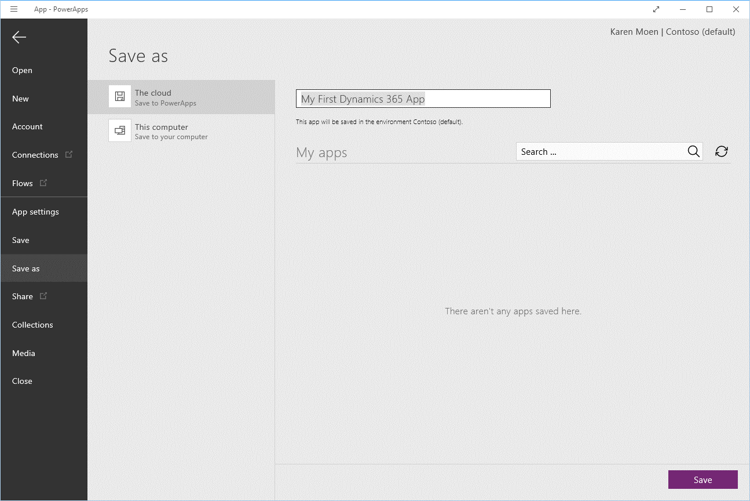
Before we walk through how to make the application functional, let’s save it: Select File > Save As > The cloud > type in your app name > Save.
Refine the Browse screen
The three screens you've created are called BrowseScreen1, DetailScreen1, and EditScreen1. You see them listed on the left side of the PowerApps Studio screen. Let’s start with the changing the Browse screen.
First, select the correct account fields to display on the Browse screen.
Click on the first cell in the list of items on the screen, as shown below. You will see the fields from the Account table that are being used on the right side of the screen under Content.
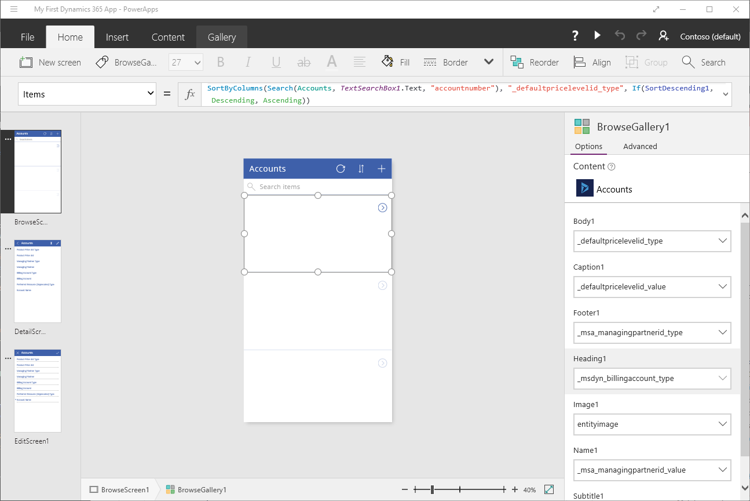
As you select each of the fields on the right, you will see where this data will display on the Browse screen.
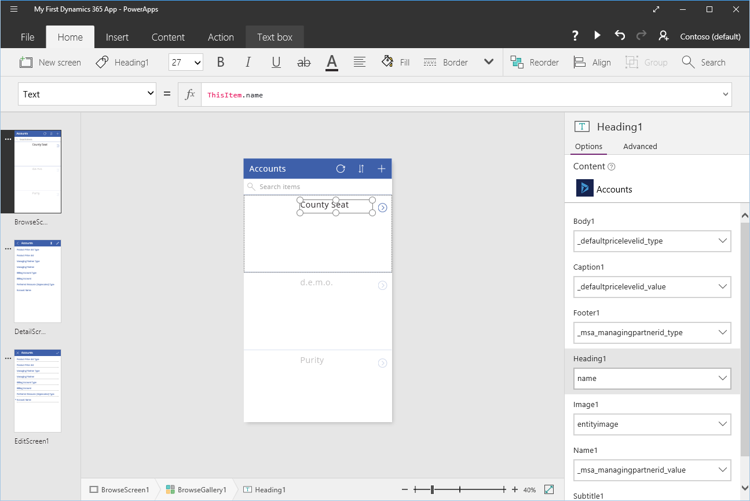
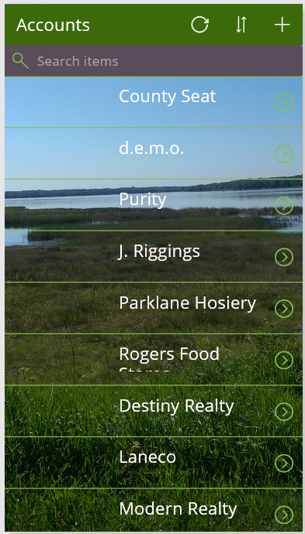
In the Content pane under Heading1, select the drop down for a list of all the fields and select the Account Name (name) field. You will now see the Account Name listed in the Browse screen, as shown below.
This is the only field we will have listed on this screen. To remove the rest of the fields, click on Body1 on the right side of the screen and the item will be selected on the Browse screen. Click Delete to remove this field.
Continue and delete the following fields: Caption1, Footer1, Name1, and Subtitle1.
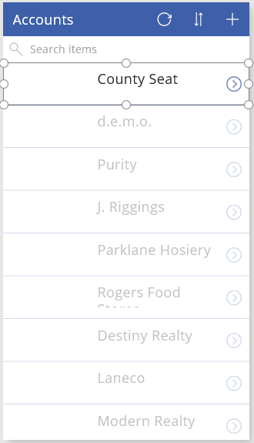
The screen will now show only two fields, Heading1 and Image1.
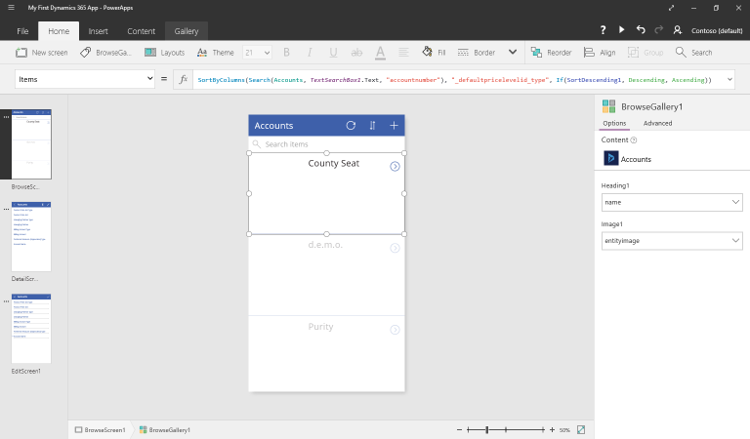
Make the display box a bit smaller by dragging the bottom sizing control up, and you will see more accounts listed on the screen.
Don't forget to save these changes.
Refine the Detail screen
The next step is to select the fields that we want to display on the Account details screen.
Select the Detail screen and then click on the first cell in the list of items on the screen. You will see the fields from the Account table that are being used on the right side of the screen.
Click on the pink eye image next to the following fields to remove them from the screen:
- Product Price List Type
- Product Price List
- Managing Partner Type
- Managing Partner
- Billing Account Type
- Billing Account
- Preferred Resource (Deprecated) Type
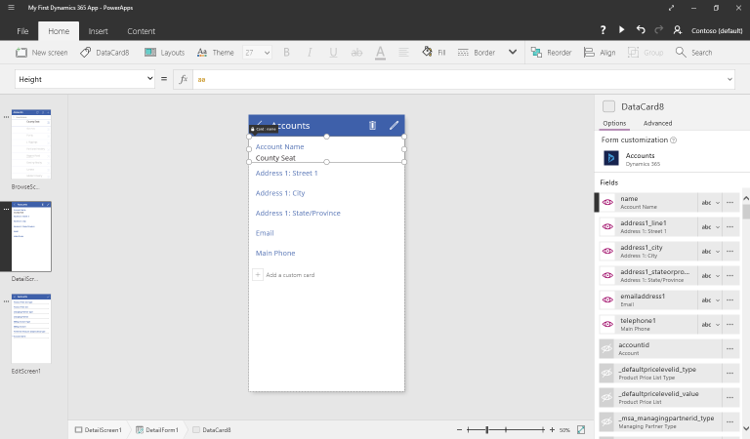
You should now see Account Name at the top of the screen.
Add the following fields by clicking on the pink eye image next to the field name:
- Address1_line1
- Address1_City
- Address 1_StateProvince
- Email_address1
- Telephone1
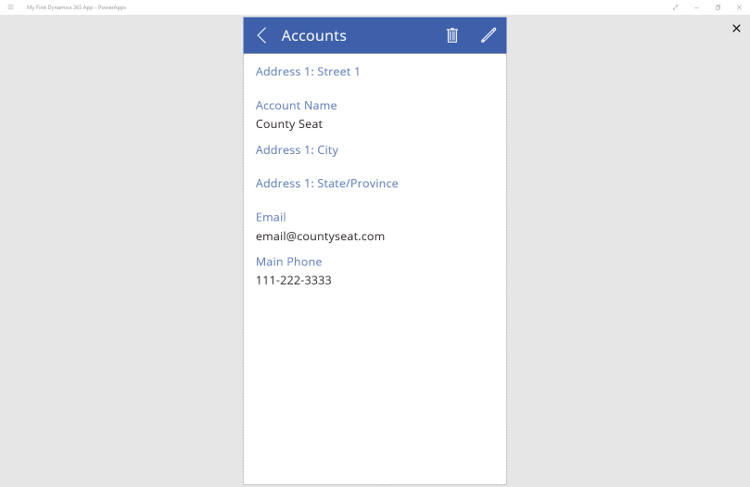
The screen should look like the below.
Don't forget to save these changes.
Run your app
Select the Browse Screen and click Play button at the top right hand side of your screen to Preview the app to see if it functions correctly.
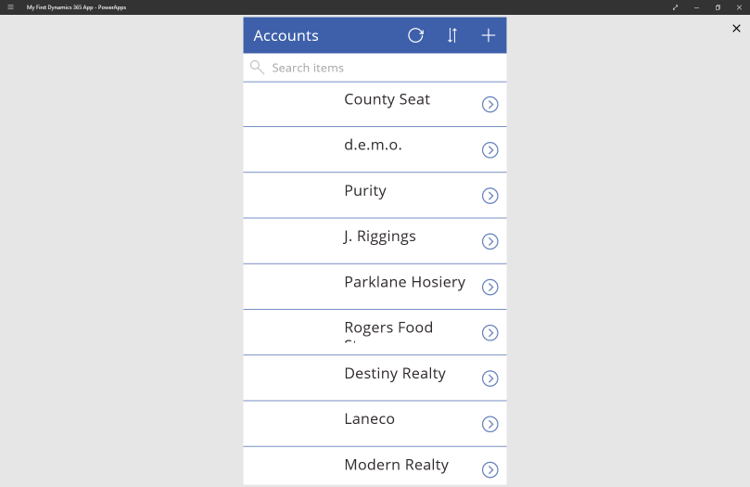
Select one of the accounts from your list to view the Detail screen for that account.
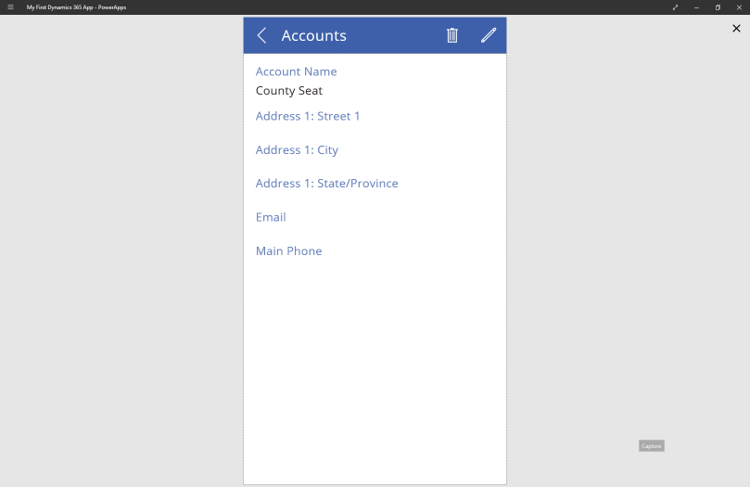
Click on the pencil icon in the upper right hand corner of the screen to edit this account record.
Add email address and main phone number as shown below, and click the checkmark in the upper right hand corner of the screen to save.

The Detail screen will then be shown once the changes to the Dynamics record has been saved.
Click on the X in the upper right hand corners of the screen to exit the app preview.
Enhance the look and feel
There are PowerApps themes that you can use to enhance the look and feel of the application to make it look very professional in a couple of clicks.
Select Theme and choose from one of the out-of-the-box themes.

Select the Screen tab to insert a Background Image, Image Position, and the Fill colors.
Congratulations! You have now written your first app for Microsoft Dynamics 365 using Microsoft PowerApps.
Run your app on a mobile device
To run your new app on a mobile device, you will need to download and install the mobile client application.
Resources for Microsoft PowerApps
- Enhance your new app with these techniques
- PowerApps Community webcasts in April and May
- PowerApps site
- PowerApps community
- PowerApps documentation