Part 2: How to build a Windows PE and Nano Server image to deploy Nano Server at scale
Over a series of blog posts we will describe a solution for how to deploy Nano Server at scale using Microsoft tools. The blog post series are:
- Part - 1: Nano Server Domain Join - Introduction
- Part - 2: How to build a Windows PE and Nano Server image to deploy Nano Server at scale (This blog post)
- Part - 3: How to configure WDS, Unattend.xml file, Windows PE Image, and Nano Server image to deploy a Nano Server at-a-scale
- Part - 4: Bare Metal Deployment (BMD) Consideration
In this blog post we will explain how to build Windows Pre-installation Environment (Windows PE) and Nano Server WIM images to provision Nano Server for deployment at scale. Windows PE allows you to add optional components to the image, which will enable more advanced scenarios than what is available by default. Following the creation of the Windows PE Image, we will create a Nano Server WIM image with the needed components and configuration to run on a virtual or physical server in a datacenter.
For general Nano Server deployment steps, see the Nano Server Deployment Guide: https://aka.ms/NanoServer
The high level tasks in this blog post are:
- Steps to build a Windows PE Image
- Steps to build a Nano Server WIM Image
- Next steps
Steps to build a Windows PE Image:
To build a Windows PE image please follow these steps:
Download and install the Windows Assessment and Deployment Kit (Windows ADK) for Windows 10 with Windows PE tools
Add the required optional components to the Windows PE image for this scenario
Create a batch file for the Windows PE Image
Add PowerShell file to the Windows PE image
Add configuration files to the Windows PE image
Unmount the Windows PE image and create media
Download and install Windows Assessment and Deployment Kit with Windows PE tools
The Windows ADK is a collection of tools and documentation that can be used to customize, assess, and deploy Windows operating systems to new computers. The Windows ADK enables two key scenarios: Windows deployment and Windows assessment. For this solution we are using the Windows PE sub component which is a minimal operating system designed to prepare a computer for installation and servicing of Windows. To install Windows PE please do the following:
Download the Windows ADK for Windows 10 from here https://msdn.microsoft.com/en-us/windows/hardware/dn913721.aspx
Run adksetup.exe
Click install ADK
Read license agreement and accept if in agreement.
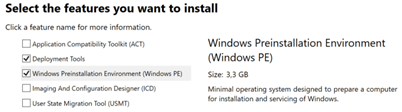
Select the following features
Click Install
Once the wizard has installed with the selected components, click Start, and type deployment. Right-click Deployment and Imaging Tools Environment and then select Run as administrator
To create a fresh WinPE image repository in C:\ do the following
Type copype amd64 C:\WinPEImage
Add the required optional components into Windows PE image for this scenario
By default, the Windows PE images does not have support for PowerShell, DISM and Disk configuration, all of which are required by the solution to configure Nano Server during provisioning described in this blog post series. To enable these features you need to add these optional packages to the Windows PE image using DISM: WinPE-WMI, WinPE-NetFx, WinPE-Scripting, WinPE-PowerShell, WinPE-DismCmdlets, WinPE-SecureBootCmdlets, WinPE-StorageWMI, WinPE-WDS-Tools, WinPE-Setup, WinPE-Setup-Client. ing. To add the optional components into the Windows PE image please do the following:
Mount the Windows PE image running this command line:
Dism /Mount-Image /ImageFile:"C:\WinPEImage\media\sources\boot.wim" /index:1 /MountDir:"C:\WinPEImage\mount"
Open a browser and go to https://github.com/uday31in/Nano/tree/master/WinPENanoDomainJoin
Download DISMWinPEInst.ps1
and save it as a file in C:\WinPEImageRun DISMWinPEInst.ps1 from an elevated PowerShell prompt
Verify that all packages are installed correctly going through the output list of installed components and check that the components mentioned above have been installed.
Add configuration files into the Windows PE image
In addition to the components added to the Windows PE image we need to modify the wpeinit file, create a boot.cmd and WinPENanoDomainJoin.ps1 file which will be launched as part of the Nano Server image deployment.
The role of the files being added are the following:
Wpeinit.ini
By adding this file to the image you can specify which script Windows PE will execute as part of the boot process
Boot.cmd
This file will execute the PowerShell script as Windows PE cannot execute PowerShell natively from Wpeinit.ini.
WinPENanoDomainJoin.ps1
This file contains the PowerShell script that will add Nano Server to the domain and automate the deployment.
Create the WinPENanoDomainJoin.ps1 PowerShell script
This script is stored on GitHub for easy access and reference as a sample script. The script should be downloaded and added to the Windows PE image and will be run after the Nano Server WIM file is installed to the physical or virtual server. The script will generate a domain blob and inject this into the Nano Server image using the parameters given by the unattend.xml or manually provided by the administrator during install.
- Open a browser and go to https://github.com/uday31in/Nano/tree/master/WinPENanoDomainJoin
- Download WinPENanoDomainJoin.ps1 and save in C:\WinPEImage
- Copy C:\WinPEImage\WinPENanoDomainJoin.ps1 C:\WinPEImage\mount\
Create boot.cmd to launch WinPENanoDomainJoin.ps1
The boot.cmd file is used to execute the WDS setup and following this launch the WinPENanoDomainJoin.ps1 script. To create the WinPENanoDomainJoin.ps do the following:
Open Notepad
Add the following lines and save as boot.cmd in C:\WinPEImage\
x:\sources\setup /wds /noreboot
cd %~dp0%
x:\Windows\System32\WindowsPowerShell\v1.0\powershell.exe -NoProfile -ExecutionPolicy Bypass -File WinPENanoDomainJoin.ps1
Copy C:\WinPEImage\Boot.cmd C:\WinPEImage\mount\
Create Winpeshl.ini to launch boot.cmd
Winpeshl.ini controls whether a customized shell is loaded in Windows PE instead of the default Command Prompt window. To load a customized shell, create a file named Winpeshl.ini and place it in %SYSTEMROOT%\System32 of your customized Windows PE image. To do this do the following:
Start a command prompt
Run Notepad C:\WinPEImage\mount\Windows\System32\Winpeshl.ini
Insert the following lines and save the file
[LaunchApp]
AppPath = x:\boot.cmd
Save the file
Create lang.ini to set install language
The lang.ini will set the language used during the installation in the GUI. In this blog post we will use English US as the UI language.
Start a command prompt
Run Notepad C:\WinPEImage\mount\sources\lang.ini
Insert the following lines and save the file
[Available UI Languages]
en-US = 3
[Fallback Languages]
en-US = en-us
Save changes made to the wim file and unmount the image.
To save all the changes made to the Windows PE image do the following.
- Start a command prompt as administrator
- Run: Dism /Unmount-Image /MountDir:"C:\WinPEImage\mount" /commit
Steps to build a Nano Server Image:
This section will explain how to build a Nano server WMI image to be deployed via WDS. This will be split into two options, physical hardware and virtual machines. To create this image, we are using standard OEM drivers for physical servers and using virtual drivers for virtual WIM image. If special drivers are needed these can be added as part of creating the WIM image which is explained here: https://aka.ms/nanoserver . It is also possible to create VHD and VHDX files following the same concept and import these into WDS. This will not be part of this blog post but is explained here.
Download the latest Windows Server 2016 image and load NanoServerImageGenerator PowerShell module
- Download the latest Windows Server 2016 build from here: https://www.microsoft.com/en-us/evalcenter/evaluate-windows-server-technical-preview
- Mount the image as a drive by right clicking on the ISO file and select mount
- Copy NanoServerImageGenerator folder from the \NanoServer folder in the Windows Server Technical Preview ISO to a folder on your hard drive
- Start Windows PowerShell as an administrator, change directory to the folder where you have placed the NanoServerImageGenerator folder and then import the module with Import-Module .\NanoServerImageGenerator -Verbose
Nano Server in a virtual machine
In this section we'll describe how to create the Nano Server WIM file to be used with virtual machines. Create a WIM for the Datacenter edition that includes the following features: Failover Clustering, Scale-out File Server and the Hyper-V guest drivers. Also enable Remote Management by running the following command which will prompt you for an administrator password for the new WIM file.
New-NanoServerImage -Edition Datacenter -DeploymentType Guest -Clustering -Storage -EnableRemoteManagementPort -MediaPath <path to root of media> -BasePath .\Base -TargetPath .\NanoServerVM\<WMI File Name>.WIM
Example:
New-NanoServerImage -Edition Datacenter -DeploymentType Guest -Clustering -Storage -EnableRemoteManagementPort -MediaPath E:\ -BasePath .\Base -TargetPath .\NanoServerVM\NanoServerVM.WIM
Nano Server on a physical computer
This section describes how to create the Nano Server WIM file to be used with physical hardware using the pre-installed device drivers. If your hardware requires a driver that is not already provided in order to boot or connect to a network, follow the steps here. Create a WIM that includes the OEM drivers, Hyper-V, Scale-out File Server, Failover Clustering features and enable Remote Management by running the following command which will prompt you for an administrator password for the new WIM.
New-NanoServerImage -Edition Datacenter -DeploymentType Host -MediaPath <path to root of media> -BasePath .\Base -TargetPath .\NanoServerPhysical\NanoServer.WIM -OEMDrivers -Compute –Clustering –Storage -EnableRemoteManagementPort
Example:
New-NanoServerImage -Edition Datacenter -DeploymentType Host -MediaPath E:\ -BasePath .\Base -TargetPath .\NanoServerPhysical\NanoServer.WIM -OEMDrivers -Compute –Clustering –Storage -EnableRemoteManagementPort
Next steps
In the next blog post we will configure Windows Deployment Server (WDS) with the newly created Windows PE and Nano Server WIM images. Then, we will configure two different unattend.xml files with input parameters required during the installation of Nano Server. Lastly we will provision a Nano Server using WDS and a VM running on Hyper-V.
Following this blog post we will release two more blogs posts:
- Part - 3: How to configure WDS, Unattend.xml file, Windows PE Image, and Nano Server image to deploy a Nano Server at-a-scale
- Part - 4: Bare Metal Deployment (BMD) Considerations
That's it for now. Please don't forget to share your feedback with us via the comments section below or using the User Voice forum!
Regards
The Nano Server Team