Part 3: How to configure WDS, Unattend.xml file, Windows PE Image, and Nano Server image to deploy a Nano Server at-a-scale
Over a series of blog posts we will describe a solution for how to deploy Nano Server at scale using Microsoft tools. The blog posts are:
- Part - 1: Nano Server Domain Join (Deployment-at-a-scale an introduction)
- Part - 2: How to build a Windows PE and Nano Server image to deploy Nano Server at-a-scale
- Part - 3: How to configure WDS, Unattend.xml file, Windows PE Image, and Nano Server image to deploy a Nano Server at-a-scale (This blog post)
- Part - 4: Bare Metal Deployment (BMD) Considerations
In the previous blog post (here) we discussed how to build a Windows PE and Nano Server image to deploy Nano Server. In this blog post we will discuss how to configure WDS, Unattend.xml file, WINPE Image, and Nano Server image to deploy Nano Server at-a-scale.
The high level tasks in this blog post will be:
- Pre-requisites for the solution
- Configuring WDS server
- Import Windows PE Image
- Import Nano Server Image
- Configure Unattend.xml file within WDS
- Deploy Nano Server using a Gen2 VM with input (Example 1).
- Deploy Nano Server using a Gen2 VM without input (Example 2).
- Next Step
Pre-requisites for the solution:
The following Pre-requisites are needed in order to deploy Nano Server and join it to a domain:
- AD domain
- DHCP Server with IP scope which the VM or physical server can lease an IP address from
- WDS Server (Domain joined)
- Modified WinPE Image (as created in the previous blog post)
- Nano WIM / VHD / VHDX Image (as created in the previous blog post)
- Domain account(s) to create the AD computer object and authenticate with WDS server.
- Hyper-V server with two Gen2 VMs connected to same network as WDS server (used as examples in this blog post to simulate a physical UEFI Server)).
Please verify that these pre-requisites are available before starting the configuration of the WDS server.
In this blog post we'll be using two examples for the deployment of Nano Server and joining it to the domain.
Example 1: Use a simple unattend file to deploy Nano Server and provide all needed information manually during the process (Video).
Example 2: Store all information in the Unattend file and provide no information during the installation (Video)
Configuring Windows Deployment Server
- Login as an administrator on the WDS Server
- Start Server Manager > Click Tools > Windows Deployment Services
- Select the WDS Server that should be used for Nano Server Deployment.
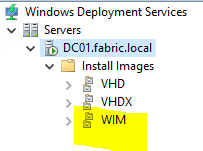
- Right click on WDS server and select Add Image Group
- Name the Image Group e.g. WIM and click Ok
Import WinPEImage
- Copy the Windows PE Image (that was created earlier) to the WDS server (if it was made on another server) to a folder on the WDS server e.g. C:\WinPEImage\media\sources\boot.wim
- Browse to the location where you copied the Windows PE Image e.g. C:\WinPEImage\media\sources\boot.wim
- Click Open and click Next
- Give an Image Name and image description and click Next e.g. WinPEBoot
- Click Next
- Verify that the WinPE WIM Image imports successfully with a message saying: "The selected images were successfully added to the server" and click Finish.
Import Nano Server WIM image
- Copy the Nano WIM Image (that was created earlier) to the WDS server (if it was made on another server) to a folder on the WDS server e.g. C:\WinPEImage\NanoServer
- Right click on Install Group created earlier and select Add Install Image.
- Browse to the location where you placed the Nano WIM Image e.g. C:\WinPEImage\NanoServer
- Click Open and click next
- Give an Image Name and image description and click next e.g. Windows Server 2016 Nano TP5
- Click Next
- Verify that the Nano Server WIM Image imports successfully with a message saying "The selected images were successfully added to the server" and click Finish.
Creating Unattend.xml files
The solution uses unattend files to install Nano Server using WDS. The unattend file holds information that is needed to deploy the Nano Server such as disk partitioning, user name to authenticate with WDS as well as domain join user and Server Name.
The solution allows you to decide how much information you would like to capture in the unattend file. For the information that is not specified in the unattend file, WDS / PowerShell script will prompt for the needed information.
In the unattend file examples provided we are using US as default language and partitioning the disk as default as well. To change this please reference to the unattend link below.
For more information on unattend files (click here)
Creating an unattend file that asks for information.
The first unattend file is the simplest one. To obtain the unattend file do the following.
- Go to GitHub project: WinPENanoDomainJoin
- Download the following two files and save them to c:\WinPEImage
- Open Gen2NoCredential.xml with a xml editor
- Go to the following section:
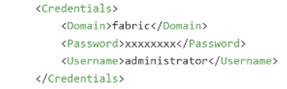
- Replace Domain, User Name and Password with a user that can authenticate with WDS Domain Server.
- Save the file in the WDS Remote Install directory e.g. D:\RemoteInstall
Creating an unattend file that as all information in the unattend file.
- Open Gen2WithCredential.xml with a xml editor
- Go to the following section:

This session is authentication WDS with a Domain user that is known by WDS.
Replace Domain, User Name and Password with a user that can authenticate with WDS Domain Server.
Go to the following section
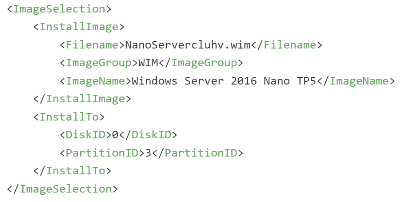
This section specifies which WIM file and Image group and Image Name that should be used for deployment
Replace: Filename, ImageGroup and ImageName with the one configured in WDS in step "Configuring Windows Deployment Server".
Go to the following section

This section specifies the computer name of the Nano Server
- Replace the computer name with one you would like to use for deployment.
- Save the file in the WDS Remote Install directory e.g. D:\RemoteInstall
Configure Unattend file with WDS (Example 1 NoCredentials)
Open WDS console
Right click on the WDS server used for Nano Deployment and select Properties.
Select Client in the Tab
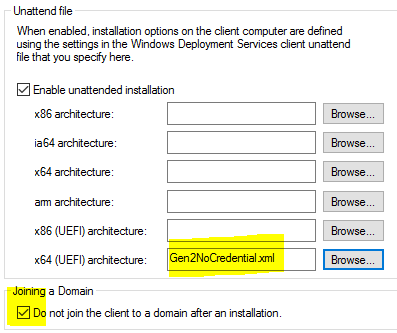
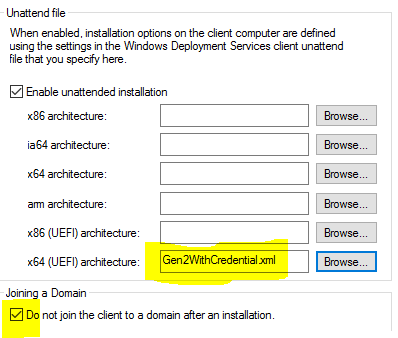
Enable unattend installation
Click on x64 (UEFI) architecture
Click browse and go to the location where the first unattend file was saved (Gen2NoCredential.xml).
Check "Do not join the client to a domain after an Installation"
Click Ok
Deploy Nano Server using a Gen2 VM with input (Example 1).
- Open Hyper-V console on a Hyper-V server connected to the same network as WDS Server
- Create a Gen2 VM and connect the VM to the same network as WDS Server
- Verify that the VM is set to boot from the network adapter connected to the network where the WDS Server
- Start the VM
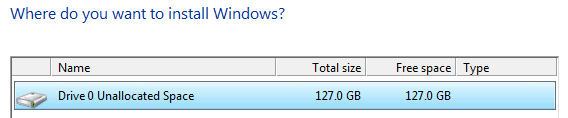
- Select the Nano Server image created earlier e.g. Windows Server 2016 Nano TP5 and click next

- Select the partition and click next.
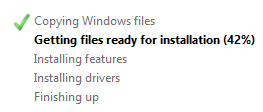
- Wait for the server to install
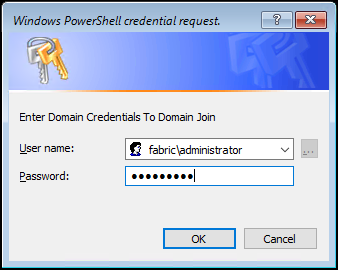
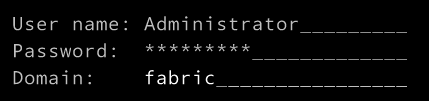
Provide User and Password for Domain user that is going to join the Server to the domain
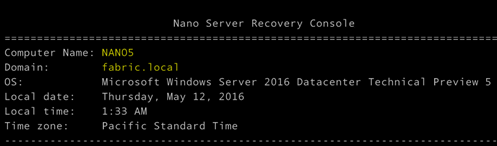
Provide Computer Name e.g. Nano5 and press Enter

Login with the user specified for Domain join e.g. fabric\administrator

Check that Nano Server is joined to the domain and computer Name is right.

Configure Unattend file with WDS (Example 2 With Credentials)
Open WDS console
Right click on the WDS server used for Nano Deployment and select Properties.
Select Client in the Tab
Enable unattend installation
Click on x64 (UEFI) architecture
Click browse and go to the location where the first unattend file was saved (Gen2NoCredential.xml).
Check "Do not join the client to a domain after an Installation"
Click Ok
Deploy Nano Server using a Gen2 VM without input (Example 2).
Open Hyper-V console on a Hyper-V server connected to the same network as WDS Server
Create a Gen2 VM and connect the VM to the same network as WDS Server or use the VM from example 1
Verify that the VM is set to boot from the network adapter connected to the network where the WDS Server
Start the VM
Note: If the VM does not download the WinPE image disabling secure boot might help. This is mostly if a WindowsPE image is used from a beta release of Windows Server.
Verify that no questions are asked and deployment and install of Nano Server happens automatically.
Login with the user specified for Domain join in the unattend file e.g. fabric\administrator
Check that Nano Server is joined to the domain and Computer Name is right.
Next Steps
The Nano Server team hopes you have found the series of blog posts helpful in your process of deploying Nano Server at-a-scale.
Please don't forget to share your feedback with us via the comments section below or using the User Voice forum!
Regards
Nano Server Team