Use OMS Automation to start virtual machines in an Azure resource group
Summary: Learn how to use OMS Automation to start all virtual machines (VMs) in an Azure resource group.
Good morning everyone, Ed Wilson here, and today I want to talk about how to use Microsoft Operations Management suite to turn on all virtual machines in a particular Azure resource group. To do this, I will use OMS Automation to run a Windows PowerShell script.
First, start up Automation
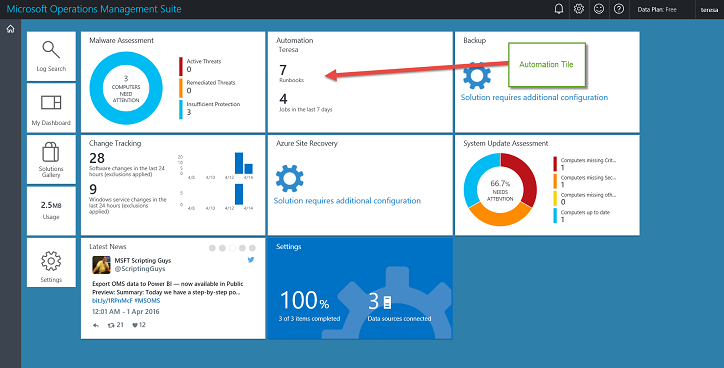
To access automation from my OMS console, I select the Automation tile. The Automation tile gives me a quick overview of the number of runbooks that I have configured and the number of jobs that have run in the last week. It also tells me the name of my automation account. This is shown here:
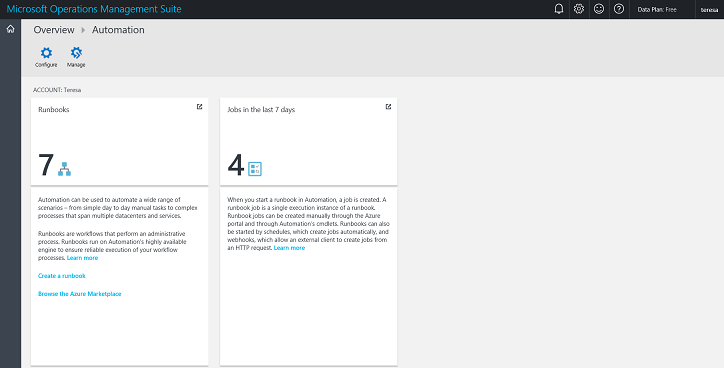
When I select the Automation tile, I go to an Automation Overview page. From here I will be able to configure my automation account, manage my automation account, or dive into the runbooks or jobs. When I select Manage > Runbooks or Manage > Jobs, I go directly to the Automation portal. This overview page is shown here:
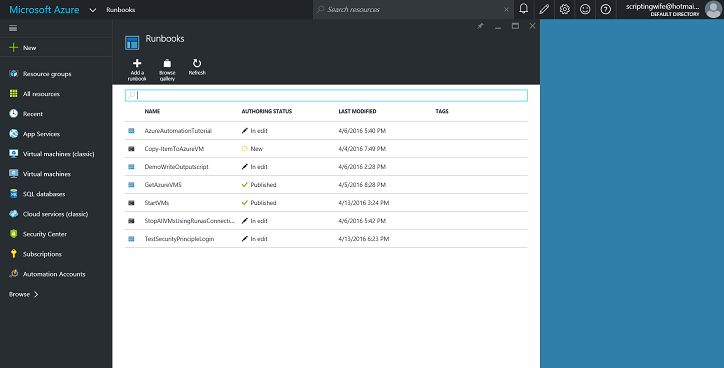
I want to see what runbooks are created, so I select Runbooks and go to that portion of the Automation portal. This page is shown here:
Create a new runbook
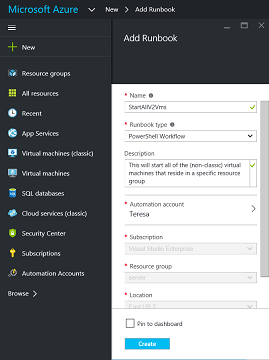
I need to create a runbook that will start all of my virtual machines in a particular resource group. From my Automation Overview page that I went to from my OMS console, I select the Create a Runbook link. This takes me to the Add Runbook page in my Automation portal. I add a name for the runbook and specify the type of runbook that I want to create. There are three options: PowerShell, PowerShell Workflow, or Graphical. I then add a description and choose my automation account. (I use the Teresa automation account instead of the automation account that I created in yesterday’s blog post).
When I choose the automation account, the appropriate subscription, resource group, and location that are associated with that automation account are automatically added. This page is shown here:
After I complete the form to my satisfaction, I select Create, which submits the job to create the new runbook and returns me to my Microsoft Azure dashboard. This dashboard appears here:
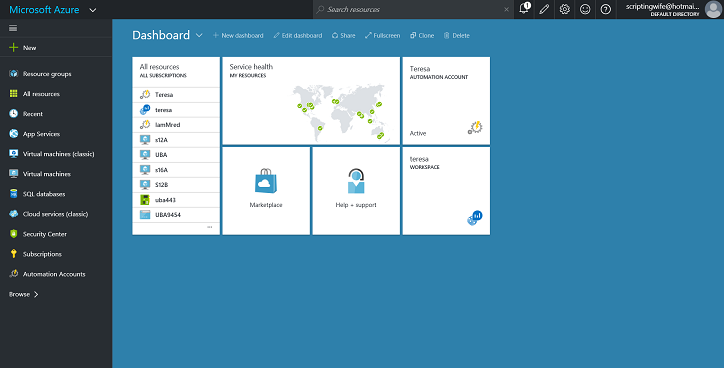
Okay, so that seems a little weird. I thought that it would create the runbook and take me to an edit runbook page so that I could add Windows PowerShell code for the workflow, but, oh well.
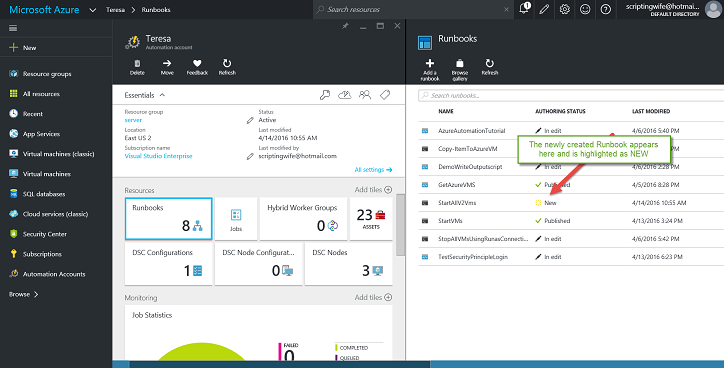
So, I click the Teresa automation icon in the upper left side of the Azure dashboard, and that brings me to the Teresa automation account page. This page is shown here:

I select the Runbooks tile, which opens the Runbooks page. I can see that my StartAllV2Vms runbook is highlighted as new. This is shown here:
Add some PowerShell code
I select my newly created runbook, and it opens to the Edit PowerShell Workflow Runbook page. Because I said that I wanted to create a PowerShell Workflow, the editor helpfully adds the word, Workflow, to the name of the runbook and the open and close curly braces. This is shown in the figure here:
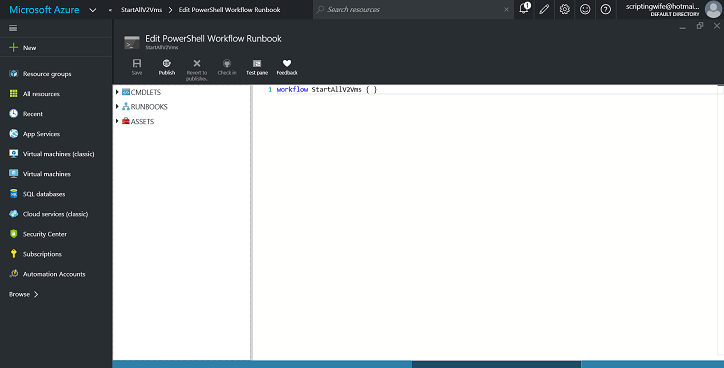
The experience of writing and editing Windows PowerShell code in the Edit PowerShell Workflow page is like writing Windows PowerShell code in Notepad. There is not much in the way of tab completion, syntax highlighting, or anything else. The cmdlets, runbooks, and assets on the left side of the page simply list stuff. There is not much relationship to the code in the workflow pane.
NOTE: This is why Joe Levy wrote the way cool Azure Automation ISE Add-on that I talked about a while back.
So, it’s time to write my Windows PowerShell workflow that will start all the Resource Manager virtual machines in Azure.
NOTE: The name of the workflow and the runbook must match exactly. This isn’t a problem if you create the PowerShell Workflow type of runbook as I outlined in today’s article. However, if you are copying code from somewhere else, make sure that the workflow name and runbook match, or you will get strange errors.
I use the connection code that I created in yesterday’s OMS team blog post to make my connection. This portion of the code is shown here:
Conn = Get-AutomationConnection -Name AzureRunAsConnection
`` Add-AzureRMAccount -ServicePrincipal -Tenant $Conn.TenantID `
-ApplicationId $Conn.ApplicationID -CertificateThumbprint $Conn.CertificateThumbprint
Now, I need to get all of my Resource Manager Azure virtual machines. To do this, I use the Get-AzureRMVM cmdlet, and I store the results back in a variable I call $VMsv2. This line of code is shown here:
$VMsv2 = Get-AzureRmVM
Now I need to walk through the collection of virtual machines. I use the Foreach Windows PowerShell language statement as appears here:
foreach ($vm in $vmsv2)
Now inside the Foreach script block, I specify the name and resource group to start each VM. The command is shown here:
{Start-AzureRmVM -Name $vm.name -ResourceGroupName 'server'}
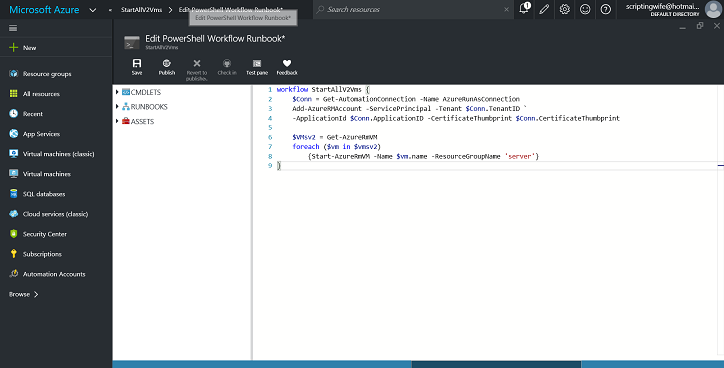
The entire workflow is shown here:
workflow StartAllV2Vms {
$Conn = Get-AutomationConnection -Name AzureRunAsConnection
`` Add-AzureRMAccount -ServicePrincipal -Tenant $Conn.TenantID `
-ApplicationId $Conn.ApplicationID -CertificateThumbprint $Conn.CertificateThumbprint
$VMsv2 = Get-AzureRmVM
foreach ($vm in $vmsv2)
{Start-AzureRmVM -Name $vm.name -ResourceGroupName 'server'}
}
The workflow now is shown here in the Edit PowerShell Workflow page:
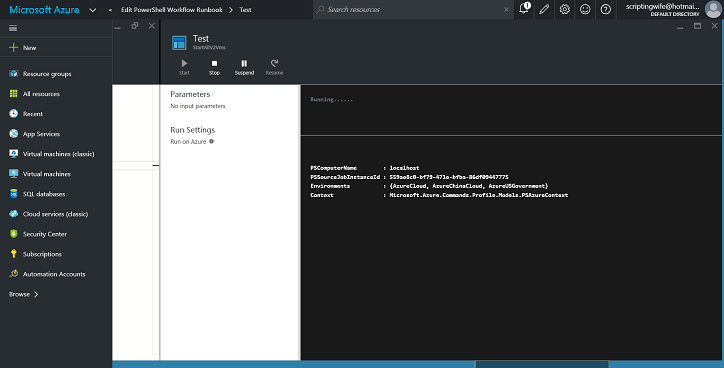
I save the runbook and select Test pane. I can then start the runbook and watch for errors. The process submits the runbook flow, adds it to the queue, starts the runbook, and runs the runbook. I can watch the output in the Test pane if I want. The pane appears here:
After I check that everything is groovy, then I can publish the runbook.
Get a free Microsoft Operations Management Suite (#MSOMS) subscription so that you can test the new alerting features You can also get a free subscription for Microsoft Azure as well.
That is all I have for you today. Join me tomorrow when I’ll talk about how to create a new runbook to stop all Resource Manager virtual machines in a particular resource group.
I invite you to follow me on Twitter and the Microsoft OMS Facebook site. If you want to learn more about Windows PowerShell, visit the Hey, Scripting Guy Blog. If you have any questions, send email to me at scripter@microsoft.com. I wish you a wonderful day, and I’ll see you tomorrow.
Ed Wilson
Microsoft Operations Management Team