SCOM Auto Author example tool
Hi, Mark Manty Premier Field Engineer with Microsoft here with another example tool for System Center Operations Manager.
This example tool (version 1.2) allows you to use snippet templates that you have created with VSAE allowing command line driven automation using your snippet templates to create monitoring workflows.
Did I test every possible monitoring workflow? No, so don’t be surprised if some of your custom templates do not work. If you would like to share the template you use that is failing that would make it much easier to reproduce any issues that are discovered. Included in the zip file are the snippet template examples that I created for testing the tool.
Command line examples
When running the example tool with command line parameters passed, it will perform some validation checks to verify if the line is formatted and ready to add workflow automated from command line.
If it finds that there are invalid parameters, it will display this windows with command line help for each Template it finds in the template directory.
The tool always expects to see the templatesnippet file passed as first argument.
Second argument is the Management pack xml file that it should add workflow to or create new MP if the MP Xml file does not exist.
Each subsequent parameter passed is unique to the template snippet specified in the first argument passed.
Note that there is a check box selection that can be unchecked to prevent the window from closing automatically. This auto close feature was added to help ensure automated command line would continue running in the event that command line params were incorrect on one line or multiple.
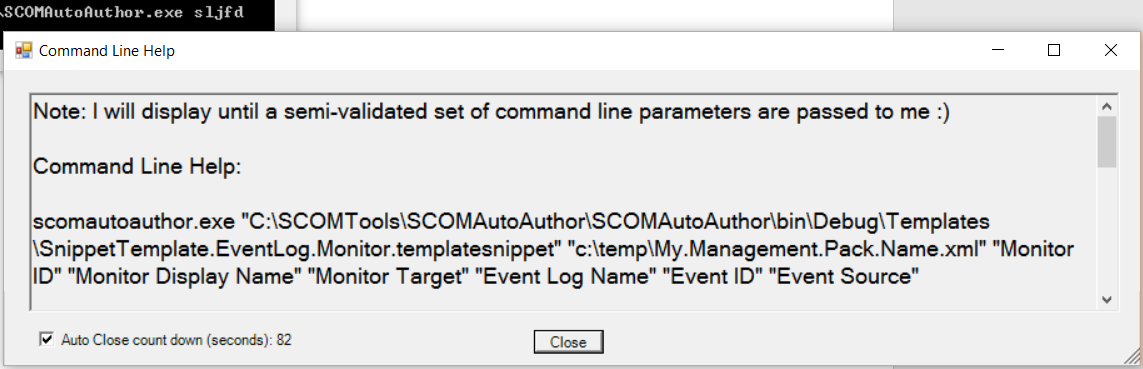
Text from Command line help box.
Note: I will display until a semi-validated set of command line parameters are passed to me :)
Command Line Help:
scomautoauthor.exe "C:\SCOMTools\SCOMAutoAuthor\SCOMAutoAuthor\bin\Debug\Templates\SnippetTemplate.EventLog.Monitor.templatesnippet" "c:\temp\My.Management.Pack.Name.xml" "Monitor ID" "Monitor Display Name" "Monitor Target" "Event Log Name" "Event ID" "Event Source"
scomautoauthor.exe "C:\SCOMTools\SCOMAutoAuthor\SCOMAutoAuthor\bin\Debug\Templates\SnippetTemplate.EventLog.WindowsComputer.Monitor.templatesnippet" "c:\temp\My.Management.Pack.Name.xml" "Monitor ID" "Monitor Display Name" "Monitor Target" "Event Log Name" "Event ID" "Event Source"
scomautoauthor.exe "C:\SCOMTools\SCOMAutoAuthor\SCOMAutoAuthor\bin\Debug\Templates\SnippetTemplate.LocalApplication.Class.templatesnippet" "c:\temp\My.Management.Pack.Name.xml" "Class ID" "Class Display Name" "Registry Key" "Class Description"
scomautoauthor.exe "C:\SCOMTools\SCOMAutoAuthor\SCOMAutoAuthor\bin\Debug\Templates\SnippetTemplate.Performance.Collection.Rule.templatesnippet" "c:\temp\My.Management.Pack.Name.xml" "Rule Class Target" "Rule ID" "Counter Name" "Object Name" "Instance Name" "Frequency"
scomautoauthor.exe "C:\SCOMTools\SCOMAutoAuthor\SCOMAutoAuthor\bin\Debug\Templates\SnippetTemplate.Service.Monitor.templatesnippet" "c:\temp\My.Management.Pack.Name.xml" "Monitor Class Target" "Monitor ID" "Service Name" "Monitor Display Name" "Monitor Description"
Below is an example that you could use to create a MP with discovery, event log, performance collections, and service monitors all from command line. Note that I have spaces in some of the last lines for fields that should not have spaces, demonstrating the tool auto remove spaces to correct.
Also, for the service monitors they both have the same Monitor ID specified and the tool automatically fixes that for you also, so the Field is unique in your MP. I imagine some users may not want this auto correction and may change this in future to configure allow auto correction or disable auto correction.
scomautoauthor.exe "C:\SCOMAutoAuthor\Templates\SnippetTemplate.LocalApplication.Class.templatesnippet" "c:\MPs\My.Management.Pack.Name.xml" "My.Target2" "My Class Target2 Display Name" "Software\MyTarget2" "My Target2 Class Description"
scomautoauthor.exe "C:\SCOMAutoAuthor\Templates\SnippetTemplate.EventLog.Monitor.templatesnippet" "c:\MPs\My.Management.Pack.Name.xml" "Event.Monitor.1" "Monitor Event Log 1" "My.Target2" "Application" "1" "MyEventSource"
scomautoauthor.exe "C:\SCOMAutoAuthor\Templates\SnippetTemplate.Performance.Collection.Rule.templatesnippet" "c:\MPs\My.Management.Pack.Name.xml" "My.Target2" "Rule.Collect.Perf1" "Counter1" "Object1" "Instance1" "900"
scomautoauthor.exe "C:\SCOMAutoAuthor\Templates\SnippetTemplate.Service.Monitor.templatesnippet" "c:\MPs\My.Management.Pack.Name.xml" "My.Target2" "Monitor.Service.1" "Service1" "Monitor Service1" "Monitor Service1 Description"
scomautoauthor.exe "C:\SCOMAutoAuthor\Templates\SnippetTemplate.Service.Monitor.templatesnippet" "c:\MPs\My.Management.Pack.Name.xml" "My.Target2" "Monitor.Service.1" "Service2" "Monitor Service2" "Monitor Service2 Description"
scomautoauthor.exe "C:\SCOMAutoAuthor\Templates\SnippetTemplate.Performance.Collection.Rule.templatesnippet" "c:\MPs\My.Management.Pack.Name.xml" "My.Target2" "Rule.Col lect.Perf1" "Counter1" "Object1" "Instance1" "900"
Using with UI
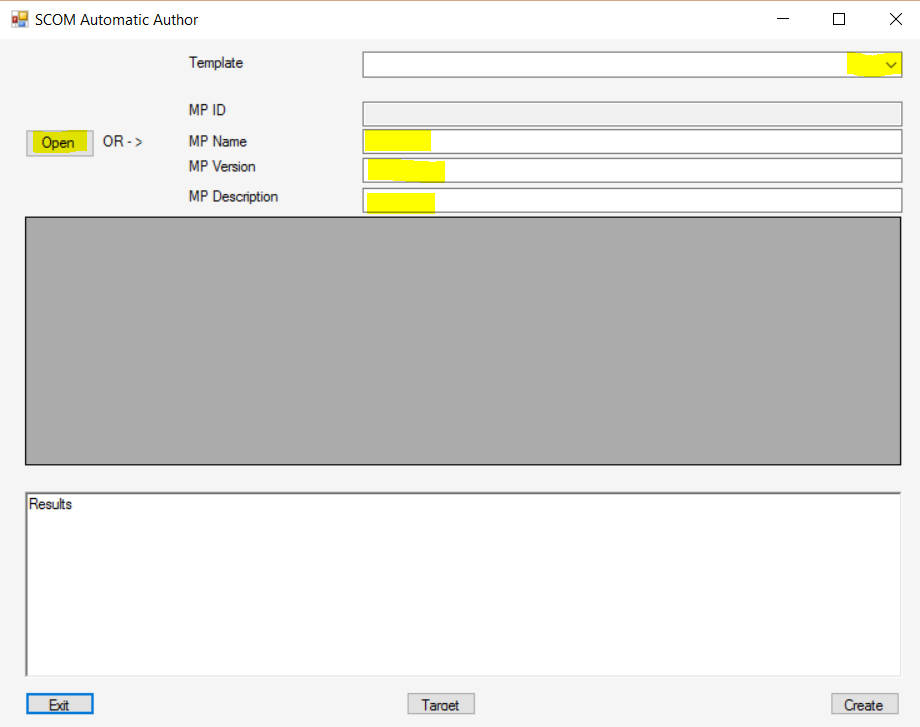
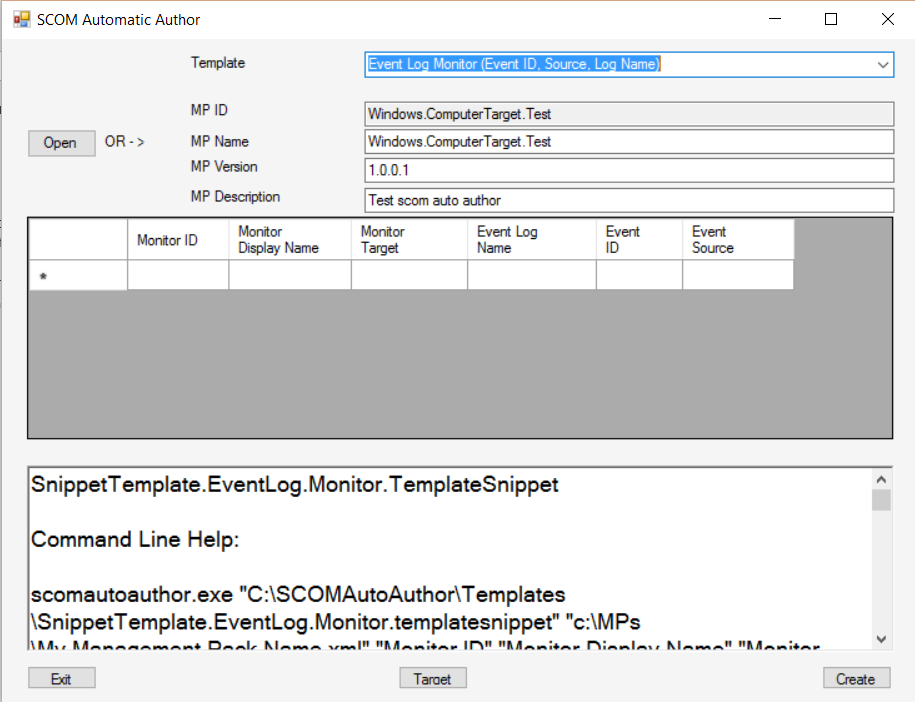
Note that you can also run this in UI. If you run example tool with no command line arguments and UI will be presented where you can enter MP or open MP file and create monitoring workflows by selecting the templates and entering information. This supports adding multiple lines resulting in multiple monitoring workflows being created.
Note that you can select Target button to get formatted string that can be used for specifying the target you would like. It will be formatted with Alias reference and the tool will automatically add the correct alias for the references based on the MP you are adding workflows in.
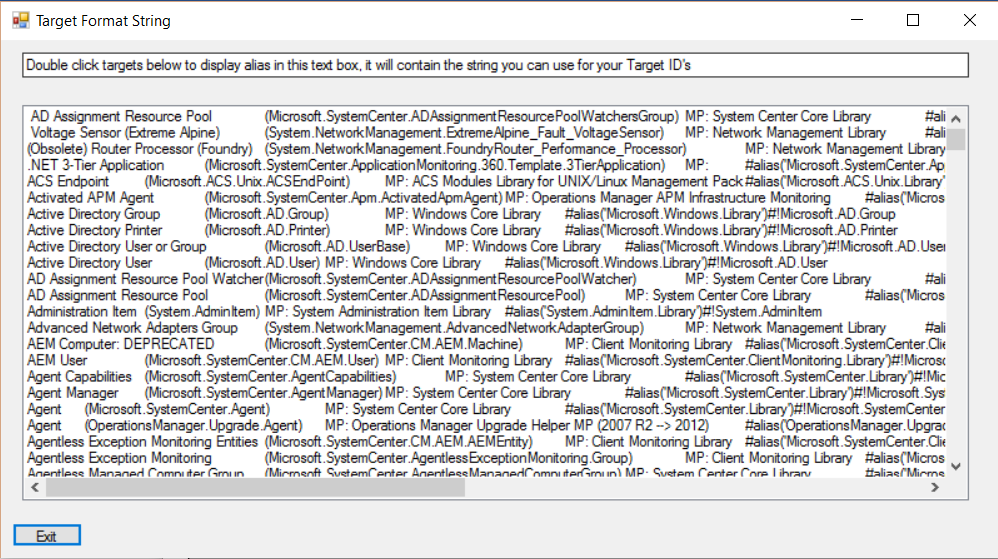
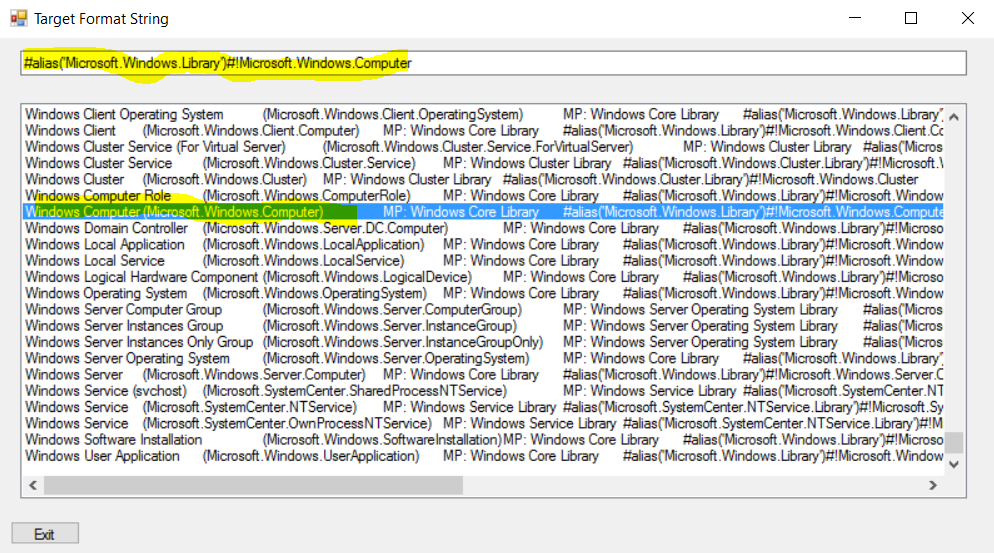
You can copy that string to use for your targeting.
After adding your monitoring workflows, select Create button to add those workflows to the MP.
When it is done it will clear out the date you entered for the workflows indicating it is complete and you can close the application.
Note: you can validate MP is ok by importing into test environment, or by using MP Author tool or VSAE to validate MP is correct.
Additional notes
Must run as admin command prompt.
Requires .NET 4.5.2 or later.
Example tool creates C:\temp directory if does not exist and create files in that directory for adding monitor workflows. We do not clean up those files, so can look at them for troubleshooting purposes.
Example tool auto increment the version on the MP file after each monitor workflow is added. So, if your version starts at 1.0.0.0 and you use the example tool to add 2 new monitors, the new version will be 1.0.0.2
Example tool makes backup copies of MP before each monitor workflow is added. The backup files are in the same directory where you create your new or update your MP with SCOM Auto author. They have extensions with date time, so they can be opened with notepad to review changes to MP as each workflow was added. It is safe to delete these files if you prefer to do so.
Installation/Configuration
Copy files in zip file to a directory.
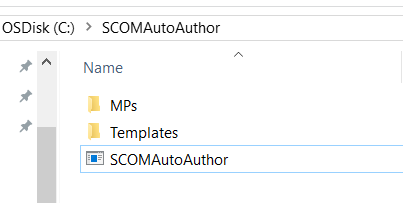
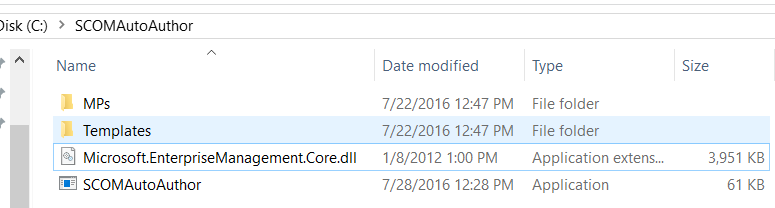
If running on system without SCOM console installed, you can copy Microsoft.EnterpriseManagement.Core.dll to same directory so it can find the DLL to allow run successful.
Note that the MPs folder listed below contains all the sealed management packs that you may want to reference in the management pack files you are creating. If you need to add additional MP’s to the folder, you can do this and the tool will automatically load the classes and references will be available when building your management packs. Note that after adding new sealed MP files to directory the next time you run the tool it will read those additional or updated MP’s and they will be available for targeting. If tool is already running, close the application and run again for updated list to be available.
How to add additional templates to tool.
You will add three files with the same name and different extensions to the folder named Templates where the SCOMAutoAuthor.exe example tool resides.
Screen shot below:
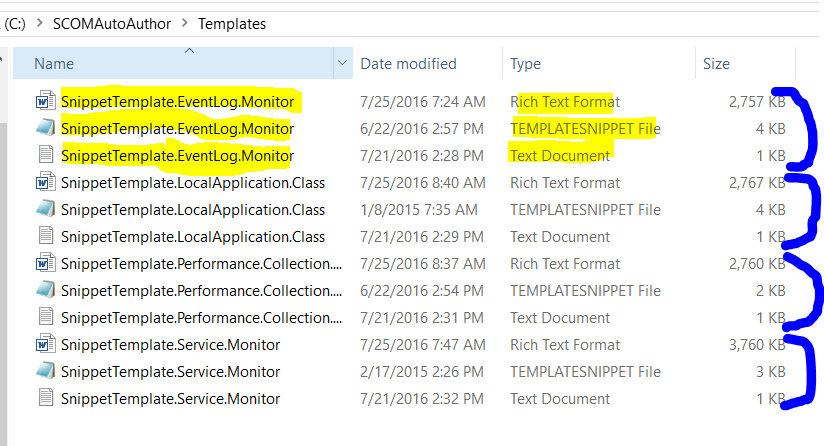
The RTF file will contain notes on how to use the template monitor, this is for display purposes only and help for others that may be using your templatesnippet file. It is loaded in tool UI when your template is selected from the drop down menu.
The TemplateSnippet file is a VSAE template snippet file you or someone else may have created using Visual Studio Authoring Extensions.
The TXT file contains information about the templatesnippet file that helps SCOMAutoAuthor format data and allows for you to select the order in which the input data is required. It also allows for specifying if a data field should be unique within the management pack file you are creating and also if spaces should be allowed in a given field. The program will remove spaces if specified and also ensure the string is unique within an MP by auto adding random number to end of string field until the string field is unique and not found in the management pack.
I am not going to cover snippettemplate files format here, however there are many blogs and resources available to learn how to create and use them with Visual Studio Authoring Extensions, a couple are listed below.
https://blogs.technet.microsoft.com/kevinholman/2014/01/21/how-to-use-snippets-in-vsae-to-write-lots-of-workflows-quickly/ https://tjmklaver.wordpress.com/2012/06/15/author-your-mp-with-snippet-templates-in-visual-studio/
The TXT file example contents are below:
Service Monitor Basic - Target hosted class (Monitor Target, Service Name, Service Monitor display name, Service Monitor description)
#text('Monitor Target')#;Monitor Class Target;nospace
#text('Monitor Id')#;Monitor ID;UniqueNoSpace
#text('ServiceName')#;Service Name;none
#text('Service Monitor Display Name')#;Monitor Display Name;none
#text('Service Monitor Description')#;Monitor Description;none
-- comment field
-- Replacement string;Display string for field;(UniqueNoSpace,nospace,none)
The first line in the above example is the display name that is displayed in SCOMAutoAuthor tool drop down menu. This helps you to inform the user of what this template creates and is used for.
Each subsequent line represents one parameter that is required by the snippetTemplate file and specifies the string that it replaces within snippettemplate file;Display String for the columns; Field requirements (like none, or Must be unique with no spaces, or just should not allow any spaces).
If “–-“ is found in first two characters of a line it is treated as a comment line that the tool ignores.
NOTE
Txt file and snippet files #text and alias are CASE SENSITIVE. Replacement of text fails if does not match case.
Version 1.2 and later
Items listed below are included with versions 1.2 and later of this example tool.
Monitor workflows with scripts
Added script file replacement capability with your templates. This allows you to specify a script file for the template to embed in your management pack using command line to create the monitoring workflows.
PowerShell.Script.Monitor.Two.State.Timed.ServerOS.Target
For this example template the contents of text file are:
PowerShell Script Timed two state Monitor (Target Server OS disabled)
#text('Monitor Id')#;Monitor ID;UniqueNoSpace
#text('Monitor Name')#;Monitor Display Name;none
#text('Script Name')#;Script Name (ends with .PS1);endswithps1
$IncludeFileContent/Scripts/MonitoringScript.PS1$;PS Script Path;script
#text('Folder')#;Folder Check;none
#text('Max Files')#;Max Files In Folder;none
-- Example of a comment line
In the template snippet file see where Monitoring script is specified and highlighted in yellow. Note that in the template we have <![CDATA[ and ]]> surrounding the script. Since most scripts we reference will not be xml safe we simple surround with CDATA to prevent us from having to make our scripts XML safe replacing characters to make them xml safe. This allows us to insert scripts that we have already tested from running without further modification.
..
..
<ProbeAction ID="Probe" TypeID="#alias('Microsoft.Windows.Library')#!Microsoft.Windows.PowerShellPropertyBagTriggerOnlyProbe">
<ScriptName>#text('Script Name')#</ScriptName>
<ScriptBody>
<![CDATA[
$IncludeFileContent/Scripts/MonitoringScript.PS1$
]]>
</ScriptBody>
<Parameters>
..
..
Let me know what you think of the tool and let me know if you find any issues with any templates you use. Would appreciate the template and txt file from any that you experience failures with. I have created a few included and imagine there are some cases where it may fail. I can take a look at it and work on when I have time to correct those issues.
Thank you for reading.
Disclaimer:
All information on this blog is provided on an as-is basis with no warranties and for informational purposes only. Use at your own risk. The opinions and views expressed in this blog are those of the author and do not necessarily state or reflect those of my employer.
Example tool zip file below