Working with Subscription Centers in Dynamics 365 for Marketing
A Subscription Center in Dynamics 365 for Marketing is a Marketing Page that known contacts can use to manage their communication preferences and contact details with your organization.
All marketing email messages that you create by using Dynamics 365 for Marketing must include a link to a subscription center, and they will fail the error check if you try to go live with a message that lacks this link.
There are at least two good reasons for requiring a subscription center link in all marketing email messages:
- Legal requirements: Many countries/regions have laws that require all marketing email messages to include an unsubscribe link
- Deliverability: Spam filters and internet reputation monitors can identify marketing email messages, and might remove those that don't include an unsubscribe link
All subscription centers include a "Do not email" check box. When a contact chooses this option, the Bulk Email field on the contact will be set to Do Not Allow - and Dynamics 365 for Marketing will never send any marketing email messages to that contact.
Optionally, you can leverage the subscription center capability to present the contact for several additional subscription options, such as a list of available newsletters. By presenting several different mailing lists on your subscription center, you gain an opportunity to learn more about your contacts' specific interests.
Overview of the steps to create and test subscription management scenario in Dynamics 365 for Marketing
- Create Marketing Lists in the Survey app
- Create a Subcription Form
- Create a Subscription Center (Marketing Page)
- Create a Content Settings record
- to test: - Create a Customer Journey
- Open subscription center from mail in one of the segment members' inbox
- Verify – in Survey app – contact is added as a member in the selected list(s)
To create and test a subscription management scenario in Dynamics 365 for Marketing follow these steps:
Step #1: Create Marketing Lists in Survey
Marketing lists aren't included in the current version of the Dynamics 365 for Marketing sitemap. You can find Marketing List in the Surveys app, which is included with Dynamics 365 for Marketing.
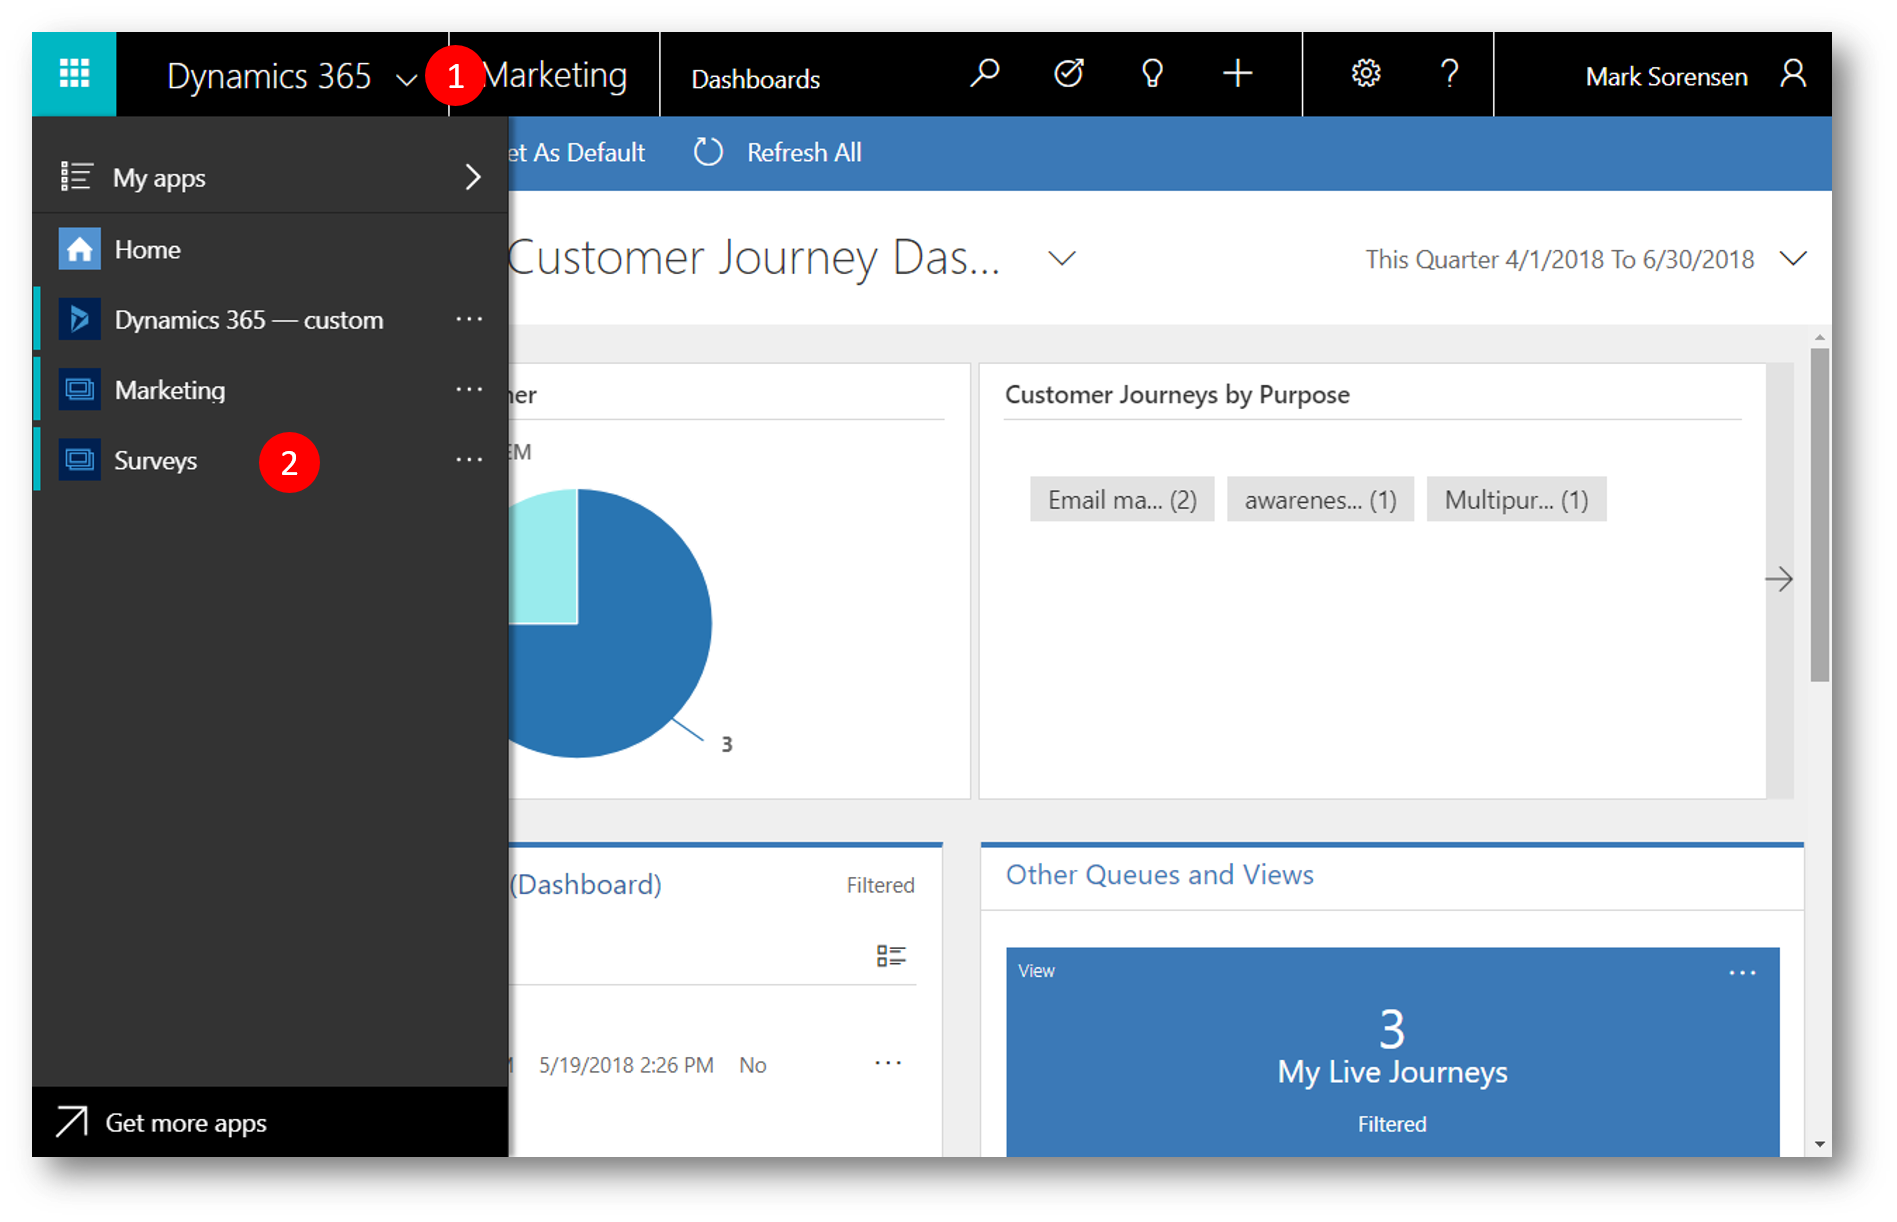
In the Dynamics 365 for Marketing app, expand the Dynamics 365 App Selector (1) and then click Surveys (2)
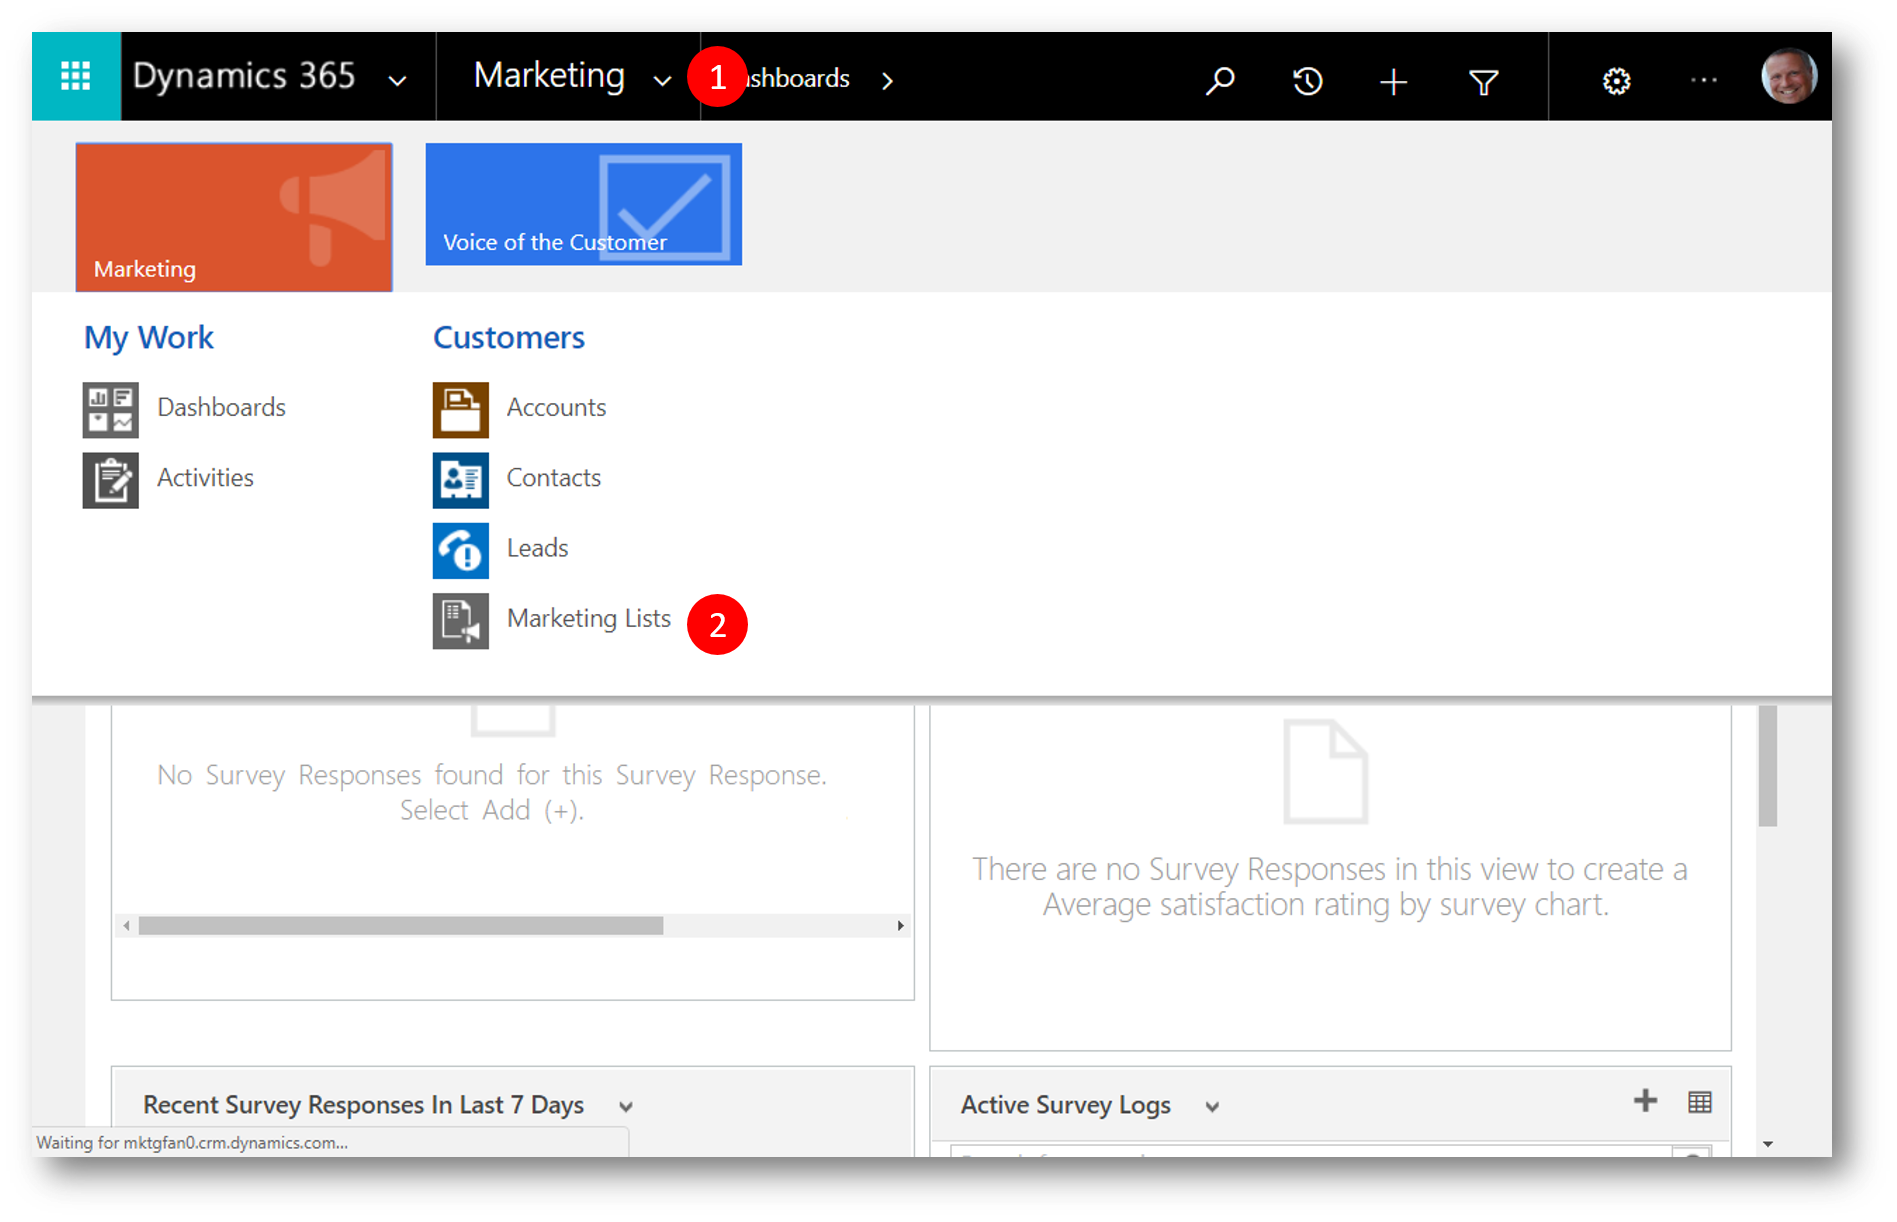
In the Survey app, expand the sitemap (1) and then click Marketing Lists (2)
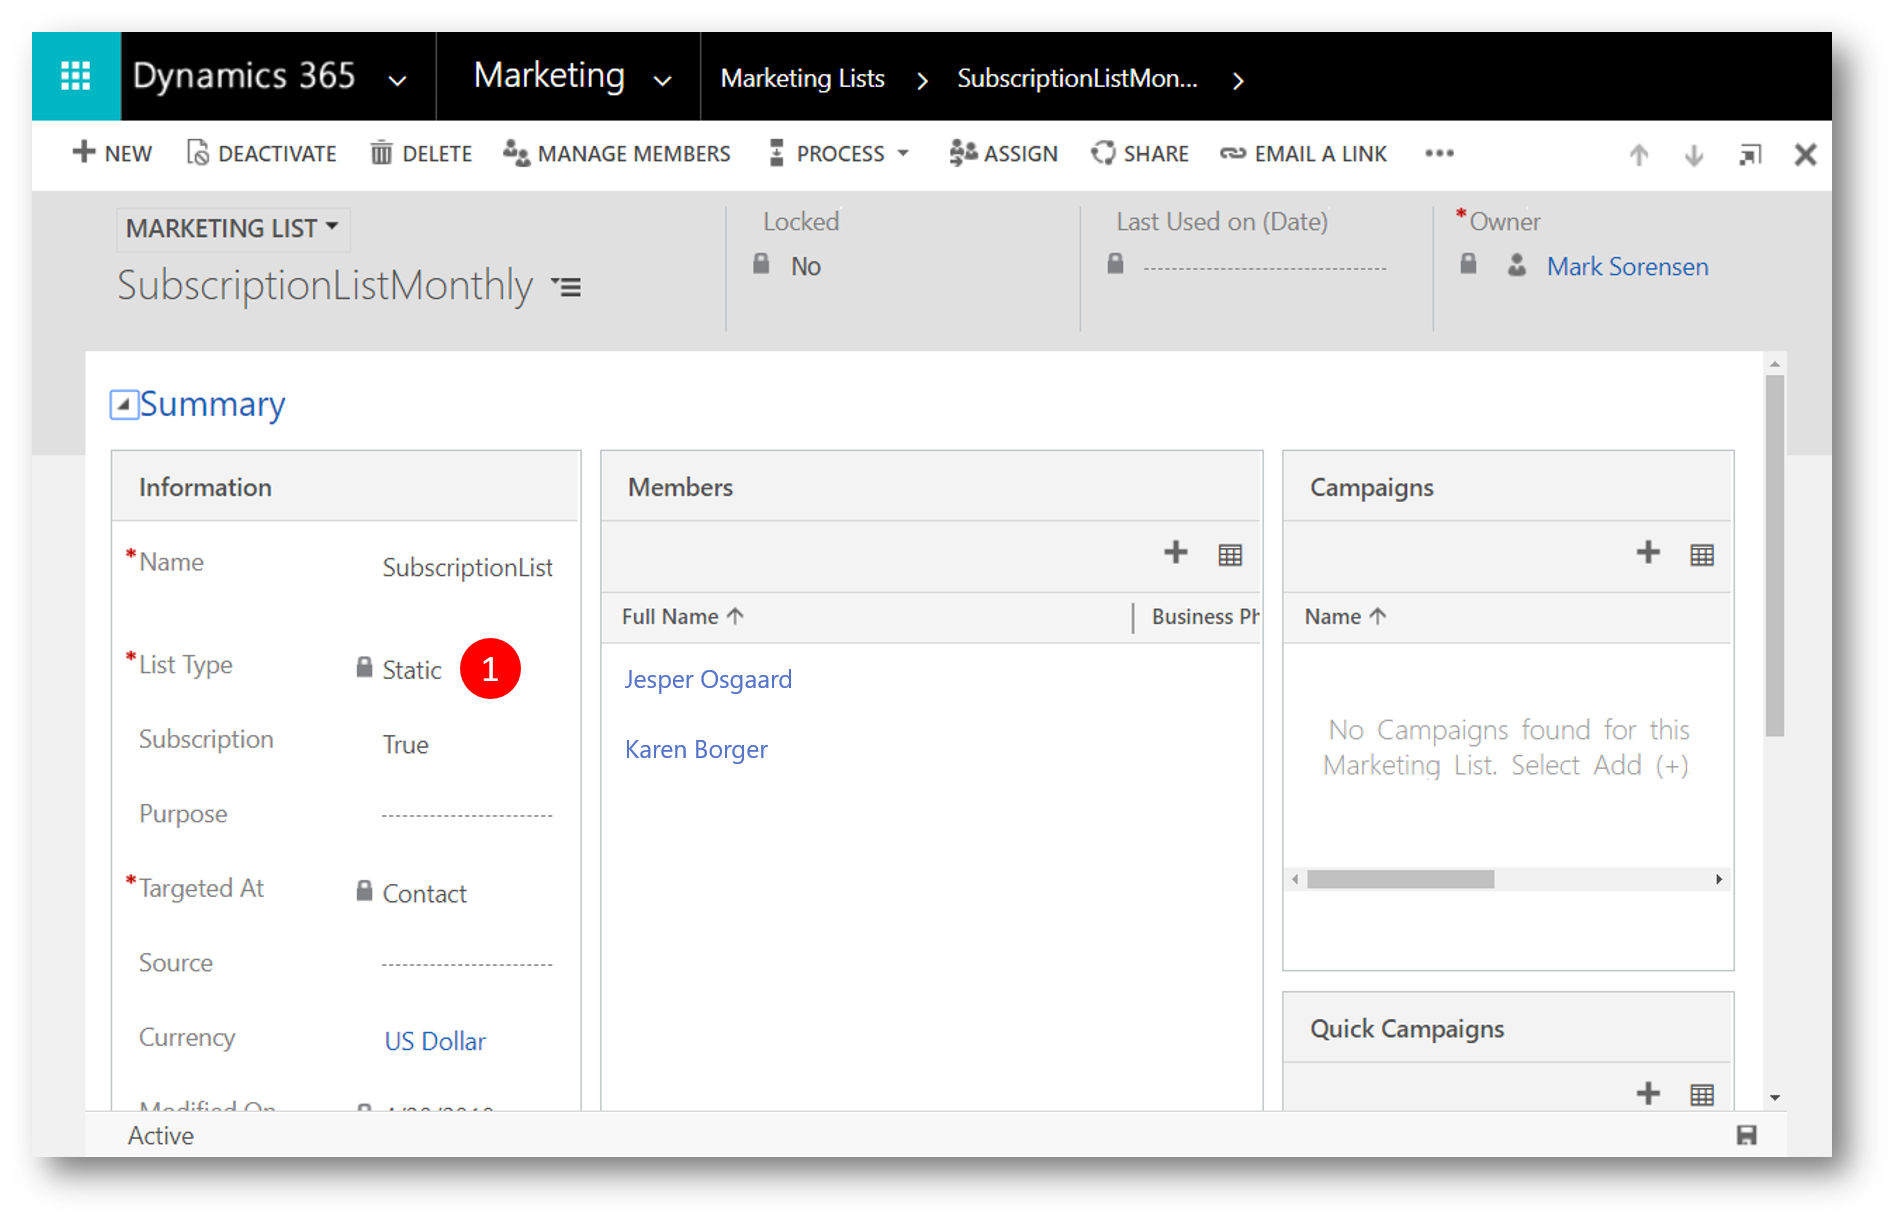
Create one or more marketing list - below you see three marketing lists I created already
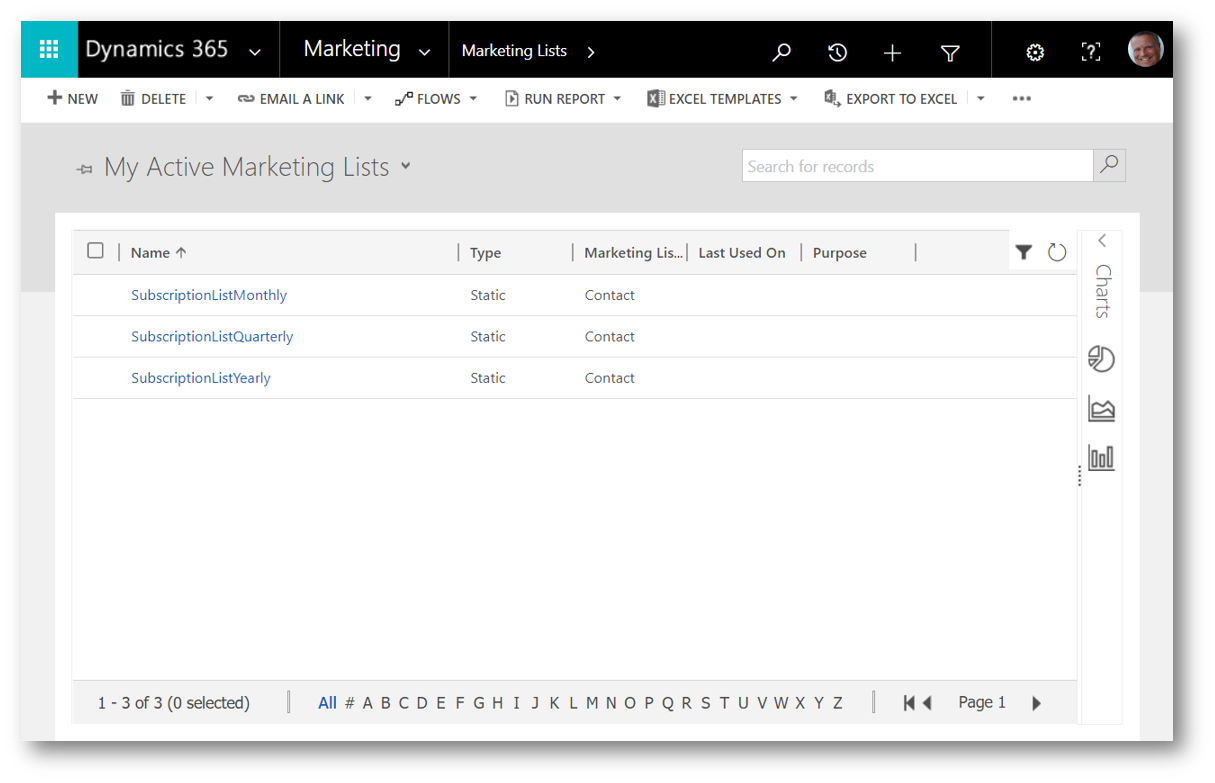
For each of the marketing lists you create, set the List Type = Static (1) - this will automatically set Subscription = True, and Targeted At = Contact, which is required for a marketing list serving a subscription list.
As contacts starts interacting with subscription centers they will be added or removed from the list(s). You see the current members of the in the Members column of the form.
Step #2: Create a Subcription Form
With the subscription list available, the next step is to add these lists to a subscription form.
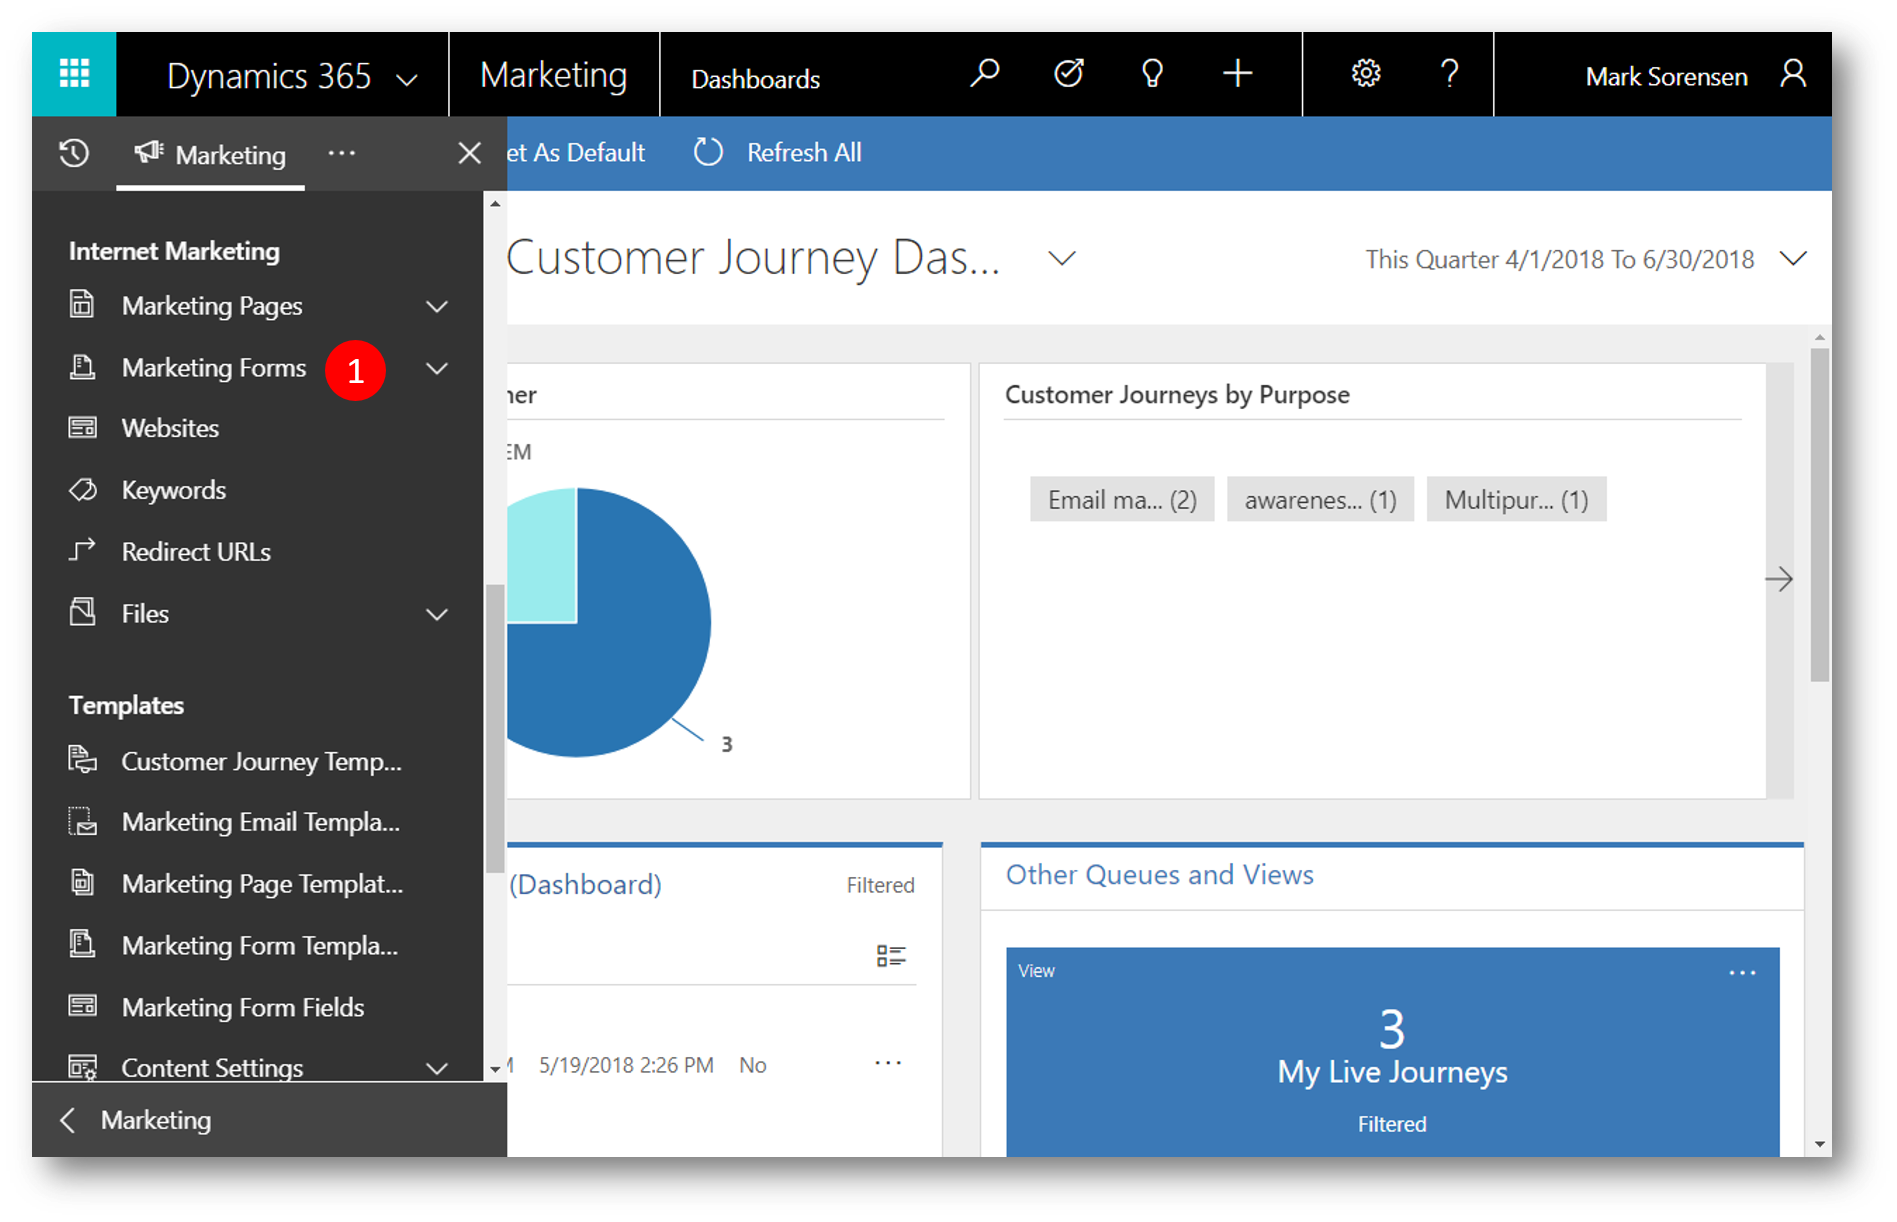
Back in the Marketing app, navigate to Marketing Forms (1)
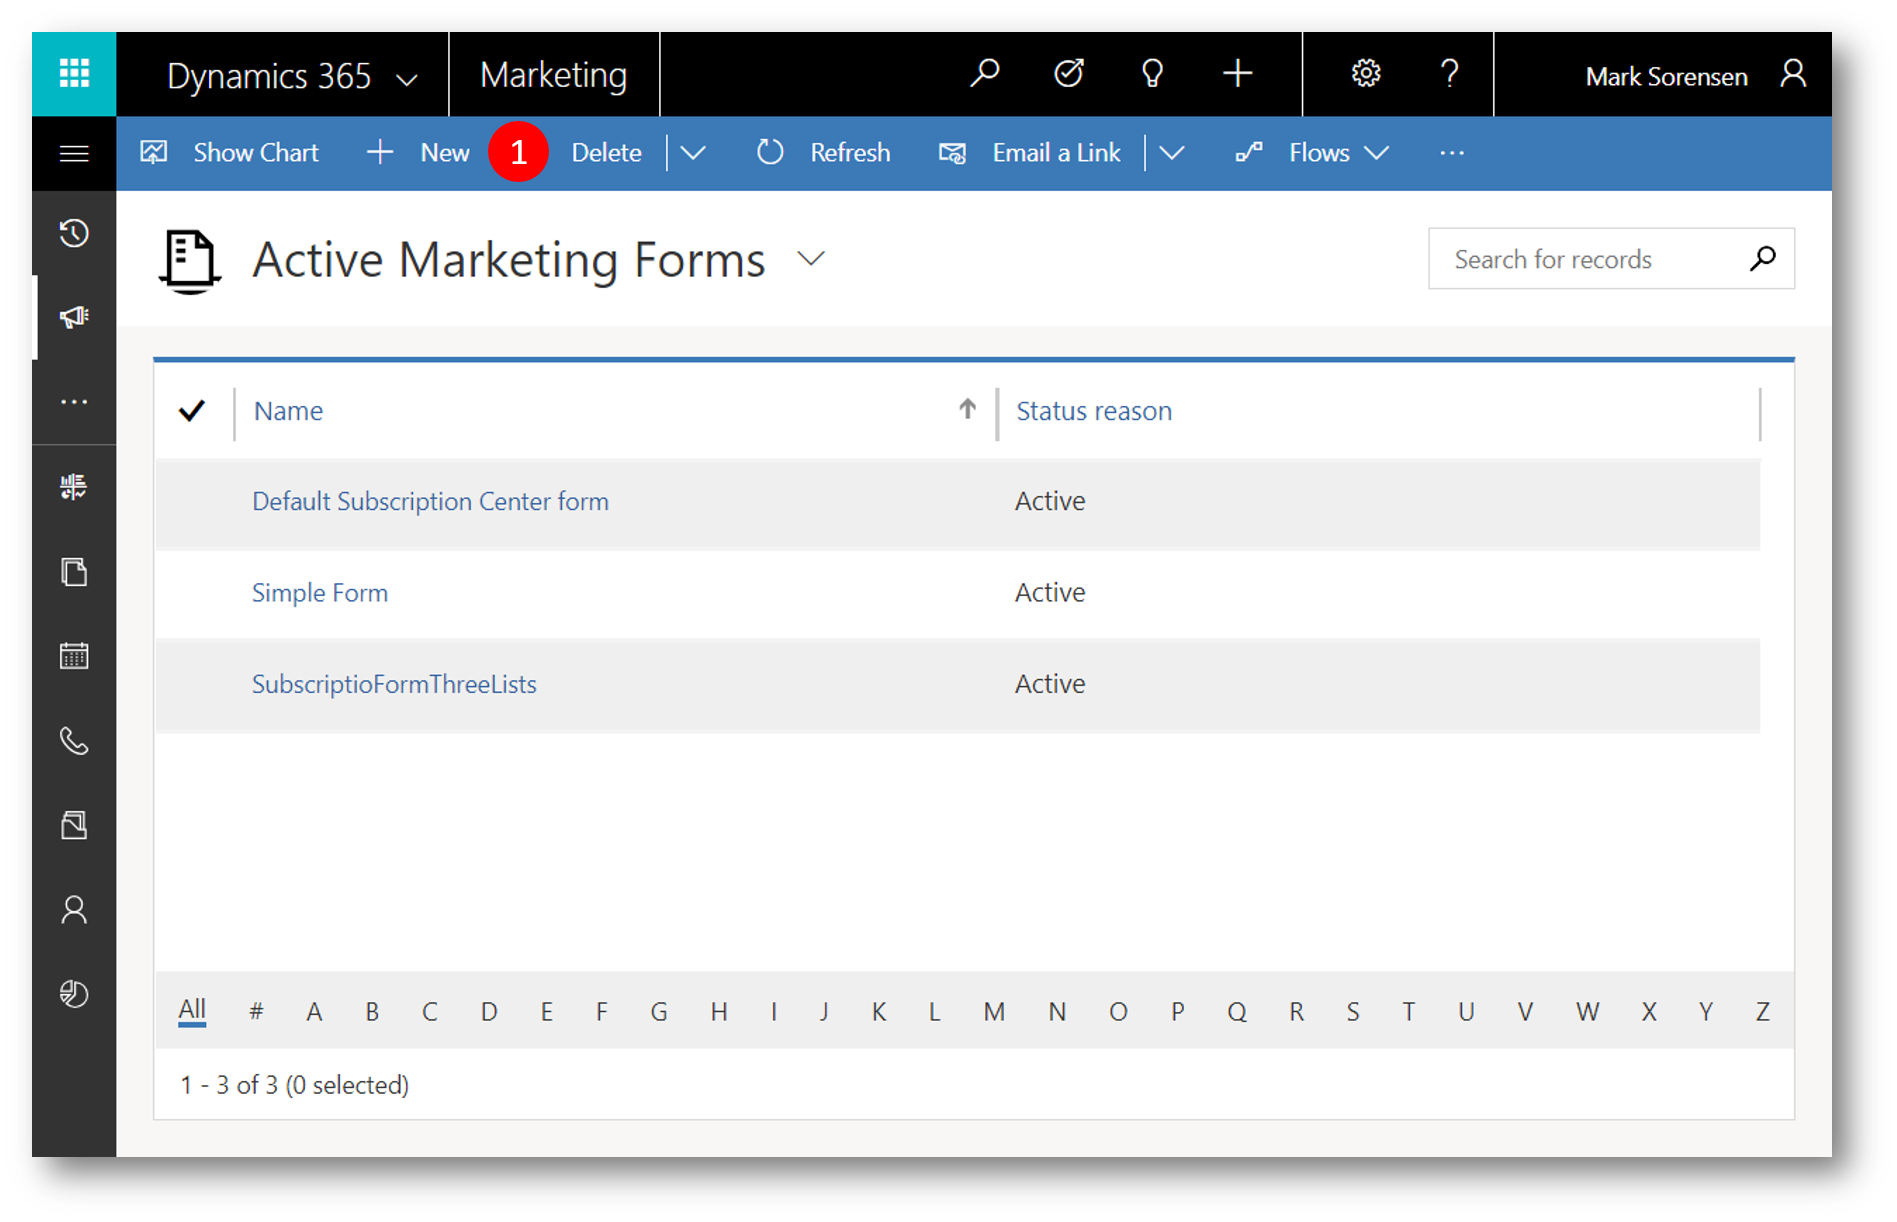
Click New (1) to create a new form (the "Select a form template" will open automatically)
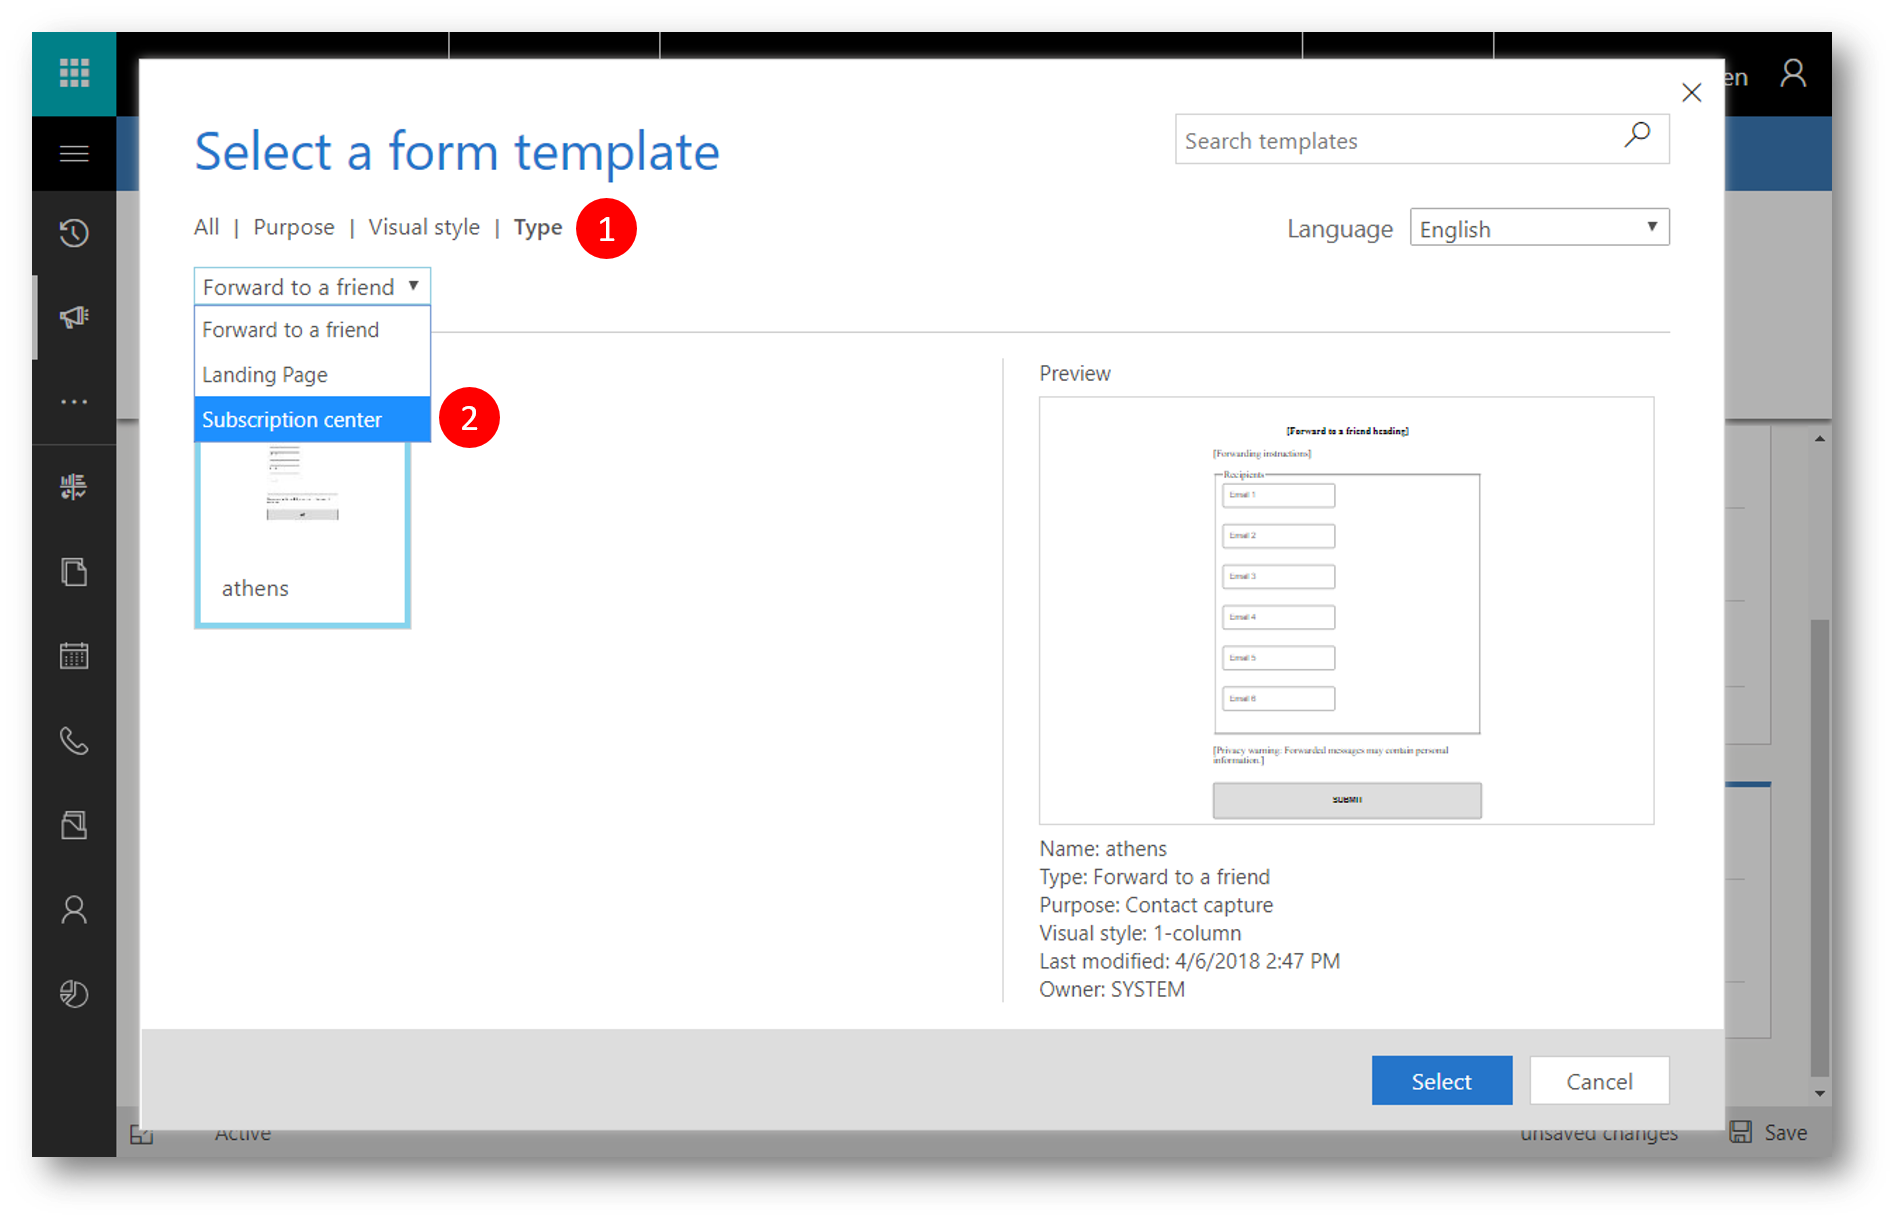
In the the "Select a form template" click Type (1) and then Subscription Center (2) to filter the form templates to those already designed for the purpose
Select a template, eg. "Heraklion"

In the designer scroll down to the bottom of toolbox to the Subscription lists section (1) to find a tile for each of the marketing lists you created above - and drag those on to the canvas under the appropriate header (2)
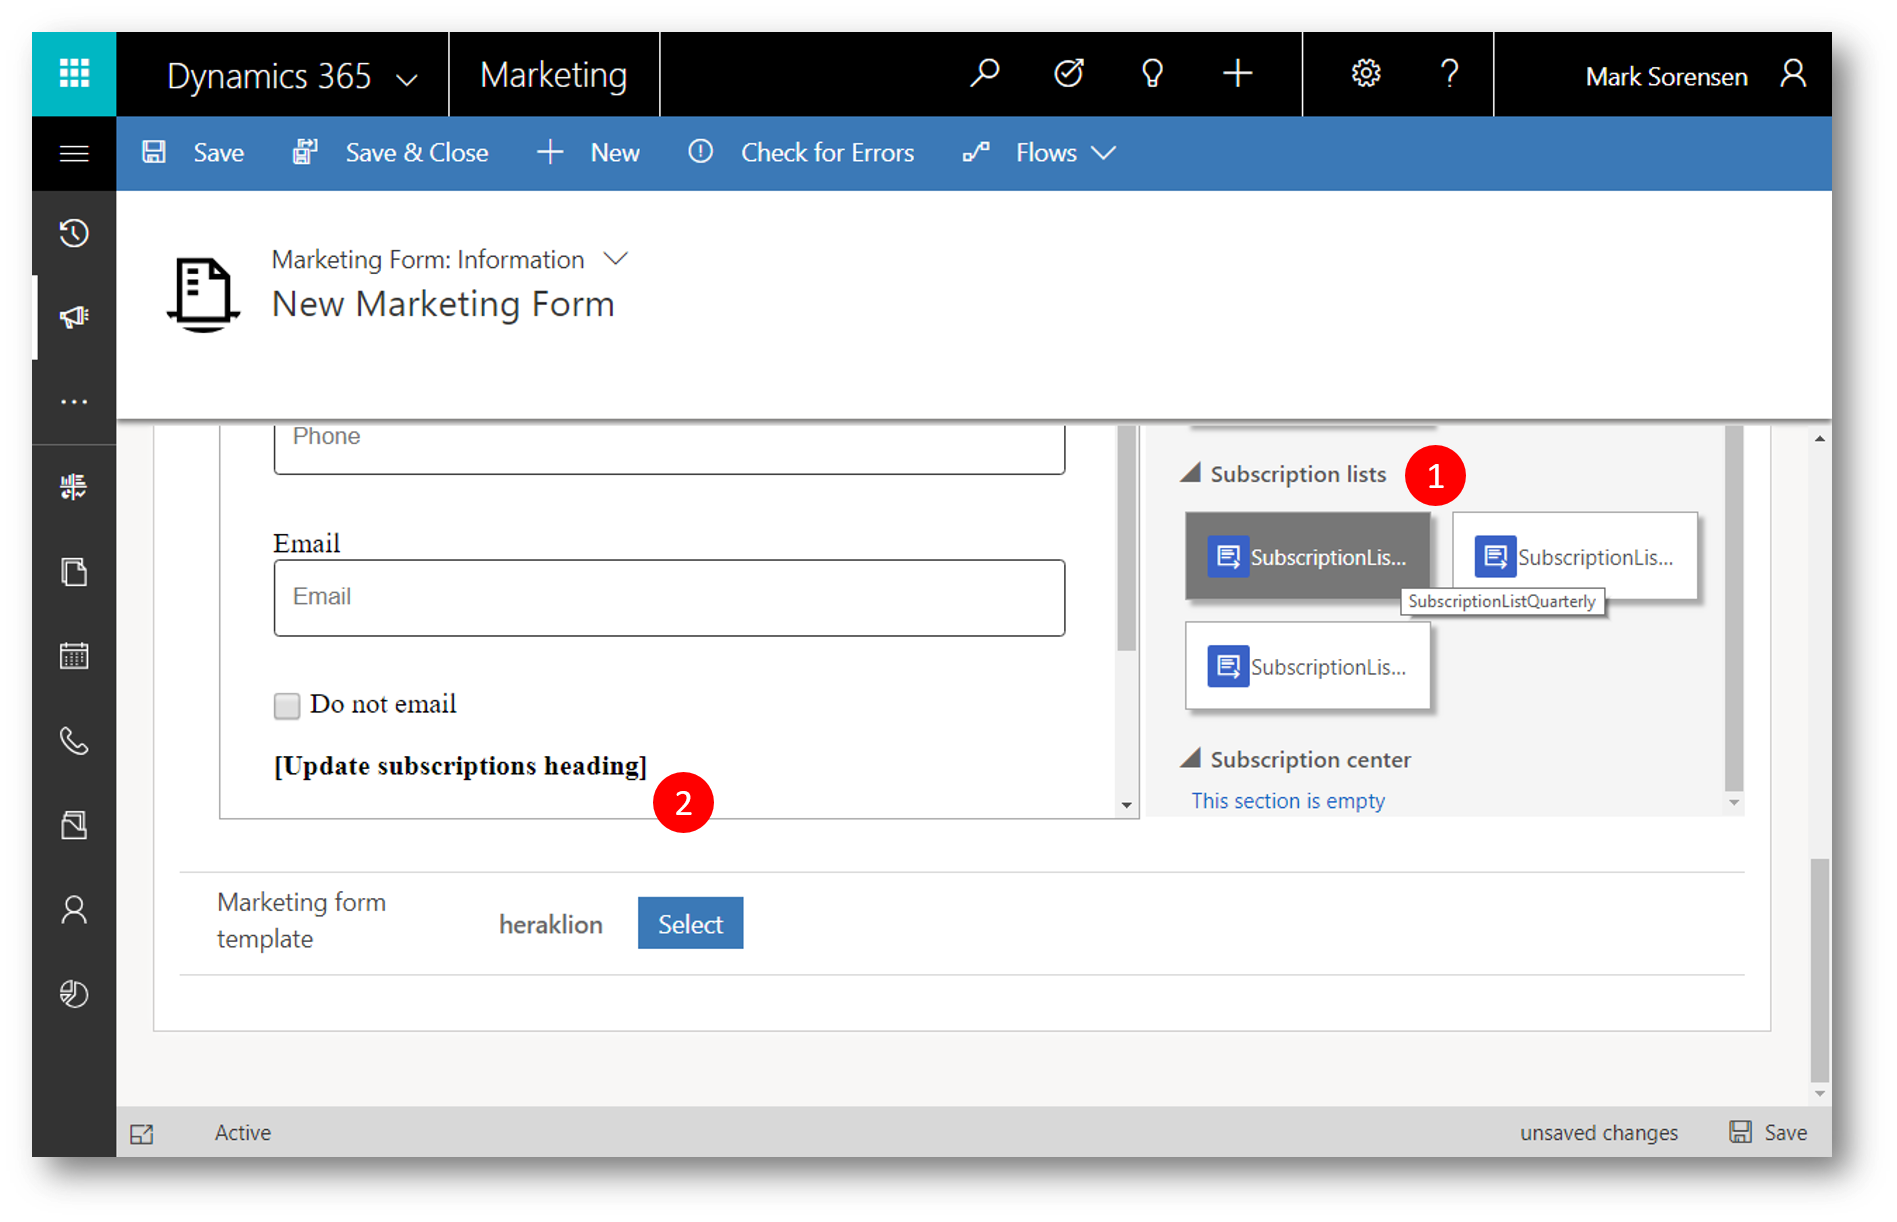
Edit header placeholders and style the form as you see fit.
Note
The "Do not email" checkbox is there for the recipient to check if he/she wants to opt out of all bulk emails from us. It will set the Bulk Email = Do Not Allow on the contact, and overrule all other subscription settings.
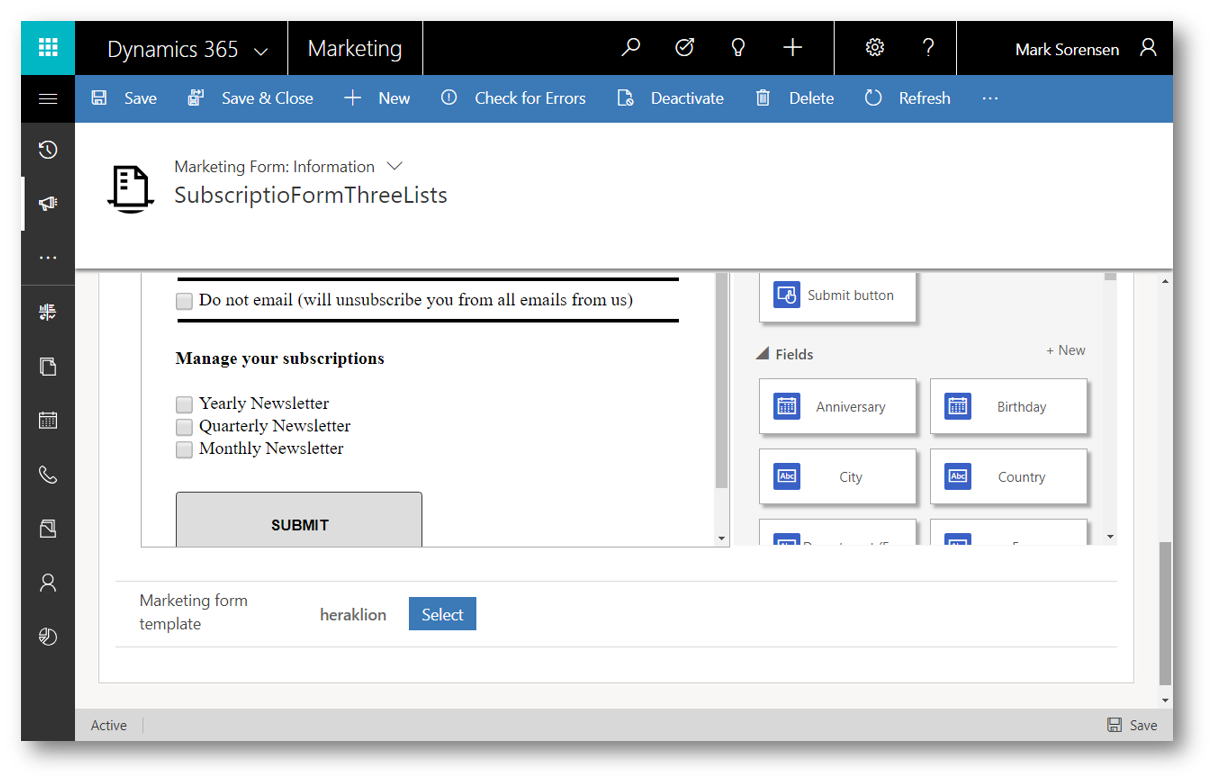
Check the form for errors and then Save & Close
Step #3. Create a Subscription Center (Marketing Page)
Navigate to Marketing Pages (1)

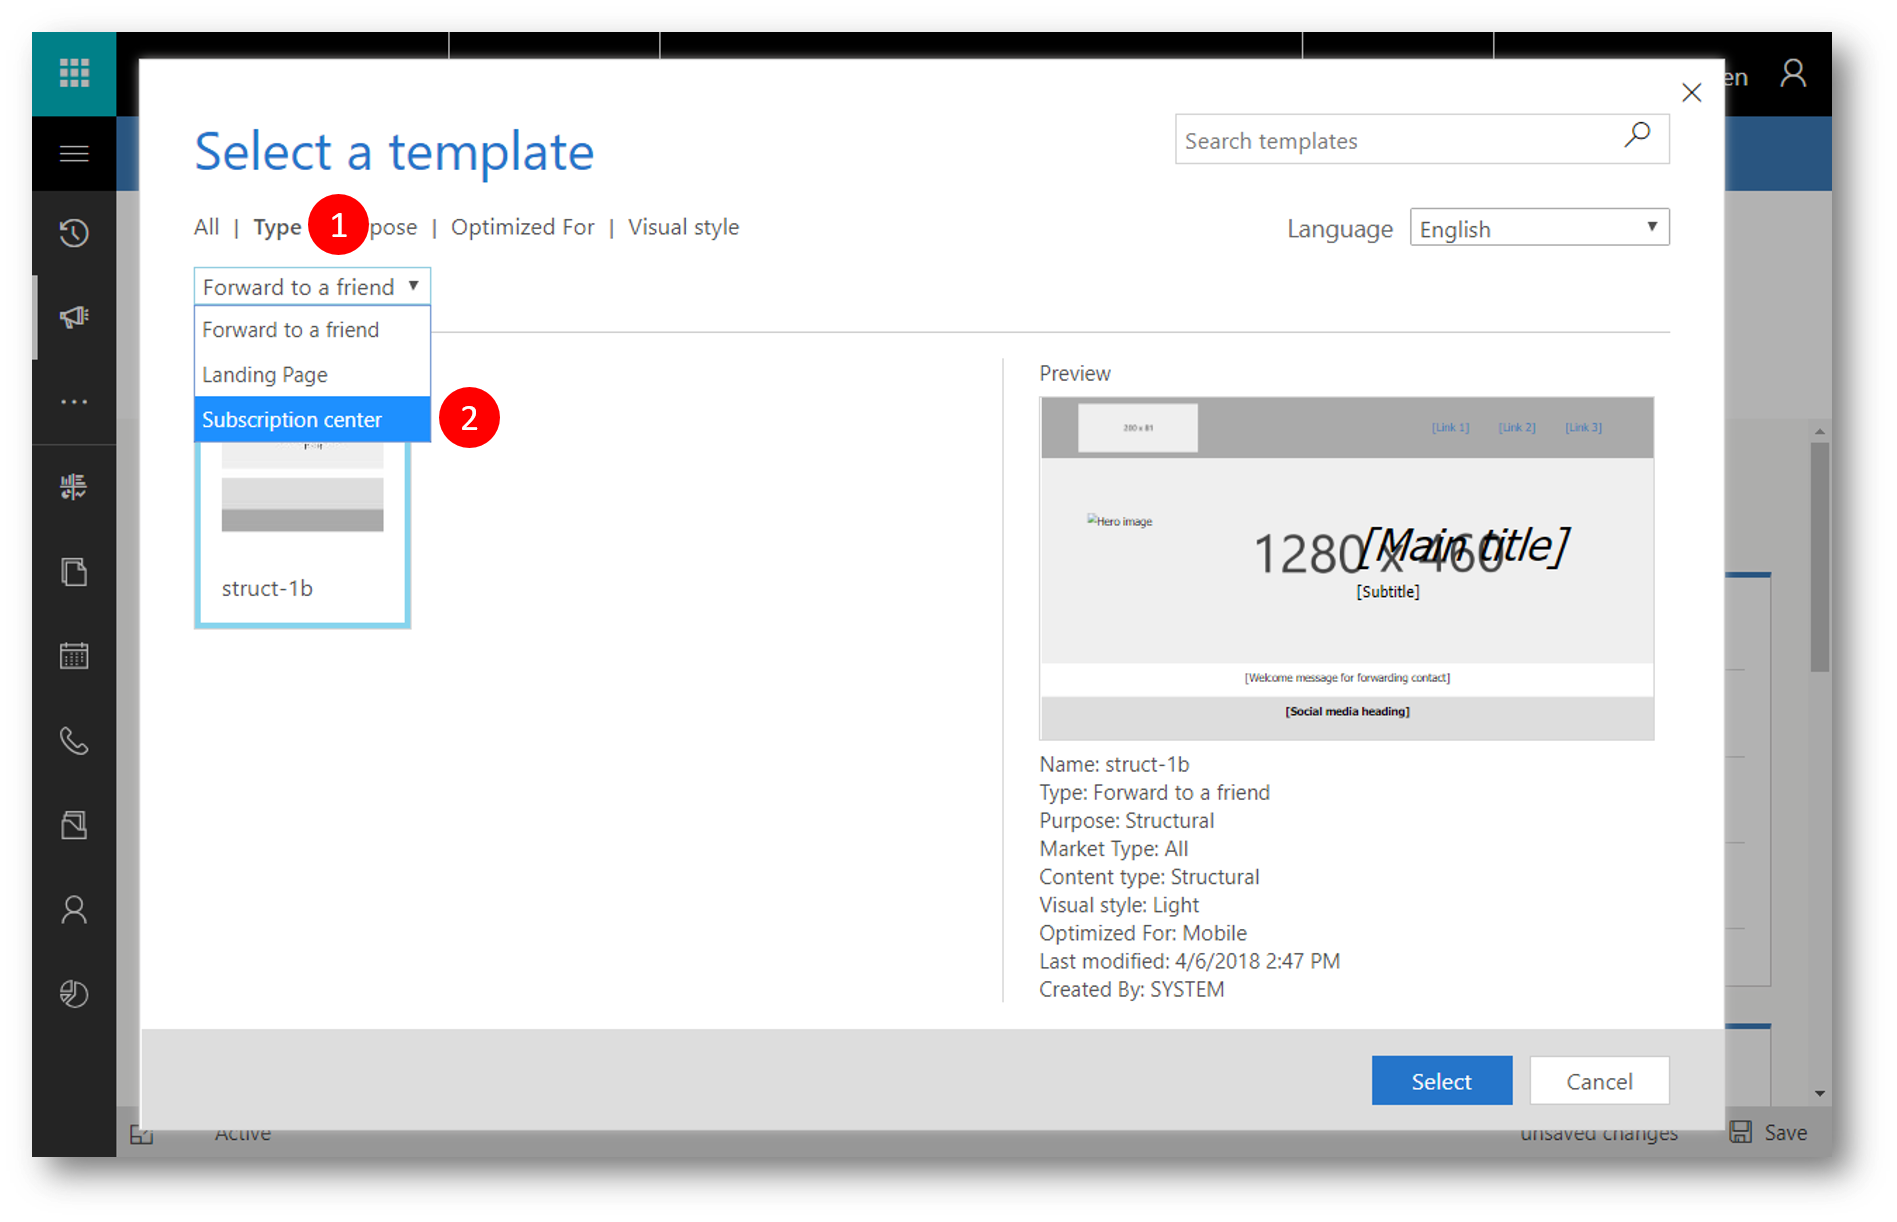
Click New (1) to create a new page - the "Select a template" opens automatically
In the the "Select a template" dialog click Type (1) and then Subscription center (2) to filter the form templates to those already designed for the purpose
Insert the form (from step #2) on the page and style the page as you see fit
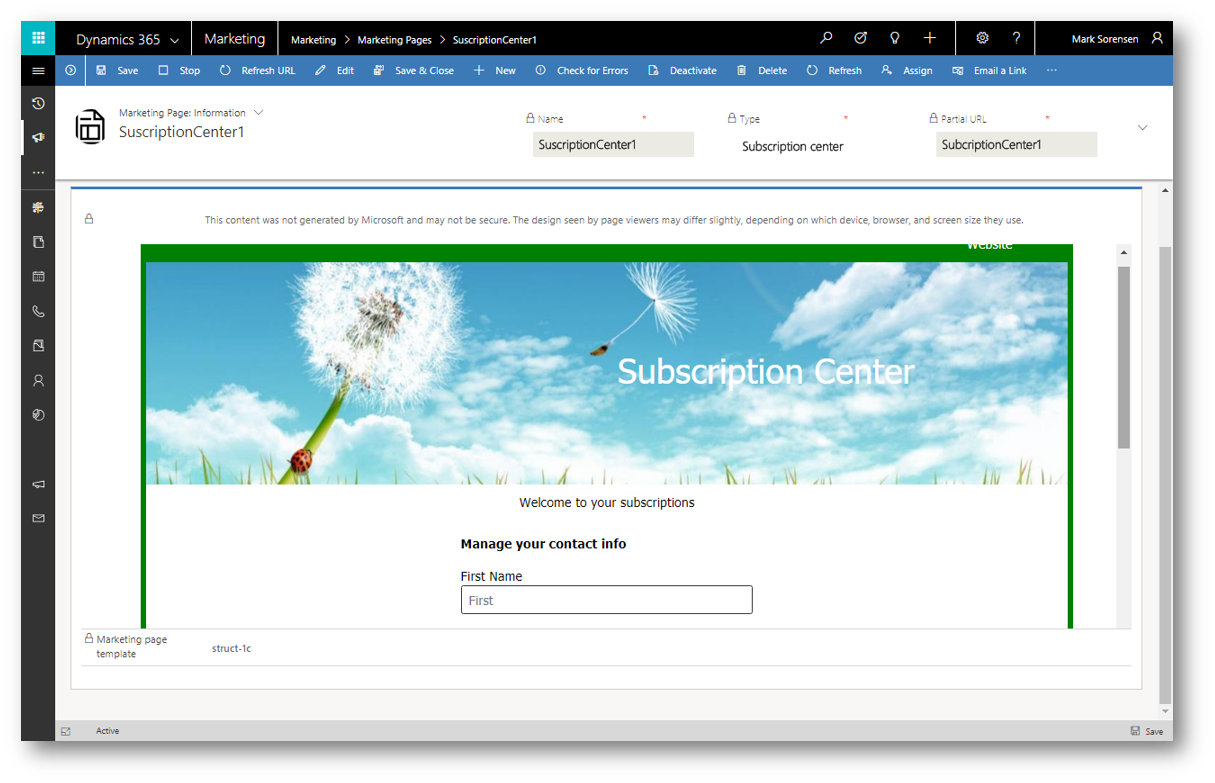
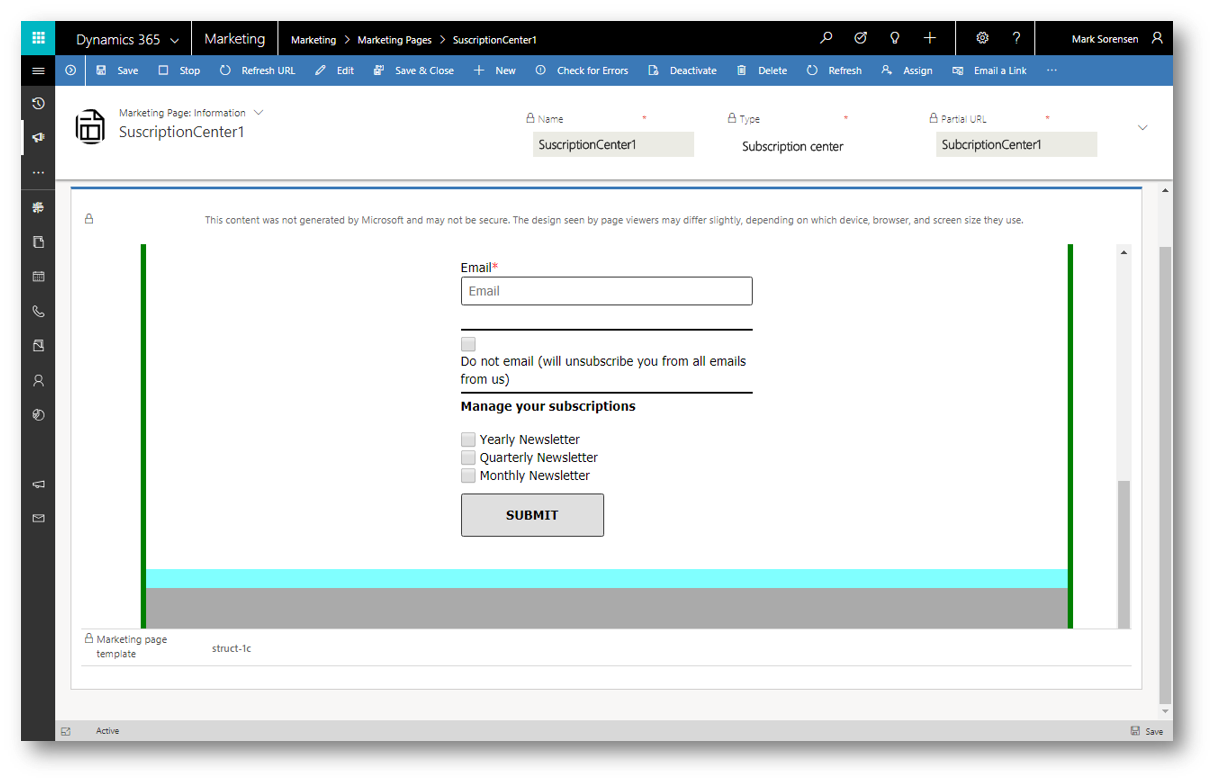
Provide a name for the Subscription Center (eg. "SubscriptionCenter1"), check the page for errors and publish the page
Step #4: Create a Content Settings record
The Content Settings records in Dynamics 365 for Marketing hold common values that you can place into an email message as dynamic text by using the Assist-Edit command button.
You can create as many Content Settings records as you need, and you must assign one to each customer journey.
Because of this architecture, you can use the same email message in several customer journeys, but the subscription center link (and other content settings) included in the message can be different for each journey
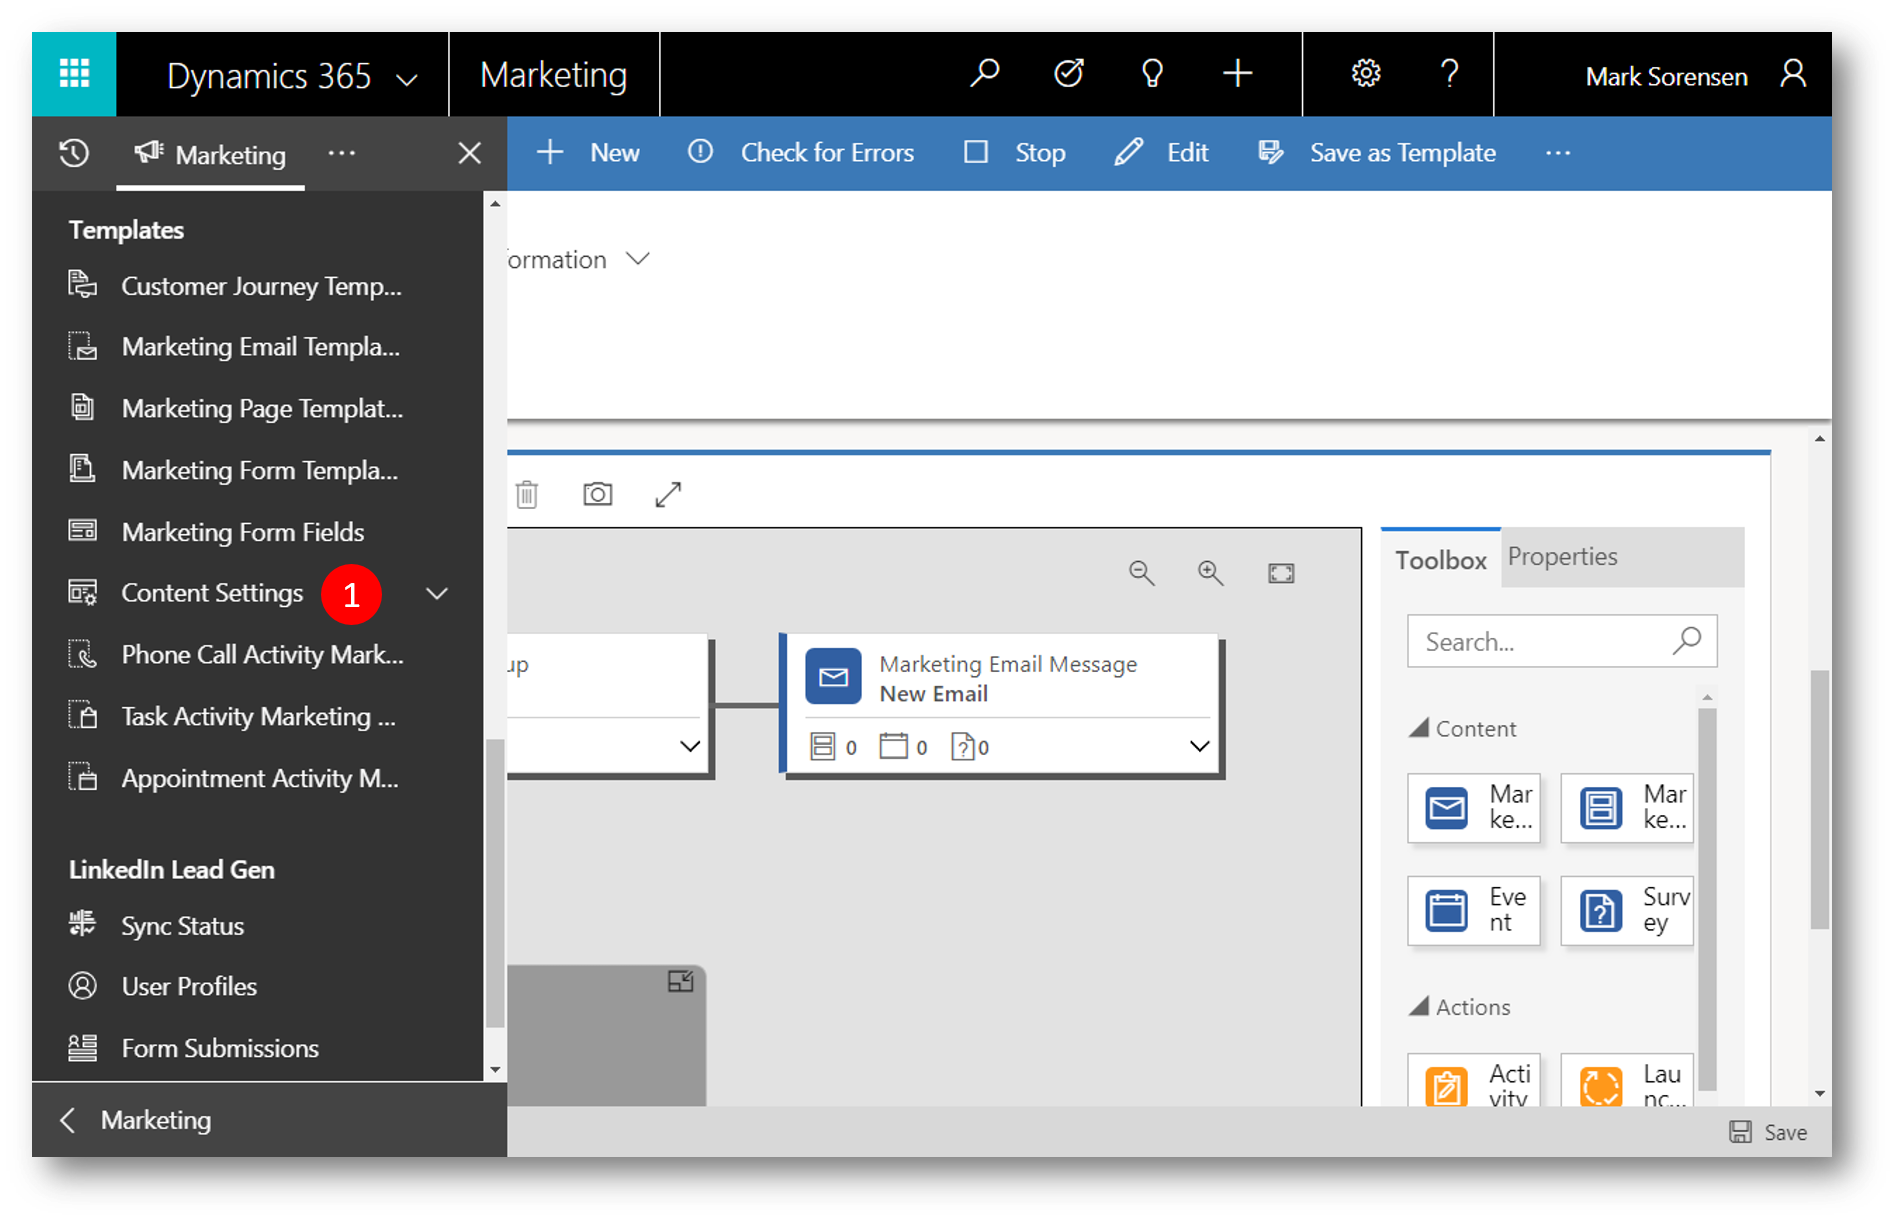
Navigate to Content Settings (1)
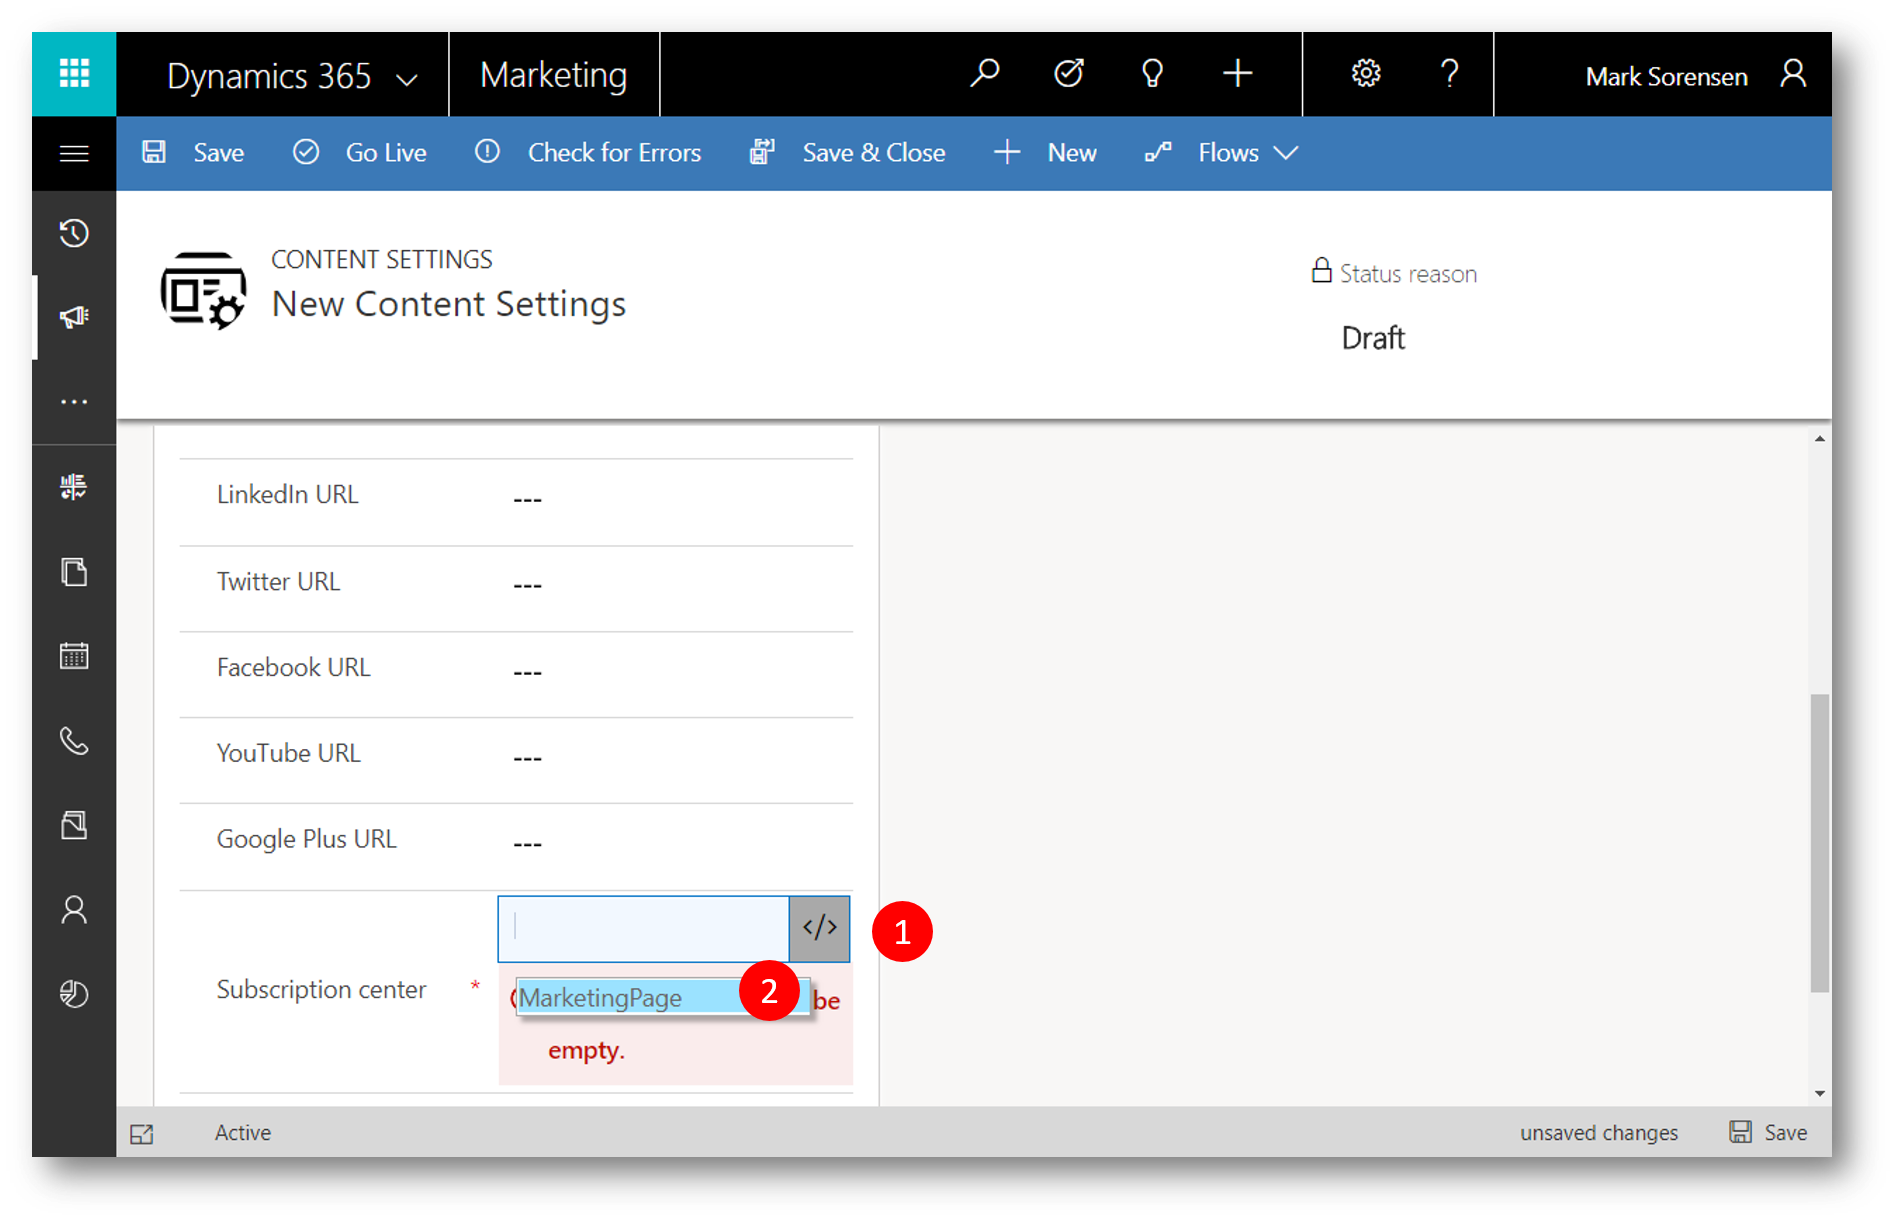
The Content Setting record must point to the Subscription Center created above. Use the Assist Edit button on the Subscription Center field to insert the Full Page URL to the Subscription Center created in the above step:
Click the Assist-Edit button (1) and then in the drop-down select MarketingPage (2)
In the next drop-down click the name of the Subscription Center created above (3)
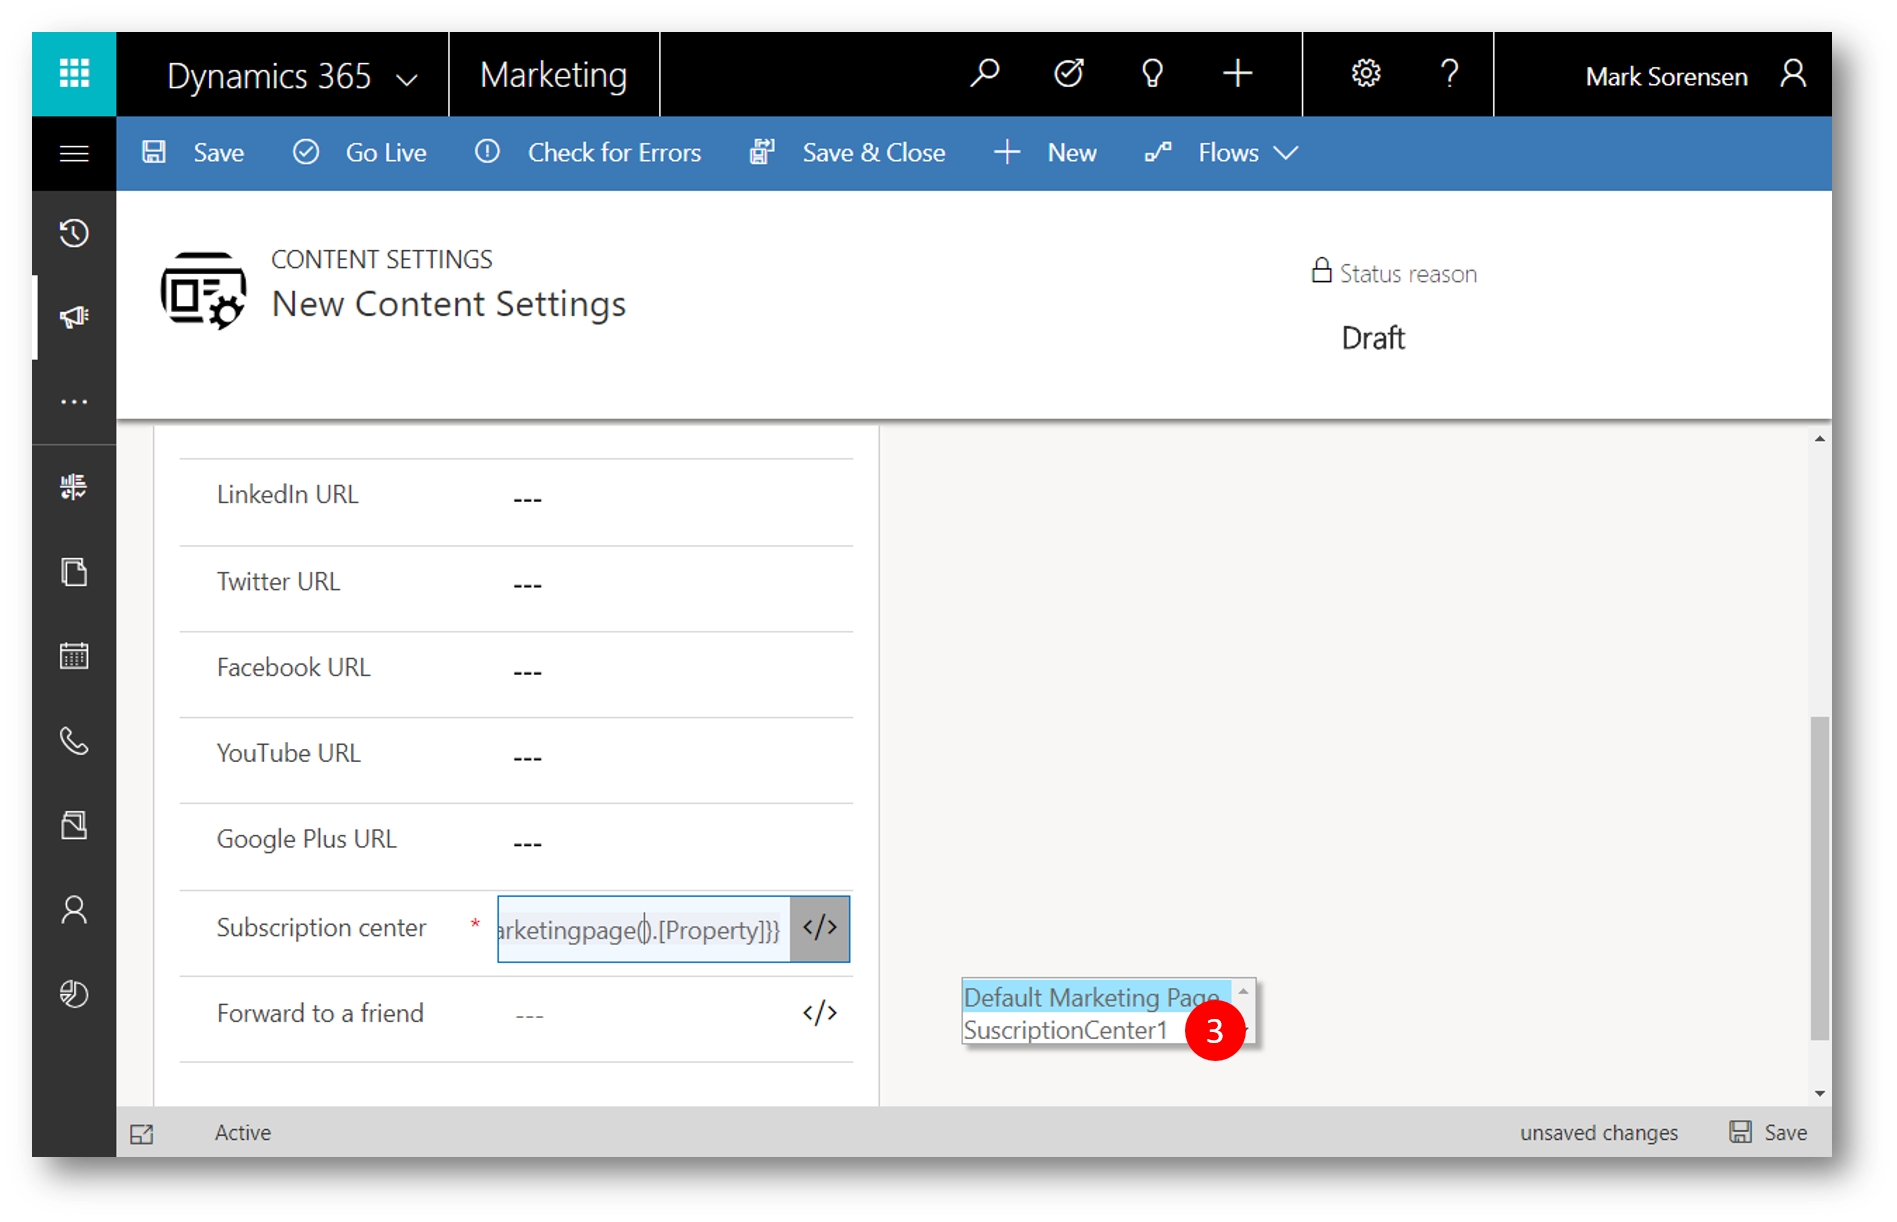
In the next drop-down select FullPageUrl (4)

The final field looks something like this (1) and will ensure all contacts are taken to their personal subscription center page when the link is clicked
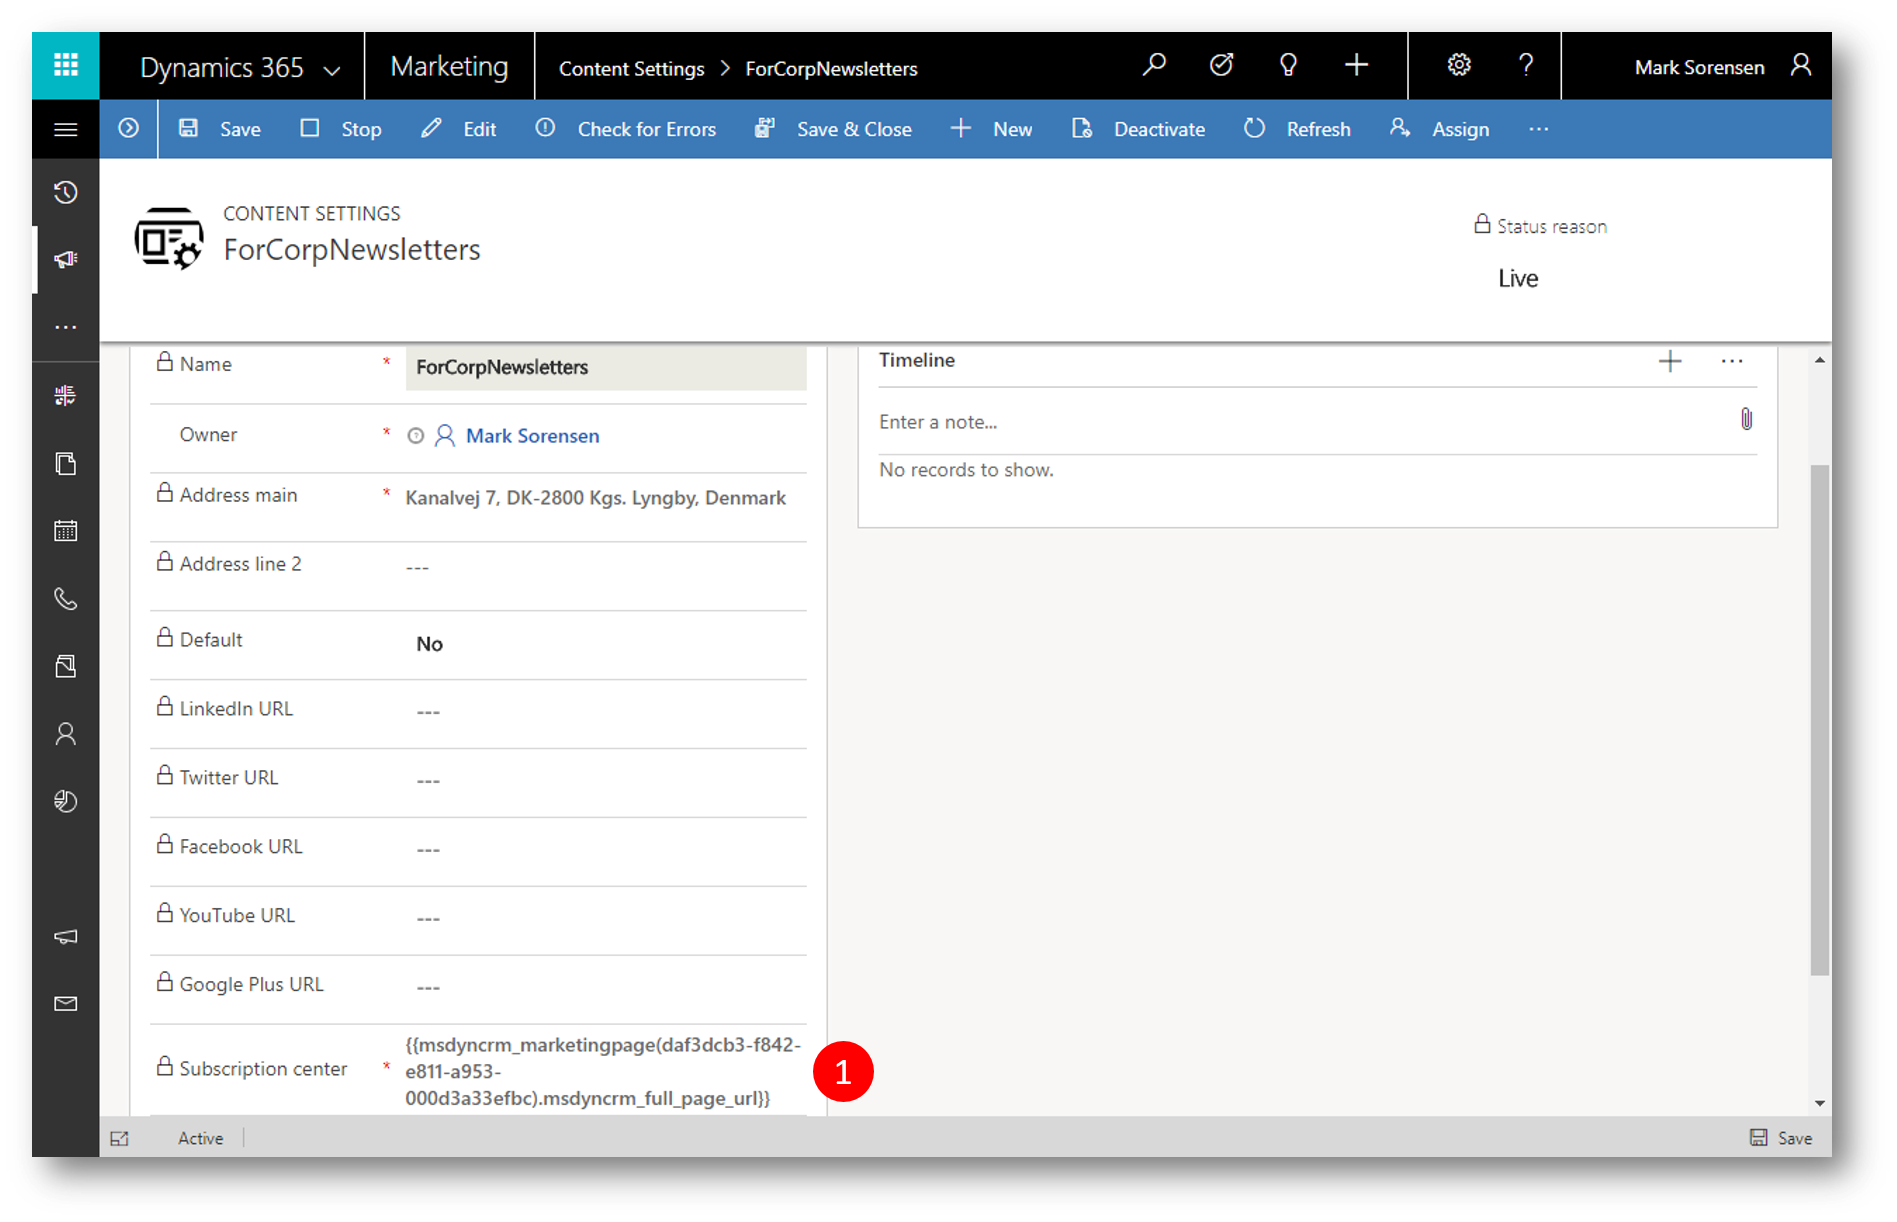
Provide a Name for the Content Setting record (eg. "ForCorpNewsletters"), provide the required Address main field (a physical address required to pass error checks) and then Save & Close
Step #5: Create a Customer Journey to test
To see the subscription center in action we create a customer journey - please refer to this blog post for how to create a segment, email, and customer journey
- The journey sends an email to the members (contacts) of a segment
- The mail contains a link to a subscription center
- The journey is linked to the Content Settings record created above to ensure the link in the email sends the contact to the correct subscription center
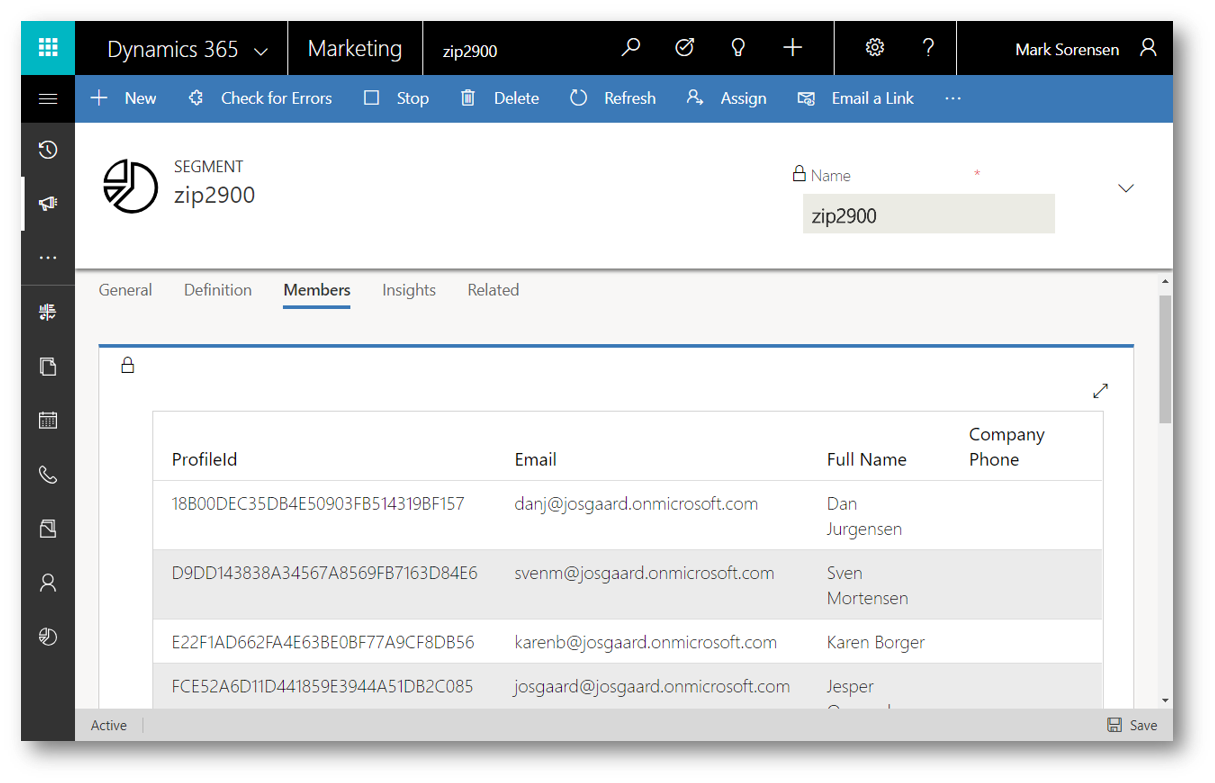
The segment is a simple segment holding all the contacts whose Zip Code is 2900
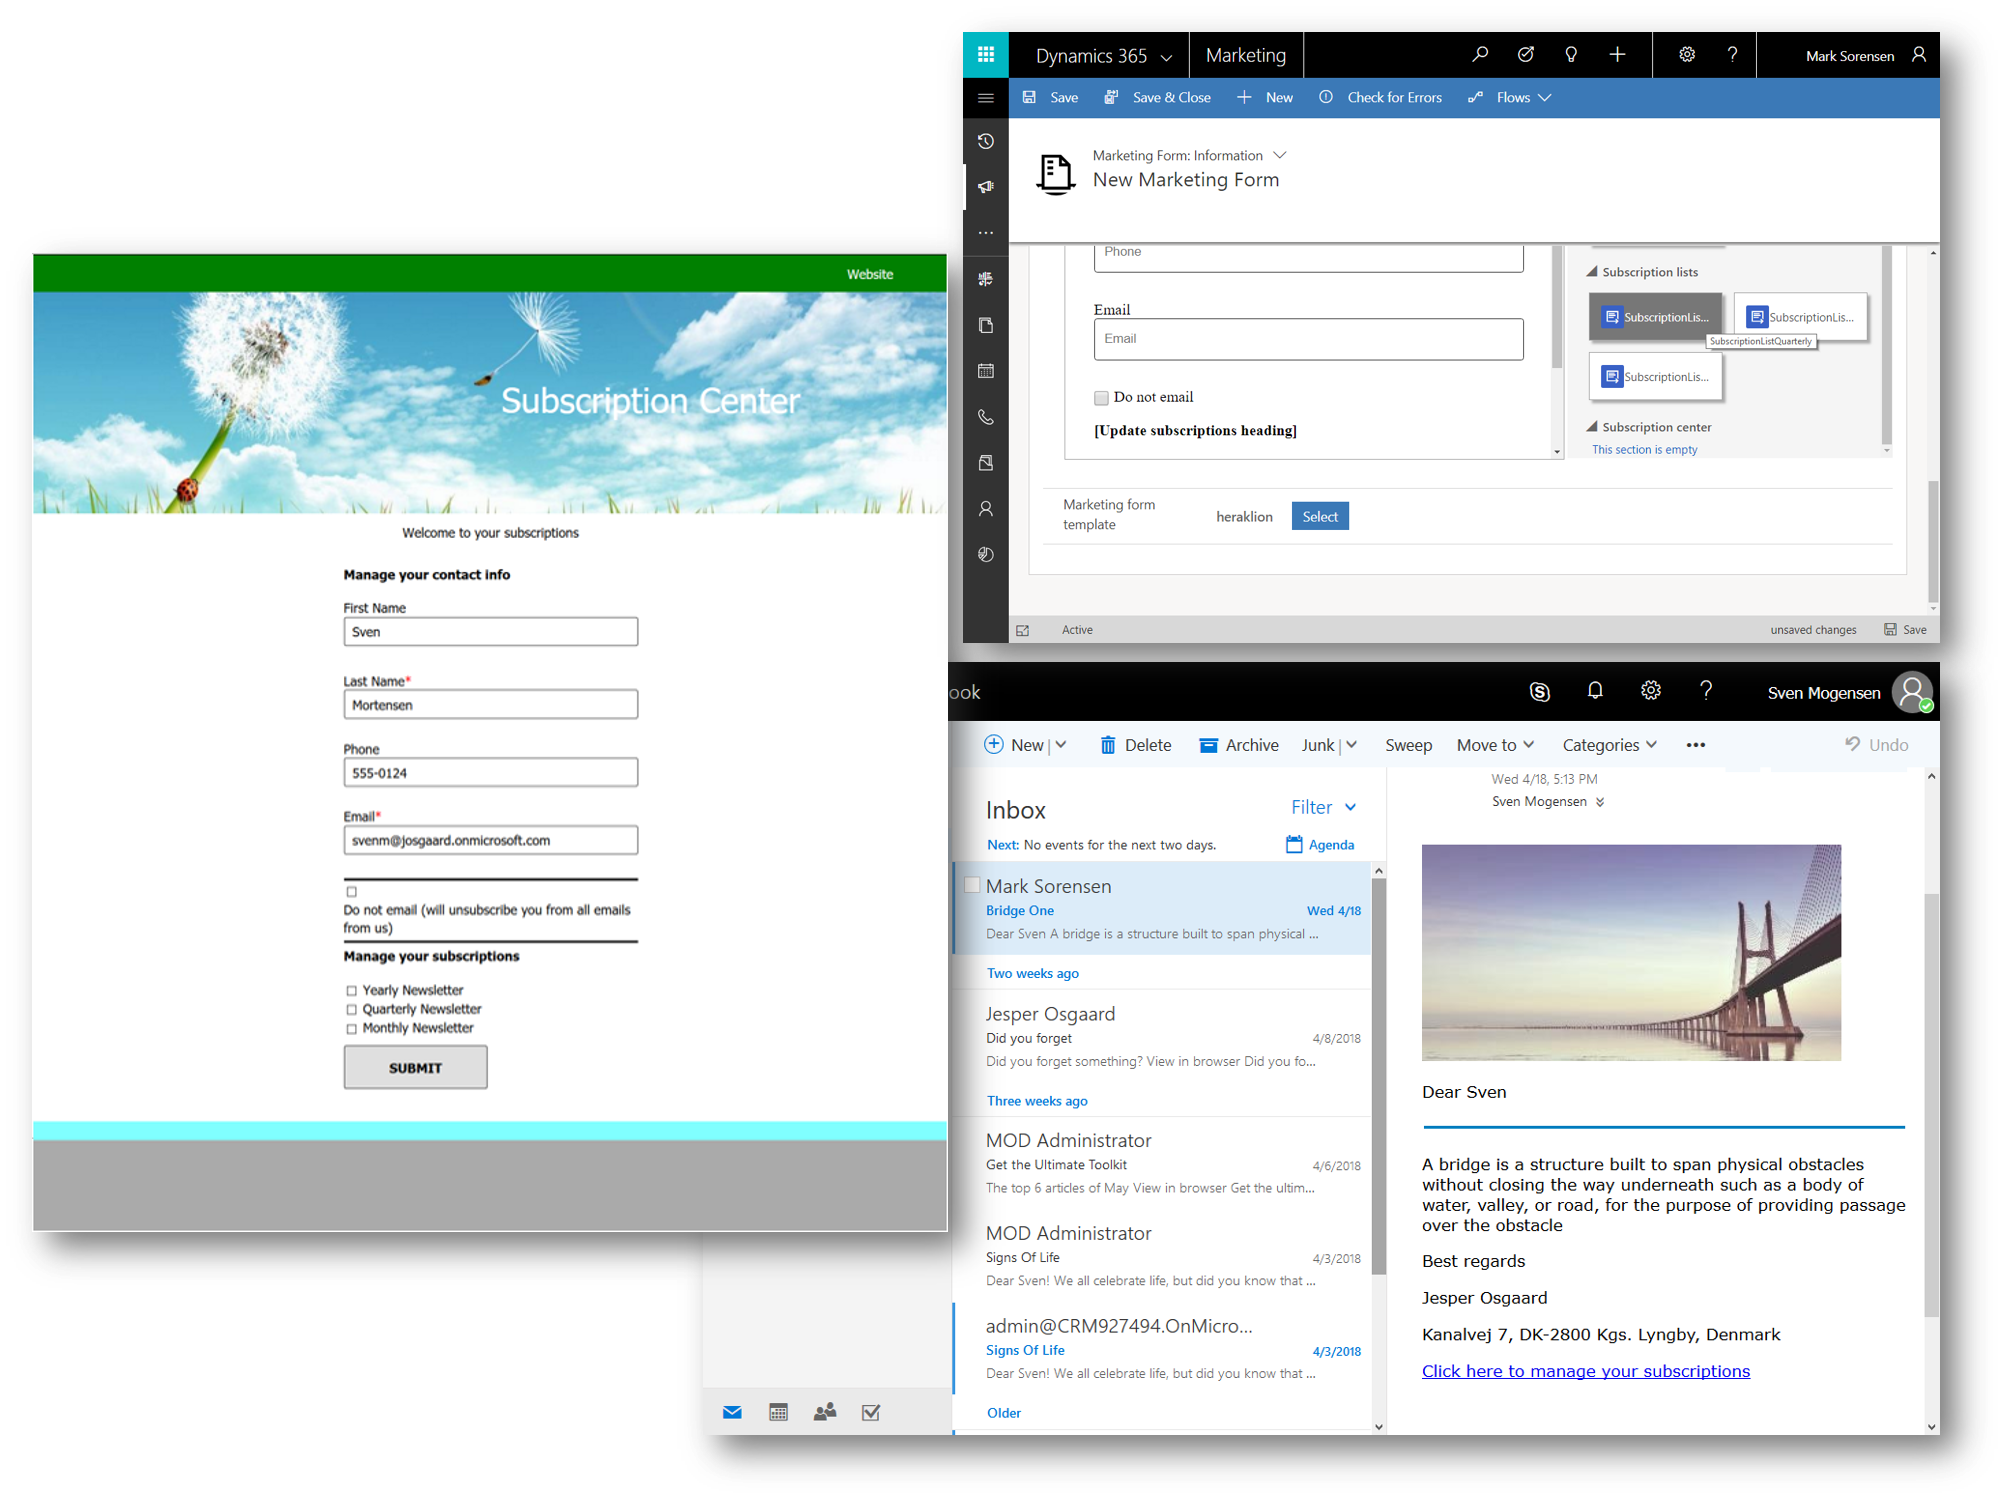
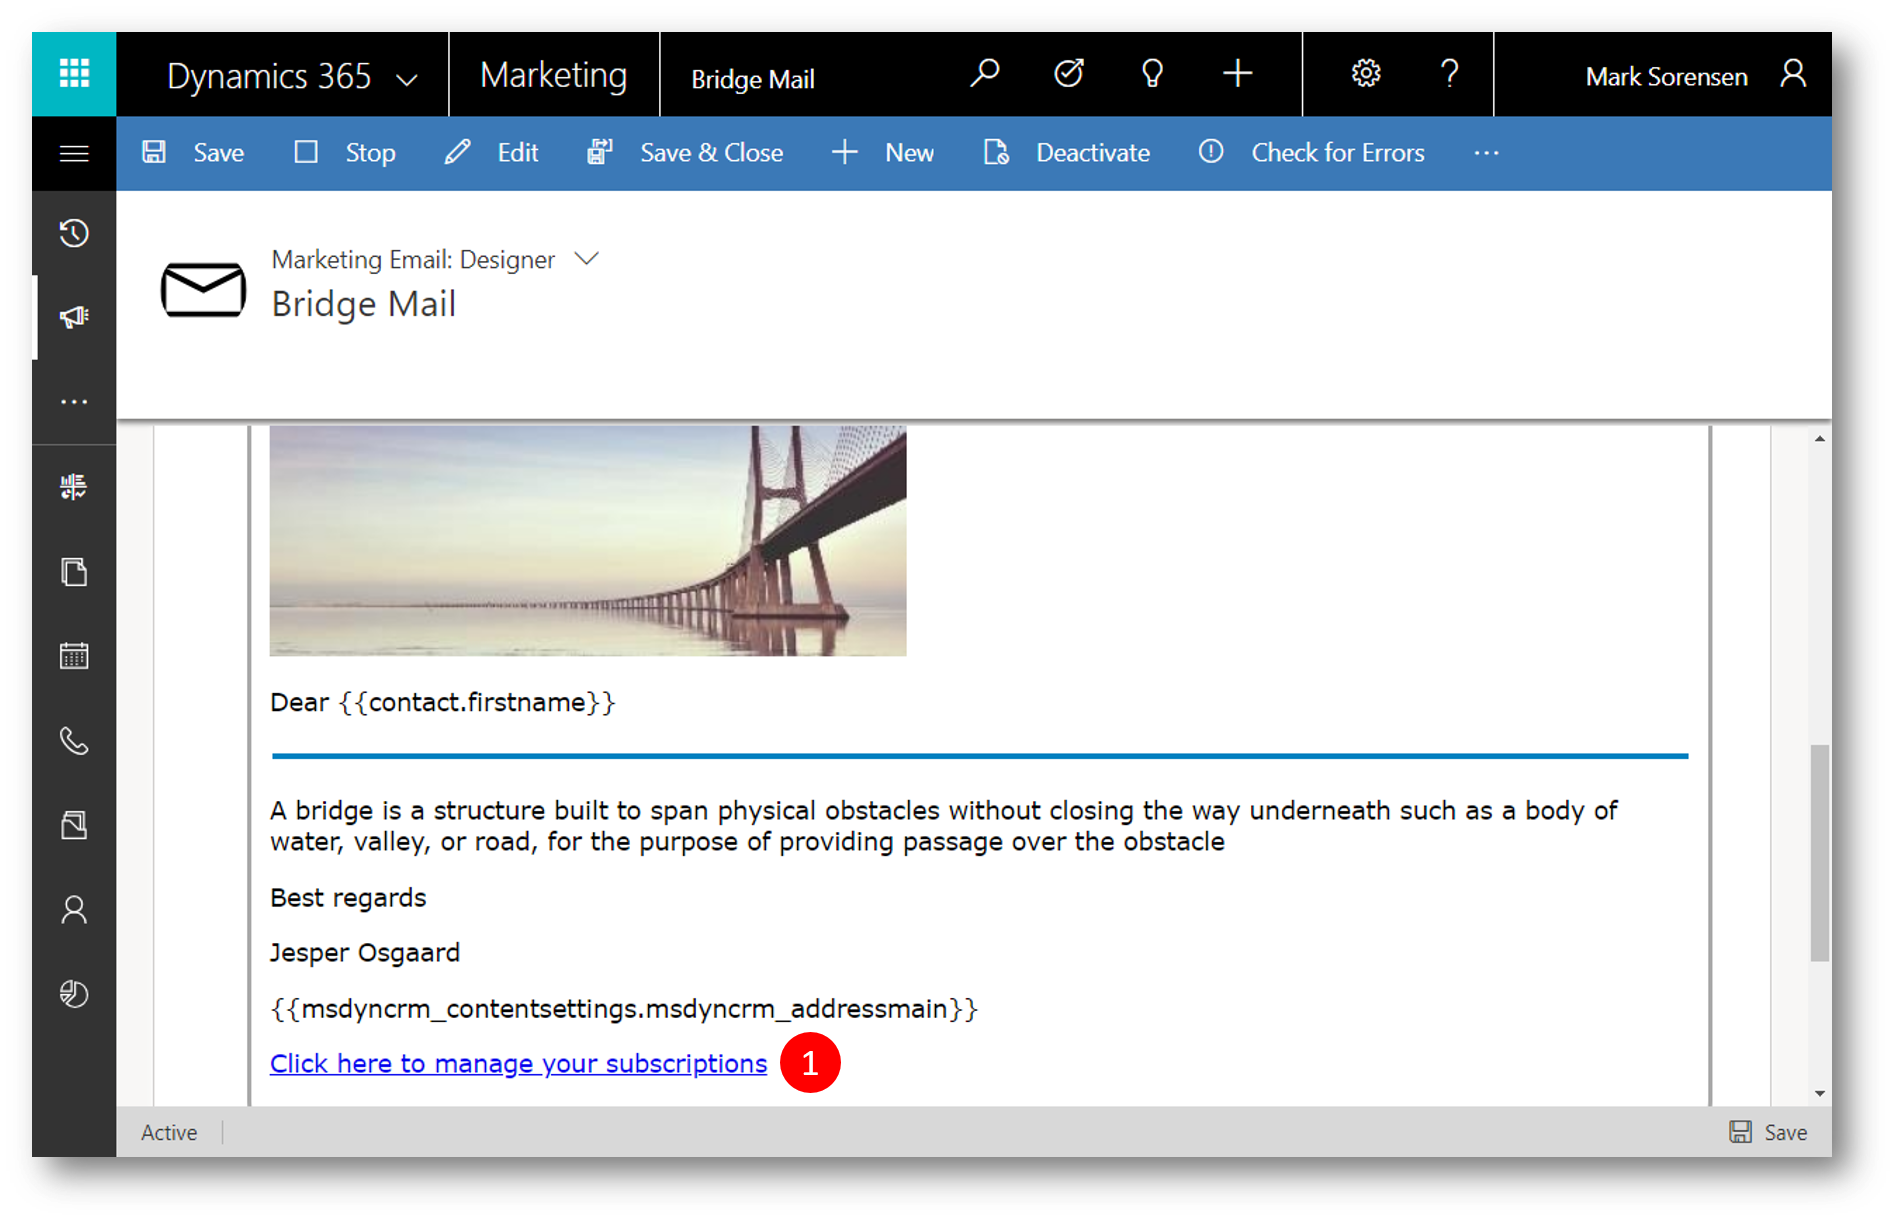
The mail is a simple mail with all the required fields in it, including a link to manage subscriptions (1)
The customer journey is a simple email journey with the above segment and email.
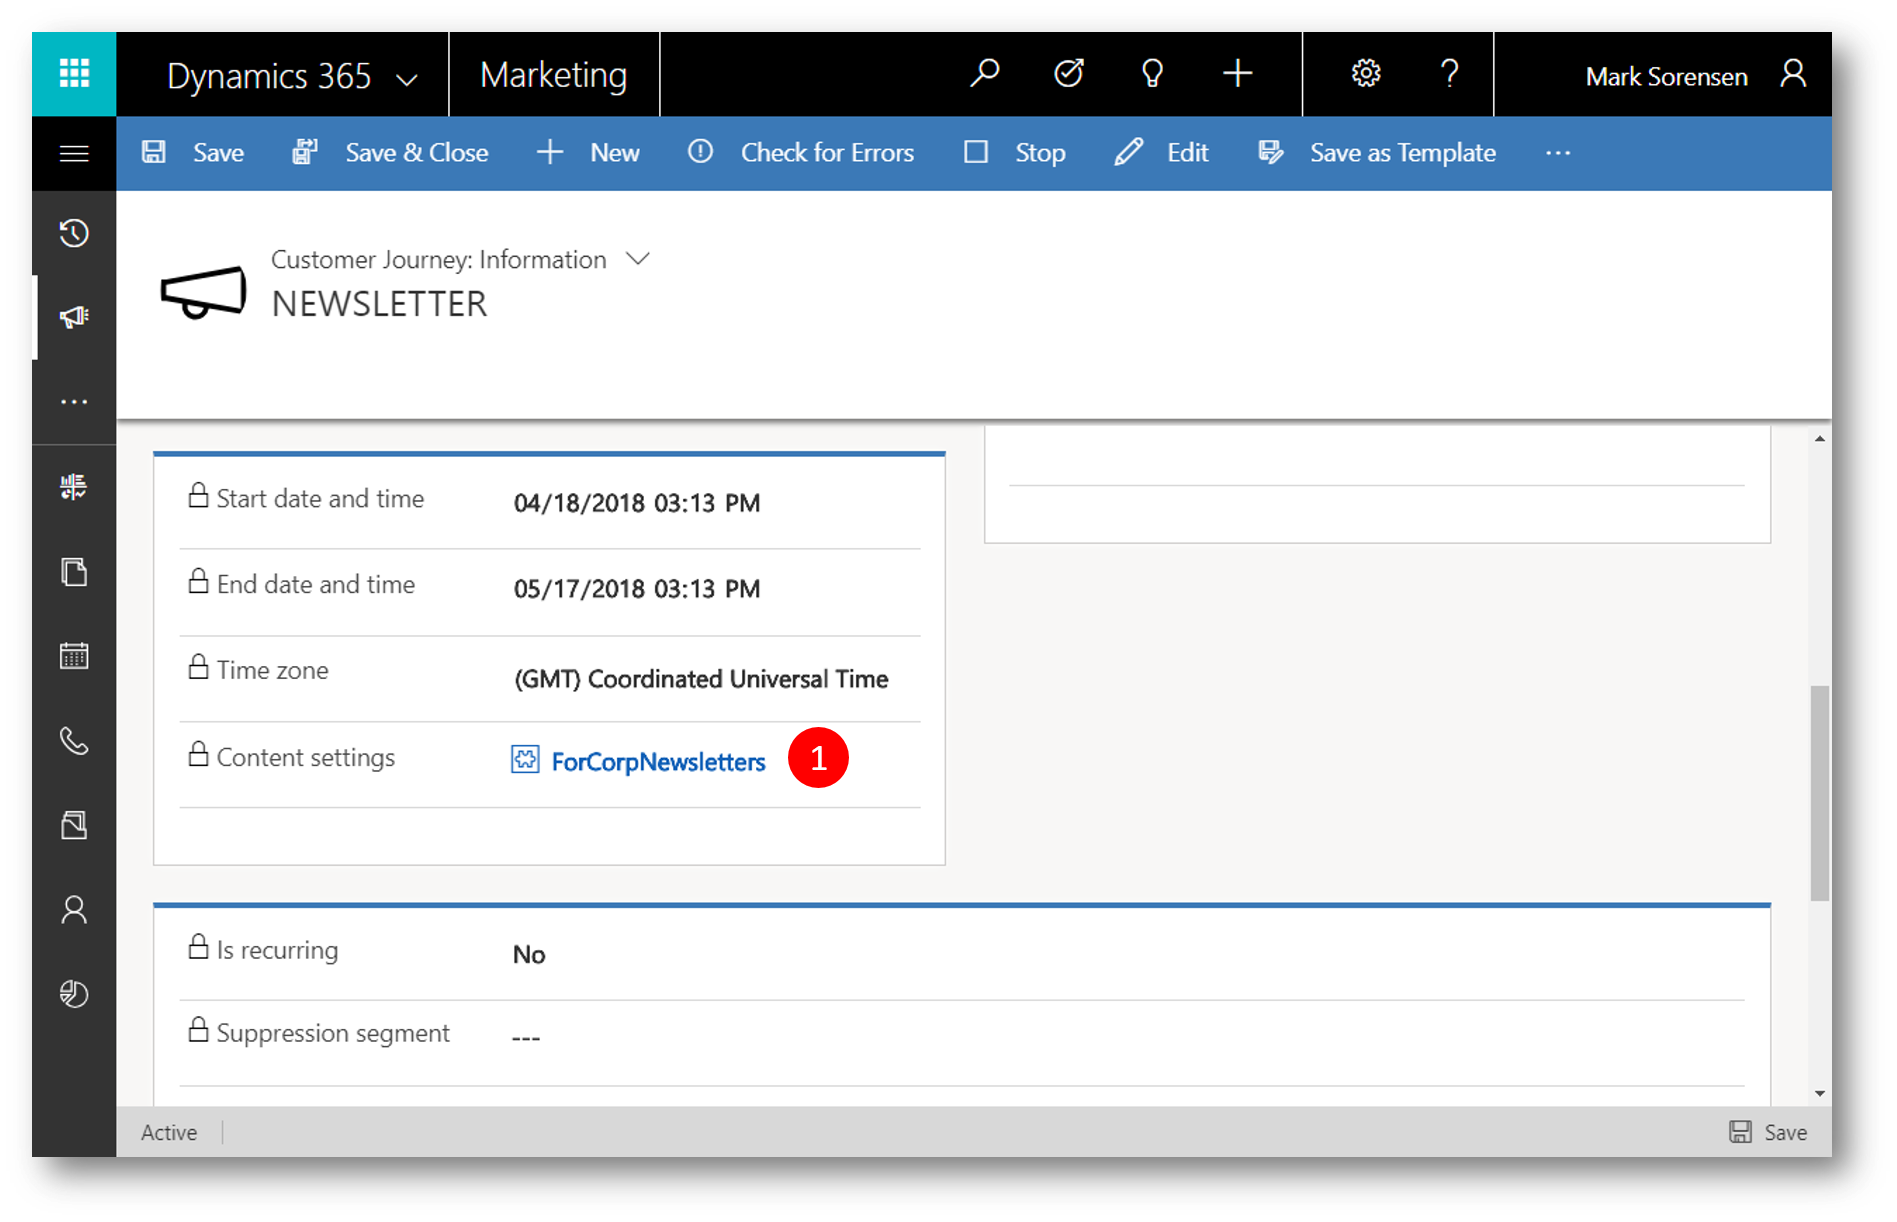
To ensure the link in the email sends the contact to the correct subscription center the journey must be linked to the Content Settings record created above
On the customer journey navigate to the General tab, and set the Content settings = (the content setting record from above) (1)
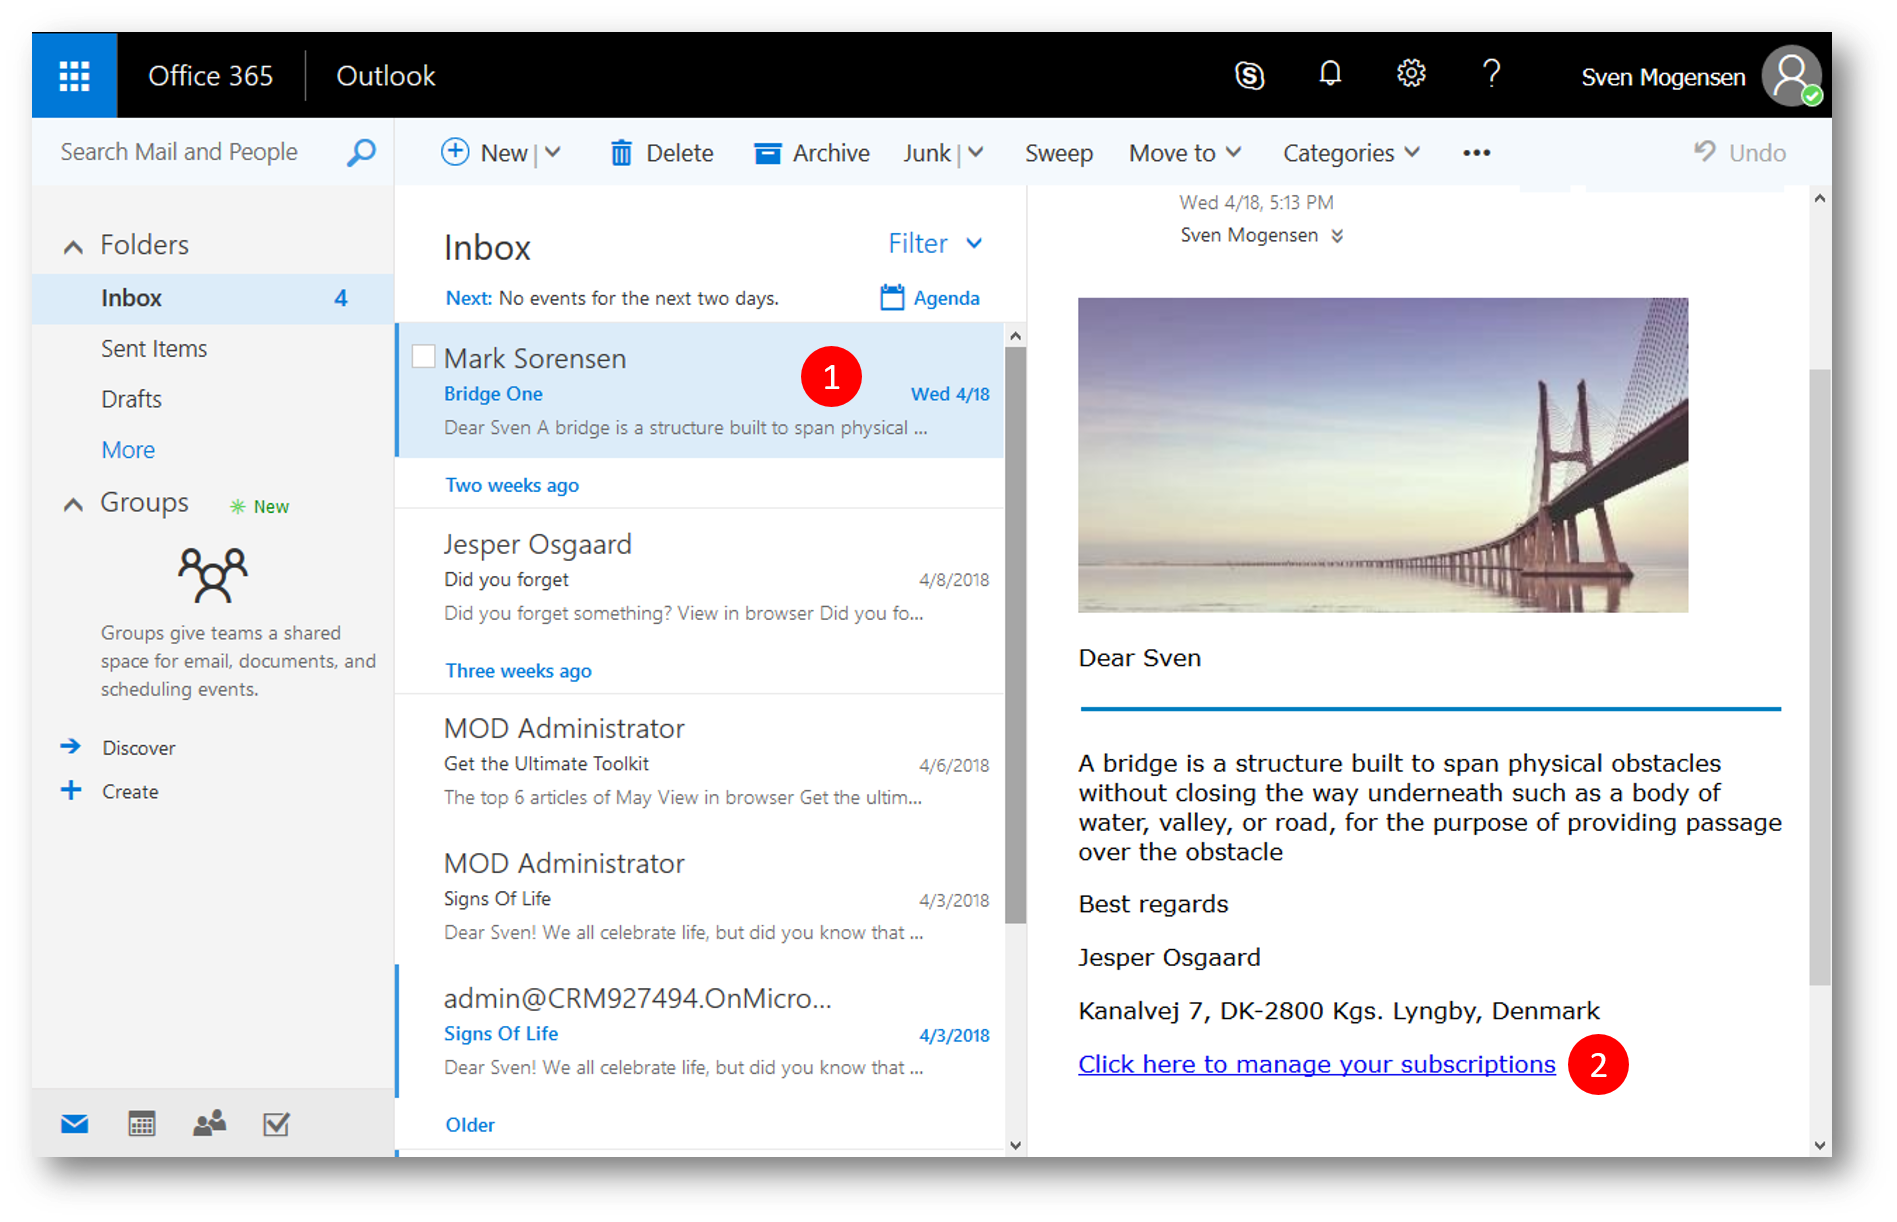
Fast forward to the live customer journey
One of the contacts Sven Mortensen in the segment "Zip2900" received the email "Bridge One" (1) from above, and decides to click the "Click here to manage your subscriptions" link in the email (2)
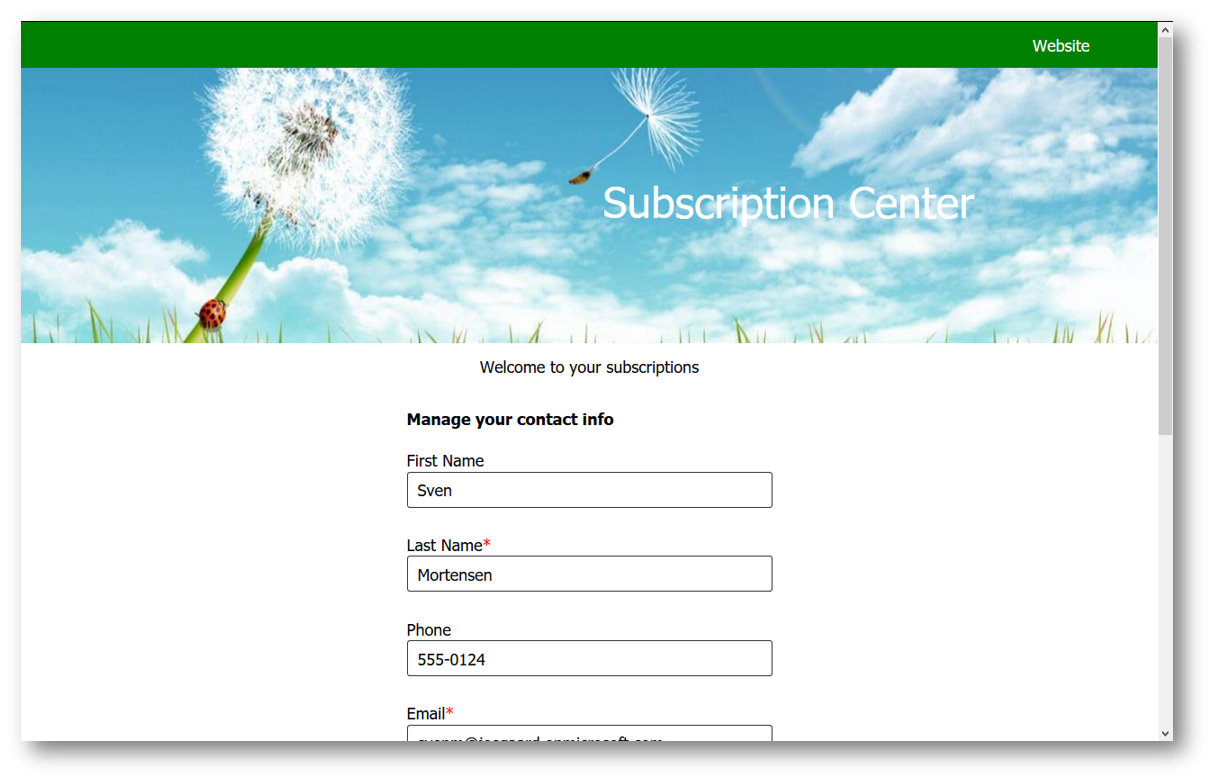
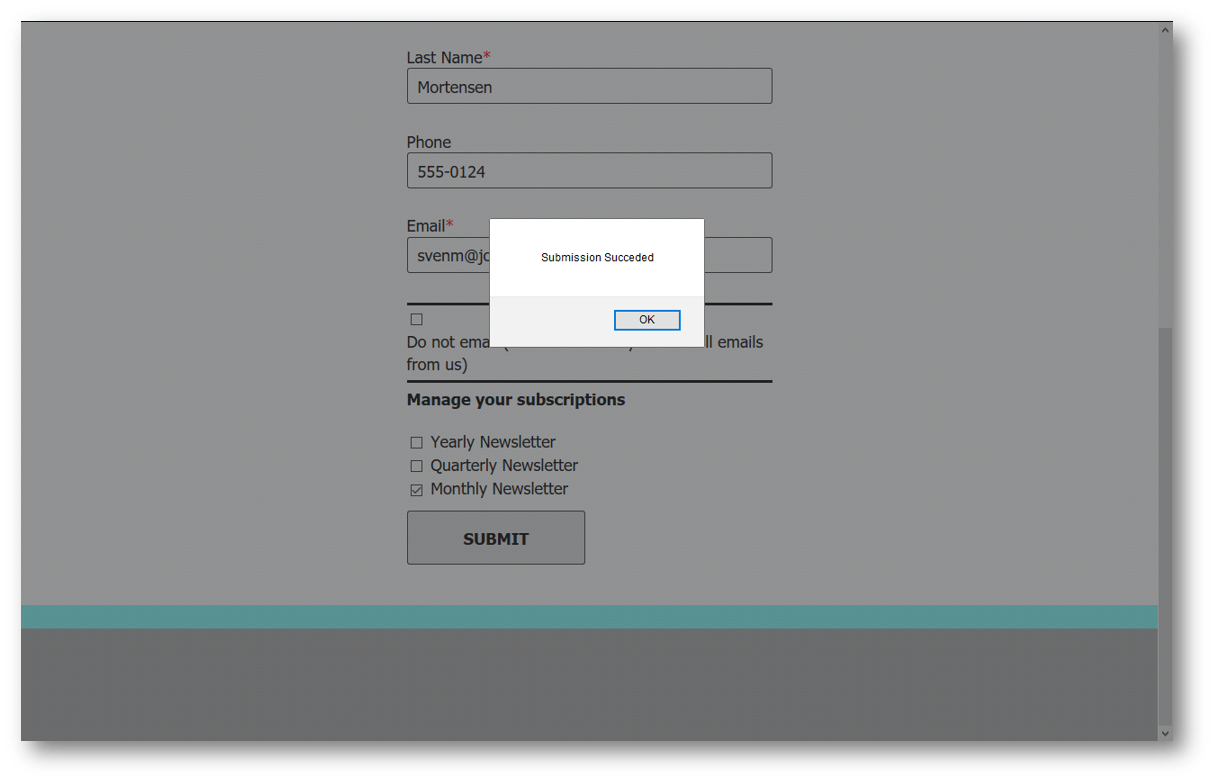
Sven Mortensen is taken to the Subscription Center (marketing page) and sees the subscrioption form prefilled with his information
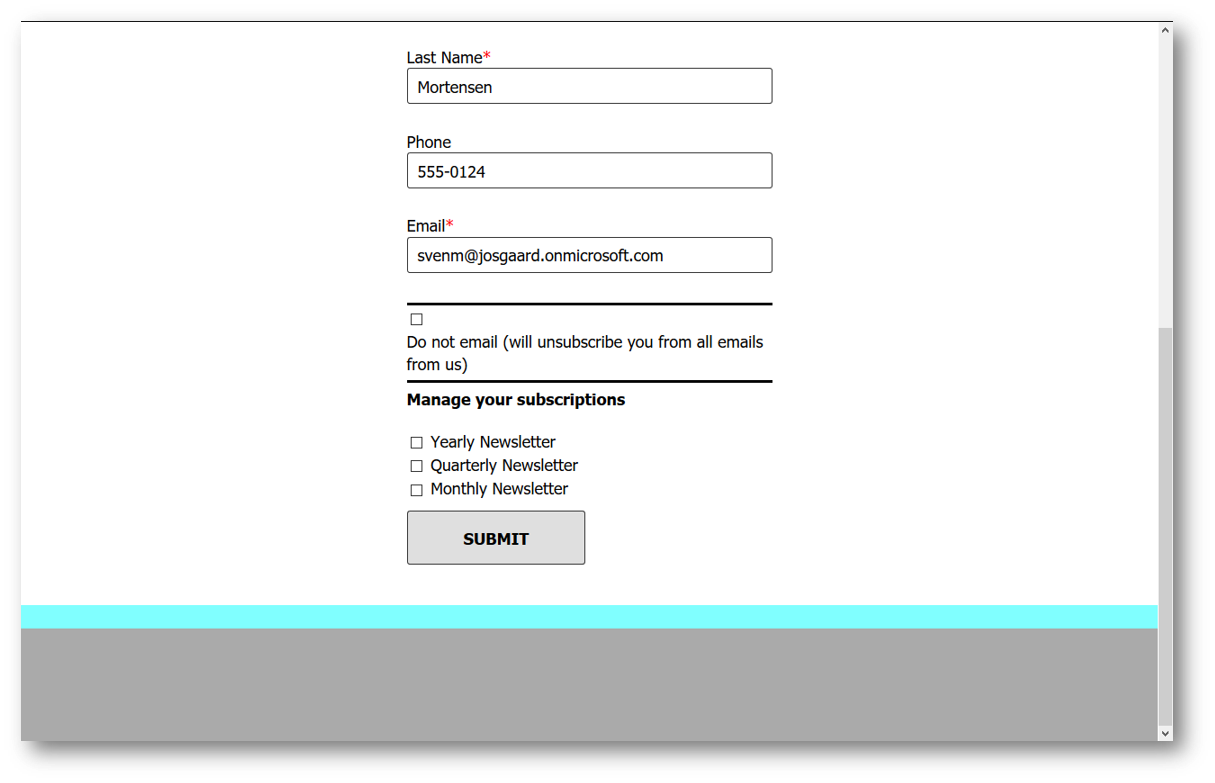
At the bottom of the form he sees the various newsletters he can subscribe to
He checks the "Monthly Newsletter" list and clicks Submit 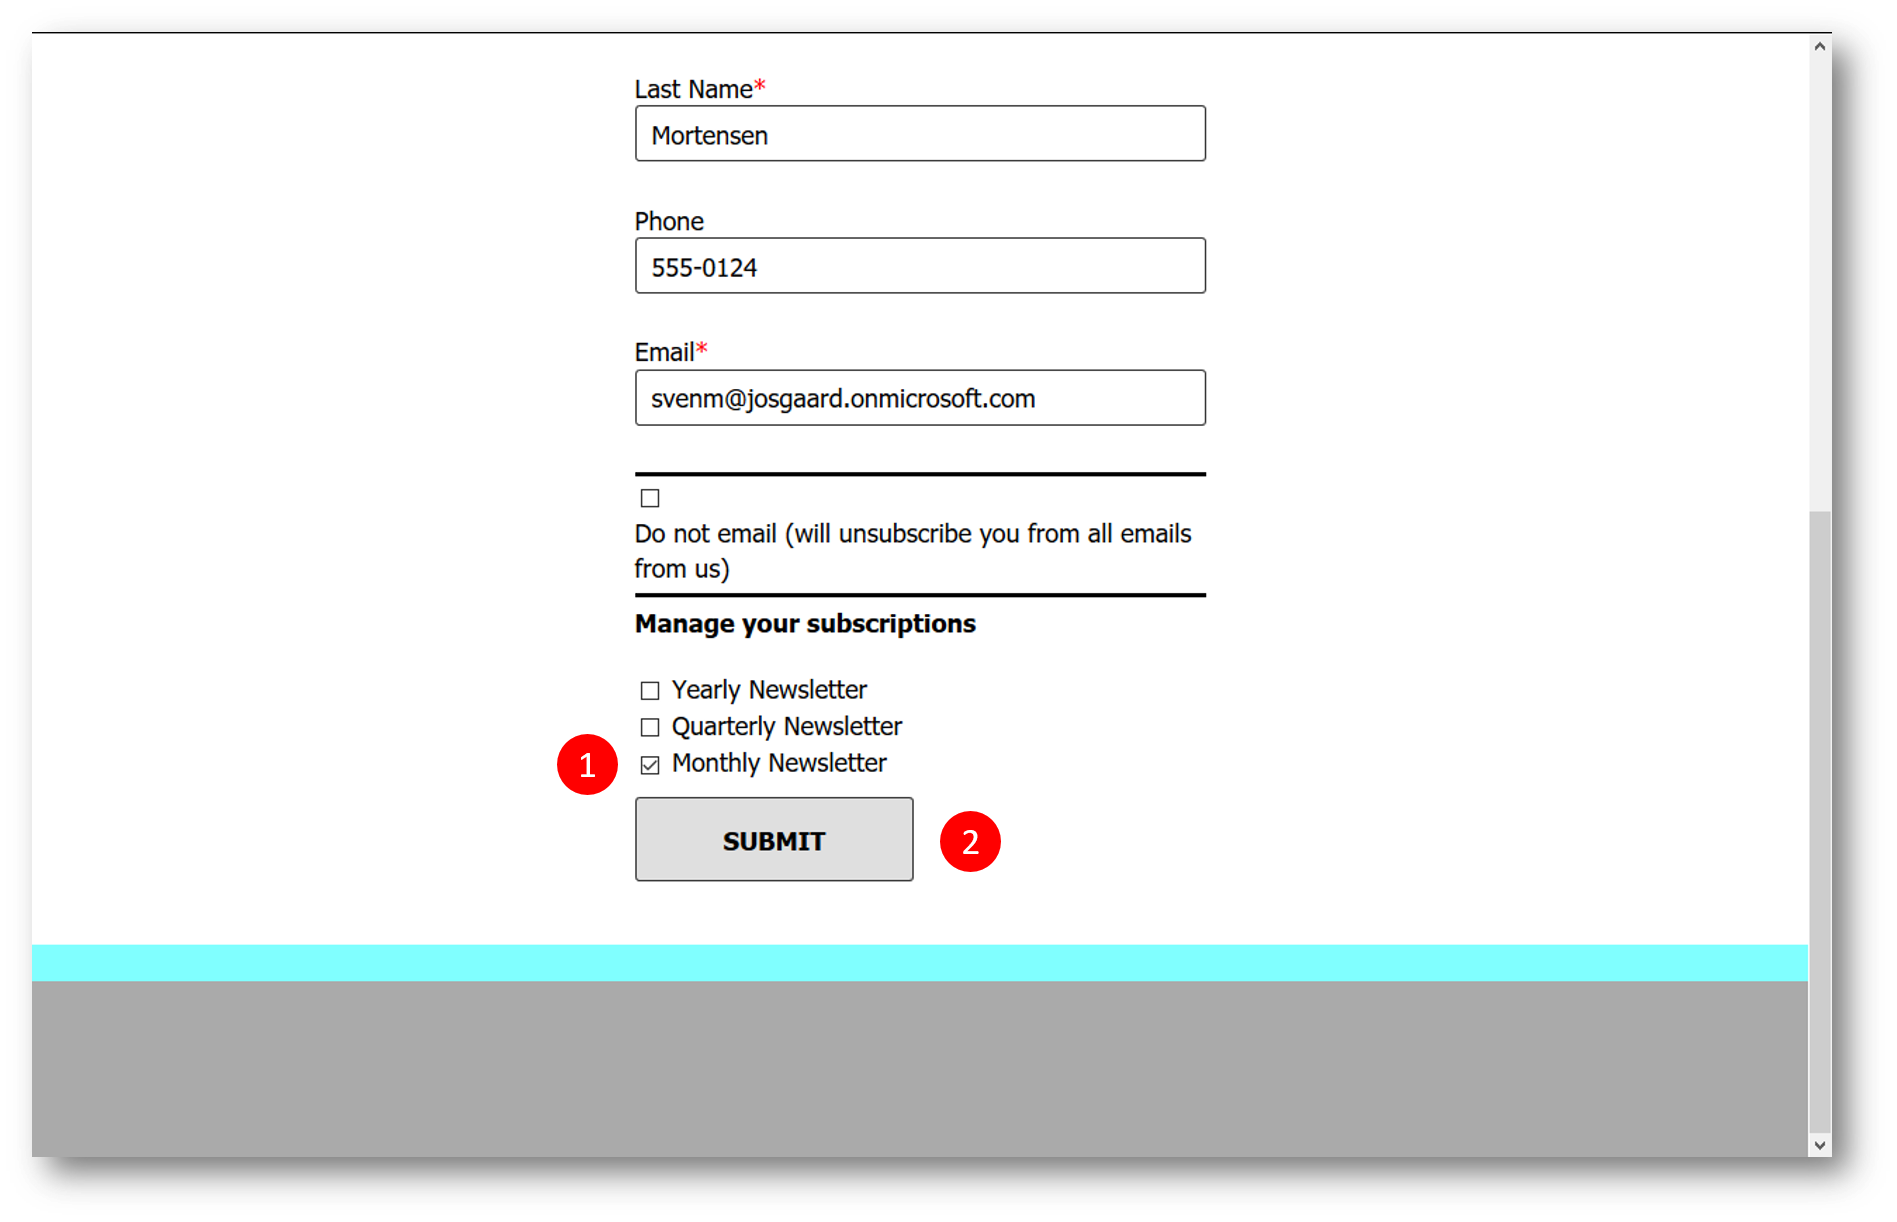
The form success message is displayed to confirm his submission
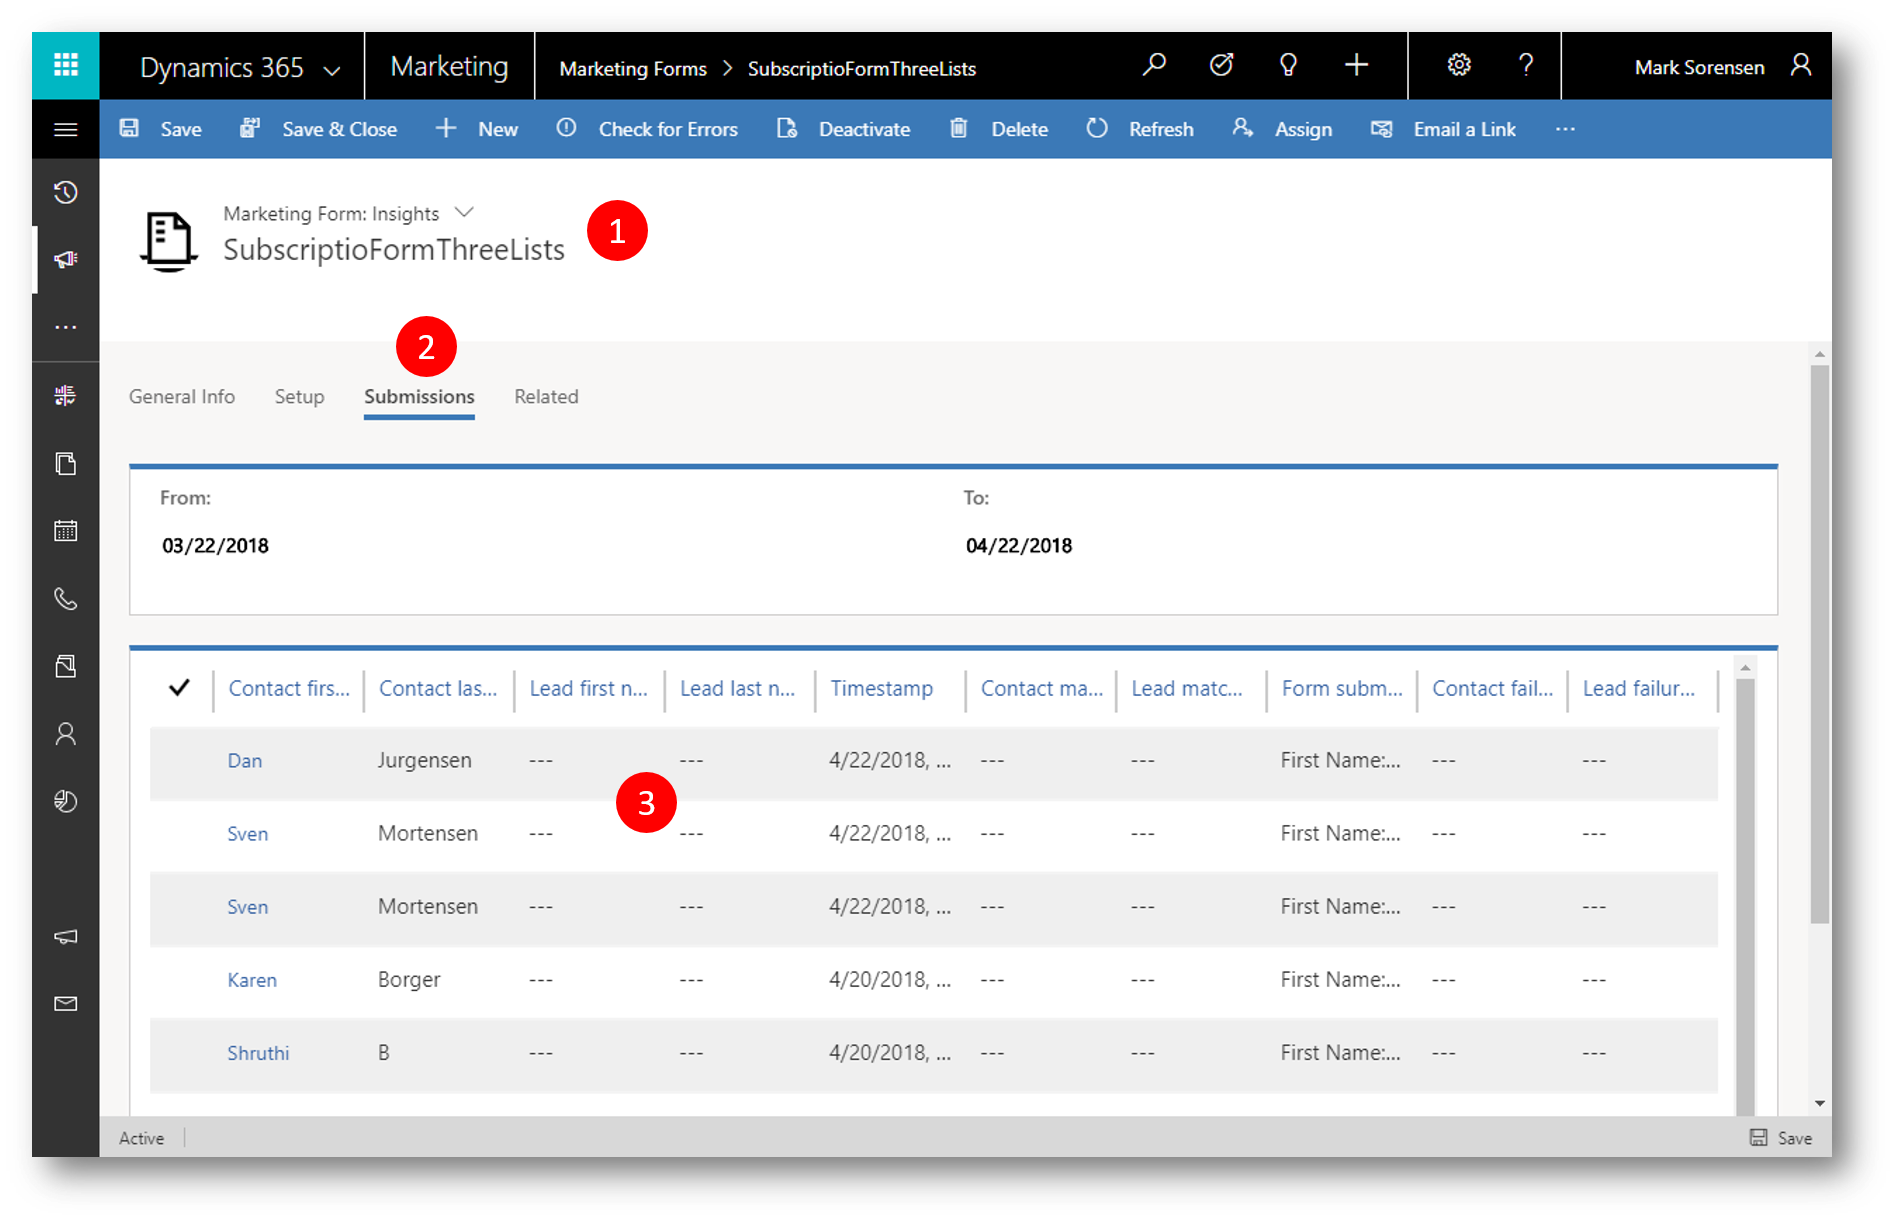
If we navigate to the subscription forms Insights (1) and then to the Submissions tab (2), we can see all the submissions from the form, including the above submission from Sven Mortensen (3)
Step #7: Verify
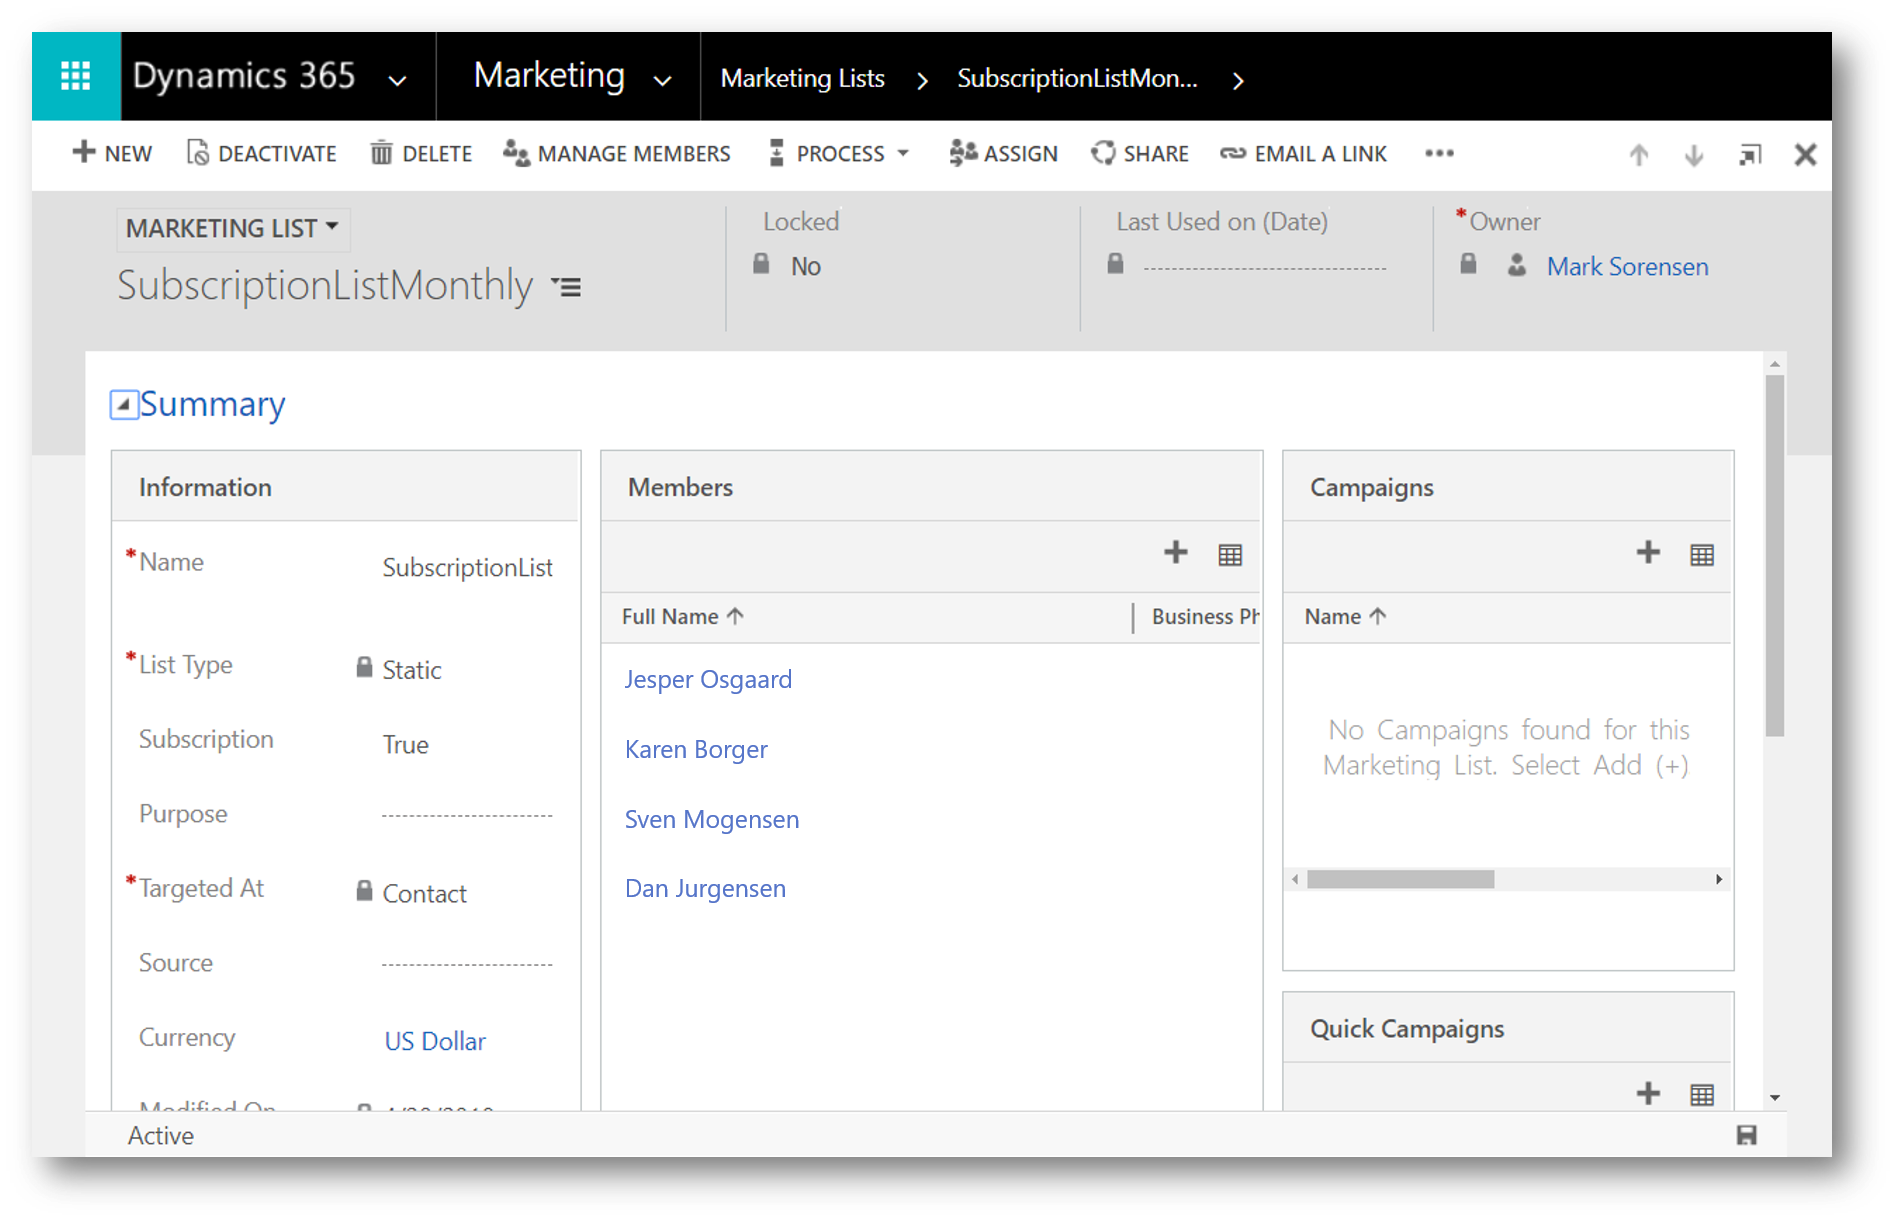
And finally - if we navigate to the Survey App, and the marketing list for the Monthly Newsletter we see the new member(s) on the list
With the Subscription Center in Dynamics 365 for Marketing you can stay compliant as well as offer your contacts granular subscription options.
See also