Data Science VM and Azure Data Lake Store - The hidden feature
Hi All!
I wanted to highlight a hidden feature in the data science VM which allows you to consume data stored in Azure Data Lake Store from Microsoft R Server.
As part of the continued improvements made to the data science VM, towards the end of December 2016, the necessary libraries that allow connectivity were added to the VM.
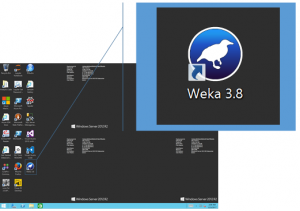
How do I know if my VM contains the lasted package? If you look on the desktop, you should see an icon for Weka which indicates that you have
Prerequisites:
- Azure Data Lake Store resource created. Follow this guide in order to create a new one: /en-us/azure/data-lake-store/data-lake-store-get-started-portal
- Azure Active Directory. Follow this guide to get you started with Azure Active Directory: /en-ca/azure/active-directory/develop/active-directory-howto-tenant
- Azure Active Directory Application Registration. Follow this blog post outlining the steps required to create an OAuth 2.0 authentication application registration: https://blogs.technet.microsoft.com/cansql/2017/03/06/creating-an-oauth-2-0-authentication-token-for-azure-data-lake-store/
Now that we got that out of the way, let’s look at some R code!
In this example, we’ll be using the functions like “RxHdfsFileSystem” which are part of the RevoScalr library. Therefore, the first step will be to load this library.
library(RevoScaleR)
Next, we’re going to set the execution context for this execution to be local. By doing this, the code will be executed locally where you’re running this code. Alternatively, you could set the context to a remote compute like SQL Server, Hadoop or even Spark. See https://msdn.microsoft.com/en-us/microsoft-r/scaler/rxsetcomputecontext for more information on this topic.
rxSetComputeContext("local")
We will then need to configure some parameters:
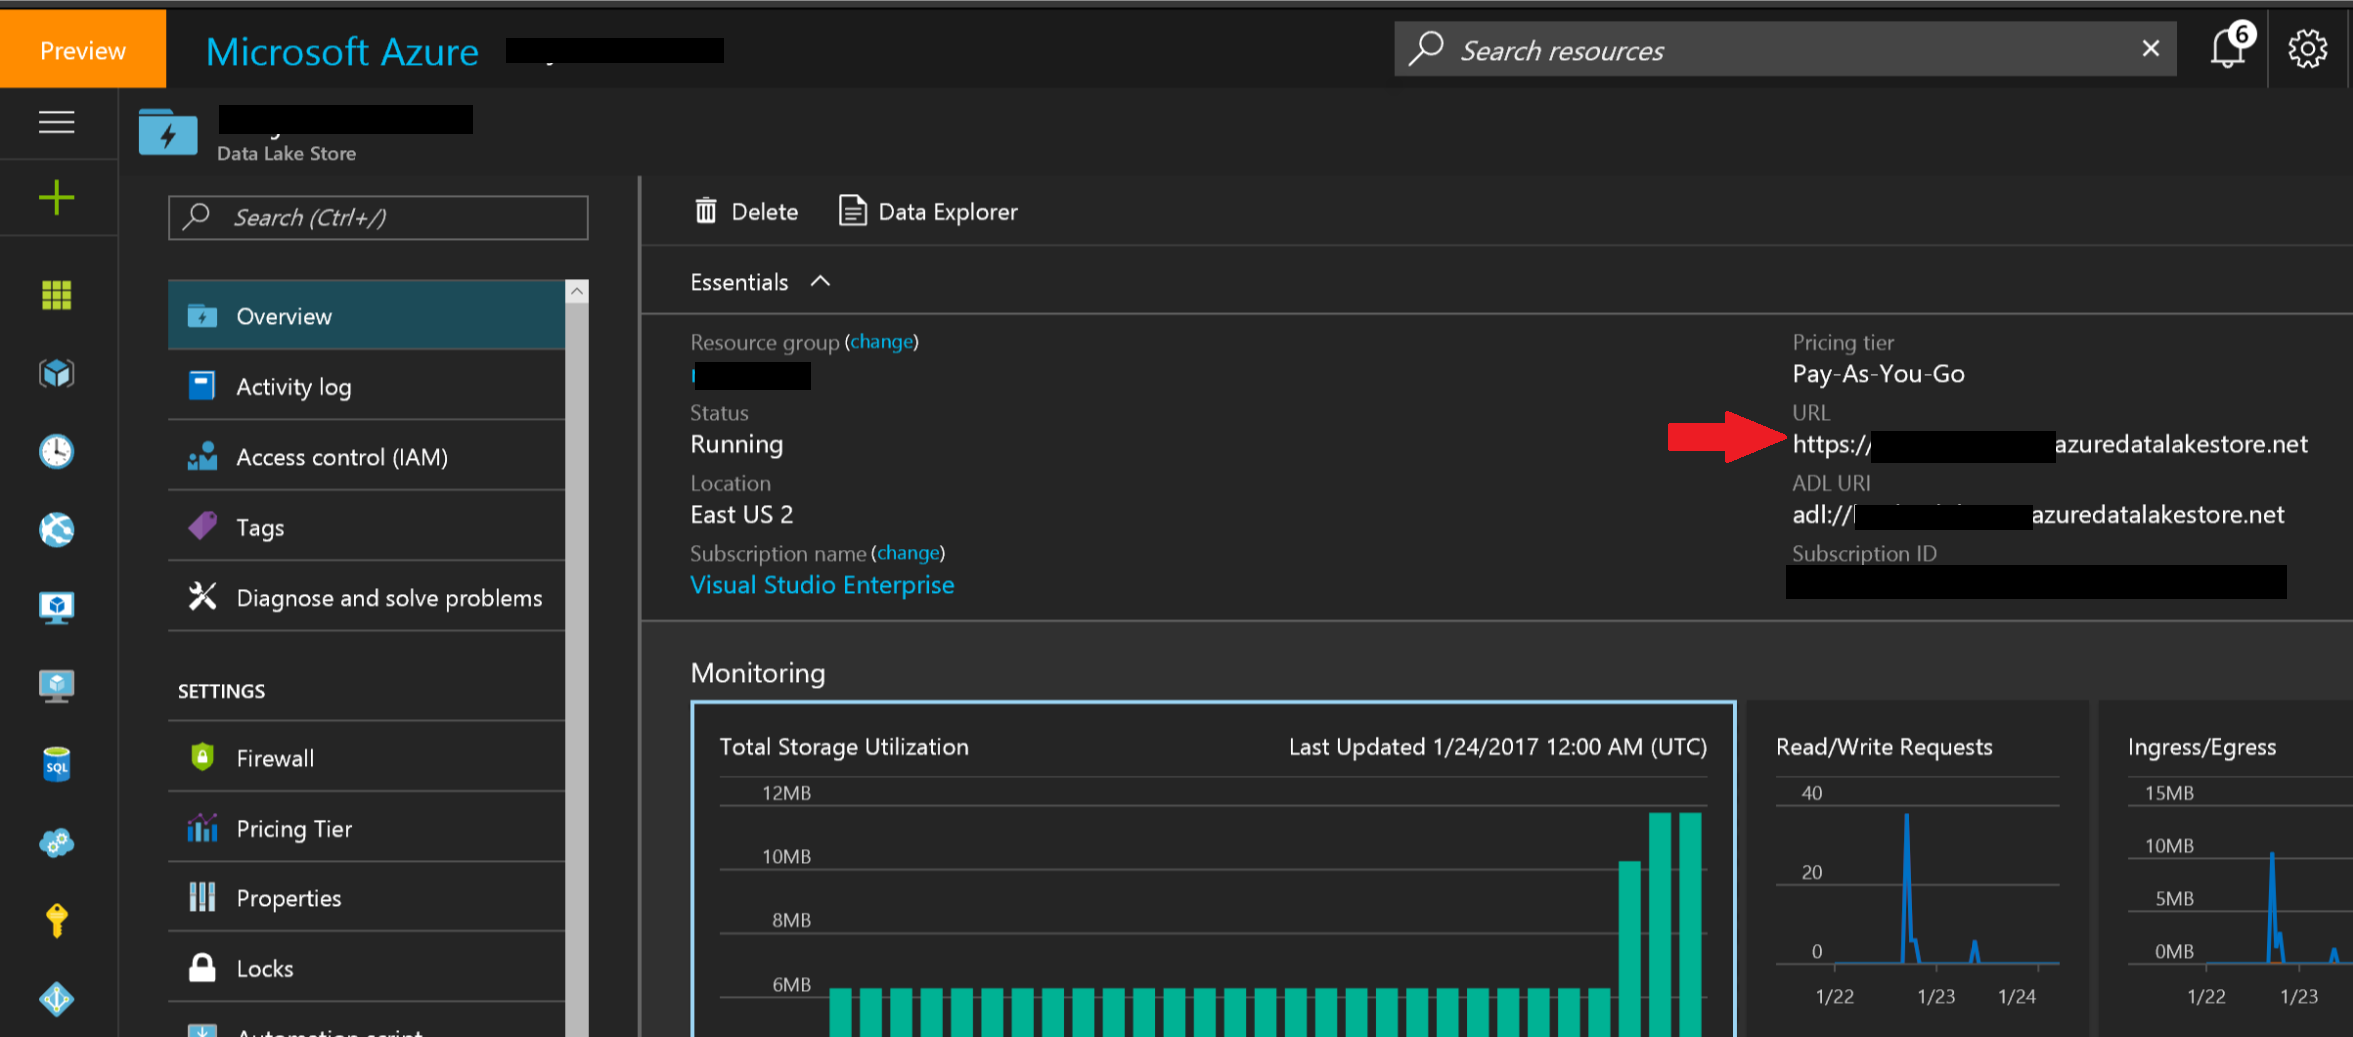
 hostName = ADLS URL
tenantId = Azure Active Directory Domain Name
clientId = Azure Active Directory Application Id
username = ADLS user email addressport = 443
hostName = ADLS URL
Navigate to your Azure Data Lake Store resource and from your navigation pane, click on “Overview”. On the information pane to the right and copy the “URL” value into the “hostName” variable.
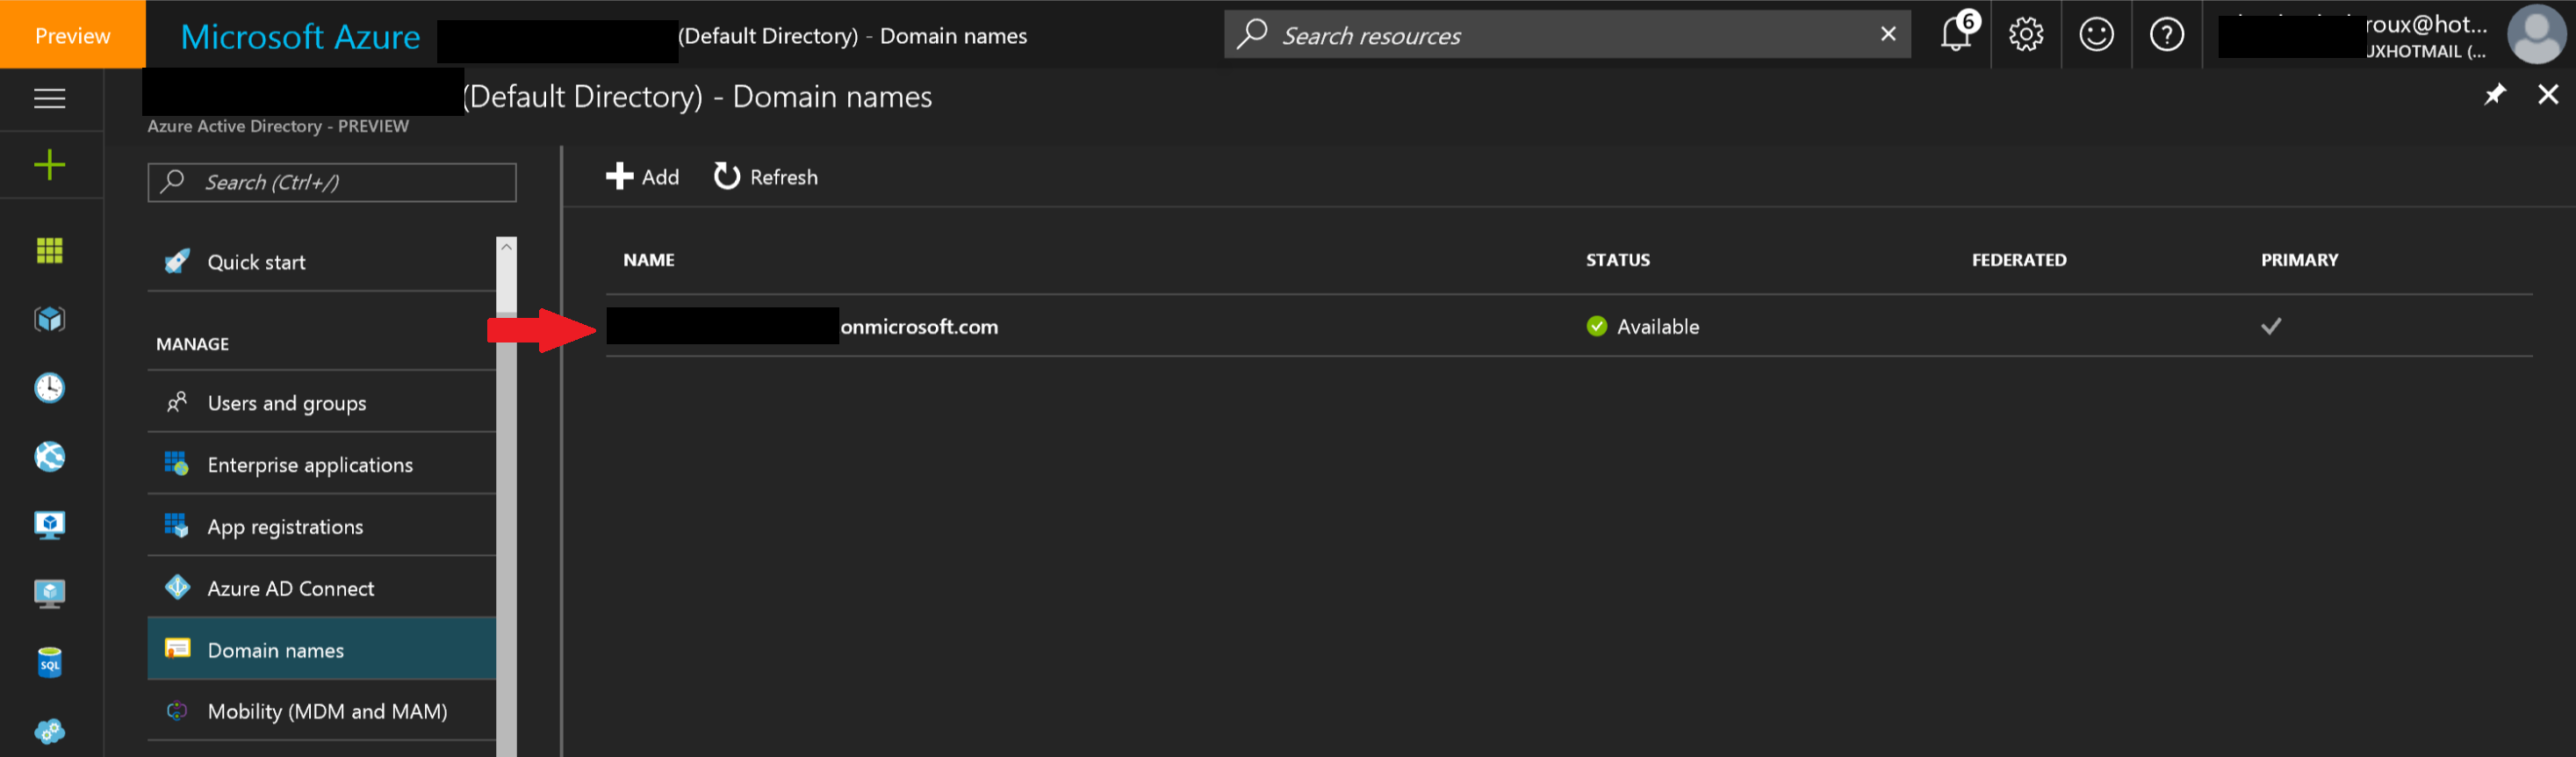
tenantId = Azure Active Directory Domain Name
Navigate to your Azure Active Directory resource and from the navigation pane, select “Domain names”. From the information pane to the right and copy the name of the domain into the “tenantId” variable.
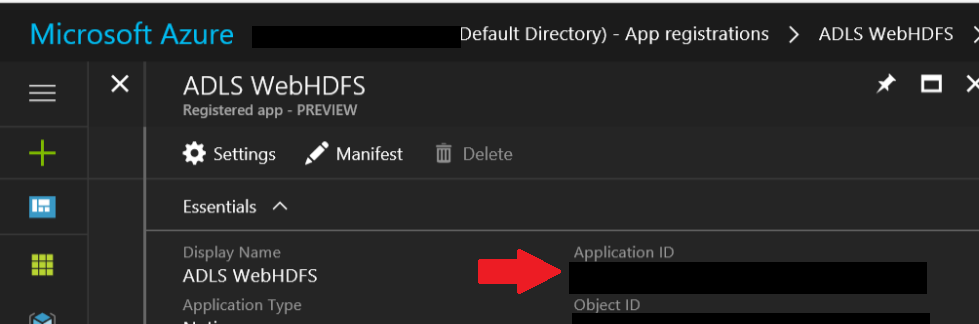
clientId = Azure Active Directory Application Id
Navigate to your Azure Active Directory resource, the to the application registration created as part of requirements, copy the “Application ID” from the information pane into the “clientID” variable.
username = Azure Data Lake Store user name used to read the content of the file. Required Read + Execute
See this link for information on how to create and secure your Data Lake Store: https://docs.microsoft.com/en-us/azure/data-lake-store/data-lake-store-security-overview
port = Port used to connect to the Azure Data Lake Store WebHDFS API.
This should be set to 443
File: Path to the sample file in the Azure Data Lake Store (Example: "/twitter_sample.csv")
file = "/twitter_sample.csv"
The sample file containing twitter feeds can be downloaded via Twitter Sample and explanation on how to upload into the Azure Data Lake Store can be found here: Data Lake Store - Getting Started with the Portal
Based on the parameters set previously, an oAuth object is created which will be used to authenticate to the Azure Data Lake Store.
oAuth <- rxOAuthParameters(authUri = "https://login.windows.net", tenantId = tenantId, clientId = clientId, resource = "https://management.core.windows.net/", username = username, password = NULL, authToken = NULL, useWindowsAuth = TRUE)
Note, because we set the parameter for useWindowsAuth = TRUE, the username and password will not be used and you will be prompted for a user name a password upon execution of the script. For automation purposes, you can set the useWindowsAuth property to FALSE and pass the username and password.
With the previously created oAuth object and additional variables, an HDFS object is defined.
hdFS <- RxHdfsFileSystem(hostName = hostName, port = port, useWebHdfs = TRUE, oAuthParameters = oAuth, verbose = FALSE)
Finally, a data frame is created with data contained in the file stored in the Azure Data Lake Store.
 myTextData <- RxTextData(file,
                 fileSystem = hdFS,
                 readDateFormat = "%Y-%m-%d",
                 firstRowIsColNames = TRUE,
                 returnDataFrame = TRUE,
                 quotedDelimiters = TRUE)
Note, when loading the data frame, you will be prompt to authenticate to Azure by providing your Azure user name and password.
With the data frame we can then use a rxGetInfo to get a summary information.
 # Look at file information
rxGetInfo(myTextData, getVarInfo = TRUE)
Then, we can also take a look at the first few records of the data frame
 # Look at the first few rows of the file
head(myTextData)
That’s it! Hope you enjoyed.
You can also get the complete R script here.