Searching for suspicious user in Azure Security Center
Last September during my presentation with Meir at Ignite, we talked about how powerful the new search capability in Azure Security Center is, the integration with Log Analytics gives you total control, and flexibility to find what you really need. But how to really use this? First step is to read our core documentation regarding Search in Security Center. Now that you know the basics, let's go over the following scenario.
Problem
As a security investigator, you identify the following Alert in Security Center:
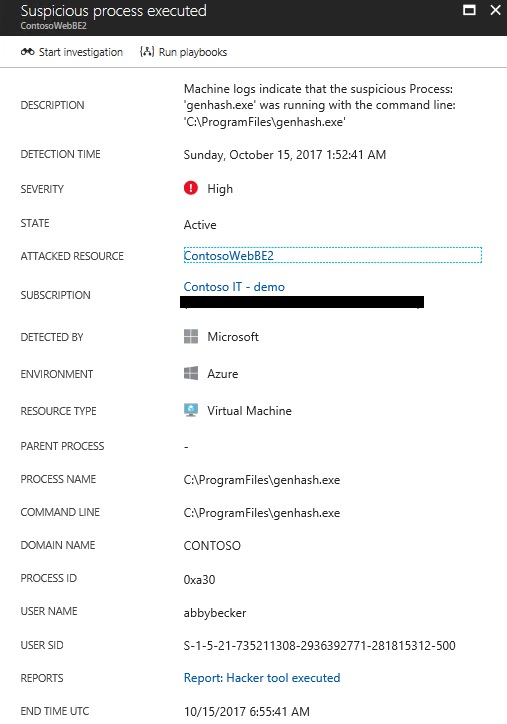
Based on this alert, you noticed that abbybecker was the user that executed this process. Now you want to find out if there are more alerts raised by abbybecker.
Solution
Now is the time to use the advanced Search. If you use this article, you will have the core steps to access the Search capability. In the Log Search page, click Advanced Analytics, and when you get there click in the + sign to create a new query. Here it is the query that you can use for that:

After typing the query, click Go, and you will see the result in the table right below the search field, as shown below:

The results are shown in a table, which makes very easy to read it. Cool, isn't it? Question now is: how did you find this SecurityDetection field to search for? Easy, on the left pane, under SCHEMA, type secur and you will see all fields that contains security and you can search for.
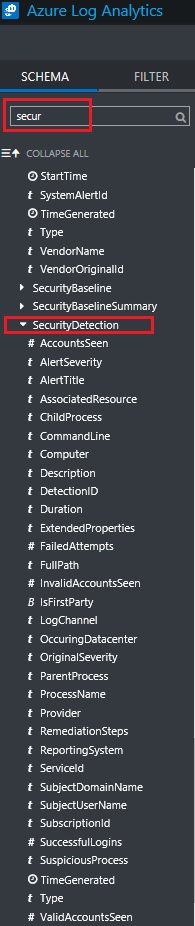
As you can see, there are plenty of fields that you can use to gather the data that you need. Now go ahead and have some fun creating queries!