Overview of Forefront Threat Management Gateway Beta 1
1. Introduction
The Microsoft Forefront Threat Management Gateway promises to be the milestone that all ISA Server admins were waiting for. I heard all the time people saying that the difference between ISA Server 2004 and ISA Server 2006 were not that big and that we pretty much have the same product for 4 years already. Well, that isn’t really true; there are indeed many differences between 2004 and 2006. Maybe some people were waiting for a huge upgrade like it was from ISA 2000 to 2004 and this didn’t happen. After two years since ISA Server 2006 was released, we have now (without a doubt) a big change, maybe will not be noticeable now but it will in the final version.
You can download the beta version from here and use the installation guide article that my friend Tom Shinder wrote. This beta version available for download has only a limited set of features. However, before install read the release notes to see what you can and what you cannot do.
There are many things that you will notice and see that it is different from ISA Server 2006. As far as installation is concern there are some things that you need to remember:
· IIS will be installed: that’s correct; IIS now will be installed by TMG. You might be thinking: “I remember that we have issues with IIS and ISA in the same box…” . You are right for ISA Server, but for TMG we need IIS because TMG needs SQL Reporting Services 2005 and SQL Reporting Services 2005 needs IIS. It is important to emphasize that IIS is not removed if you uninstall TMG.
· 64 bits System: although the final version of TMG requires a 64-bit processor and Windows Server 2008 64-bit, this beta version can be installed in a 32-bit system with Windows Server 2008.
· WEBS: the TMG beta version that we have available for download it will be part of the Windows Essential Business Server. TMG will be available through WEBS Standard and Premium Edition.
Note: The official TMG documentation is available at Microsoft TechNet Library web site.
2. Just installed, now what?
Now that you installed let’s create a Web Access Policy, to do that click in Configure Web Access Policy in the screen below:
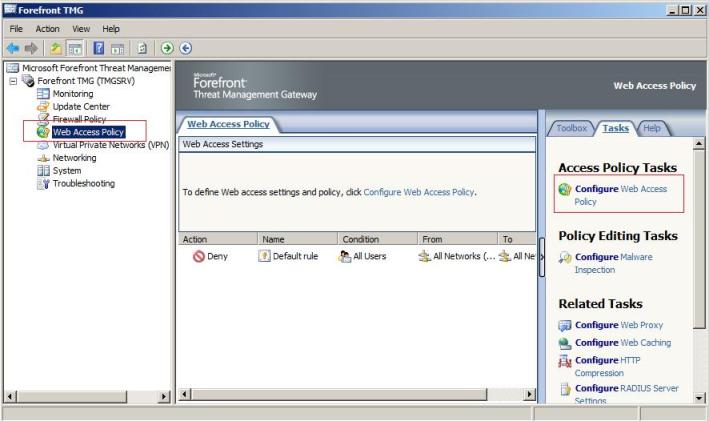
Figure 1 – Web Access Policy.
Now follow the steps below to use this new wizard:
1) In the welcome screen click in Next.
2) In the Web Protection page, click in Yes, enable malware inspection feature, and click in Next:
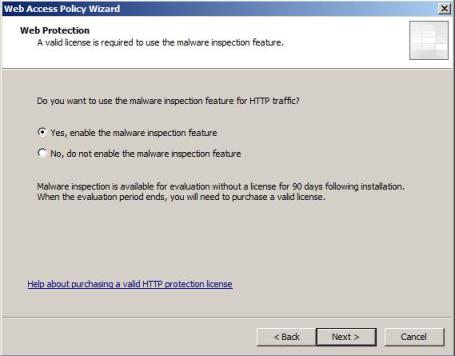
Figure 2 – Web Protection page.
3) In the Web Access Policy Type page, click in Create customized Web access policies for users, groups and computers and click in Next:
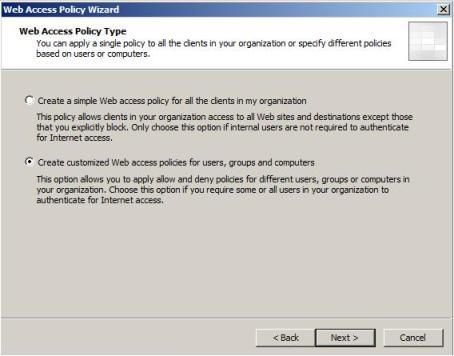
Figure 3 – Web Access Policy Type window.
4) In the Access Policy Groups page you can select the option to allow users, groups, computers by name or IP and also subnets. For the purpose of this demo, select Users and user groups only. Click in Next to continue.
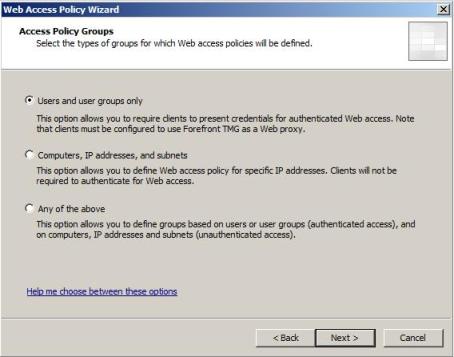
Figure 4 – Configuring the Access Policy Groups
5) In the Default Web Access Policy Page click in Allow the Web requests and click in Next.
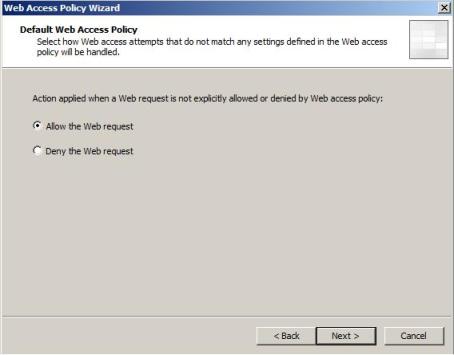
Figure 5 – Default Web Access Policy Page.
6) In the Authenticated Web Access Policies page, click in Add.
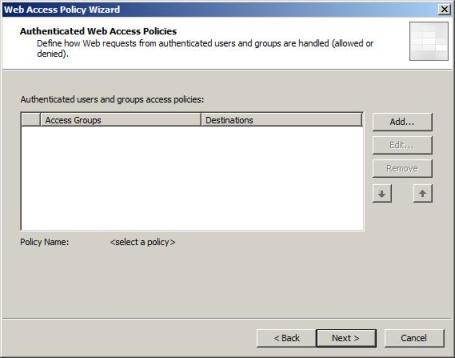
Figure 6 – Selecting the users that will have access.
7) In the Add Access Policy window, type the policy name, click in Add buttonto add the group that will have access. Notice that this window is similar to the ISA Server 2006 window; you can use the same functionalities to add: windows groups, LDAP, RADIUS or SecurID. For the purpose of this demo, select All Authenticated Users. Click Add and click Close. Select Allow access to the destinations below and click in Add button to add the External network. After finish, click OK and Next to proceed.
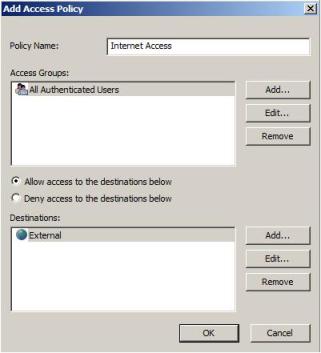
Figure 7 – Access Policy configuration.
8) In the Malware Inspection Setting page, leave the default options selected and click in Next.
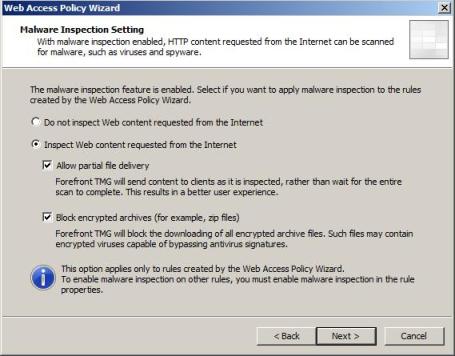
Figure 8 – Malware Inspection Setting.
Note: for more information in the Malware Inspection feature read the TechNet Article about that.
9) Since the cache driver was not configured yet, the next window will allow you to configure that:
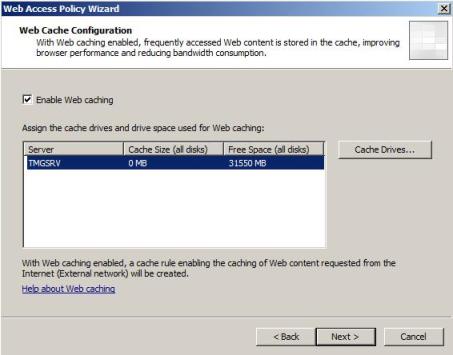
Figure 9 – Web Cache Configuration.
10) For the purpose of this example, I’m going to disable the option Enable Web Caching. Click in Next to continue and then click in Finish.
After finished creating the rule, click in Apply to commit it. Now check it out this nice improvement in the interface:
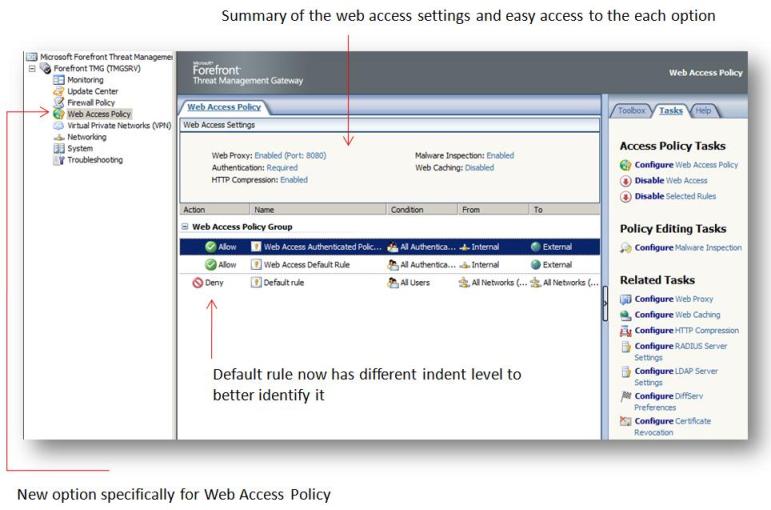
Figure 10 – New TMG Interface with enhanced items.
3. Try to Browse now
If you try to browse after creating this rule one thing that you will notice in the live logging is the presence of new fields that can identify “on the fly” if the web site has any threat or not:
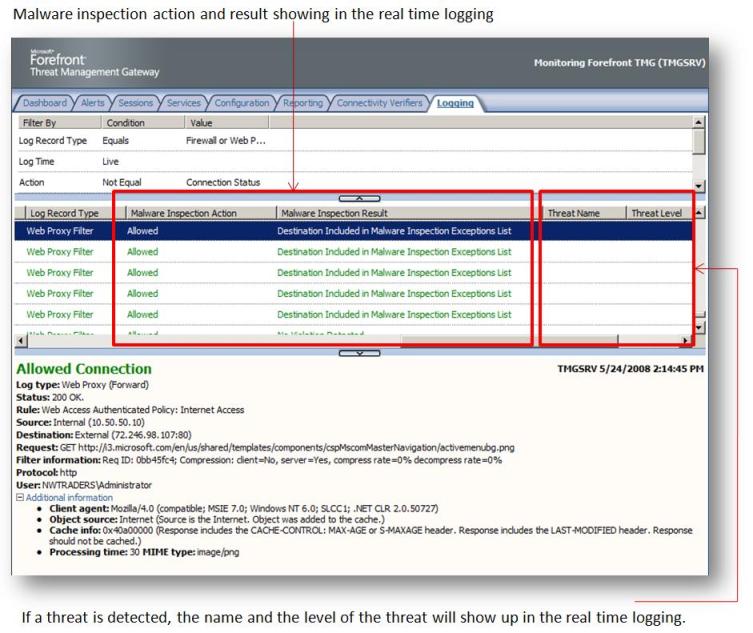
Figure 11 – New TMG Logging Interface fields.
4. Conclusion
This is a just a little overview of what is the TMG that is part of the WEBS, but as I said before, much more will be available in the future. Keep watching the news and playing with this beta version to get used to.