Publishing Terminal Server through IAG 2007 – Part 2 of 3
1. Endpoint Policy
The Endpoint Policy concept is pretty straight forward: are you compliant with company’s security policy or not? If yes, then access the resource, if not then your access will be denied. There is no “maybe I’m compliant”, the endpoint policy is a mechanism that will assure that regardless of where you are and in which machine you are using, you will be verified.
Last session we ended up unable to access the Terminal Service through the Application Portal. This happened because our client workstation wasn’t compliant with the default endpoint policy that was used during the application setup.
This part of the article will explains how to review the current policy and how to create one custom policy.
2. Reviewing the Endpoint Policy
First thing to do is to access the Application Endpoint Policy, to do that follow the steps below:
1) Click in the Terminal Servers application to highlight and then click in the Edit button.
2) On the first tab (General), click in the Edit Policies button.
3) Highlight the Default Non Web Application Access and click in Edit. The window below will appear:
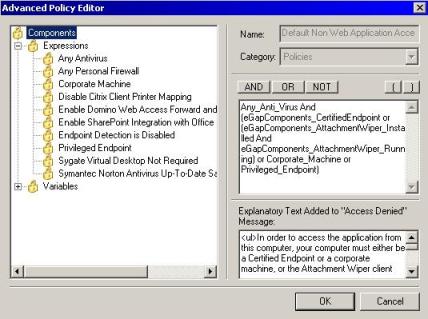
Figure 1 – Advanced Policy Editor
The Policy Editor is divided in two main functions:
· Expressions
· Variables
The variables are pre-defined values that will be used to validate a state of certain component. If you want that you policy checks if the antivirus is running, then we have a variable for that. As you can see on the figure below:
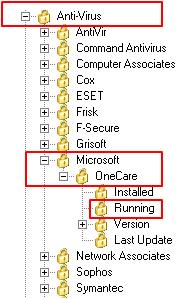
Figure 2 – Variable Tree.
This variable will check if the Anti-Virus, from Microsoft, called OneCare is Running in the system. The expression in another hand can be build not only based on the predefined values; you can go beyond and change the expression. For example: you want to allow only machines that are part of the domain, where the netbios name is CONTOSO to access the application.
3. Creating a New Endpoint Policy
For the purpose of this demonstration we are going to create a new Endpoint Policy that it is not really restrictive, but the main idea is to show how to do it. The requirement will be: the computer must have any AntiVirus installed and any personal Firewall on the workstation. Follow the steps below to create your new policy:
1) Click in the Terminal Servers application to highlight and then click in the Edit button.
2) On the first tab (General), click in the Edit Policies button.
3) Highlight the Default Non Web Application Access and click in Add. The window below will appear:
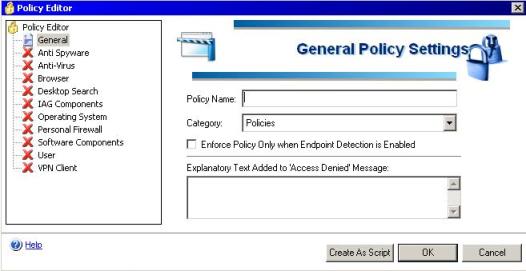
Figure 3 – Basic Policy Editor.
4) On the Policy Name, type: MyFirstPolicy.
5) Click on the Create As Script button and the window below will appear:
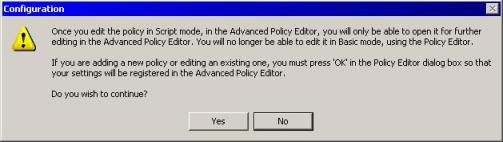
Figure 4 – Warning.
6) This warning is completely fine as long as you understand that once we exchange from basic mode to advanced, we will not be able to reverse that. In this case in the Yes button.
7) On the Advanced Policy Editor click in Any Antivirus, then click in the AND button and click in the Any Personal Firewall expression. The window should appears like this:
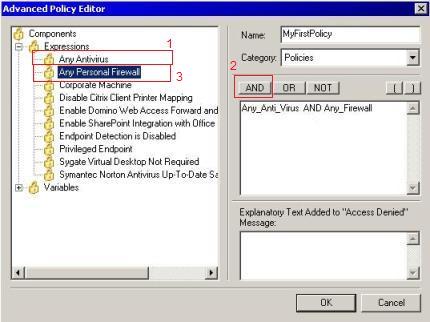
Figure 5 – Choosing the expressions
8) Down on the right side of the window you can type the message that will appear to the client in case the computer it is not compliant with the policy. For this example the message will be:
“Your computer is not compliant with the Company’s Security Policy, therefore your access will be denied. “
9) Click OK.
10) On the Policies window click Close.
11) On the Endpoint Policies change the access to the policy that you just created (MyFirstPolicy) and click OK.
12) Press CTRL + G to activate the configuration.
4. Testing the Access
Now you just need to access the portal and the Terminal Servers option will be available. Next session will cover the monitoring capabilities on the server side as well as on the client side.