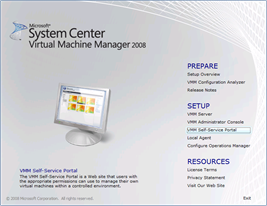
Screencast: SCVMM Self-Service Portal with Laptop Part 1 of 4, Overview
 A Self-Service Portal is basically a Web site to be installed on a web server with ASP.NET, IIS6 Metabase Compatibility, and IIS6 WMI Compatibility Server Role Services. By accessing the Self-Service Portal, authorized users can create and operate their own virtual machines (VMs) as permitted by each user's User Roles, while the created VMs are placed in a Library Server managed by the System Center Virtual Machine Manager, or SCVMM. A User Role here is essentially a policy with membership, authorized hardware and software profiles, allowed scope of operations, and assigned templates applicable for creating and managing VMs using Self-Service Portal. In a Self-Service Portal session, an authorized user sees only those virtual machines that the user owns or is authorized to operate upon. And as a VM is created or deleted by a user, the user's quota points are subtracted or regained with the amount of quota points that the VM is assigned in an employed template. Once a user has quota points fewer than what are needed for creating a new VM, the user has reached the maximal number of VMs allowable for the applicable User Role to create.
The system requirements of components for constructing a Self-Service Portal include
- Virtual Machine Host System Requirements
- VMM Library Server System Requirements
- VMM Self-Service Portal System Requirements
To prototype a Self-Service Portal using a laptop, here are the steps:
- Install Windows Server 2008 in a laptop and enable Hyper-V Server Role
- Create VMs and construct a domain environment
- Install SCVMM on a target VM in the domain
- Optionally join the laptop into the domain
- In SCVMM admin console, add the laptop as a host in the Active Directory Domain
- In laptop, create a network share for later sharing VM resources like sysprep generalized images, iso files, disks, etc.
- In SCVMM admin console, add the laptop as a Library Server with the network share
- In SCVMM admin console, create hardware/software profiles and template, as needed
- In SCVMM admin console, create User Roles and add members
- Install Self-Service Portal from SCVMM media on a target web server and associate the Self-Service Portal with the SCVMM (this step may be included in step 3 if both SCVMM and Self-Service Portal are to be placed on the same server)
- Log in Self-Service Portal as a Self-Service Portal User and start creating and managing VMs as permitted by the user’s User Roles
The following screencasts present the user experience and walk through the operations carried out from steps 5 to 11:
- Screencast: SCVMM Self-Service Portal with Laptop Part 1 of 4, Overview
- Screencast: SCVMM Self-Service Portal with Laptop Part 2 of 4, Adding Host
- Screencast: SCVMM Self-Service Portal with Laptop Part 3 of 4, Adding Library Server
- Screencast: SCVMM Self-Service Portal with Laptop Part 4 of 4, Running Self-Service Portal