Installing a Two Tier PKI Hierarchy in Windows Server 2012: Part II, Installing a Root Certification Authority with the GUI
In this blog posting I will cover installing a Root Certification Authority with PowerShell in Windows Server 2012. With this Blog Series I am not going to get into the details of best practices. In other words I am not going to get into the “Why?” of the configuration decisions I have made. In some future blog posts I will talk about best practices. For now I am just going to cover installing the Roles and Role Services.
In this article I will talk about the steps required to install a standalone Root Certification Authority with PowerShell. In this article I will not performing the post-configuration, I will however, cover that in a follow up blog.
In this example I am going to install a Certification Authority with the following base configuration:
· CA Type: Standalone Root Certification Authority
· Common Name: FourthCoffee Root Certification Authority
· Key Storage Provider: RSA#Microsoft Software Key Storage Provider
· Public Key Algorithm: RSA
· Hashing Algorithm: SHA1
· Key Length: 2048
· Validity Period: 20 Years
In this blog, I will be Installing Certificate Services via the GUI. However, before I install Active Directory Certificate Services the will be installing the ADCS Binaries via PowerShell.
Launching PowerShell
The first step of course is to launch PowerShell. This can be accomplished by starting a command prompt and typing powershell and pressing the Enter key or by clicking on the PowerShell icon on the taskbar.
Import Server Manager Module
The first step is to import the Server Manager Module for PowerShell which will then allow you to add the ADCS feature. To import the Server Manager Module for Powershell type: Import-Module ServerManager and press Enter .
Installing ADCS Binaries
The next step is to install the ADCS binaries so that we can install ADCS. To install the ADCS binaries type: Add-WindowsFeature Adcs-Cert-Authority and press Enter.
Install Certification Authority Role

Now that I have the binaries installed I can install ADCS. As you will see in the screenshot there is an Alert in Server Manager indicating that there is work for me to do. So, when I click on the Alert, I have the option to “Configure Active Directory Certificate Services on this Server”. When I click on that link it opens the ADCS Configuration Wizard.
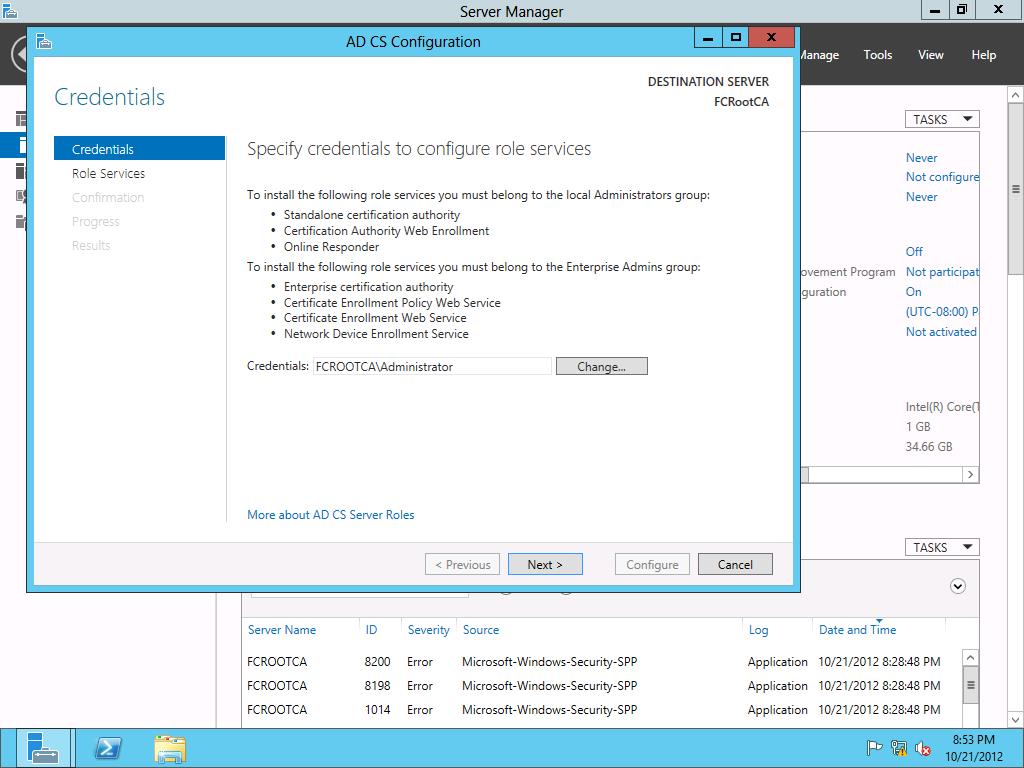
Here you are presented with the options to change credentials. However, if you are installing a Standalone Root Certification Authority this will typically be accomplished with the local Administrator account. I will click Next to continue.

Since I am just installing the Certification Authority role service, I just select Certification Authority on the Select Role Services to configure page of the wizard. I then click Next.
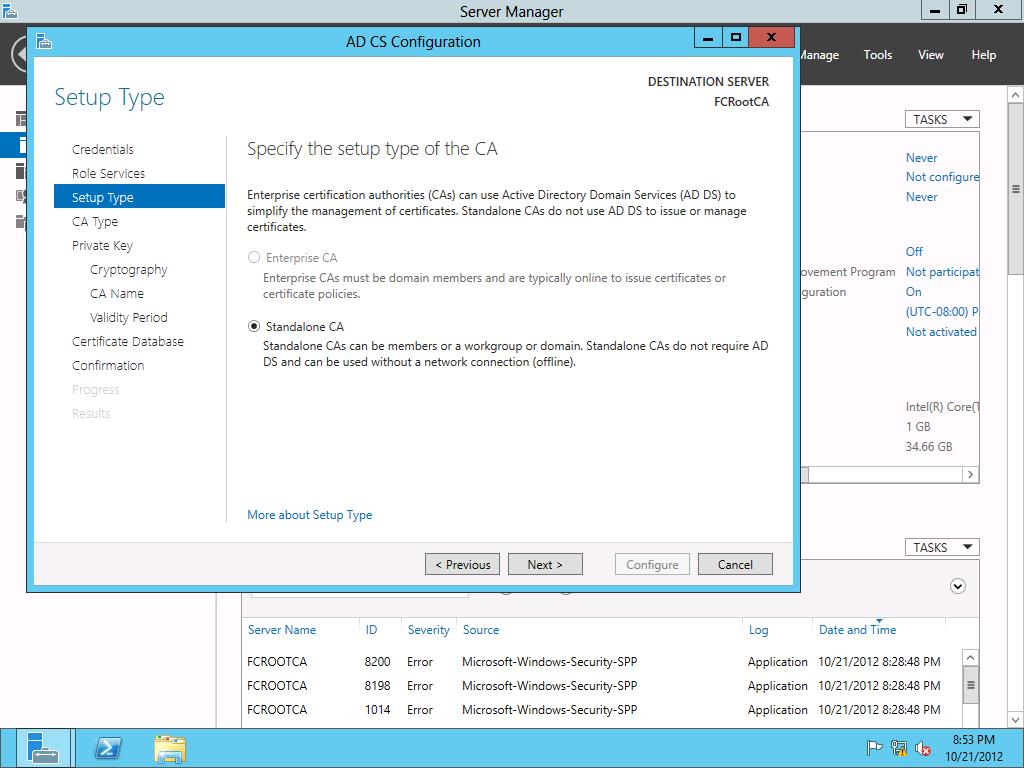
Since I am installing a Standalone CA (which essentially means the CA does not use Certificate Templates), I select Standalone CA. You may notice in the screenshot below that Enterprise CA is grayed out. The machine would need to be a member of the domain, and I would have to be logged in as an Enterprise Admin. The next step is to click the Next button.
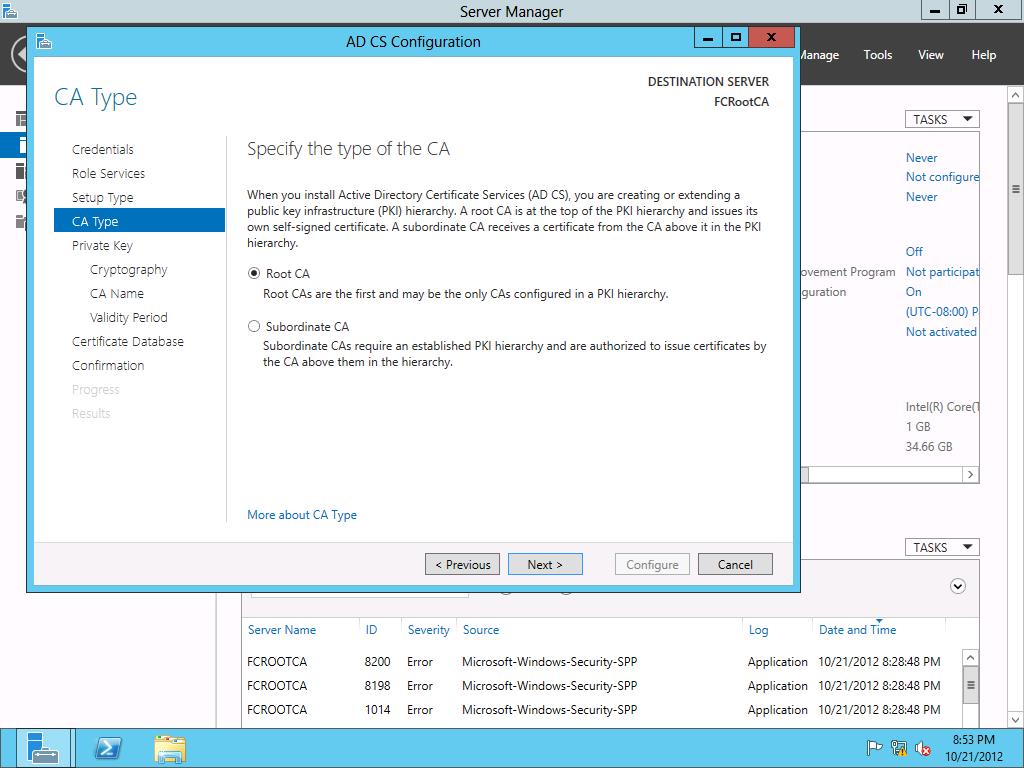
On the Specify the type of the CA page of the wizard, I will select Root CA since I am installing a Standalone Root CA. I will then click next to continue the wizard.
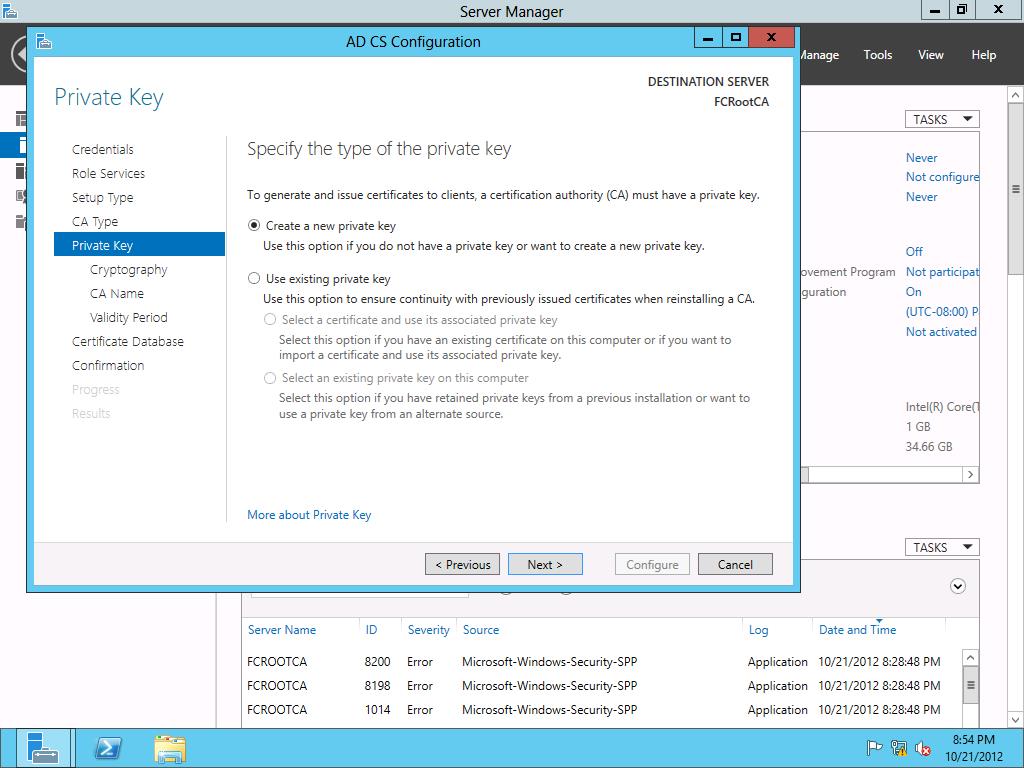
I am installing a new Certification Authority, so on the Specify the type of private key page of the wizard I select Create a new private key. Then I click Next.
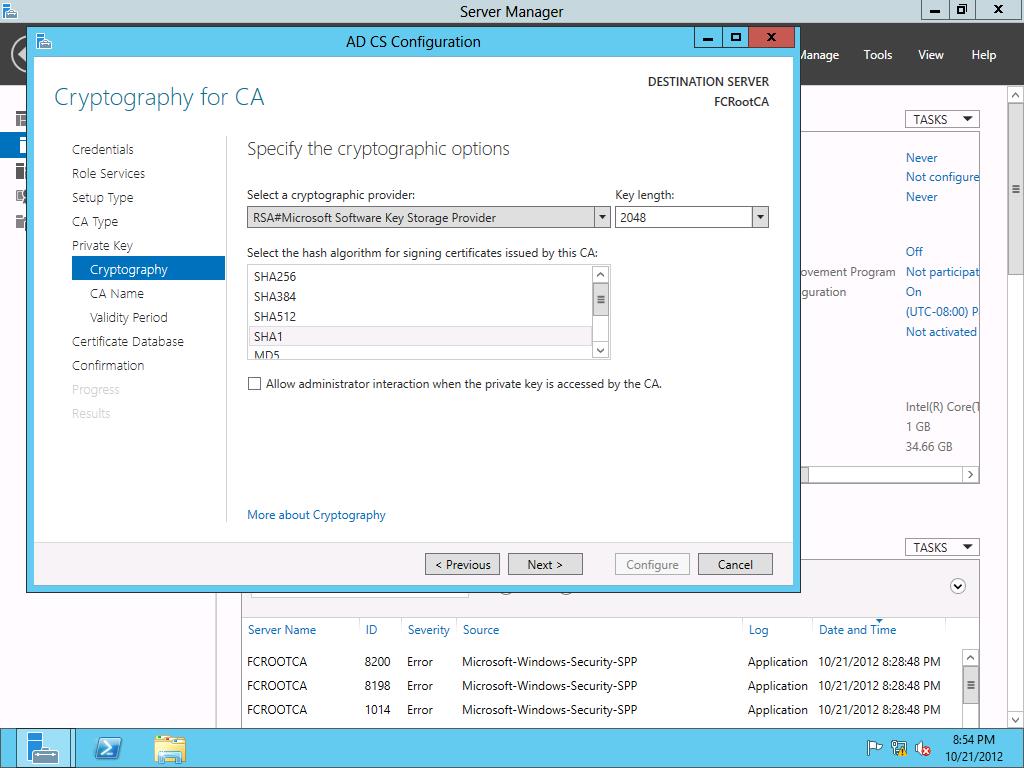
On the Cryptography for CA page of the AD CS Configuration Wizard I am leaving the defaults which are RSA#Microsoft Software Key Storage Provider as the KSP, 2048 as the key length for the RSA keys, and a hashing algorithm of SHA1. This will result in a CA certificate that uses RSA, SHA1, with a key length of 2048-bits.
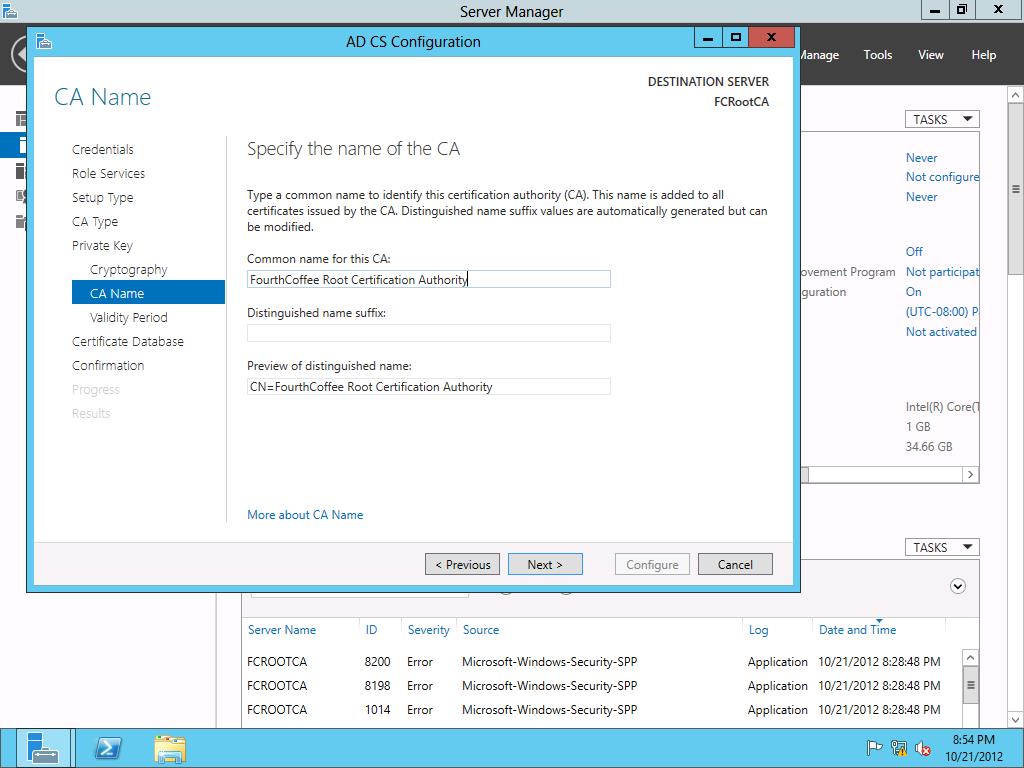
As I mentioned earlier, I decided the common name for my CA will be FourthCoffee Root Certification Authority, so on I type that in under Common name for this CA on the Specify the name of the CA page of the wizard. Then I click Next.
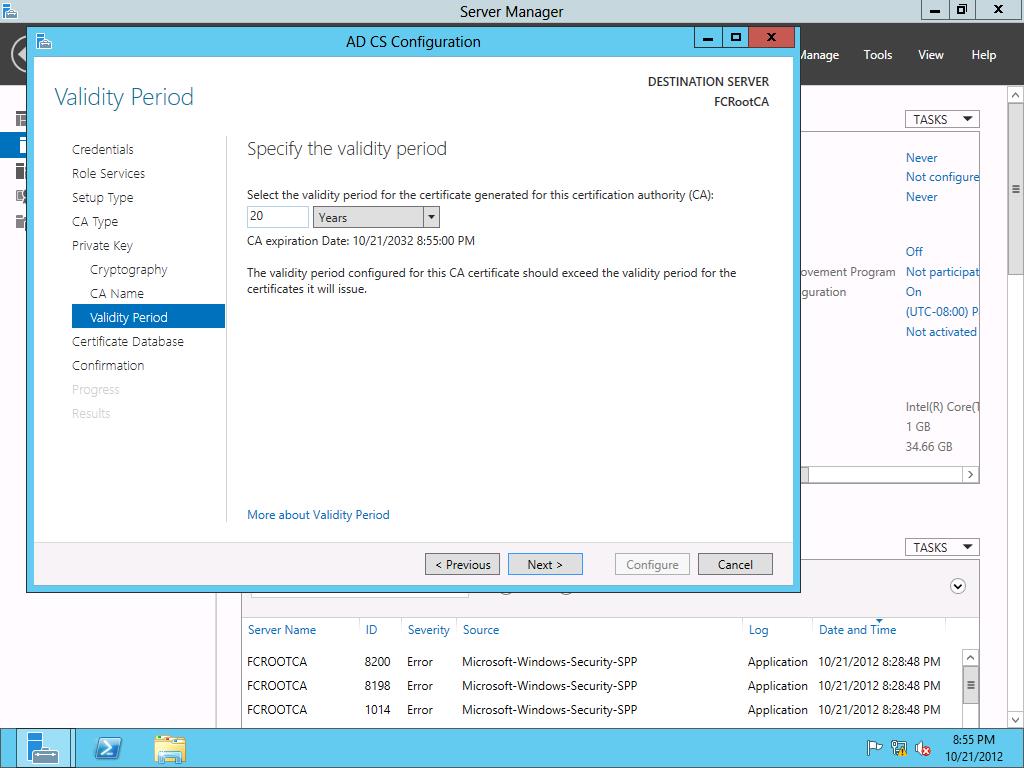
On the Specify the validity period of the wizard I select 20 Years as the validity period for the CA certificate. I then click Next.
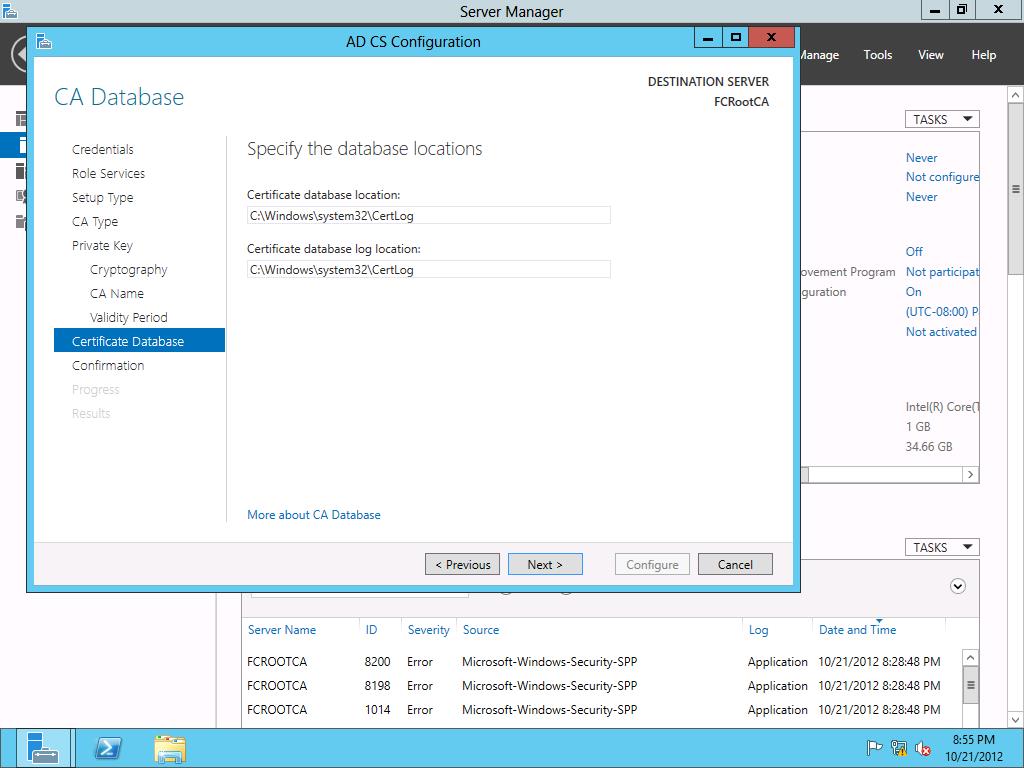
I am leaving the database and log files on the C: Drive. This is a Root CA so the anticipated growth of the ADCS database is going to be relatively minor, so there are no real reasons for me to move the database to another drive. So, I accept the defaults on the Specify the database locations page of the wizard, and click Next.
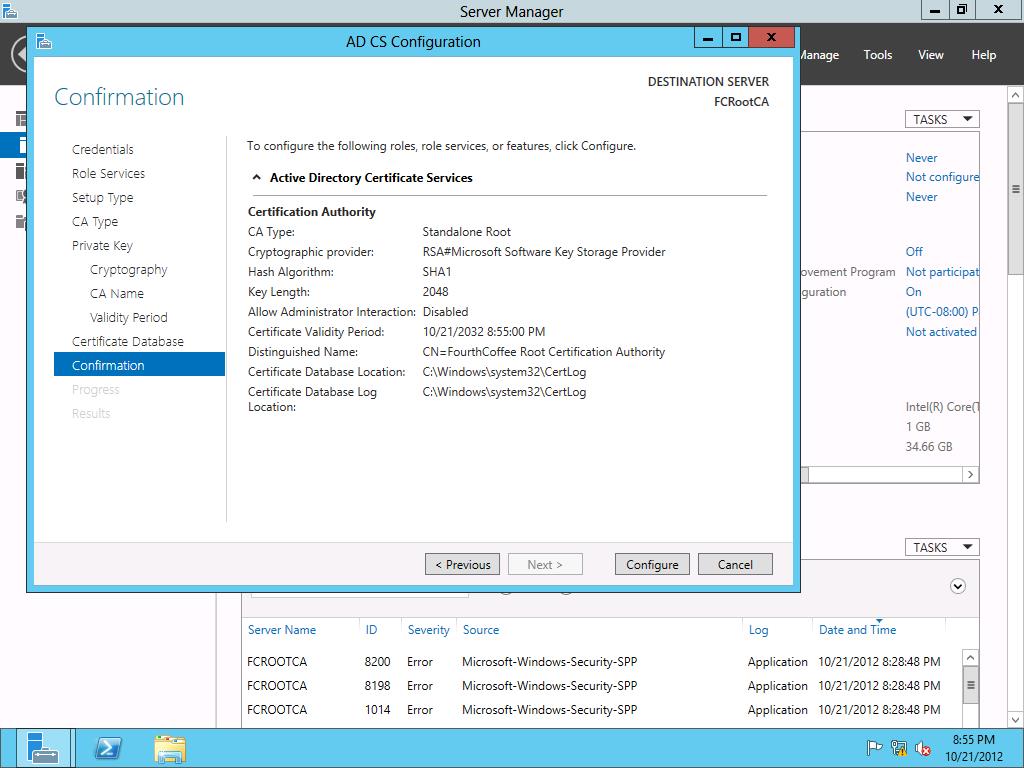
Finally, I click Configure to install the Active Directory Certificate Services.
Conclusion
I had two goals in writing this article. The first goal was to turn through the steps in the GUI for those that have not yet seen the Windows Server 2012 interface. The second goal was to show that using the GUI to the install involves many more steps that simply using PowerShell to install Certificate Services. The disadvantage to using the GUI is the process is not as easily repeatable compared to using PowerShell.