How to disable the Save to SkyDrive functionality in OneNote 2010.
We have been getting a few support cases lately dealing with finding a way to disable the Save to SkyDrive functionality for OneNote. Since it seems like this is something other people might also find useful, we decided to create this blog post to explain how this can be accomplished.
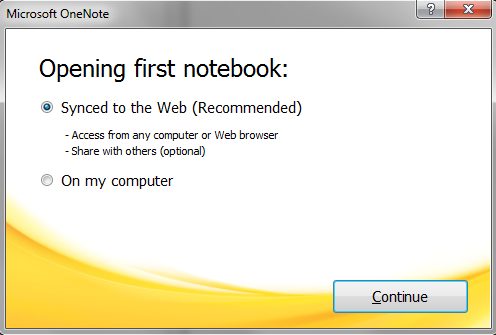
The first thing to mention before we get into how this will work is to explain the different entry points for SkyDrive functionality in OneNote. First, after installing OneNote and running the application for the first time, you will be presented with the following dialog.
Second, there is a section in the backstage where you can share your notebooks on SkyDrive. This feature is found in the Share tab of the backstage under the heading "Web Location" and should look similar to the following screenshot.
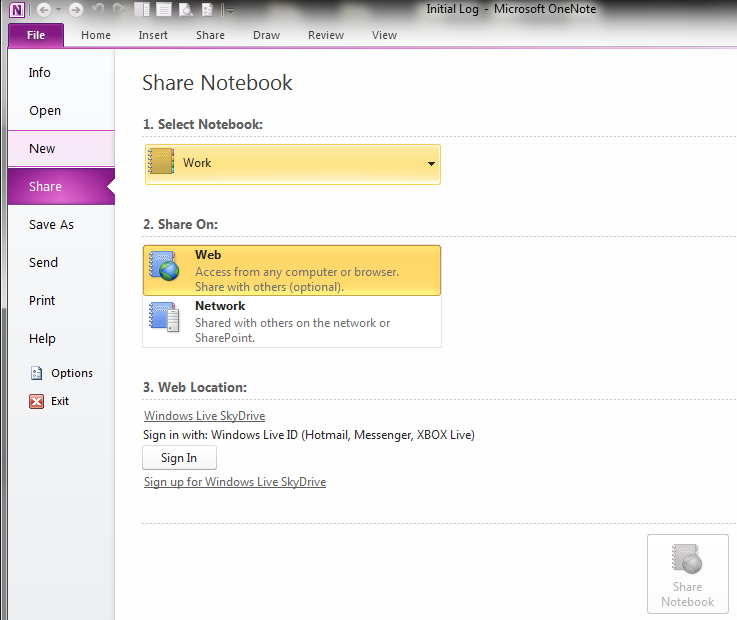
This feature allows you to login with your Windows Live credentials and you will have access to your SkyDrive folders out on the web. Many companies feel the need to prevent this type of internet access in their environments, hence the need to disable this functionality.
Keep in mind, the following information is somewhat geared towards IT admins, so I will be making a few assumptions along the way.
Since most admins make use of group policies (GPO's) in their environment, this should be a simple task. Assuming you have already installed the group policy templates for Office (https://www.microsoft.com/download/en/details.aspx?displaylang=en&id=18968), you can open the group policy editor and navigate to:
User Configuration | Policy | Administrative Templates | Classic Administrative Templates | Microsoft Office 2010 | Miscellaneous.
In this section, you can "Enable" the item "Do not allow Save to Web integration". Once this policy is in place, you should notice that the "Web Location:" section, in the above screenshot is no longer available and users will not be able to sign in to their SkyDrive account.
If you would rather just set a registry key, you can use the following.
HKEY_CURRENT_USER\Software\Policies\Microsoft\Office\Common\WebIntegration
DWORD = WebIntegrationEnabled
Value = 0
Note: It is important to mention that this will disable the functionality for OneNote and the rest of the Office applications.
Now the next item to discuss is the dialog presented to users the first time they boot the OneNote application. This dialog can be disabled with the following regkey:
HKEY_CURRENT_USER\Software\Policies\Microsoft\Office\14.0\OneNote\WebServiceProvider
DWORD = DisableSkydriveSetupOnFirstBoot
Value = 1
The last thing I want to mention is how to test if this key worked. The first key, which disables the functionality in the backstage, should be an easy check and you can open the application to see if it worked. The first boot check will be a little bit trickier, since the user has probably clicked on the dialog and it no longer prompts the user with the option about where to open the first notebook.
When a user makes a selection in that first boot dialog and they click on continue, the following registry key is added.
HKEY_CURRENT_USER\Software\Microsoft\Office\14.0\OneNote
DWORD = FirstBootStatus
The value is not important because simply deleting the key will cause OneNote to prompt with the first boot dialog the next time you open the application. That is unless you have enabled the DisableSkydriveSetupOnFirstBoot key, in which case you should see the expected behavior and OneNote will open without the prompt.