Extending the Service Request Form and Exposing the Request Offering Field in System Center 2012: Service Manager
In Service Manager the portal is used to submit new incidents and service requests. Once an end-user submits a new service request through the portal, there is no way out-of-the-box to change the request offering if the end-user chose the wrong offering. This is a fairly common scenario that our tier 1 teams see as an end-user may choose a generic “site issue” when really there is a request offering specific to the tool or site they are using. Here we will show you how to expose the request offering picker in a field on the service request.
Extending the Service Request Form
Before adding a field to the service request, we need to know how to extend the service request form. This is done through the System Center 2012 Service Pack 1 – Service Manager Authoring Tool. The Authoring Tool can be downloaded from https://www.microsoft.com/en-us/download/details.aspx?id=36214.
After launching the Authoring Tool, create a new management pack that the extension will be saved in. This is done by clicking ‘File’, then ‘New’, naming the management pack, and clicking ‘Save’.
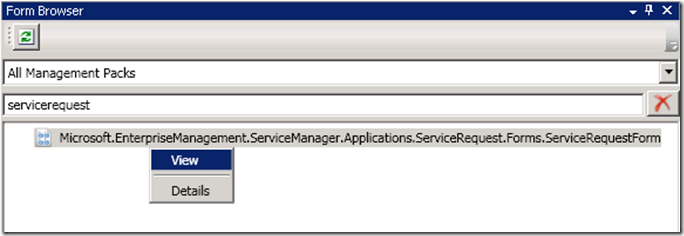
In the Form Browser pane (if you don’t see the pane, go to the View menu to display it), in the search box type “servicerequest”. Right-click the resulting “Microsoft.EnterpriseManagement.ServiceManager.Applications.ServiceRequest.Forms.ServiceRequestForm” and click ‘View’.
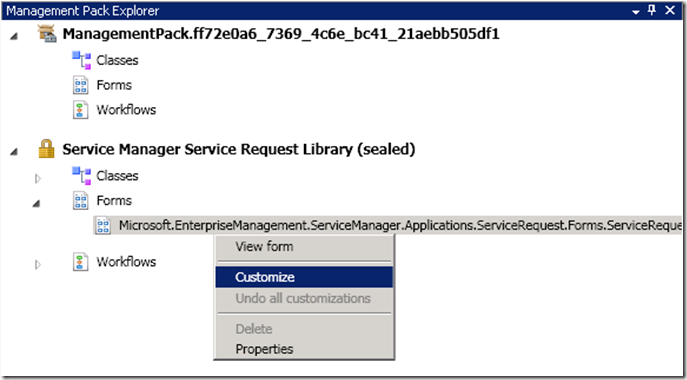
In the In the Management Pack Explorer (again, go to the View menu if you don’t see it), right-click the form and click ‘Customize’.
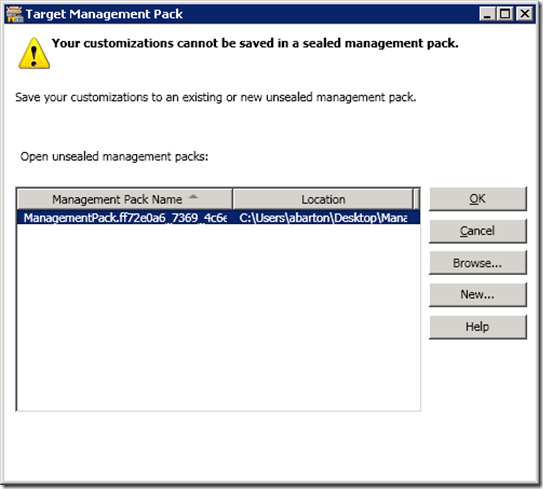
In the resulting Target Management Pack window, click OK on the prompt to save the extension in your custom management pack.
Note: We are prompted with this because the extensions can’t be saved into a sealed management pack.
Adding Fields to the Service Request Form
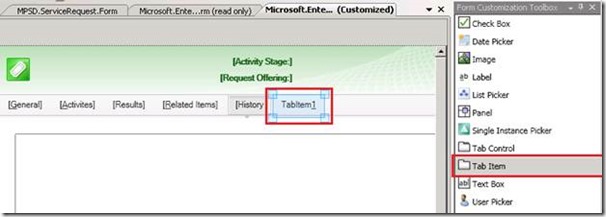
The general tab on the service request form would be the ideal location for request offering picker, however this tab is already filled with information that are snapped to grids, so finding a location for the picker will be difficult. We recommend creating an additional tab on the form.
To create an additional tab, go to the ‘Form Customization Toolbox’ and drag the Tab Item control and drop it next to the existing ‘History’ tab.
To rename the tab, click on the new tab, go to the details pane, and change the name under the ‘Content’ field.
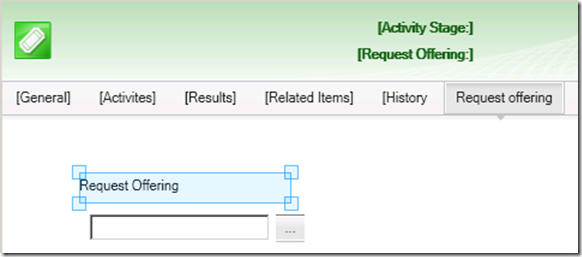
Back in the ‘Form Customizations Toolbox’ drag the ‘Single Instance Picker’ control to the blank area under your new tab. Do the same with a label control as well so you can label what the field is going to be.
Click on the new label then go to the details pane. Change the ‘Content’ field to “Request Offering” or something used to describe the new field that will enable users to identify what the field is used for. Expand the field as necessary to allow the name to be fully displayed.
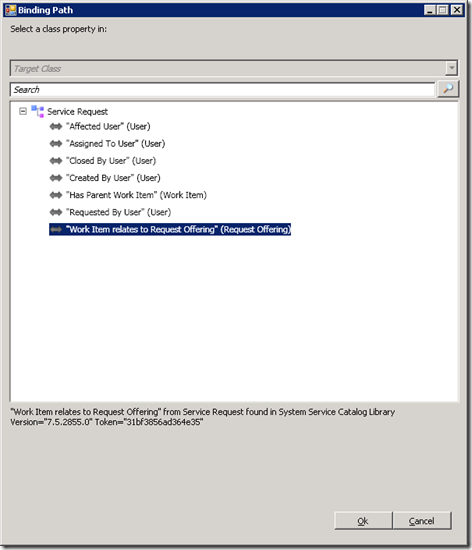
Click on the single instance picker that you added, then click the details pane. Click on the empty ‘Binding Path’ text box, then click the ellipses. Choose the ‘“Work Item relates to Request Offering (Request Offering)”’ class property, then click OK.
If you’ve followed my blog post on deploying the service catalog through PowerShell and CSV files (https://blogs.technet.com/b/wincat/archive/2013/03/04/automating-service-manager-service-request-catalog-deployment-through-powershell-and-csv-files.aspx), you can also add a field to show the related category and service offering for the chosen request offering right on the form (if you haven’t deployed the service catalog through this method, skip to the “Sealing the MP” section below).
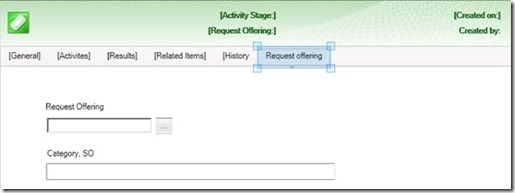
Back in the ‘Form Customizations Toolbox’ pane, drag a label and a text box and place them on the form (the label will be used to label what the textbox is). Change the content of the textbox so it says “Category, SO”. Expand the textbox on the form so that the entire text is displayed.
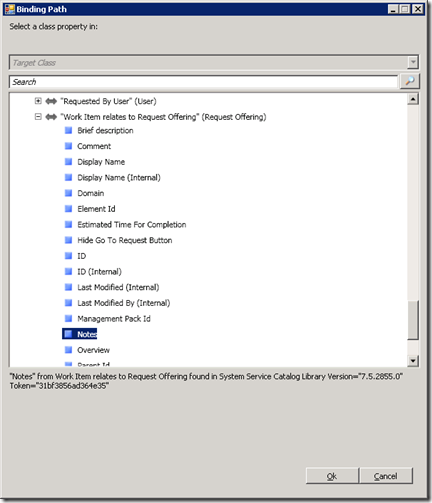
Click on the textbox. On the details pane, click on the empty ‘Binding Path’ text box, then click the ellipses. Expand the ‘“Work Item relates to Request Offering (Request Offering)”’ class property, then click Notes. Click OK.
Still in the details pane, under ‘Miscellaneous’ set ‘Focusable’ to ‘False’.
This makes it so the new field can’t be clicked on and text entered.
The final step is to expand the field so none of the text is cutoff when it is populated in the console.
Sealing the MP
Once we have created the new fields in on the service request form, we need to seal the MP in preparation for importing it into Service Manager.
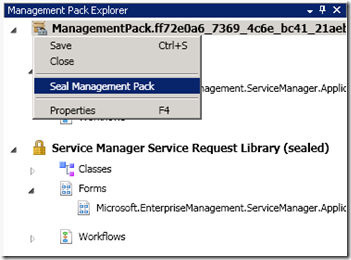
Go to the Management Pack Explorer view, right-click your custom management pack, and click Seal Management Pack.
Note: Sealing makes it so nobody can edit the management pack you’ve created (unless you have the original XML).
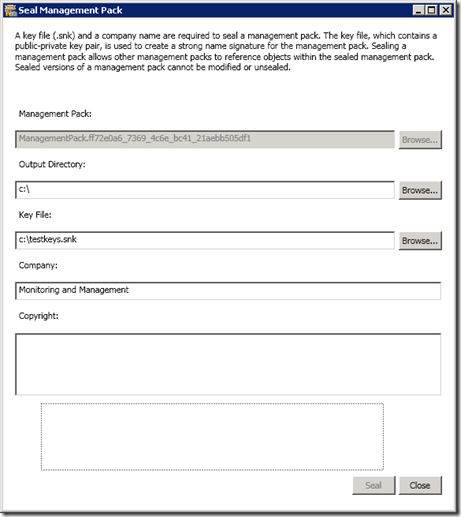
In the resulting window, specify an output directory, select your Key File, and type in the name of your company, then click Seal.
Note: Information about key files can be found halfway down the article at https://technet.microsoft.com/en-us/library/hh457550, and how to create them can be found at https://msdn.microsoft.com/en-us/library/6f05ezxy(v=VS.80).aspx.
Import the resulting .MP file into your Service Manager environment.
Using the New Field to Set the Request Offering
In a service request, click on the new tab that we created.
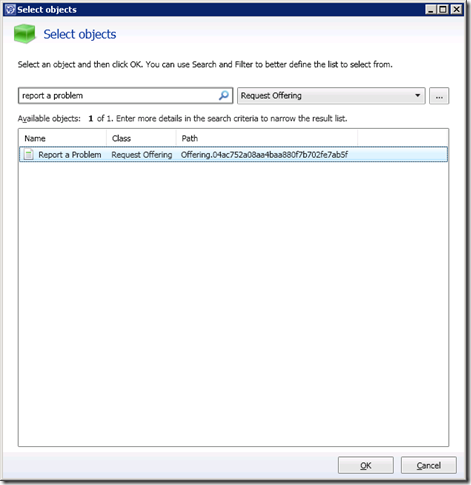
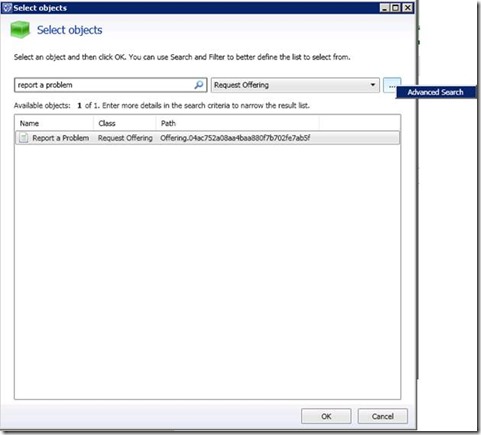
Click the ellipses next to the request offering field. This will bring up a list of request offerings for you to choose from. Select one and click OK. You can optionally filter on the request offering name as well.
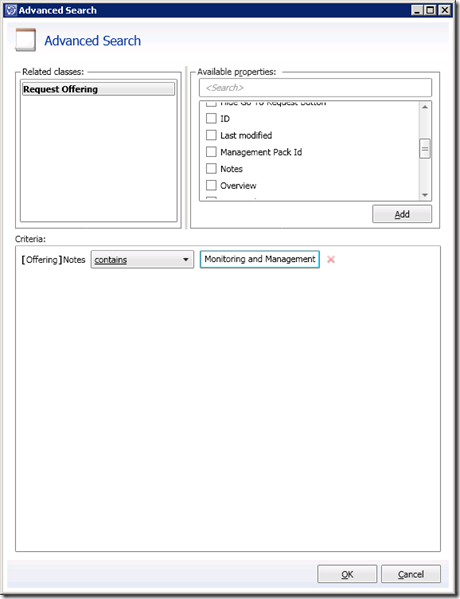
If you created the service catalog through the automated PowerShell and CSV files, you can do further filtering based on the notes field of the request offering. Click the ellipses next to the Request Offering drop-down and click ‘Advanced Search’.
Since the notes field contains the category and the service offering (in the format of Category,ServiceOffering), we can add the notes field in our filtering criteria and filter for a category and/or service offering:
This will filter the list of request offerings to just the category and/or service offering you specify.
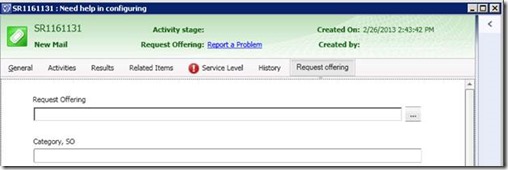
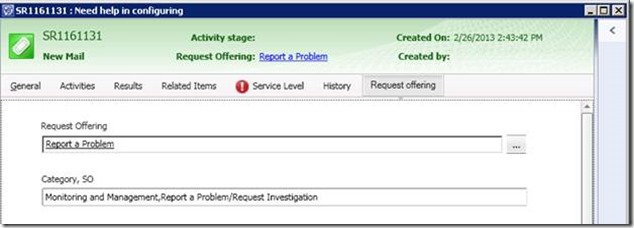
The end result in the service request will look similar to the following:
