Adding custom UPA Properties by Configuring profile synchronization using BCS connection and custom SQL database
Consider a scenario where you have some property values of some users stored somewhere else, not in active directory or your directory source and you need to have those other additional property values populating/showing with your existing user profile properties in user profile store.
For example, you need to have a new profile property named "LaptopBrand" with value "Lenovo" shown in SharePoint user profile store for some users but that specific property and value doesn't exist in your directory source say "Active directory".
In that case, if you have that property and value stored in a SQL database, here are the complete steps with all screenshots on how to pull those properties and values from databases to SharePoint user profile store.
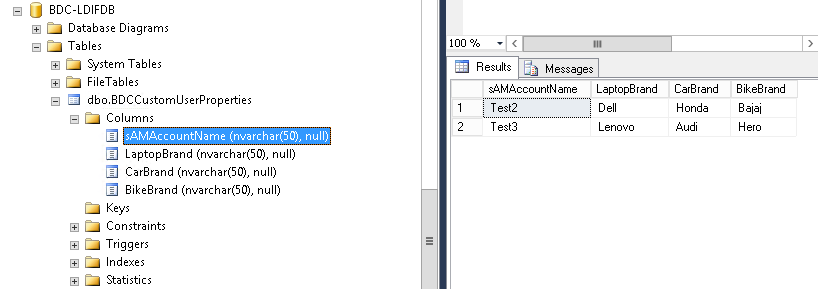
1. Create a custom DB> create a Table> Add columns and values (Create manually or import data from .csv file)
-Keep one column as sAMAccountName or something already present in user profile store with unique value for each user.
-That will be used to pull data from BDC DB.
-Other Columns names are same are custom user profile properties.
-Create all columns with data type as nvarchar(50). 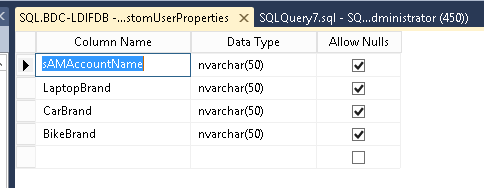
2. Create Secure store service application and make sure you can browse to it.
3. Create BCS service application and make sure you can browse to it.
4. Open SharePoint site in SharePoint Designer(SPD)> Go to External content types> Create a new external content type.
Provide Name, Display Name and then save it.
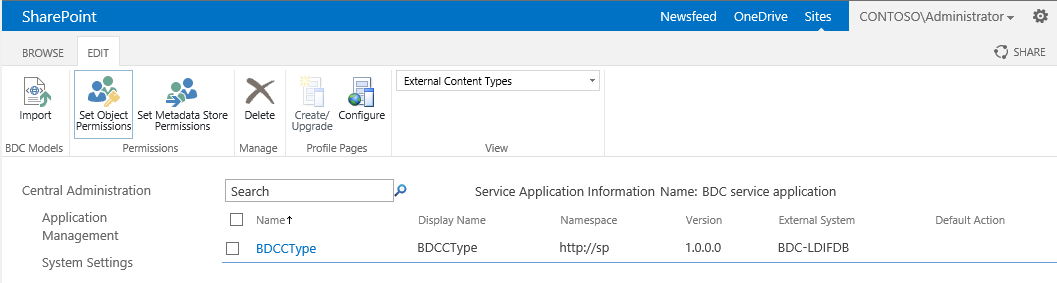
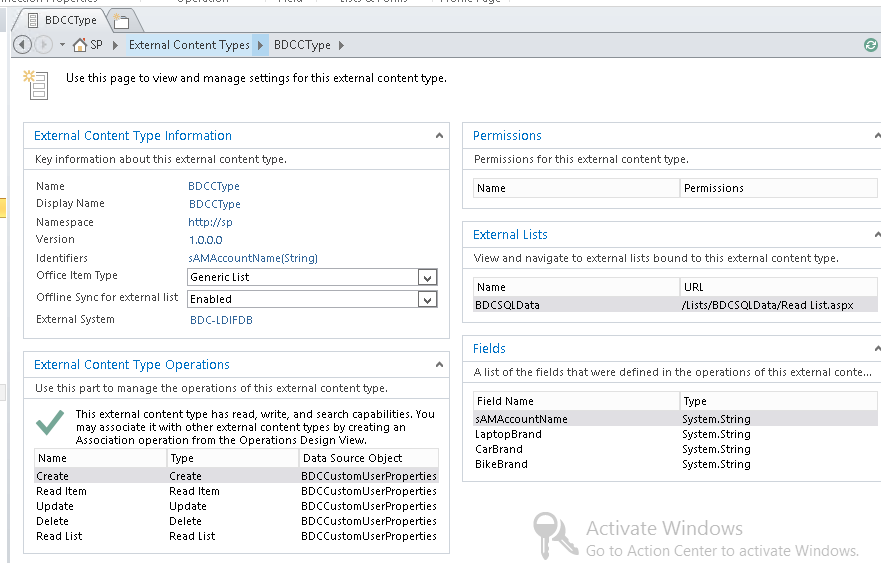
After saving in SPD, you will see it in BCS service application page as an external content type:
5.Come back to SharePoint Designer.
Click on "operations design view".
Click on "Add connection".
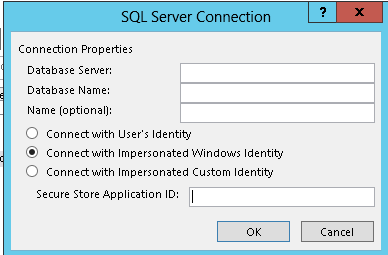
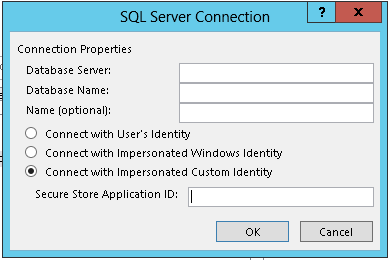
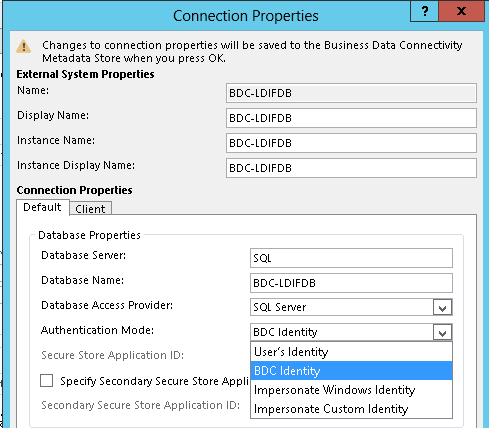
Specify Database server, Name details and connect with User's Identity and then click ok.
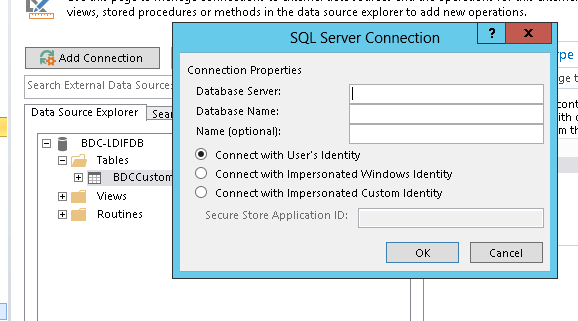
-If you choose to use "Impersonated Windows identity" or "Impersonated Custom identity" then you will have to provide "Secure store application ID".
6.Then in the same External content type window, Right click on SQL table and click on "create all operations" -- Follow the options in the Wizard.
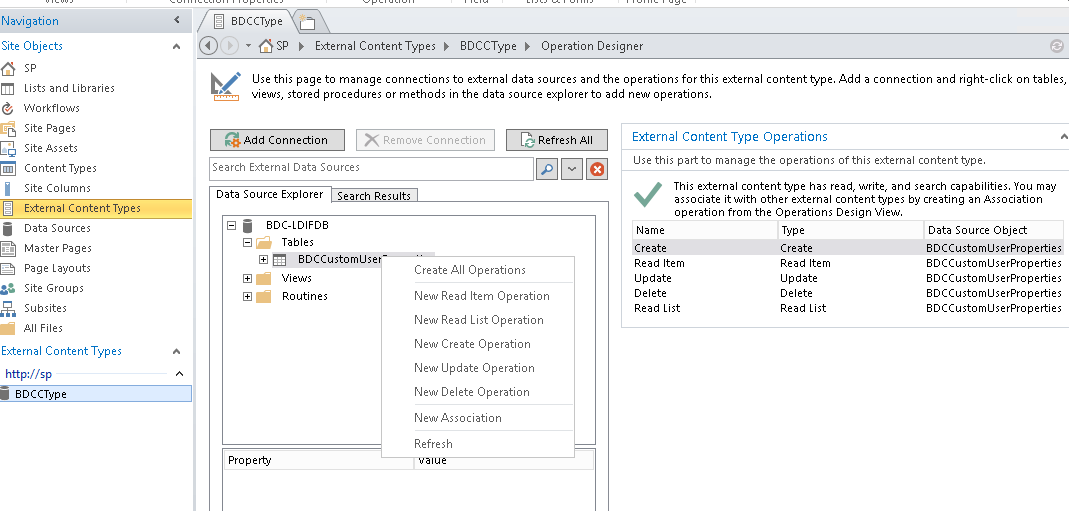
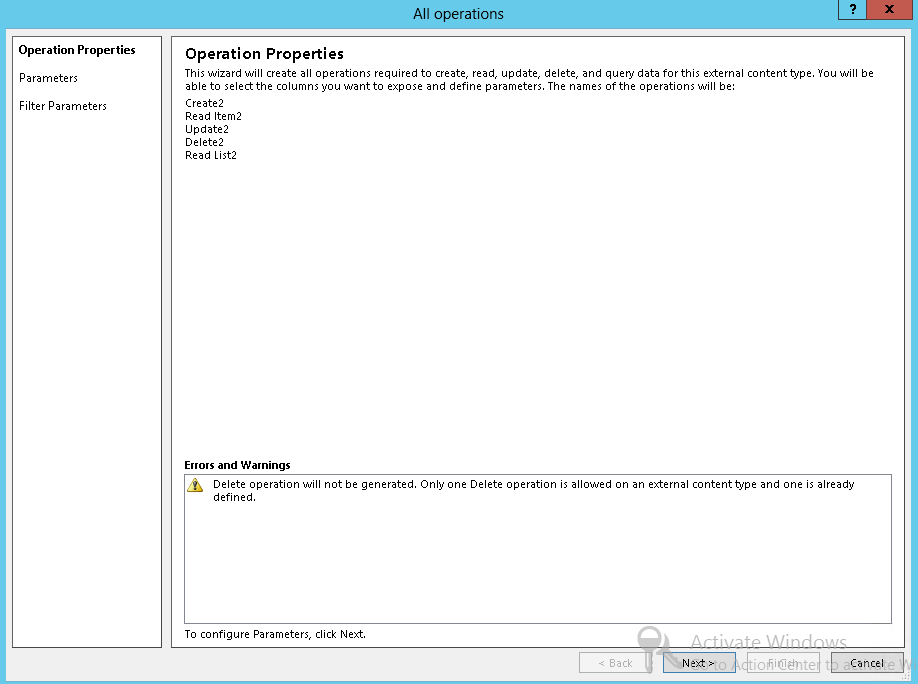
-Click next.
-Map sAMAccountName as identifier using "Map to identifier" option.
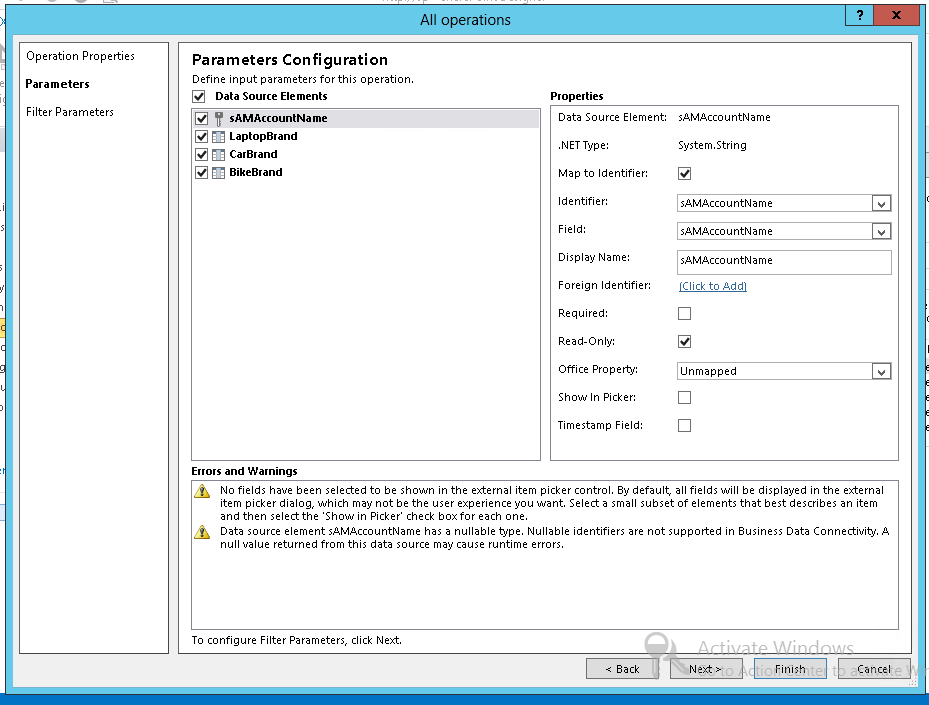
-This is how it should look like in SPD after doing above:
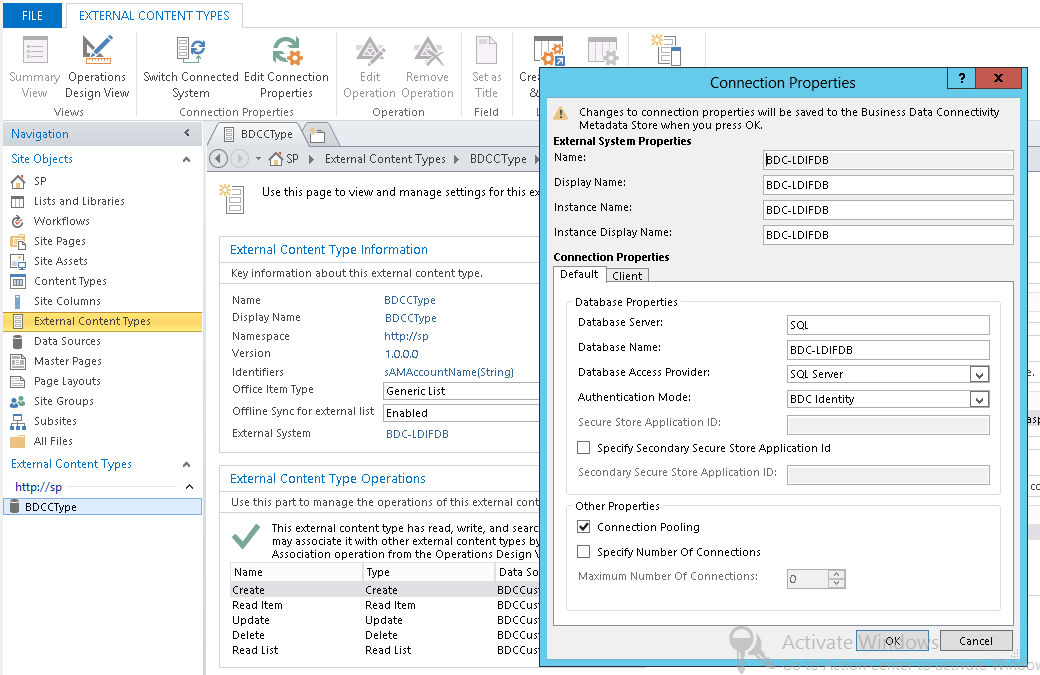
7.Use "BDC identity" for Connection to External System
- Click on link on database for "External system".
If you get an error in this step while setting "BDC identity" for Connection to External System, refer to solution in step 8.
8.Go to SharePoint site> all site content> Add an app> External list.
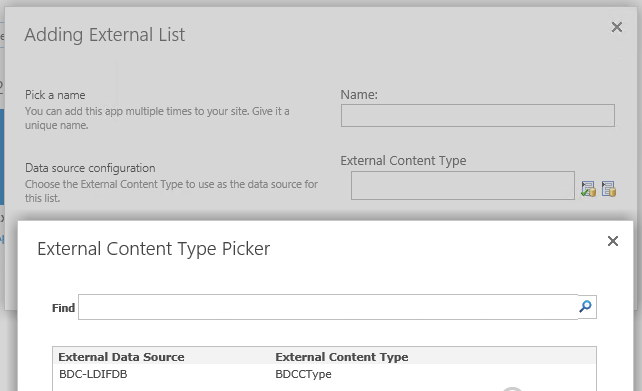
Provide a name and Select the "External content Type" we created.
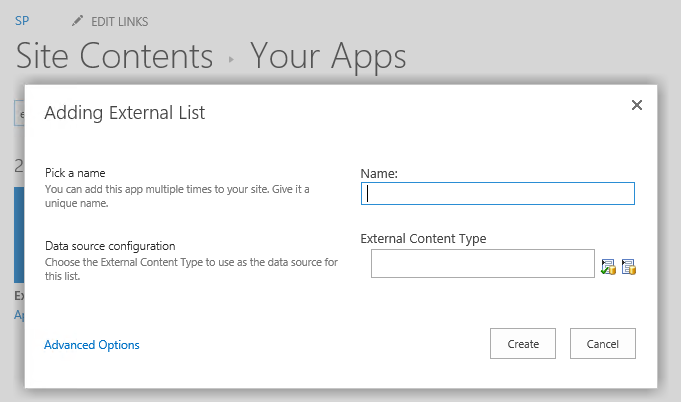
-Click ok to create the external list.
-URL should be something like this:
https://sp/Lists/BDCSQLData/Read%20List.aspx
-When you browse to the URL, you should be able to see the SQL Table data with column and values as list column and values.
-If that works that means pulling that SQL data from Database using BDC external content type in SharePoint is working which is required to move forward to next steps. 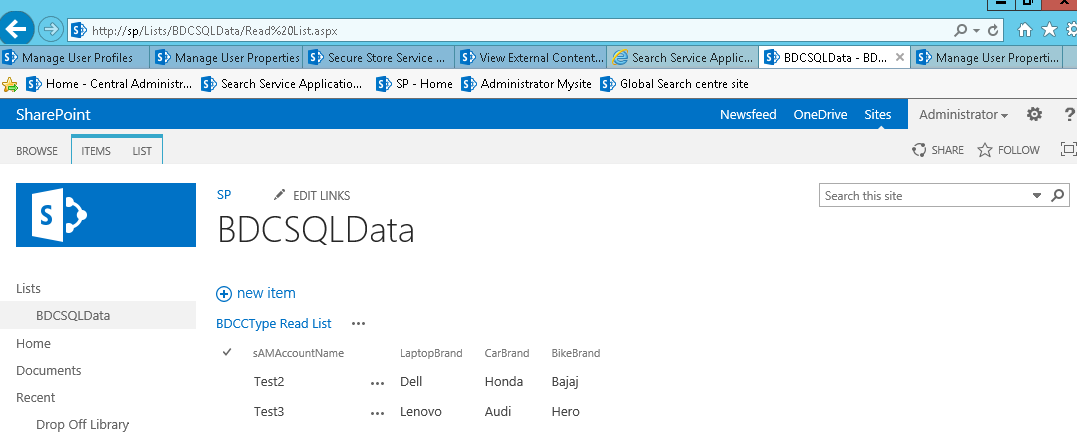
Note: If you use "Impersonated Custom identity " for Connection to External System in SP designer for External content type and if Secure store credentials were not set properly then, when you try to browse to External list, you might get an error like this:
Message from External System: 'Login failed for user 'Domain\UserName'.'.
For example:
Message from External System: 'Login failed for user 'Amat\apqs_install'.'. 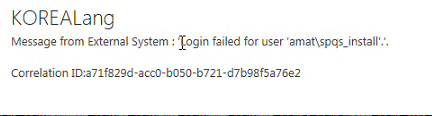
-Where 'Amat\apqs_install is the farm account and BDC identity.
-It has DB owner access on our custom SQL database 'BDC-LDIFDB'.
-In this situation, you will have to use "BDC identity" for Connection to External System.
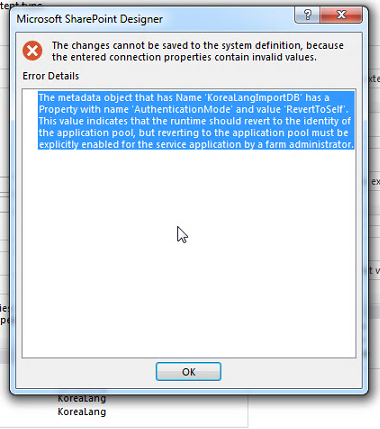
-But when you try to set "BDC identity" for Connection to External System in SP designer, while clicking ok, you might get an error like this:
"The metadata object that has Name 'KoreaLangImportDB' has a Property with name 'AuthenticationMode and value 'RevertToSeIf'.
This value indicates that the runtime should revert to the identity of the application pool, but reverting to the application pool must be explicitly enabled for the
Service application by a farm administrator."
-RevertToSelfAllowed BDC property is responsible for the above error.
-Here is description for the RevertToSelfAllowed BDC property from MSDN:
-----------
BdcServiceApplication.RevertToSelfAllowed property
Gets or set a value that indicates whether reverting to process identity is enabled as an authentication mode for BDC connectors.
true if reverting to process identity is enabled as an authentication mode for BDC connectors; otherwise, false.
-----------
To solve the issue, follow these steps below:
-Run these PowerShell commands to check the current value of RevertToSelfAllowed property:
-----------
#Run this to get BDC service application ID:
Get-SPServiceApplication
#Then use that ID in command below:
$BDCApp = Get-SPServiceApplication -Identity <BDC service application ID>
$BDCApp.RevertToSelfAllowed
-----------
-If that returns value as false which is default value meaning it was reverting to identity of APP pool identity at Runtime and getting access denied.
-Then you will have to set the property to True using these commands below:
$BDCApp.RevertToSelfAllowed = $true
$BDCApp.Update()
-Then try changing 'Authentication mode' to 'BDC identity' again in SPD and this time it should work.

-Then External list also must show data without any errors so You should be able to pull Database information using BDC External content type to SharePoint external list.
So, what we learned in step 7 and step 8 is that:
while setting "BDC identity" for Connection to External System in SP designer, if you get an error like this below:
"The metadata object that has Name 'KoreaLangImportDB' has a Property with name 'AuthenticationMode and value 'RevertToSeIf'." --- and so on
AND/OR when you try to browse to External list, if you get an error like this:
Message from External System: 'Login failed for user 'Domain\UserName'.'.
Then you will have to set BdcServiceApplication.RevertToSelfAllowed property value to TRUE using PowerShell commands above.
Now, move to the next steps once you confirm that you can successfully browse to External list after this step to PULL data from custom database using BDC application.
9. Go to UPA service application> "Configure Synchronization Connections" option> Create a new connection of type "Business data connectivity". 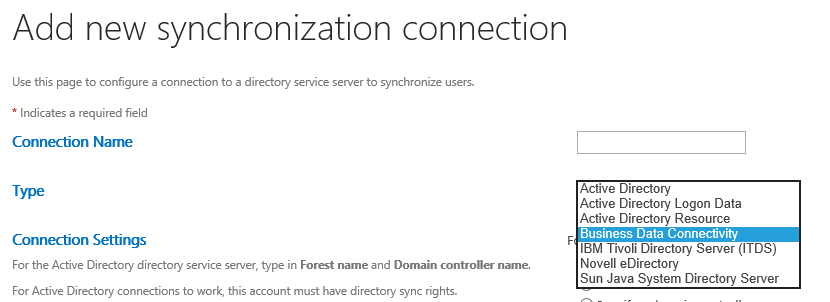
Select the BDC entity from "External content type picker".
In connection settings> Connect User profile store to BDC entity as 1:1 mapping> Select 'Username' in "Return items identified by this profile property" drop down option.
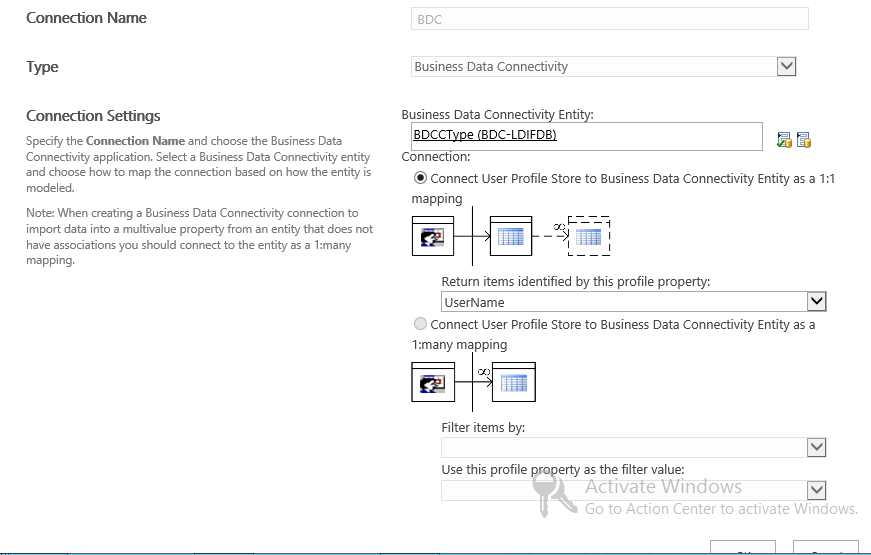
-Click ok to create the BDC connection.
-It must now show in SYNC connections page along with your AD connection.

10.Then We have to do profile property mapping.
-Go to edit option of each custom user profile property we created.
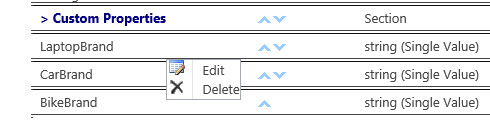
-Map the property to the similar 'attribute' from 'BDC' source data connection. It has to be an Import connection.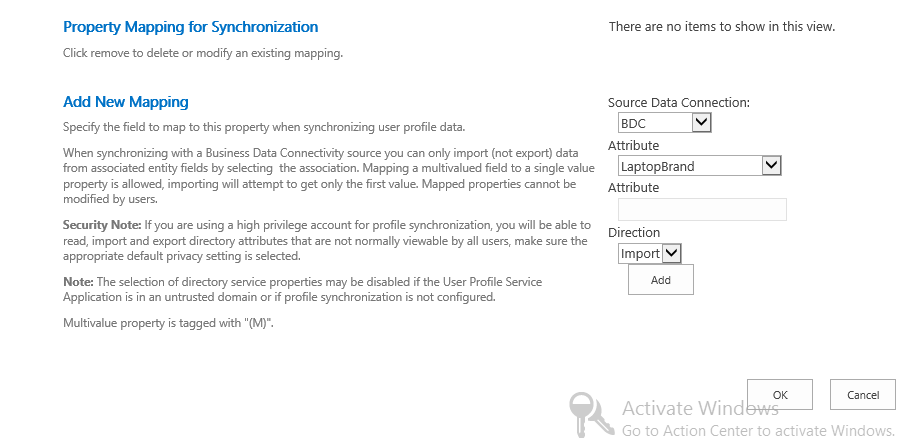
-Map all the custom properties to their respective BDC property/attribute. For example:
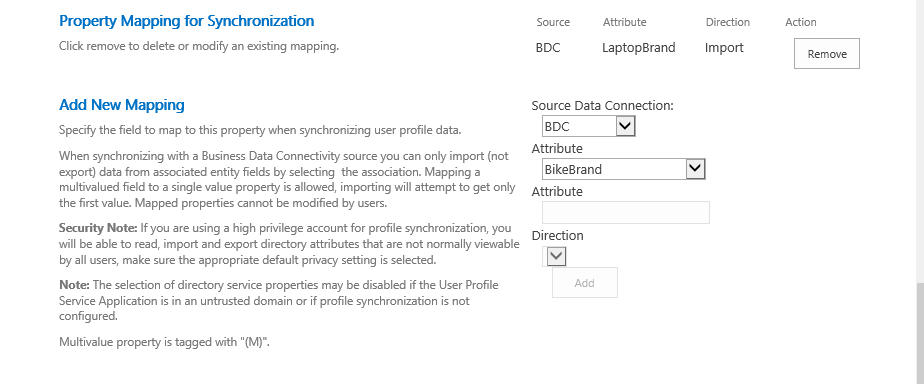
-After mapping, it should appear like this:

11.We are ready to do SYNC now.
Note:
Although you can do incremental UPA SYNC to pull these values, for better functionality/experience, we recommend you to run FULL UPA SYNC.
Even if you do incremental UPA SYNC and property values are pulled accordingly, we recommend following that up with a FULL SYNC later but sooner.
-Then We have to run Incremental SYNC from UPA service application page.
-That should kick off AD incremental SYNC and FULL SYNC for BDC connection as SYNC would be happening for the first time.
-You can see Adds to profiles in DS_FULLIMPORT FIM operation for BDC MA: 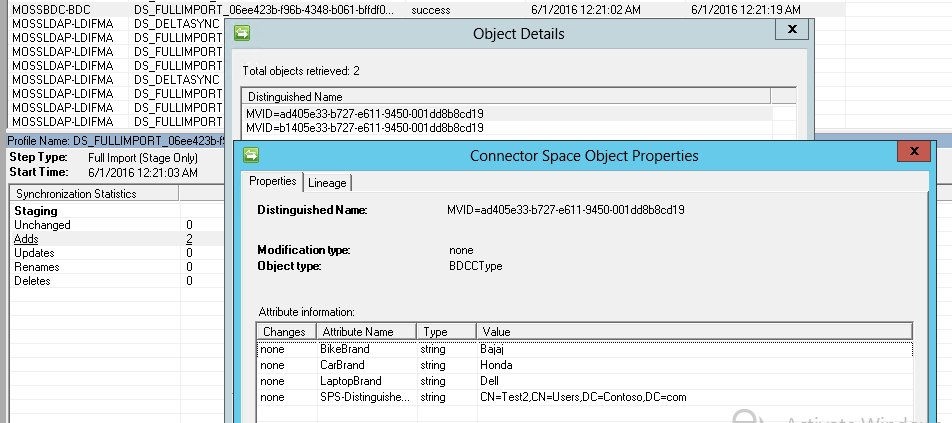
-You can see New JOINS and Attribute flow in DS_FULLSYNC FIM operation for BDC MA: 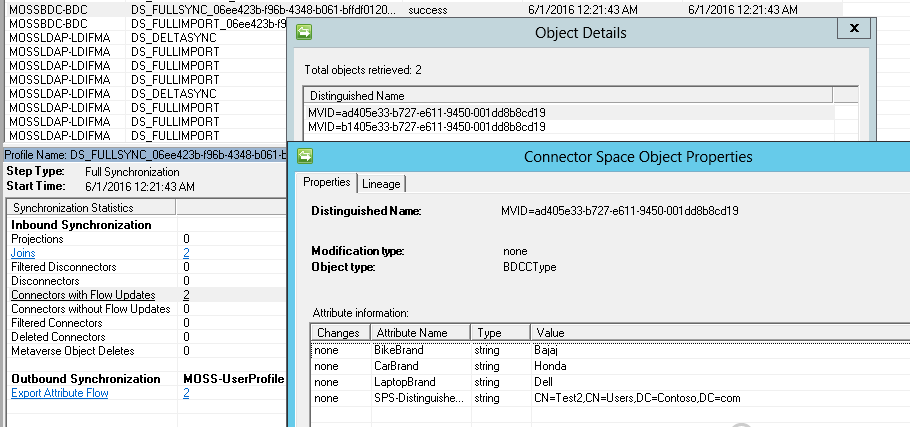
-Last FIM operation for MOSS-UserProfile(MOSS_EXPORT) MA will have updates to those existing profiles based on their userNames and those new Profile property changes will be pushed to SharePoint User profile store.
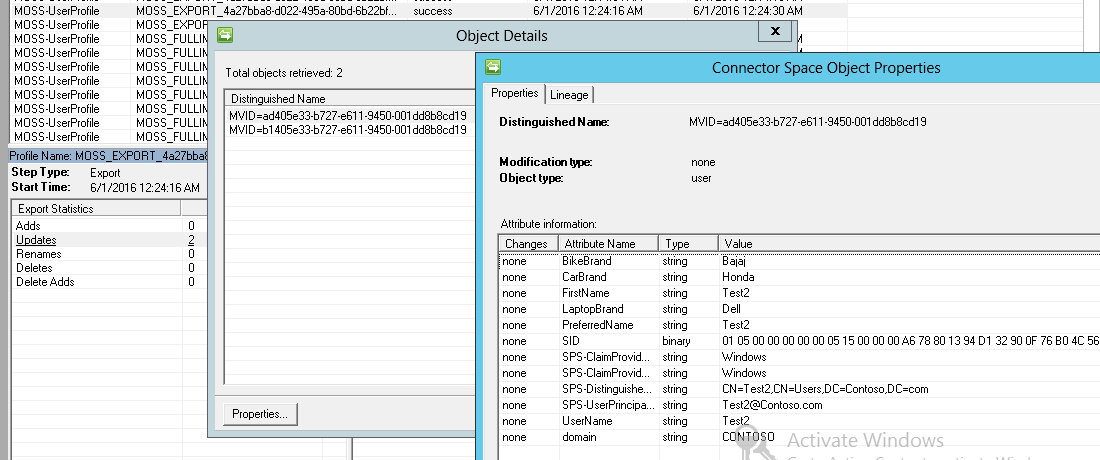
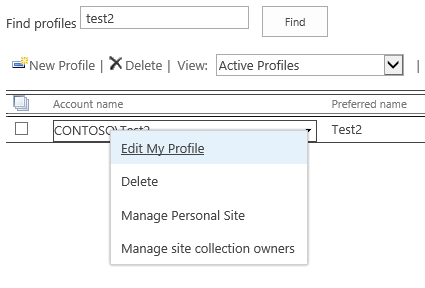
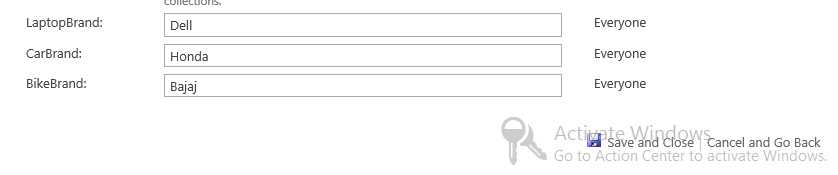
12.After the SYNC completes, you will see updated Profile property values in SharePoint User profile store from "Edit my profile" page.
I hope that helps. Happy SHAREPOINTING !!