Installing the SoftGrid Client on a non-domain machine
Many of our customers want to use SoftGrid for users that sit on machines outside there security boundary. In these instances they lose some management for deploying the client and pushing policy's to enforce. However, this is normally offset by the benefits that SoftGrid offer.
The KB article details this https://support.microsoft.com/kb/931172
Firstly, You may want to configure your local client to use the softgrid server variable. I tend to use the %SFT_SOFTGRIDSERVER% in my OSD files. In this example I will use the server name softgrid.charltonschool.com as my Virtual Application Server address.
1)Go to the computer properties
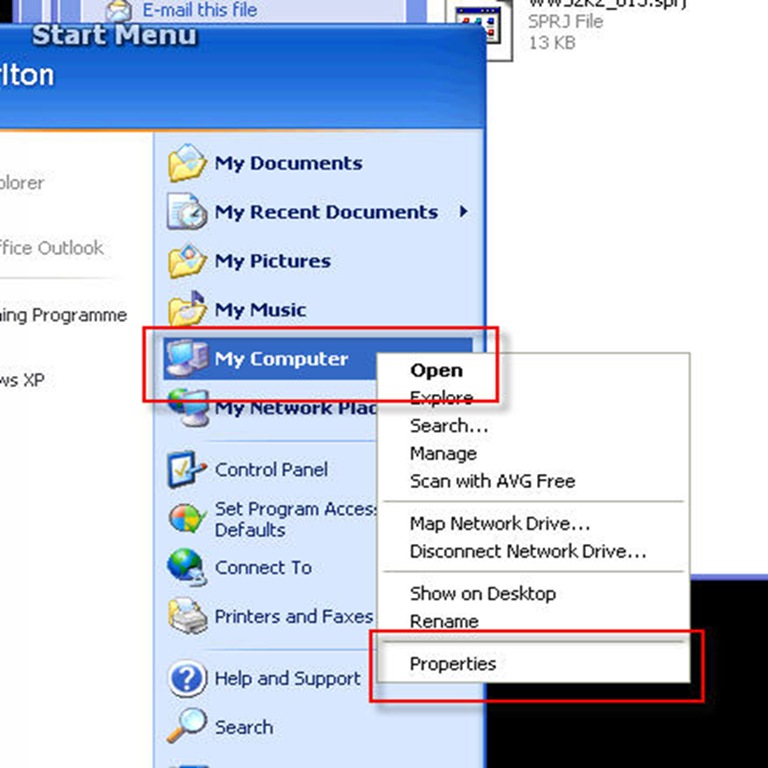
2) Go to Advance Tab and then select environmental variables
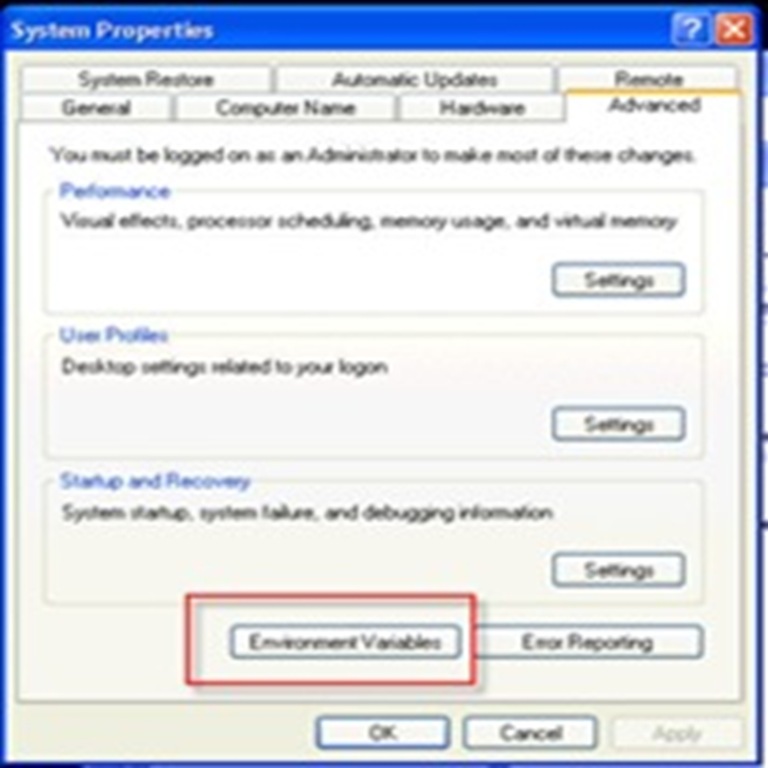
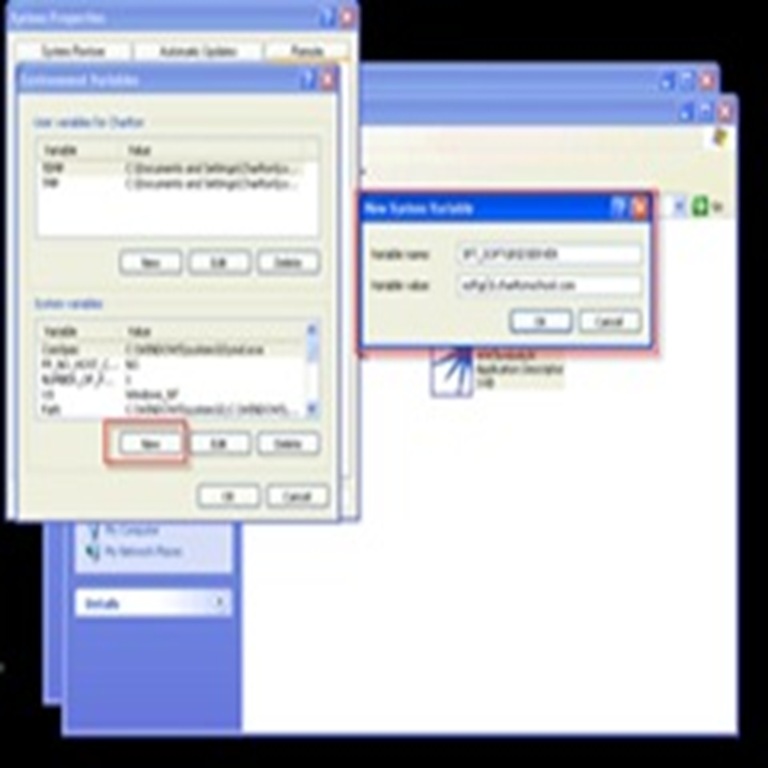
3)Click New System Variable and than add
Variable Name: SFT_SOFTGRIDSERVER
Variable Value: softgrid.charltonschool.com (Your SoftGrid Servers name or IP address alias)
The Next section is to install and configure the your softgrid client on your workstation.
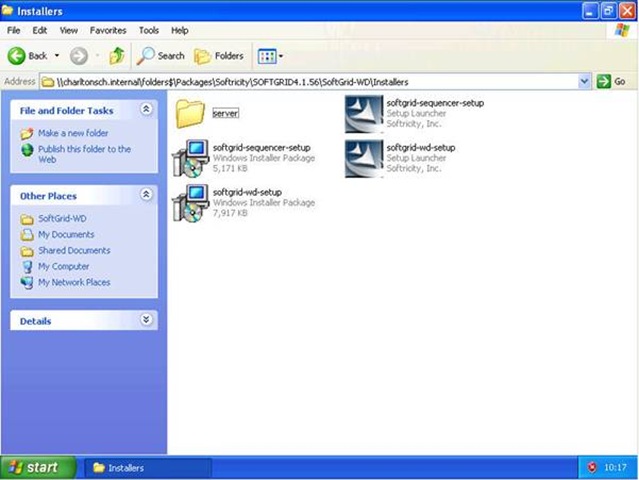
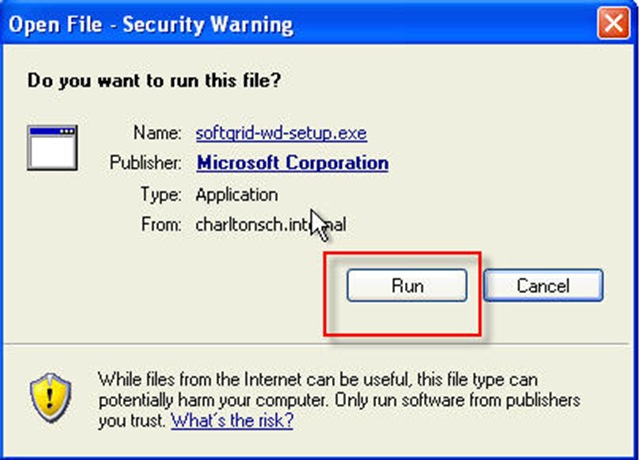
1) Install the softgrid client on the machine that will be being distributed out and run the setup.exe
2) The below dialogue box will appear. Select Run.
3) Click Next

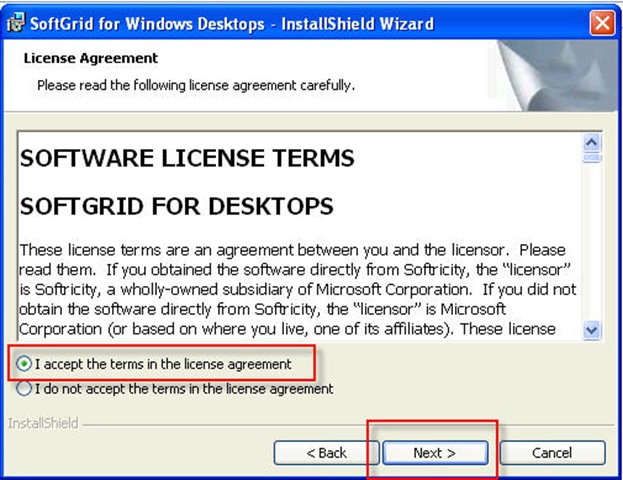
4) Accept the Licence after reading it !..... and click next
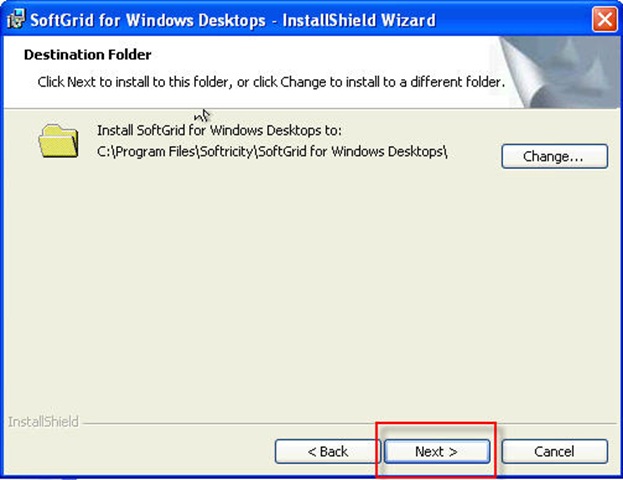
5) Select the location for the installation of the client (This has been left as default) and select next
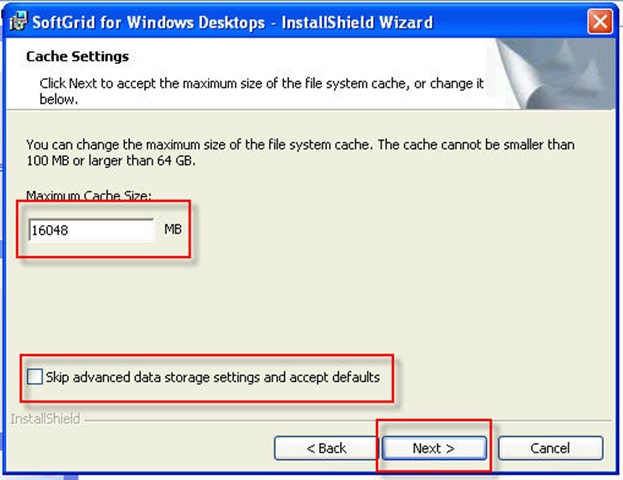
6) Change the Cache Size to 16048 and unselect the skip advanced options.
7) Change the desktop configuration to the below or use a policy to make the changes;
In this example I have manually set this by Selecting set up a desktop configuration server now. You may need to validate the below depending on your servers configurations! (HTTP, HTTPS, RTSP, RSTPS....... validate this in your environment!)
Display name : Charlton School
Type: Softgrid Virtual Application Server
Hostname: (Your DNS hostname or location for the SoftGrid VAS)
Port: 554 (RTSP)
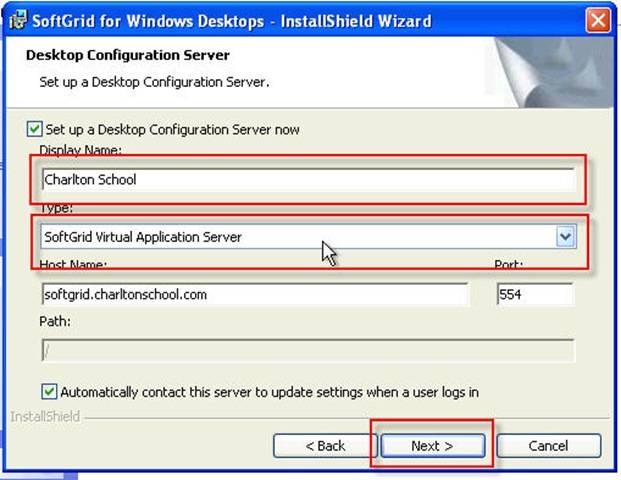
8) Click Next
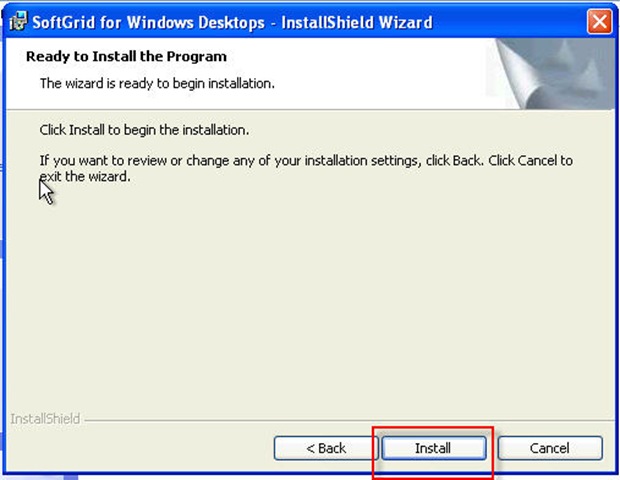
9) This should than complete the install and then click finish.
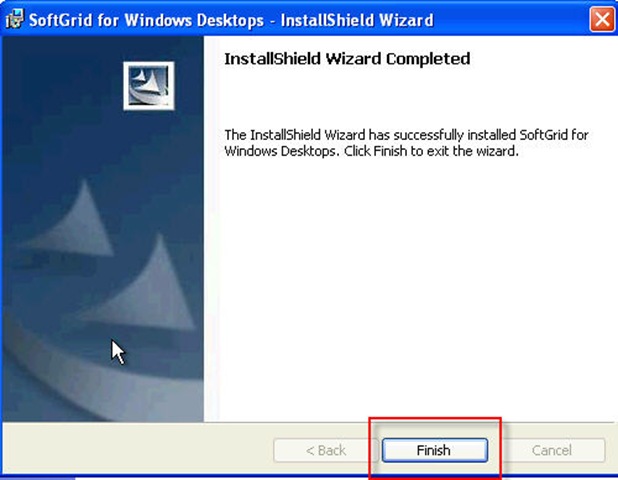
10) Ok now thats the install of the client!
User Account : https://support.microsoft.com/kb/931172/en-us
With The client installation complete we must allow a method for the softgrid client to authenticate with the SVAS to retrieve and populate the applications for the machine.
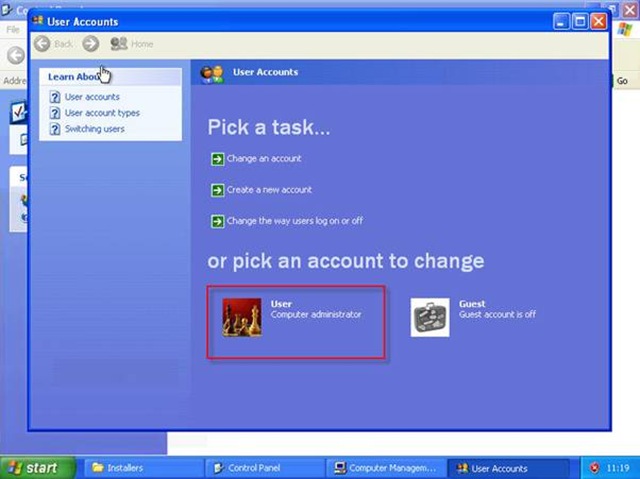
Go to control panel. And select User Accounts
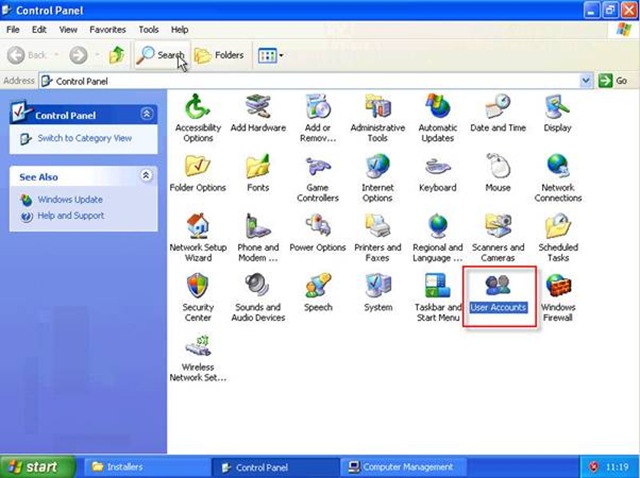
11) Select the account that the user will log on with.
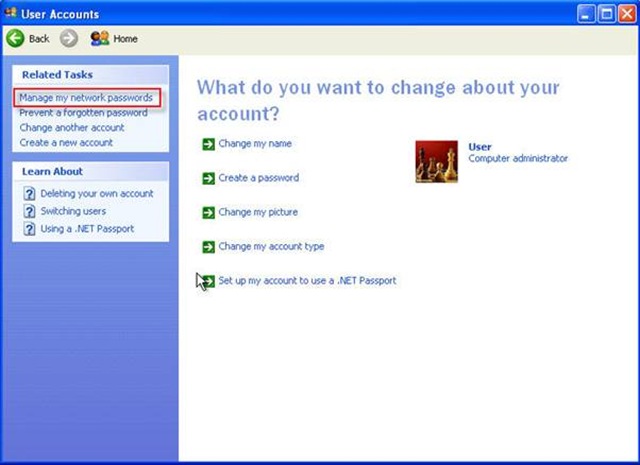
12) Select Manage my network passwords
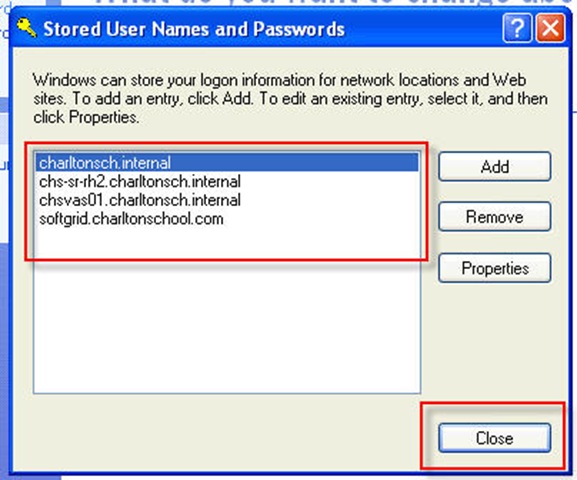
13) The following dialogue box will appear. Click Add

14) In the below box we need to add an account to access the resources on the network.
We need to add the server names for the SVAS and an account to access the resource

15) Complete the above for as many SVAS locations or method to locate your SVAS.
That's It!! You should now be able to force a desktop refresh and this should populate your application set.
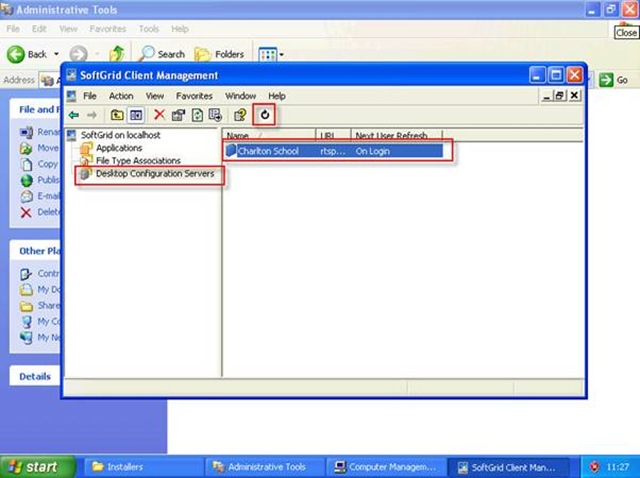
For Example; Go to Start > Control Panel > Administrative Tools > Softgrid Client Management
Within the tool go to the following , select Desktop Configuration Servers on the left hand payne > and than select the Softgrid server in the Right Payne.
Once selected, hit the refresh button above the server.
This will perform a refresh and give access to the applications that the user requires.
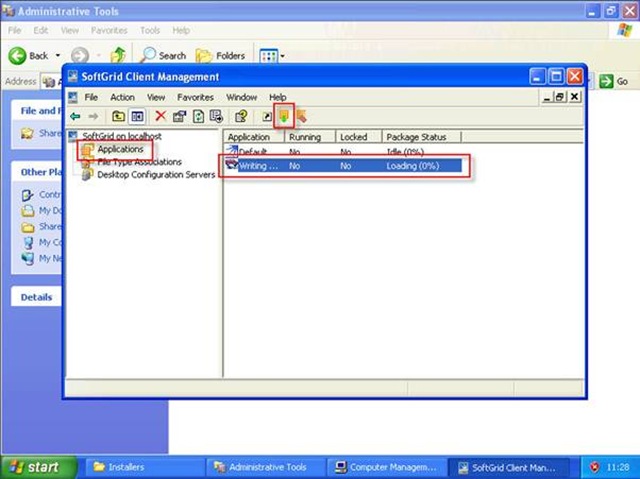
17) Now select applications in the left hand payne. This will show you applications in the right hand side.
Your applications should now be showing and this should also be represented by your desktop icons that are now present.
How easy is that!!! Try it, love it, enjoy it! You can now start to enjoy the benefits of your test environments or production SoftGrid environments on your non-domain clients!