Walkthrough of Office Live Workspace features
In the Using Office Live Workspace for Collaboration post I gave a brief overview of the Office Live Workspace service. In this blog post, I will do a feature walkthrough of OLW and showcase some of key features and concepts. Please note that last major upgrade of features was done 2 months back - You asked for them - New features!. You can keep a track of updates and features through the Community website.
Storage
Total space available for each account in 5 GB and the maximum size allowed for individual files is 25 MB regardless of the file format/extension. Given that the average size of a document is 500 KB or even less, you can upload thousands of documents.
Workspace
Workspace is the storage place where you can save, access, and share documents and files. You can use it to group related information. It's like a "document library" of SharePoint.
Create Workspace
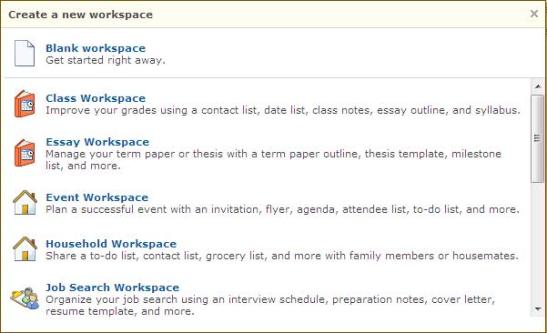
Click on "New Workspace" button in the "My Workspaces" pane on left hand side. While creating a Workspace you need to select a pre-defined template. These are similar to Site Templates in SharePoint with a difference that you cannot create/publish custom templates here.
Share Workspace
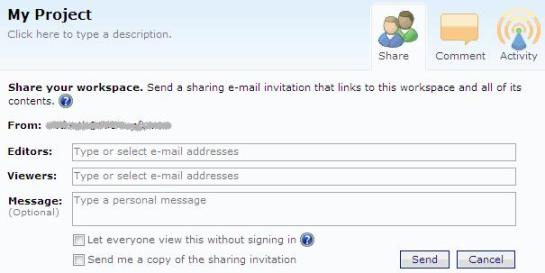
You can invite up to 100 people to share a workspace. To send a sharing invitation select the workspace that you want to share with others. On the toolbar, click the arrow next to Share and select Share Workspace. A Sharing pane appears. Fill in the required fields and click Send button.
Delete Workspace
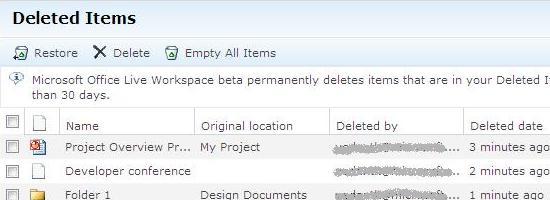
To free up more storage space the owner of the Workspace can easily delete the workspace. If you delete something accidently do not worry, you can always restore it from the Deleted Items area ;-)
Create/Add Documents
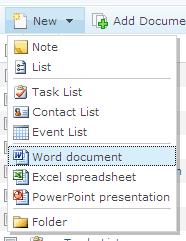
You can create documents using the "New" button on top bar of the workspace. The options available are slightly different depending on where you are in a workspace. If you are in the root of the Workspace, you have following options:
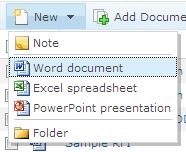
If you create a folder and add new document inside it, the list of options available gets reduced to following:
You can add/remove columns to List, Task List, Contact List and Event List. Here List is like the Custom List in SharePoint i.e only 1 column by default. You need to add rest of them as per your requirements.
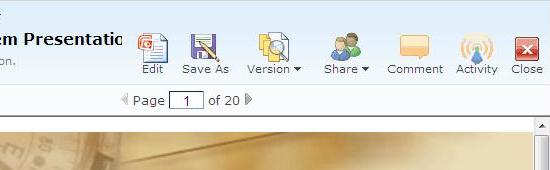
View a document in Web page format
Just click the name of the document that you want to view. It will open in web browser :-) You have Edit button to edit the document in Microsoft Word/Excel/Powerpoint client program as appropriate. To download to desktop, you can click Save As button.
Cut/Copy/Paste Documents
You can select and cut/copy/paste documents, lists and even folders too. There are buttons available on the top bar for doing this.

Alternatively, you can
- use keyboard shortcuts CTRL+X, CTRL+C and CTRL+V, or
- simply select document and then drag and drop it to another workspace
Share Documents
You share a document with upto 100 people.
If you want to share a document, you must first move it to the Documents workspace. Then select the document and click the arrow next to Share. In the drop-down list that appears select Share Document. This options grays out if you select multiple documents. So, you cannot share multiple documents in one click; you would have to share them one by one.
Note: You cannot share folders in Office Live Workspace
Deleted Items
If you delete a workspace, folder or a file and later change your mind, you can easily restore it. Anything that you delete is stored in the Deleted Items workspace for 30 days before it is permanently removed from your site. It's like the Recyle Bin feature in SharePoint.
Track workspace activity
Office Live Workspace makes it easy to keep up to date on activity in your workspaces. When you open a workspace, the Activity pane on the right side of the page shows you recent workspace activity, such as the date and time someone added a new document or starts sharing the workspace.

Additionally, Office Live Workspace gives you the option to receive activity updates by e-mail. You need to select the checkbox shown above for that.