Leading Your Customers to Modern IT with Windows Server 2012 R2: Installing Roles and Features
 |
Hello Everyone. In this post, we will cover one of the very basic points of Windows Server 2012 R2, the installation of Roles and Features.
Now, I know that many of you are probably scratching your head going, why are we covering this? This is pretty much the first thing we all do when we get our new Server 2012 R2 installation up and running. Well, you’re right in the sense that this should be a review for most of you, but I thought a quick refresher could be helpful. Here is how to install the DHCP role on your 2012 R2 Server:
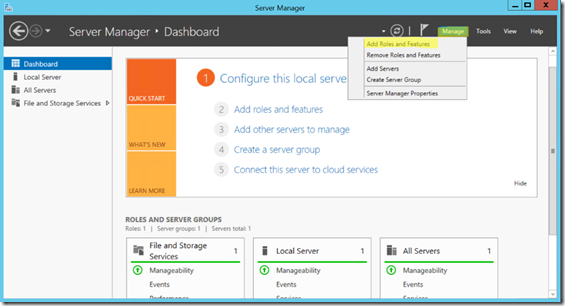
1. The Server Manager is your best friend, when you want to live in a GUI world. For our purposes let’s look first at installing a role or feature from the server manager window. To get started we click on Manage and then Add Roles and Features:
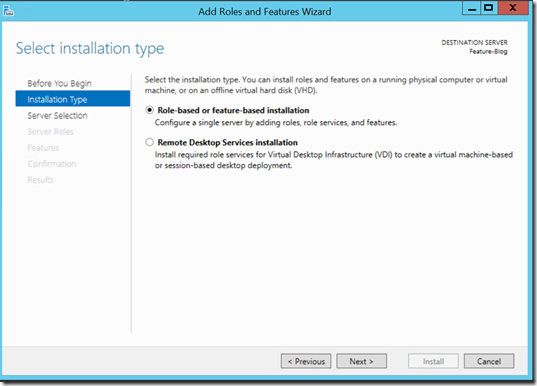
2. Now let’s tell the system what we want to install. The first window that comes up, if this is the first time you have run the wizard, is the before you begin window. I typically click the little check box in the bottom that says Skip this page by default, so I don’t see it again. Next we will select whether this is a Role-based or feature-based installation, or if we are doing a Remote Desktop Services Installation, we will choose Role-Based or feature-based installation and click next to move on to the next step.
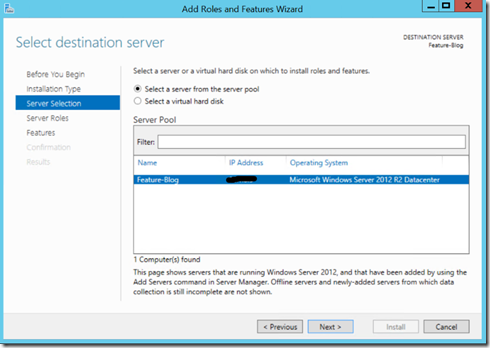
3. We are then asked to select a server, or a VHD to install the role to. Typically, you will just select a server, but if you want to install the role into a VHD you can point the system to the necessary VHD and then specify which server to mount the VHD to, in order to install the role. For our purposes, we will just install the role into the 2012 R2 box I stood up in Azure to create this post in five minutes called Feature-Blog.
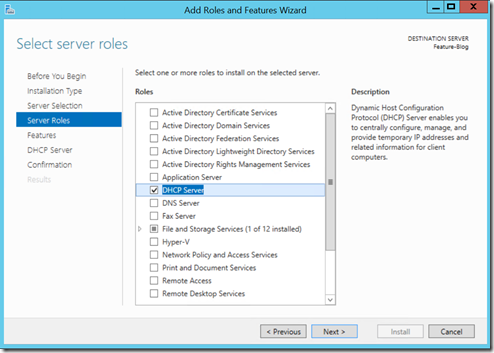
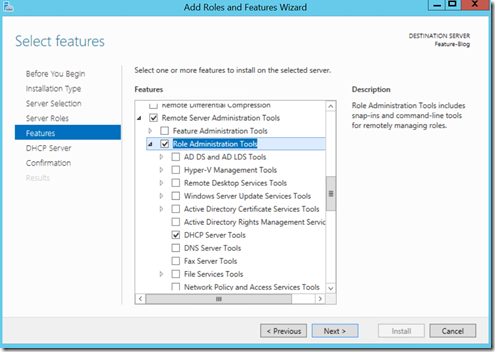
4. For our example we will install the DHCP Server Role to our server. One of the great things about Windows Server 2012 R2, is that if you go to install a Role and you need dependencies met (other roles), or admin tools to manage the role, the Add Roles and Features Wizard is smart enough to pop up a new window and tell you what you are missing and ask you if you want to add them then.
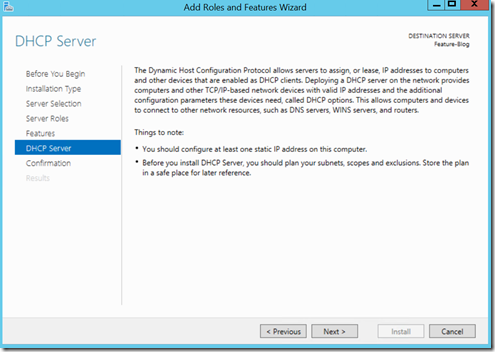
5. Next you will confirm the automatic features selection and then in our case we receive a Things to note page as well before our confirmation screen.
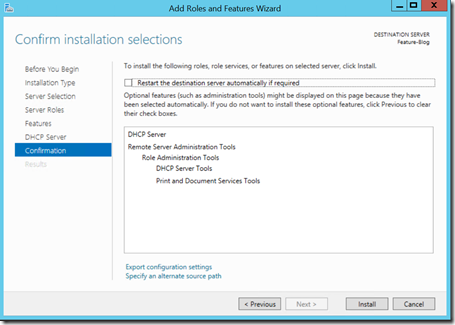
6. Finally, on the confirmation page you will see an option to Restart the destination server automatically if required. This is a nice feature that was added previously, allowing you to install and then walk away. No more waiting for the role to finish installing and then getting to go home for the day. You can install check the box and walk away. If this is not a production server yet, I would recommend selecting this checkbox to save yourself an extra step.
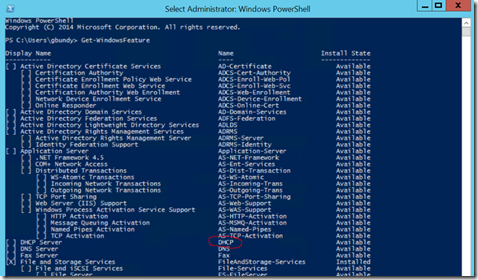
Alternatively, to this massive GUI work we just did, we could have used PowerShell and with two quick commands accomplished the exact same thing. The first command is: Get-WindowsFeature which will produce a list of the features installed and those available to install. A Quick scan will reveal that the name of our feature is DHCP, which is convenient, because some others have some long names. Note that you must have the EXACT name of the Role or Feature you are trying to install and it is case sensitive.
Finally, you would use the following syntax to do exactly what we did in the GUI above:
Install-WindowsFeature -Name DHCP -IncludeManagementTools -Restart
With that you have successfully installed a server role! Hope that this little refresher was helpful, and that it showed you the power of PowerShell (pun intended). If you have questions about role installation or anything covered here, don’t hesitate to comment on this post. See you Next Time!
Please check out our whole series on Windows Server 2012 R2 at https://aka.ms/ts2windowsserver2012r2
Till Next Time,
Garrett
Technorati Tags: Garrett Bundy,Windows Server 2012 R2,Windows Server 2012,Windows Server

