Windows Azure: Setting up Synchronization between an On-Premises Infrastructure and Windows Azure with Windows Server 2012 R2
|
Rob Waggoner |
I’ve been working with Windows Azure for a while now. I really like the idea of creating workloads without having to house the servers for the workloads and I see tons of possibility for Windows Azure. I truly feel like we’re just starting to scratch the surface with Windows Azure, and like everything else, there comes a time to dive in.
I’ve created VMs in Windows Azure for various tasks, it is actually easier to create VMs in Windows Azure than it is to create them on-premises, but today I wanted to share with you my biggest step (so far) in getting to know Windows Azure. I configured a Site-to-Site VPN connection between my on-premises infrastructure and the Windows Azure infrastructure and then I setup Domain Controllers and file servers in both places that synchronize! This is a single Domain that has one DC on-premises and four DC’s in Windows Azure. The reason for four DC’s in Windows Azure is that I could. There is a wealth of documentation on setting up Windows Azure workloads, and I want to share the resources I used to set this up as well as a few pictures of what I have working.
Setting up my on-premises Configuration
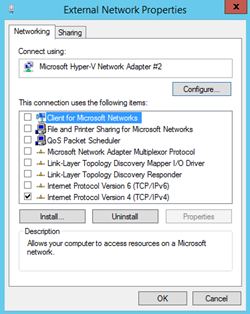
First I setup three on-premises virtual machines all running Windows Server 2012 R2, these three servers comprise my on-premises footprint (for now). I used the Routing and Remote Access (RRAS) services within Windows Server 2012 R2 as my internet facing router. I put two virtual NICs in the RRAS server, one is connected to the public Internet, the other one is connected to my internal network. The other two servers consist of a Domain Controller and a File Server, these servers only need one NIC each. If you use RRAS as your internet facing router, be sure to remove all but the TCP/IP binding from your external NIC.
Of course you do not have to use RRAS, there are a number of Cisco and Juniper devices supported natively, but since I don’t have one of those, I chose to use RRAS. If you do not have one of the supported devices, don’t worry, there is documentation here on the changes necessary to support the virtual connection. This document also lists the known compatible VPN devices that have been tested with Windows Azure.
My on-premises configuration looks like this.
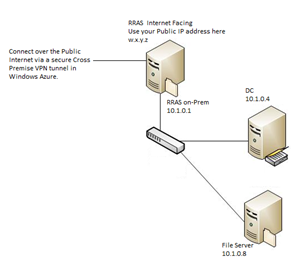 |
Windows Azure expects a Public Facing IP Address. From the information I found, a NAT’d address will not work. |
Now that my on-premises footprint is setup, let’s setup the Windows Azure Virtual Network.
Setting up Windows Azure
The first thing to do in Windows Azure is create a Virtual Network for Site-to-Site connectivity. This document was instrumental in getting me up and running because it showed me how to setup this up and how to configure the gateway. I love the “Download VPN Device Script” you can download once you’ve setup your gateway. When you choose the “Download VPN Device Script” you pick the script for your actual device. There are scripts to automatically configure a number of the Juniper and Cisco devices as well as RRAS, remember that you can always check the known compatible VPN devices for updates to our compatible device list. I used the RRAS PowerShell script (provided by Windows Azure) to configure RRAS for the Azure Cross Premise connection.
Once this is complete, your Site-to-Site virtual connections screen (under Networks) in Windows Azure should look something like this:
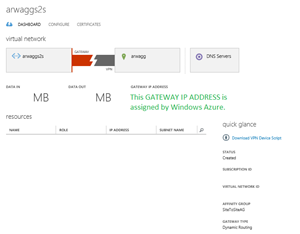 |
The GATEWAY IP ADDRESS is provided by Windows Azure and is unique to your installation. |
The Gateway IP address is assigned by Windows Azure, we need the Gateway IP address before we can configure the on-premises gateway. Once I configured my Site-to-Site network, Windows Azure took about 15 minutes to fully configure the network and provide the public facing IP Address. Be patient, you need this IP address before you can proceed.
Connecting on-premises to Windows Azure
Now that the on-premises and Windows Azure networks are configured, I had to tell them how to connect together. This is where the magic happens.
Once you have your Gateway IP address, you can use the “Download VPN Device Script” link to download the configuration script that is ready to apply to the RRAS server. By waiting for the GATEWAY IP ADDRESS, the IP ADDRESS gets embedded into the VPN Device Script. If you do not wait for the GATEWAY IP ADDRESS to post, you have to manually add the IP address to your script once it’s posted to your page. Take Note: if you haven’t installed the Remote Access role yet on your RRAS server, the VPN Device Script will install Remote Access and then reboot the server before the rest of the script can execute.
Looking at the script for RRAS, Line 63 is where RRAS is actually installed. Take note of the comments in the script:
 # Install RRAS role
Import-Module ServerManager
Install-WindowsFeature RemoteAccess -IncludeManagementTools
Add-WindowsFeature -name Routing -IncludeManagementTools

#
!!! NOTE: A reboot of the machine might be required here after which the script can be executed again.
If you haven’t already installed Remote Access, you will probably have to re-run the script again after the reboot, so save the script locally before you execute it in PowerShell.
After I ran the script on my RRAS server, it took less than 15 minutes to establish the VPN connection. I’m not saying your connection will only take 15 minutes, the first time I tried to set this up, it took a couple of hours before the two sites connected, but be patient and your networks should connect shortly.
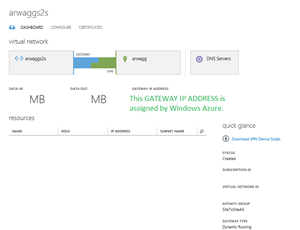
Once the two networks connect, your status screen will show a blue and green connection between your Windows Azure virtual network and your on-premises network.
 |
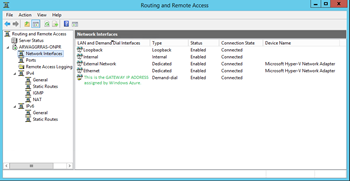 |
| This is the screenshot from the Windows Azure Networks Dashboard. | This is the screen shot of the Routing and Remote Access console from the on-Premises RRAS server. |
At this point I now have my two networks connected together forming one big happy network! My next blog, here, will talk about how I got the virtual machines in both locations talking. The good news is that its all downhill from here.
Until next time,
Rob
Technorati Tags: Setting up Windows Azure and Windows Server 2012 R2,Windows Azure Site-to-Site VPN,RRAS Azure VPN

