Optimizing the Dynamics AX 2012 Demo VM for Windows 8 and Windows Server 2012
Overview:
Hyper-V has many new performance improvements, one of them is a new virtual hard drive format called VHDX.
The main new features that we will find of interest are:
- Protection against data corruption during power failures
- Performance improvements for dynamic and differencing disks
- TRIM support allowing unused disk space to be reclaimed
For more information please see the Overview on TechNet.
With the inclusion of Hyper-V in Windows 8 and the fact that most demo users will be running VM’s on laptops; these are worthwhile improvements.
Getting Started:
First you will need to be running Windows 8 with Hyper-V feature installed or the Windows Server 2012 RC with the Hyper-V role enabled.
The conversion process also requires enough free hard disk space to copy the existing VHD file to the new VHDX file.
This will require between 75 and 133 GB of space depending on if you choose to keep the disk dynamic or switch to fixed.
If you do not have enough space on your local drive you can use an external drive for the conversion and move the VHDX file over later once it is safe to delete the old VHD.
The Dynamics AX Demo VM must be shut down during the conversion process.
Please be aware that the VHDX format is only compatible with Windows 8 and Windows Server 2012.
Configuration
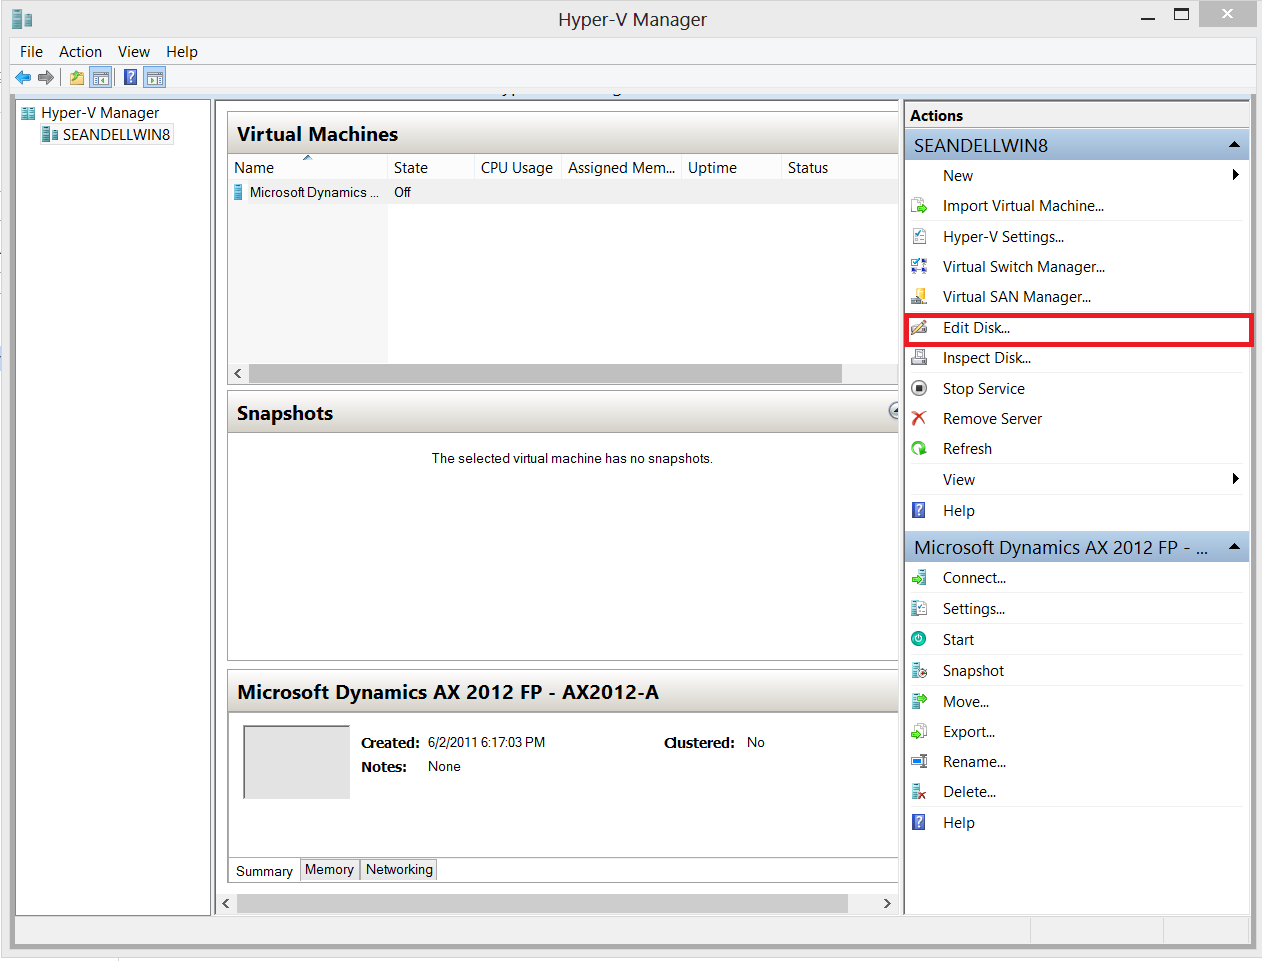
Step 1. Open the Hyper-V Manager from Windows 8 or Windows Server 2012
Step 2. Select “Edit Disk” from the Actions pane
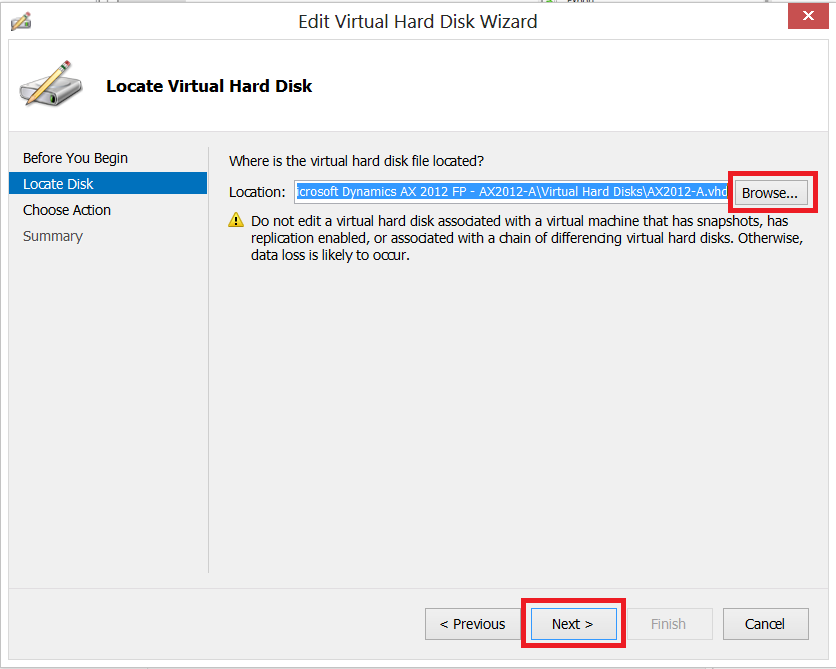
Step 3. On the initial screen click the “Next” button, you will need to know where the VHD file is located on your machine.

Step 4. Browse out to find the VHD file, this will be the location chosen during the VM import process.
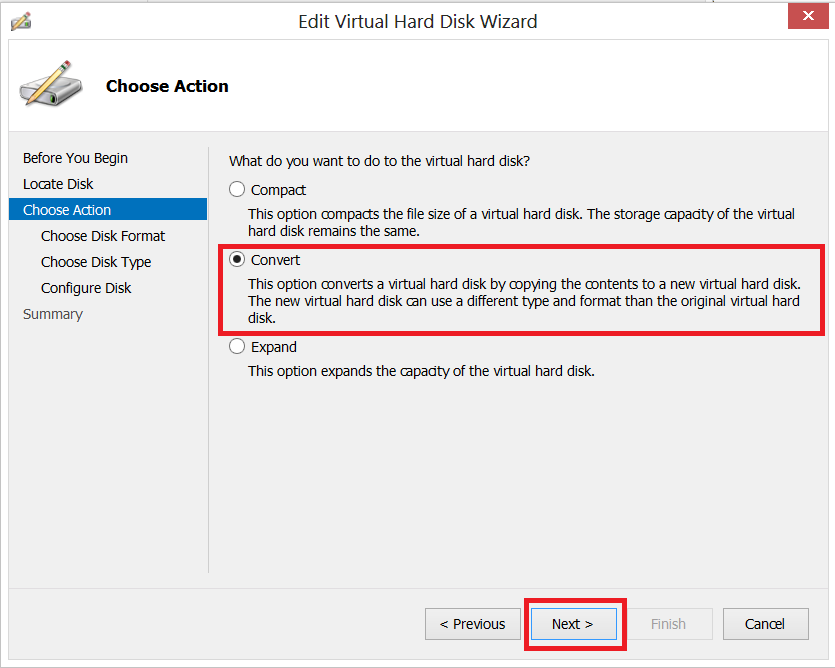
Step 5. Choose the Convert option and click the “Next” button.
Step 6. Select the VHDX format type and click the “Next” button.

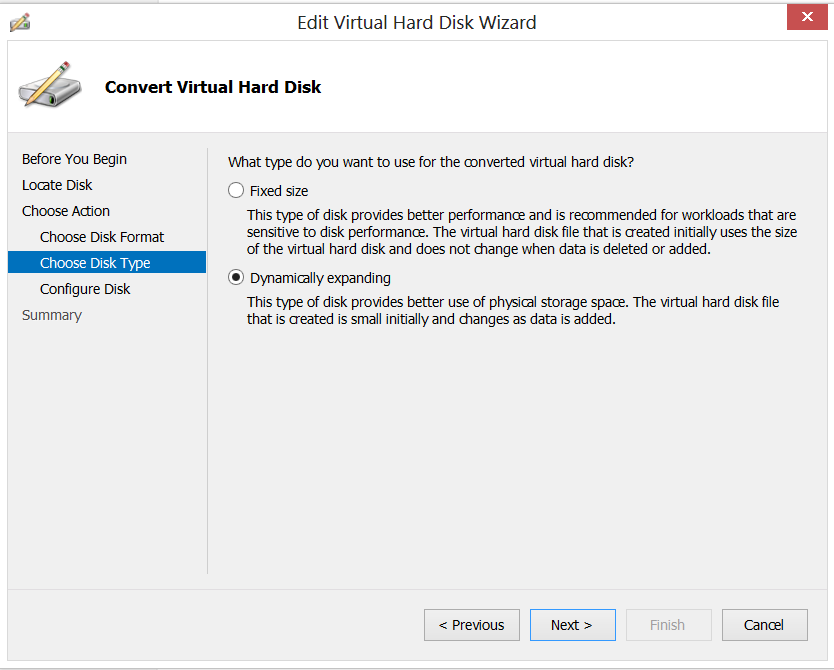
Step 7. Choose the Dynamically expanding option if you need to conserve disk space.
Fixed Size will speed up performance by around 20%, but require 133 GB of disk space.
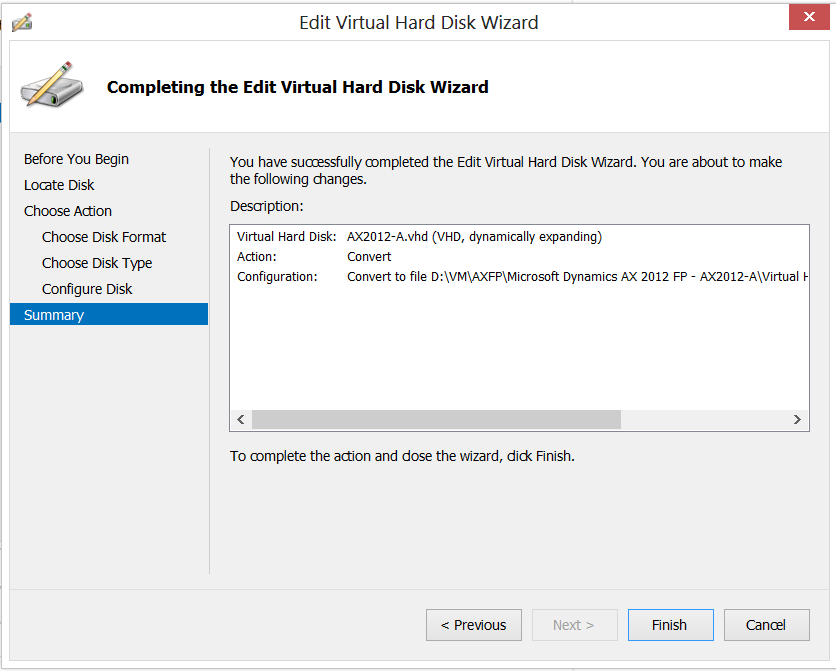
Step 8. Select the location to save the converted disk, I chose the same directory the existing VHD was located.

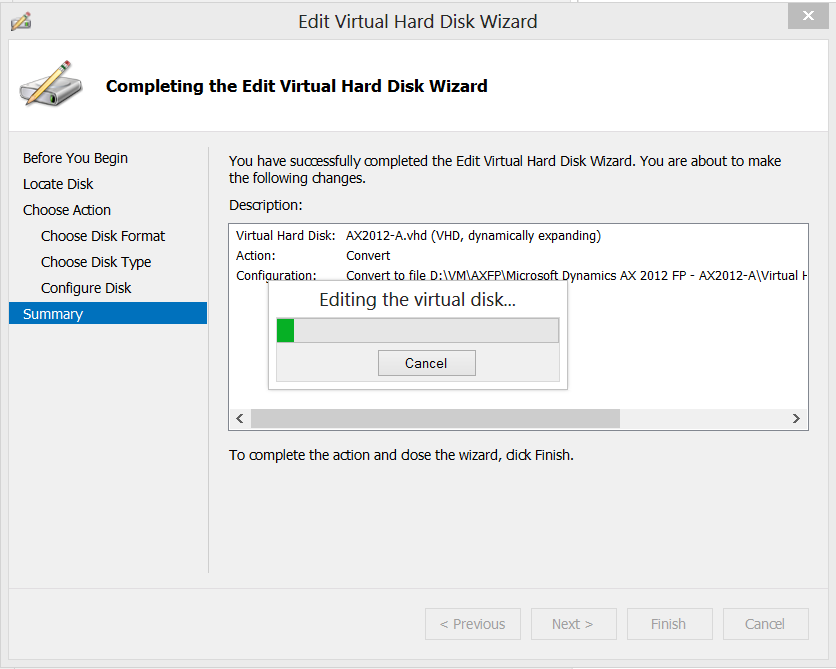
Step 9. To initiate the conversion click the “Finish” button.
Step 10. The conversion process will take around 30 minutes to an hour depending on the speed of your hard drive.
Step 11. Once the conversion is complete the Wizard will automatically close, you should now have a VHDX file created

Note: In this example I chose the fixed disk mode for performance, so my new VHDX file is much larger than the old VHD
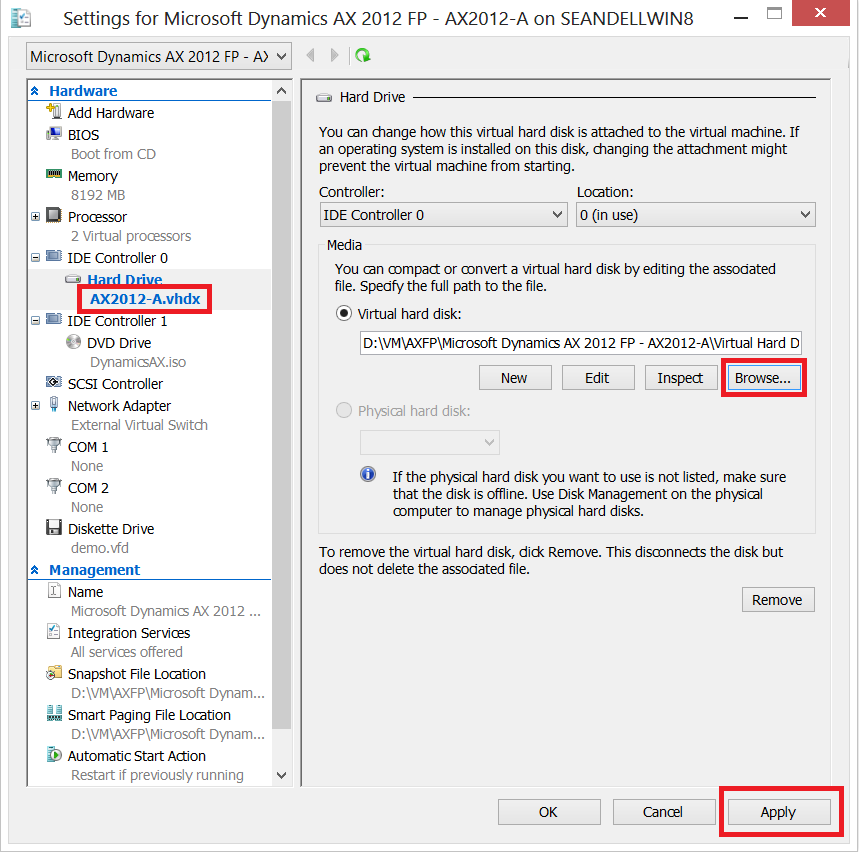
Step 12. To use the new VHDX file we must associate it to the Dynamics AX Demo VM, open the Hyper-V Manager and open the VM settings by right clicking on the virtual machine.

Step 13. From the settings form click the “Browse” button and select the new VHDX file. Click Apply to make the change, the Hard Drive should now be listed as “AX2012-A.vhdx”.
Step 14. Start the virtual machine up to confirm that the new VHDX is working correctly
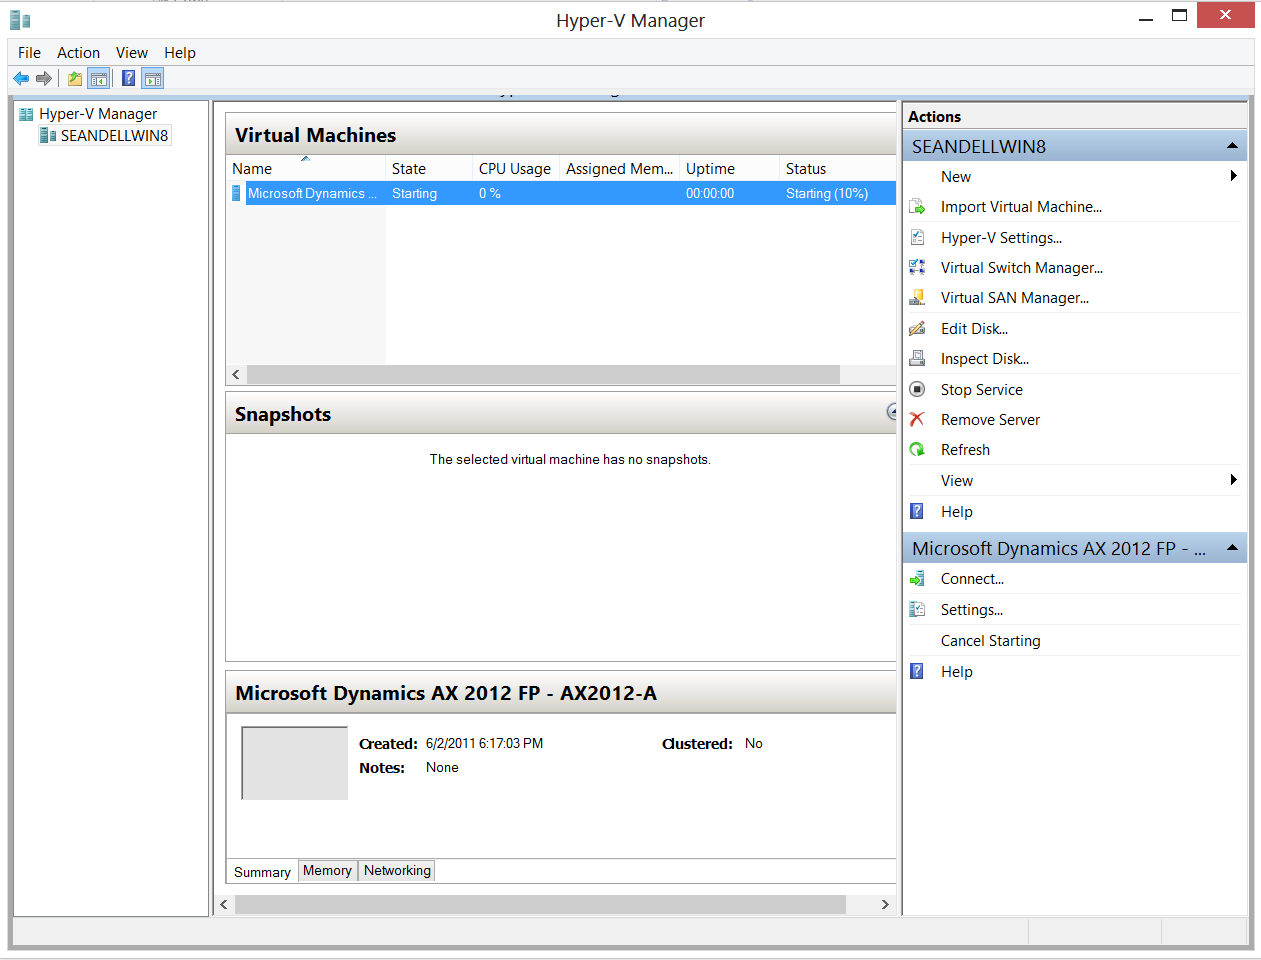
Step 15. After successfully starting up, you should now be able to enjoy the improvements afforded by the new VHDX format

Note: After confirming the conversion was successful you may now delete the old VHD file to reclaim your hard disk space.
Conclusion:
In this post we have walked through the steps required to convert the Dynamics AX 2012 Demo VM from the older VHD file format to the new VHDX file format supported in Windows 8 and Windows Server 2012.