Creating Scoped DLP rules with Custom Sensitive Information Types
A few weeks ago, I put out a series of posts on creating and using custom sensitive information types (https://blogs.technet.microsoft.com/undocumentedfeatures/tag/sensitive-information-types/). The blog, posts, however, focus on using the DLP configuration options available in the Security & Compliance Center.
Rules created via the DLP wizard in the Security & Compliance Center have the benefit of being able to be applied globally across your organization and its content sources. However, due to the global focus, you do lose some of the granularity in crafting rules. Multi-organization tenants (such as enterprise conglomerates or consolidated governments) may need to create email DLP policies that are more restrictive and apply only to certain business units or agencies.
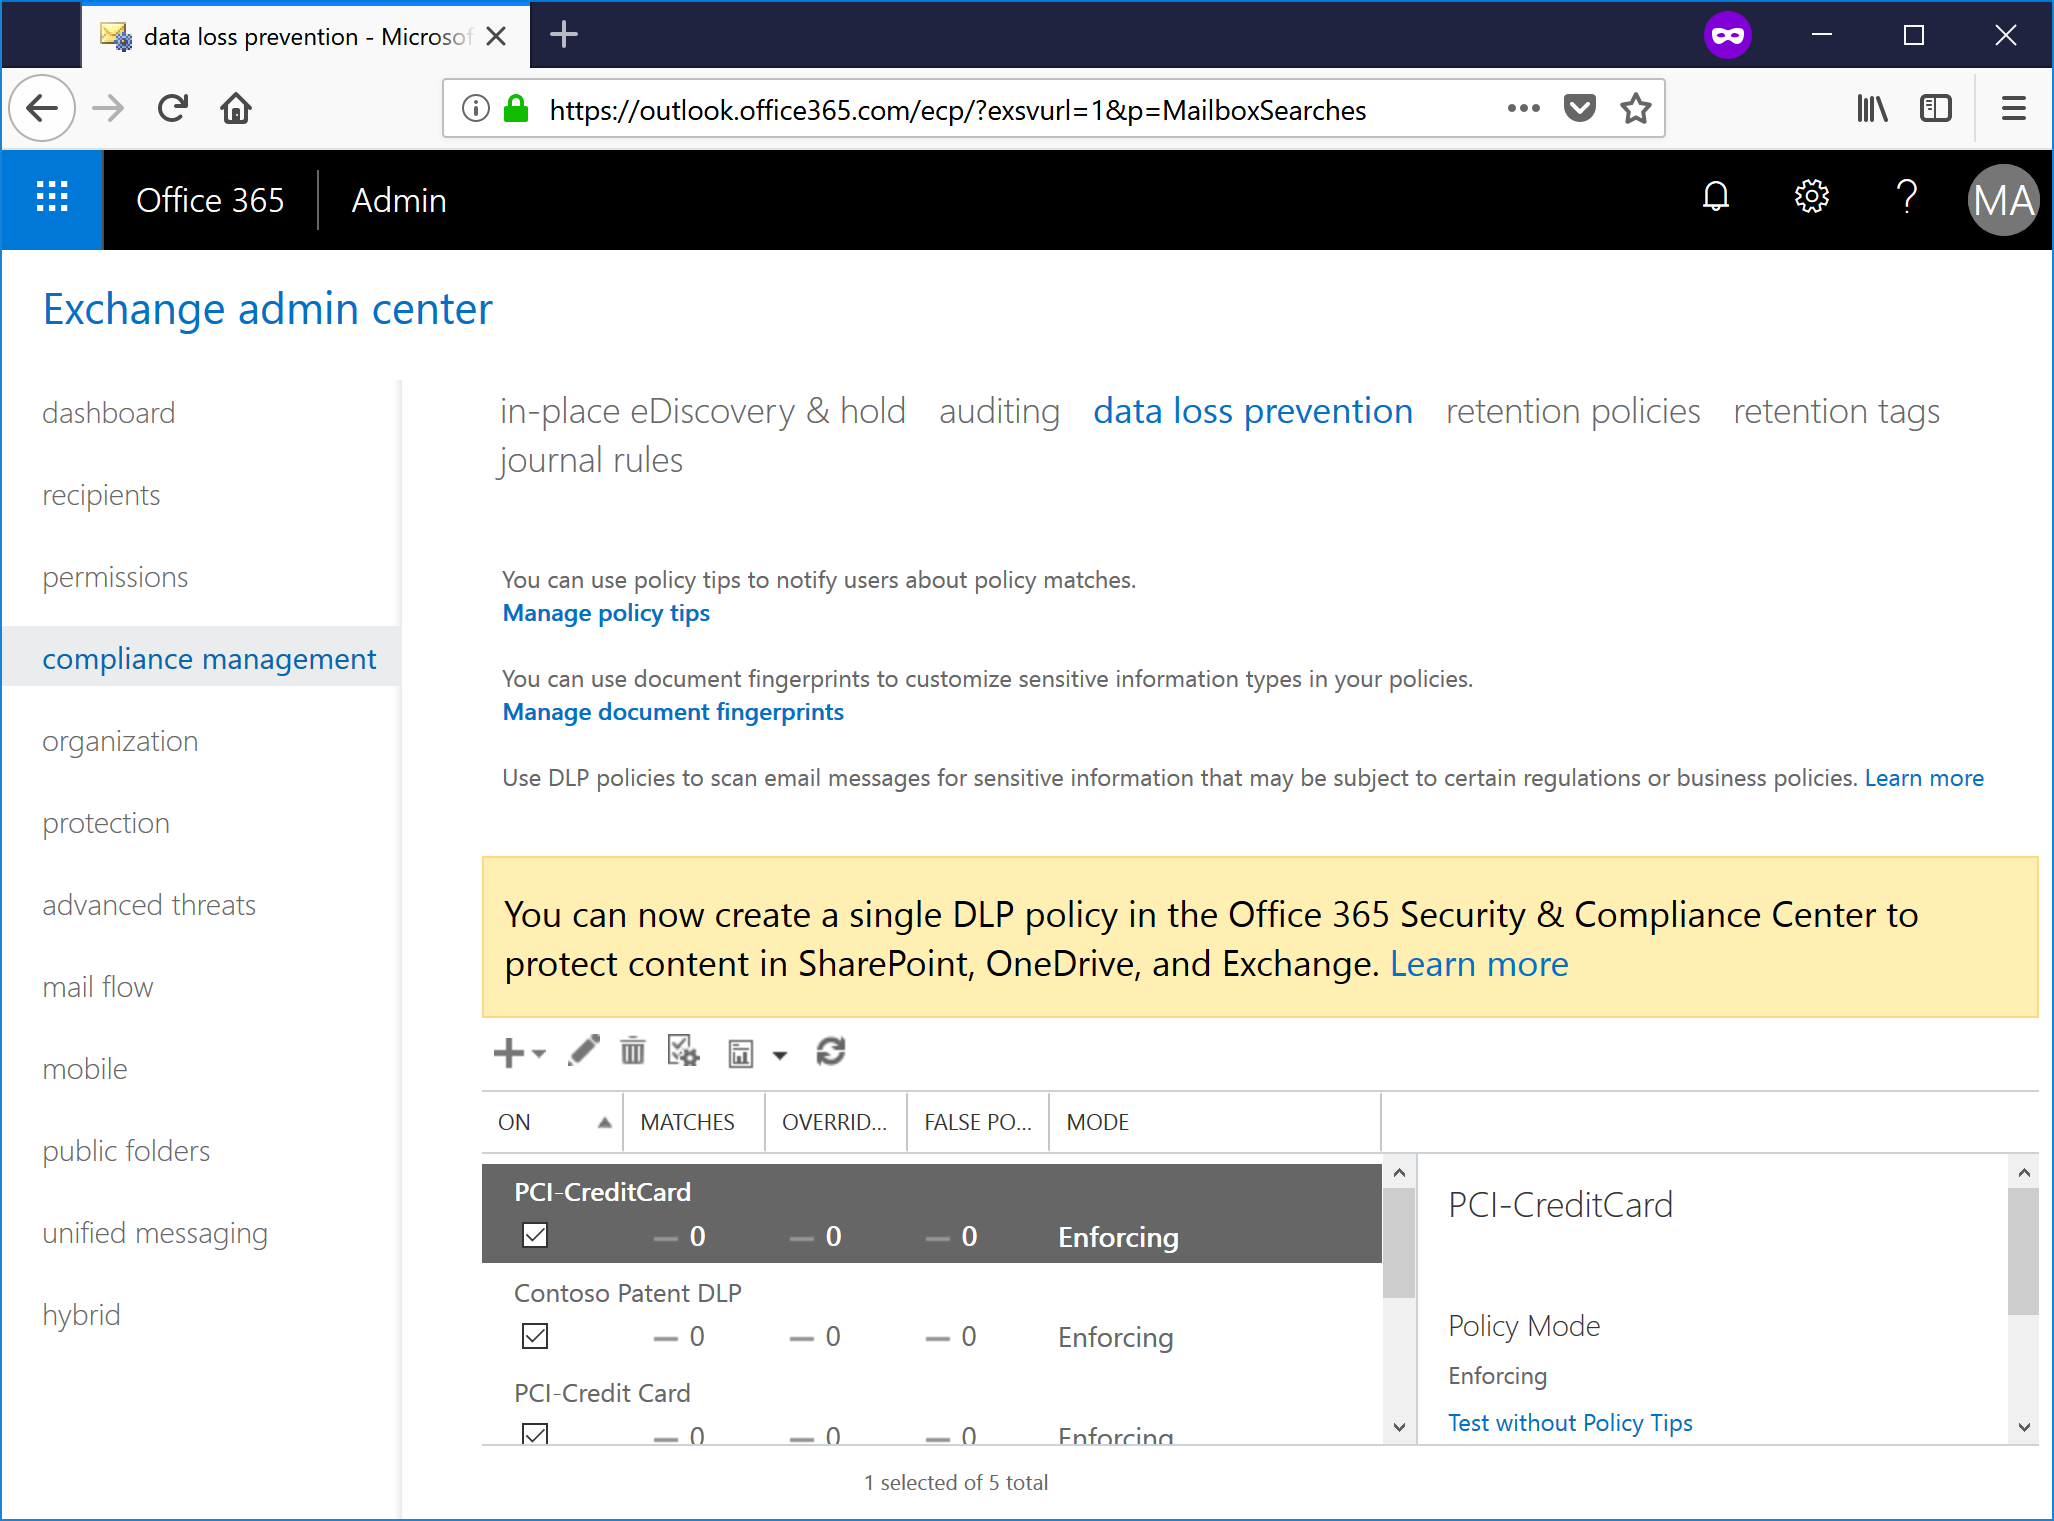
For this, we need to head to the Exchange Admin Center.
- First, build or import a custom DLP package (you can use mine, as outlined here) or build your own (as described here) and get them imported into Office 365.
- Navigate to the Exchange Admin Center (https://outlook.office365.com/ecp/?exsvurl=1&p=Compliance | Compliance | Data Loss Prevention).
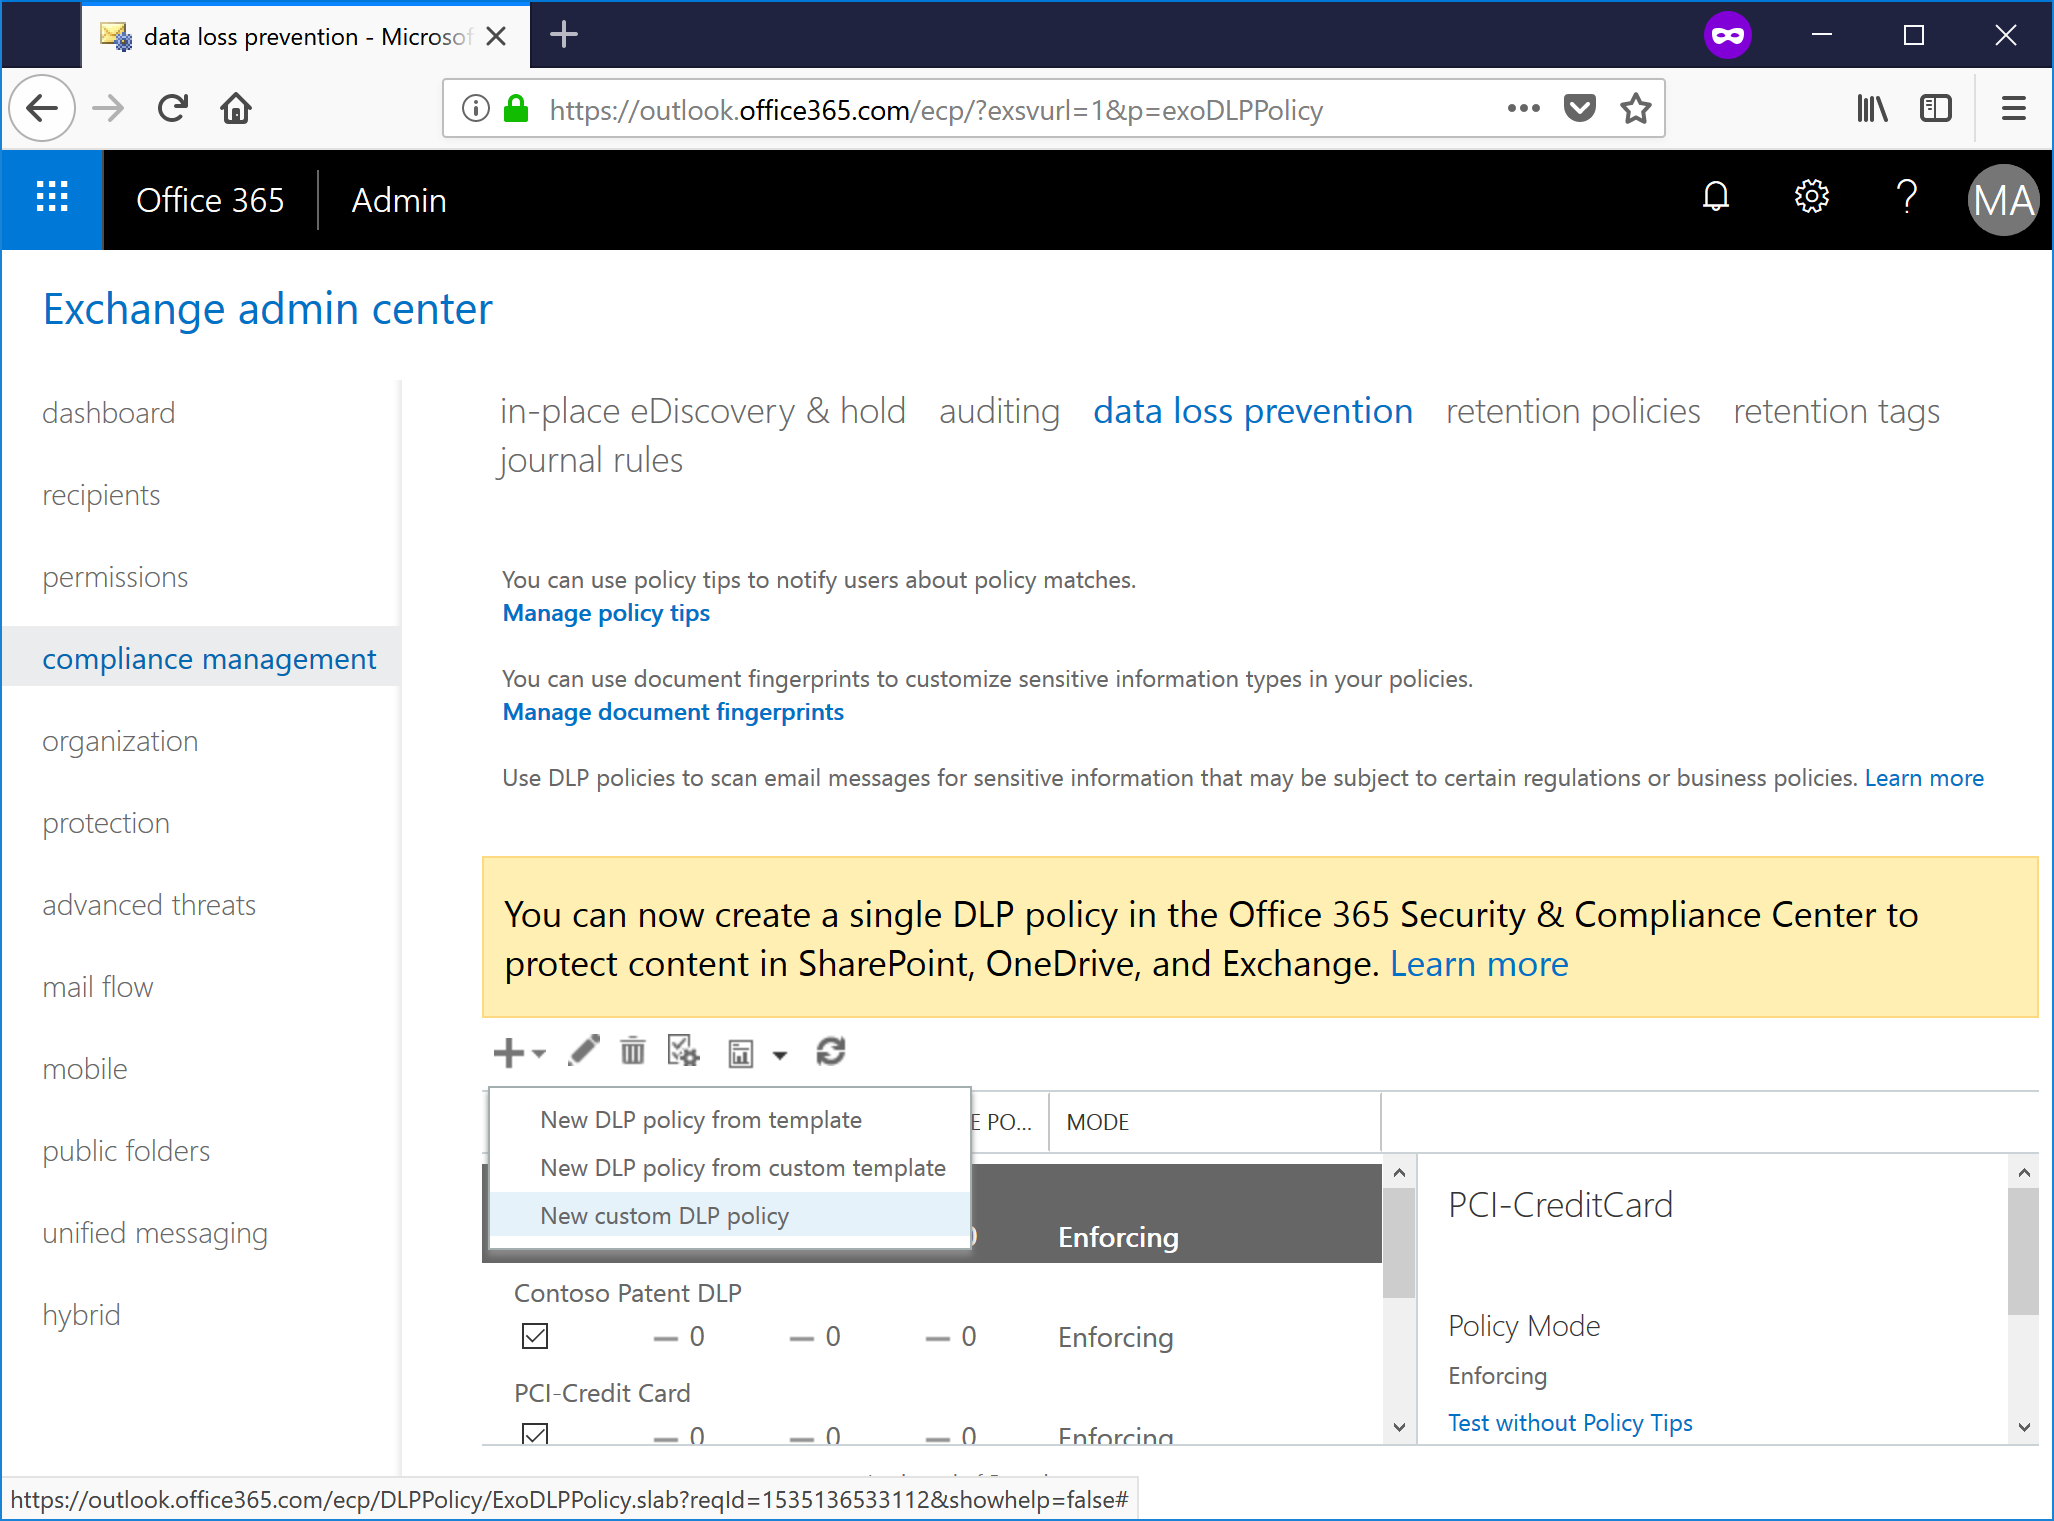
- Click + and select New custom DLP policy.
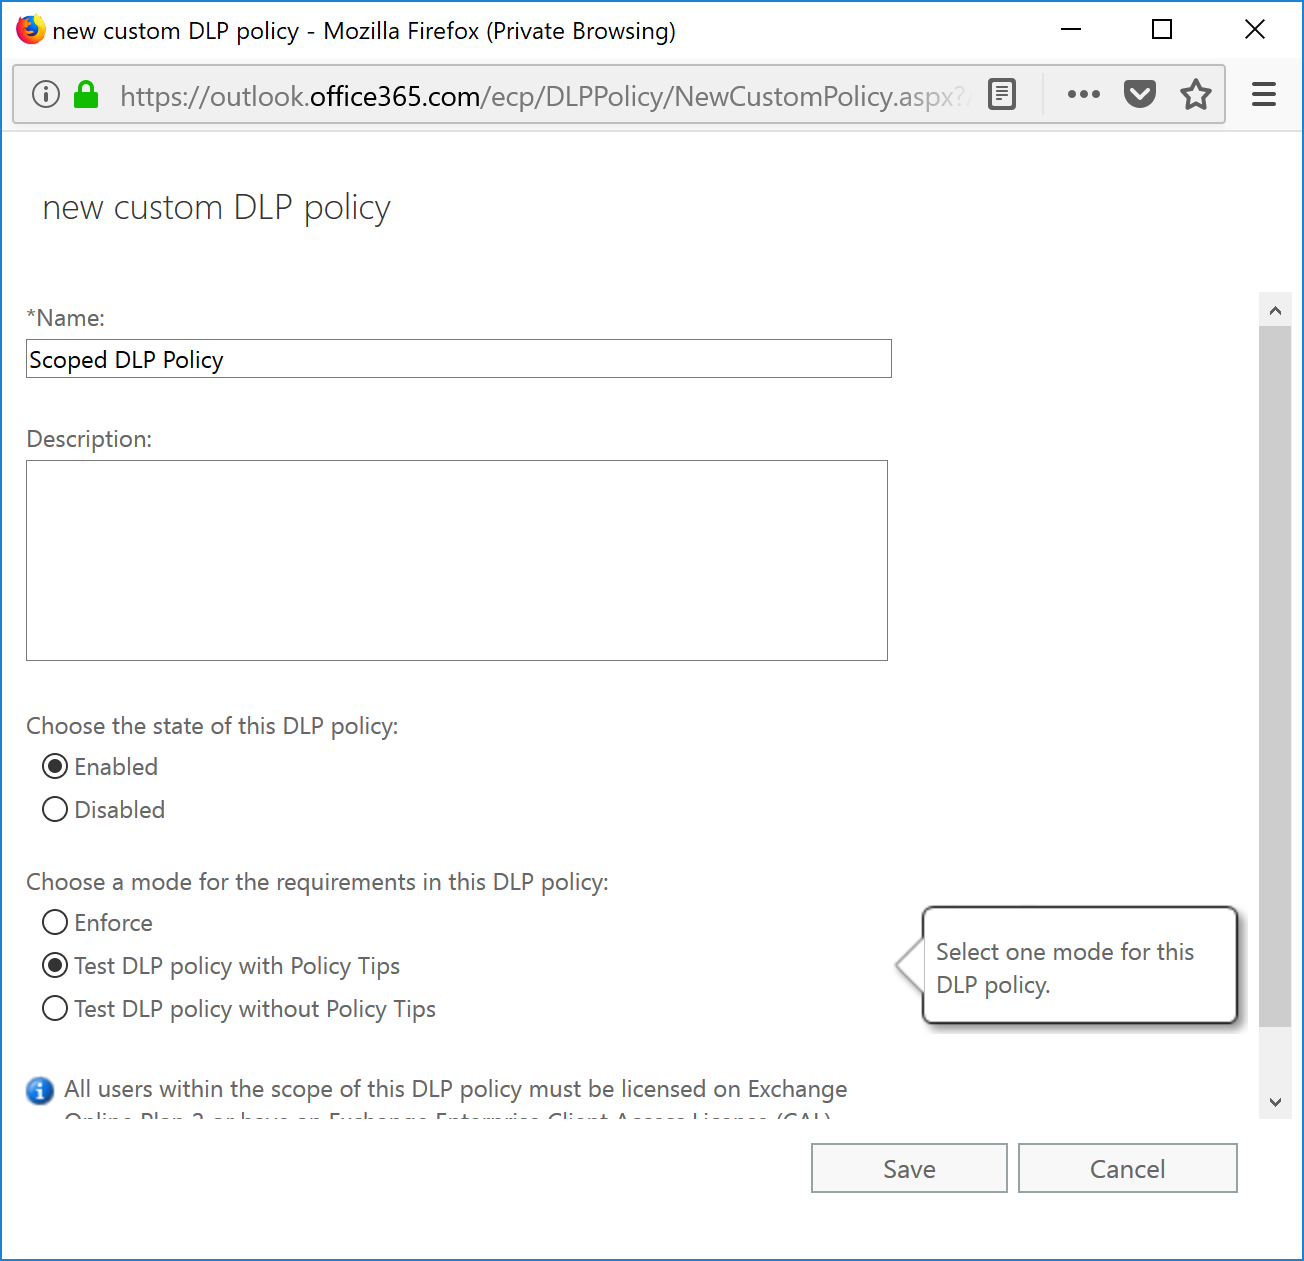
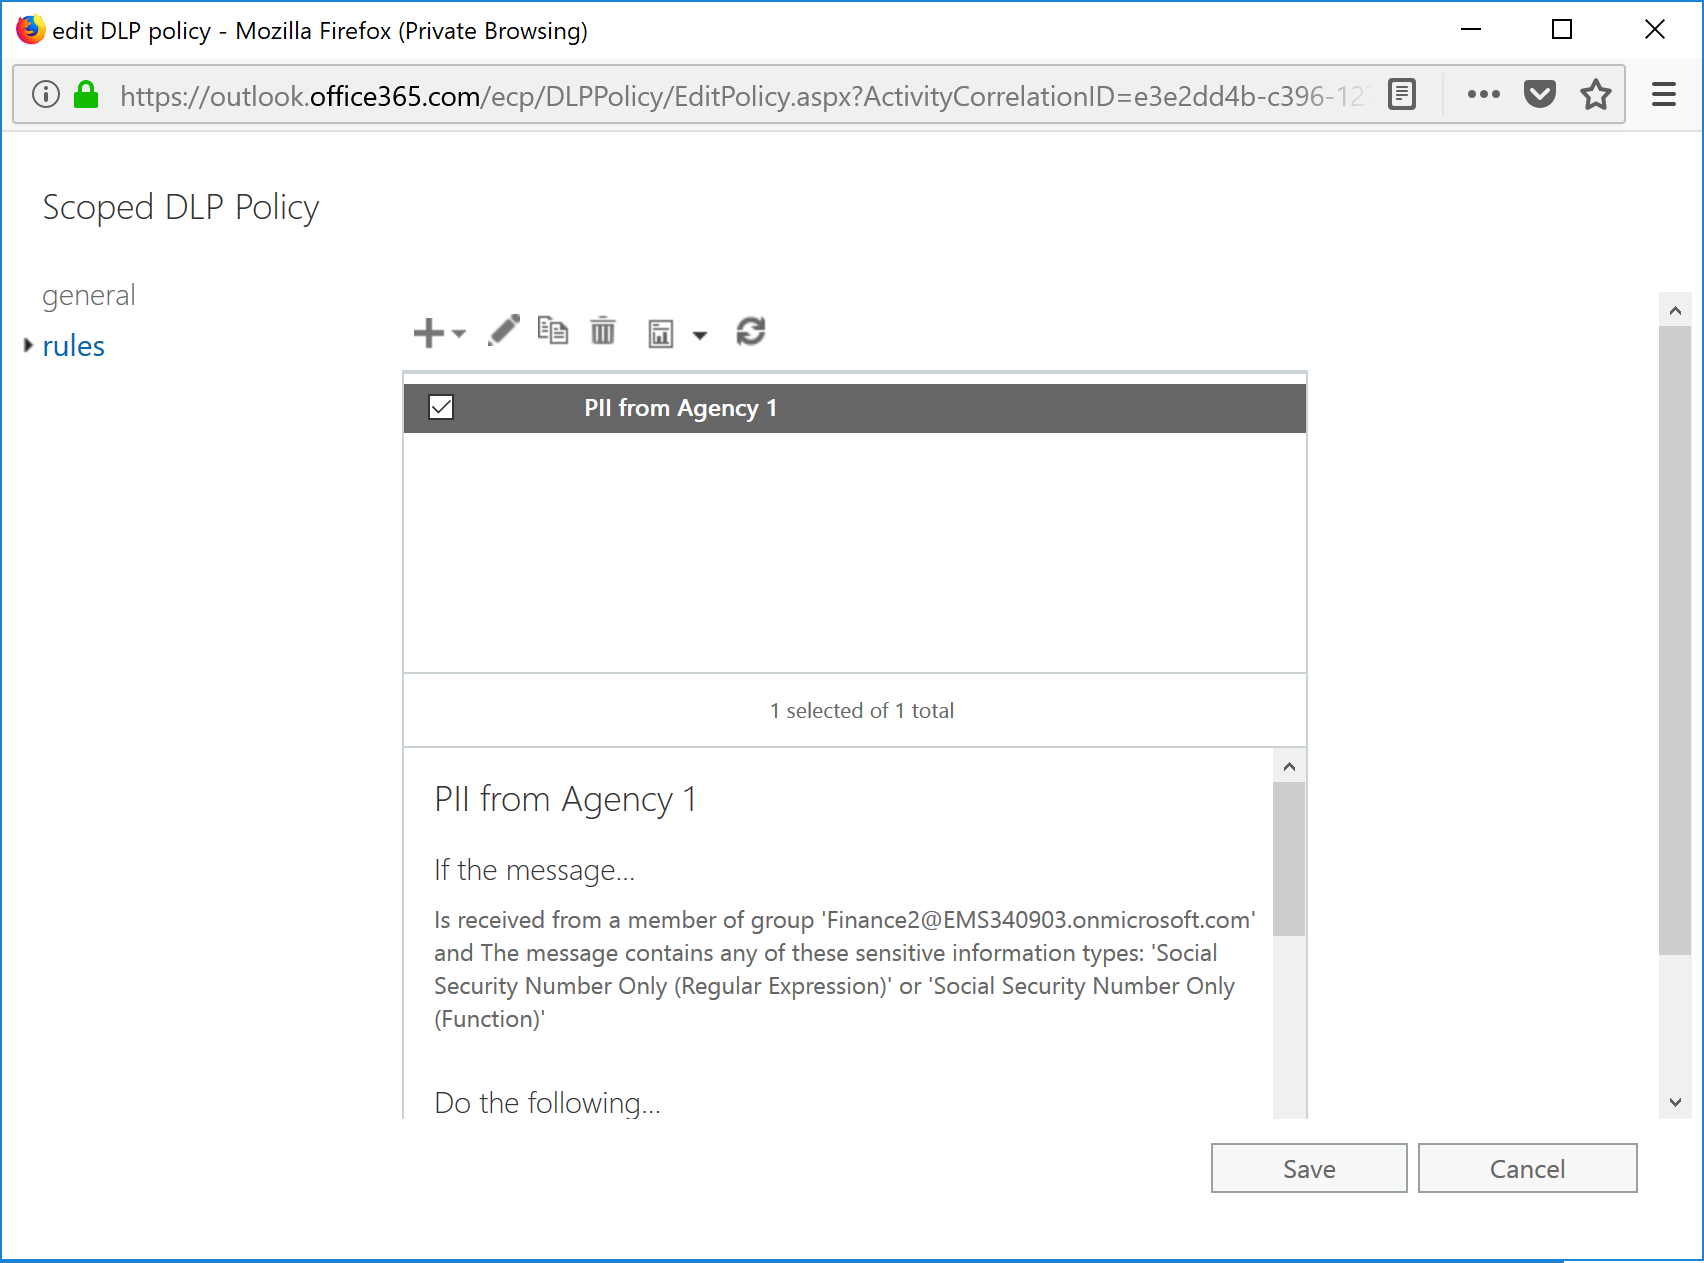
- Name the custom policy, select Test with policy tips and then click Save.
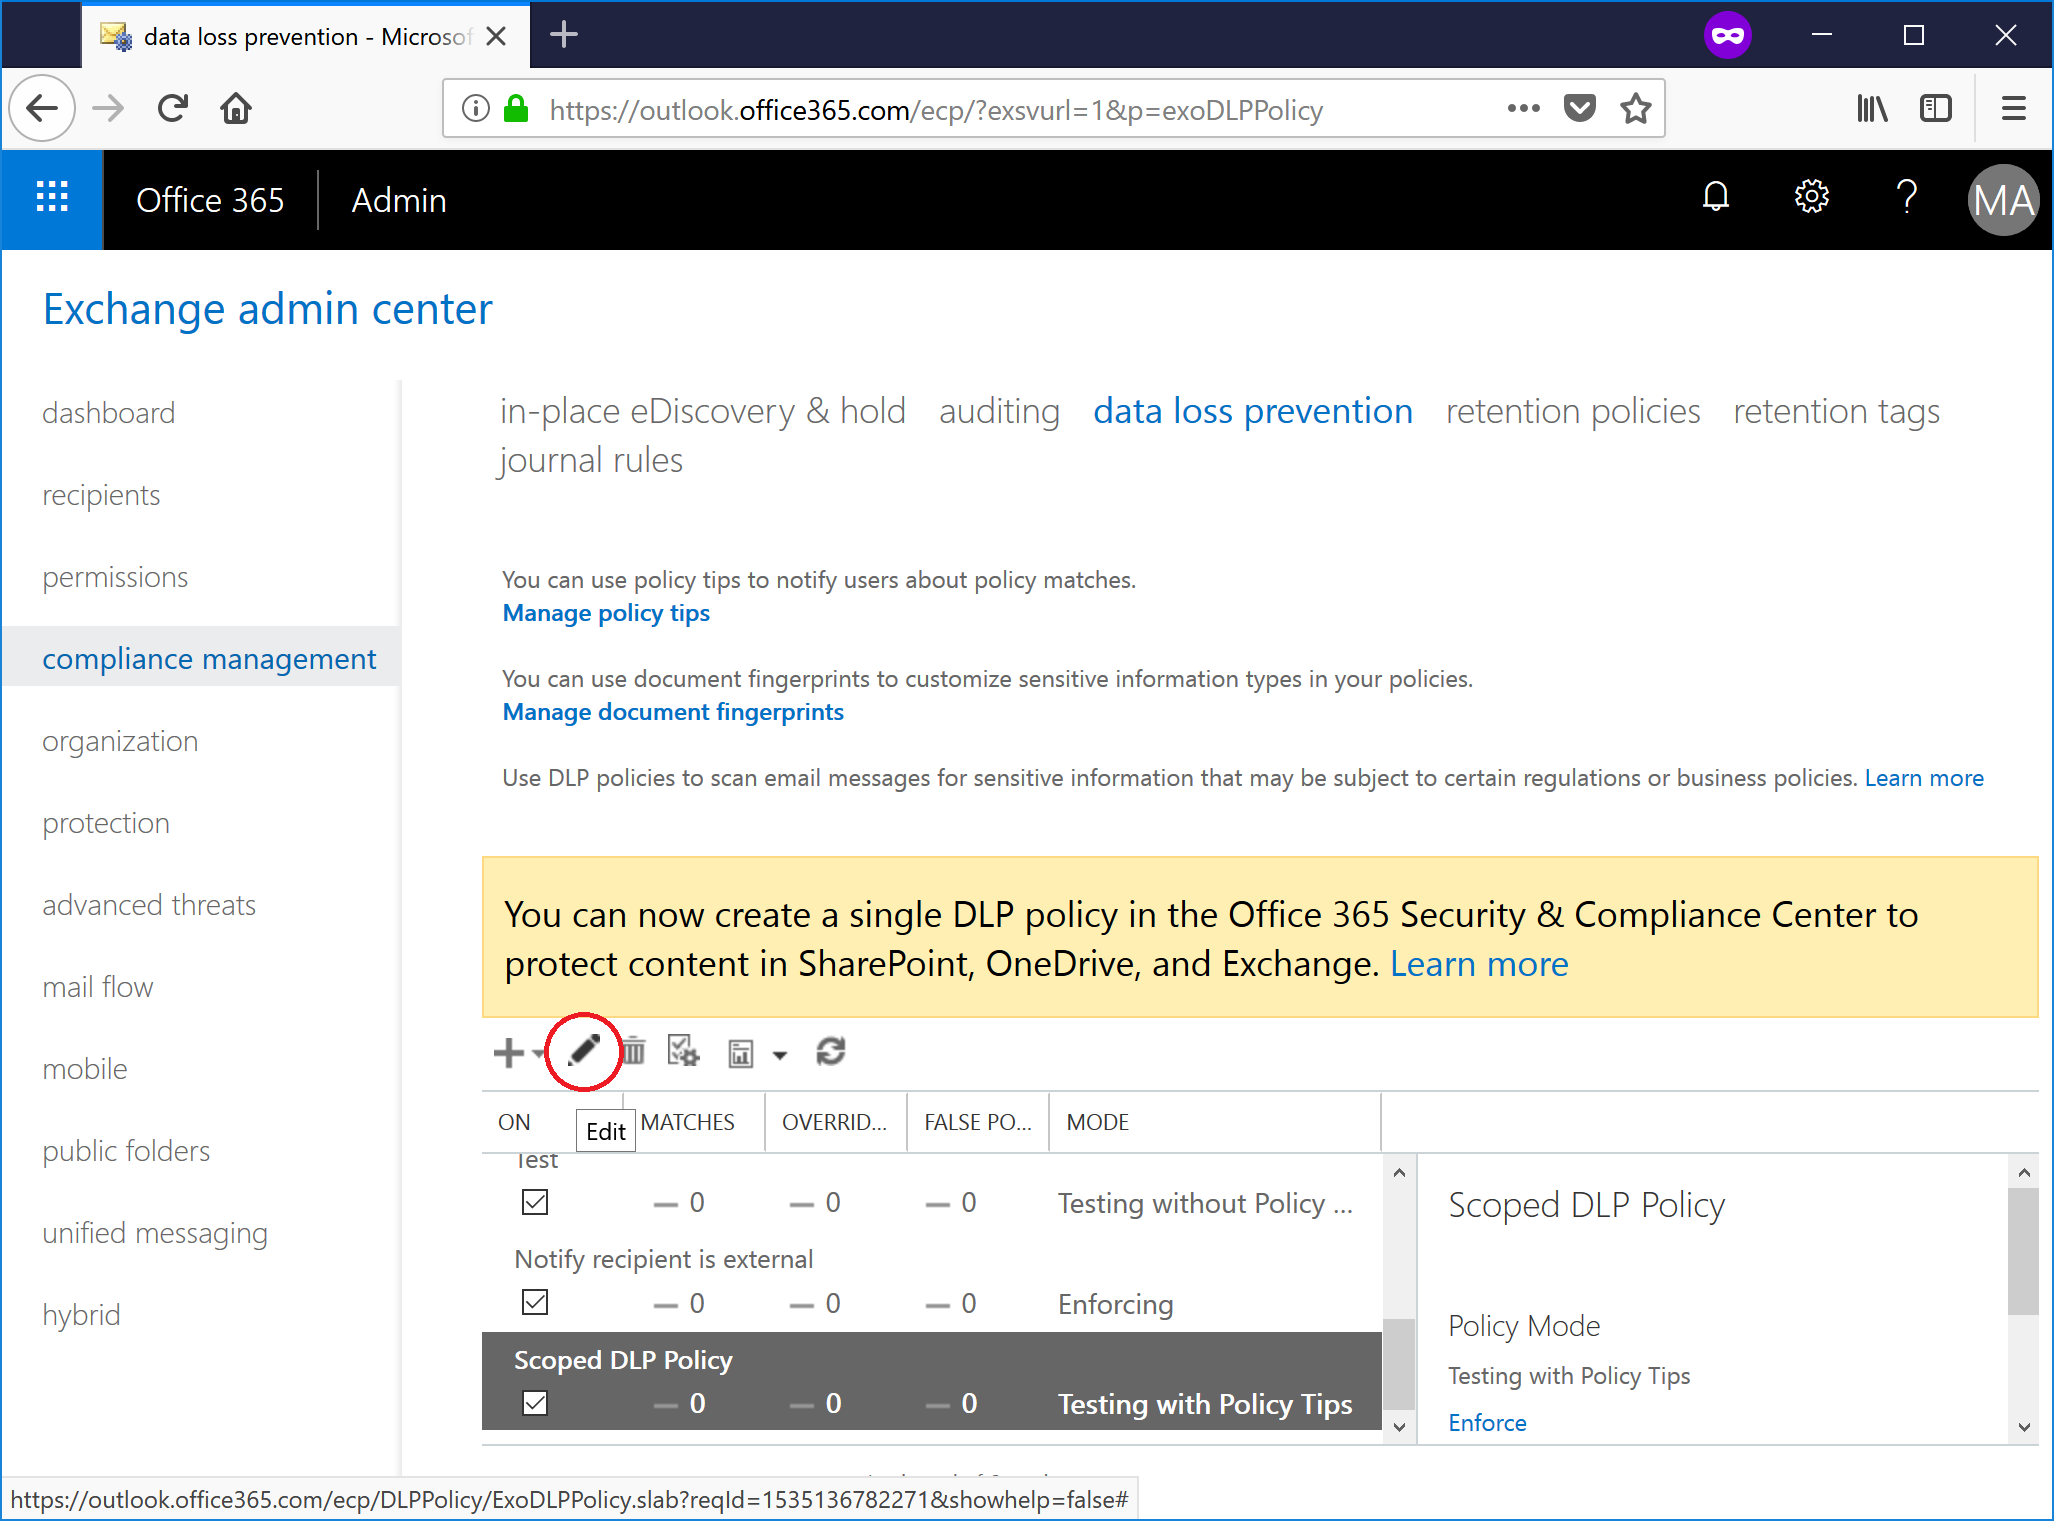
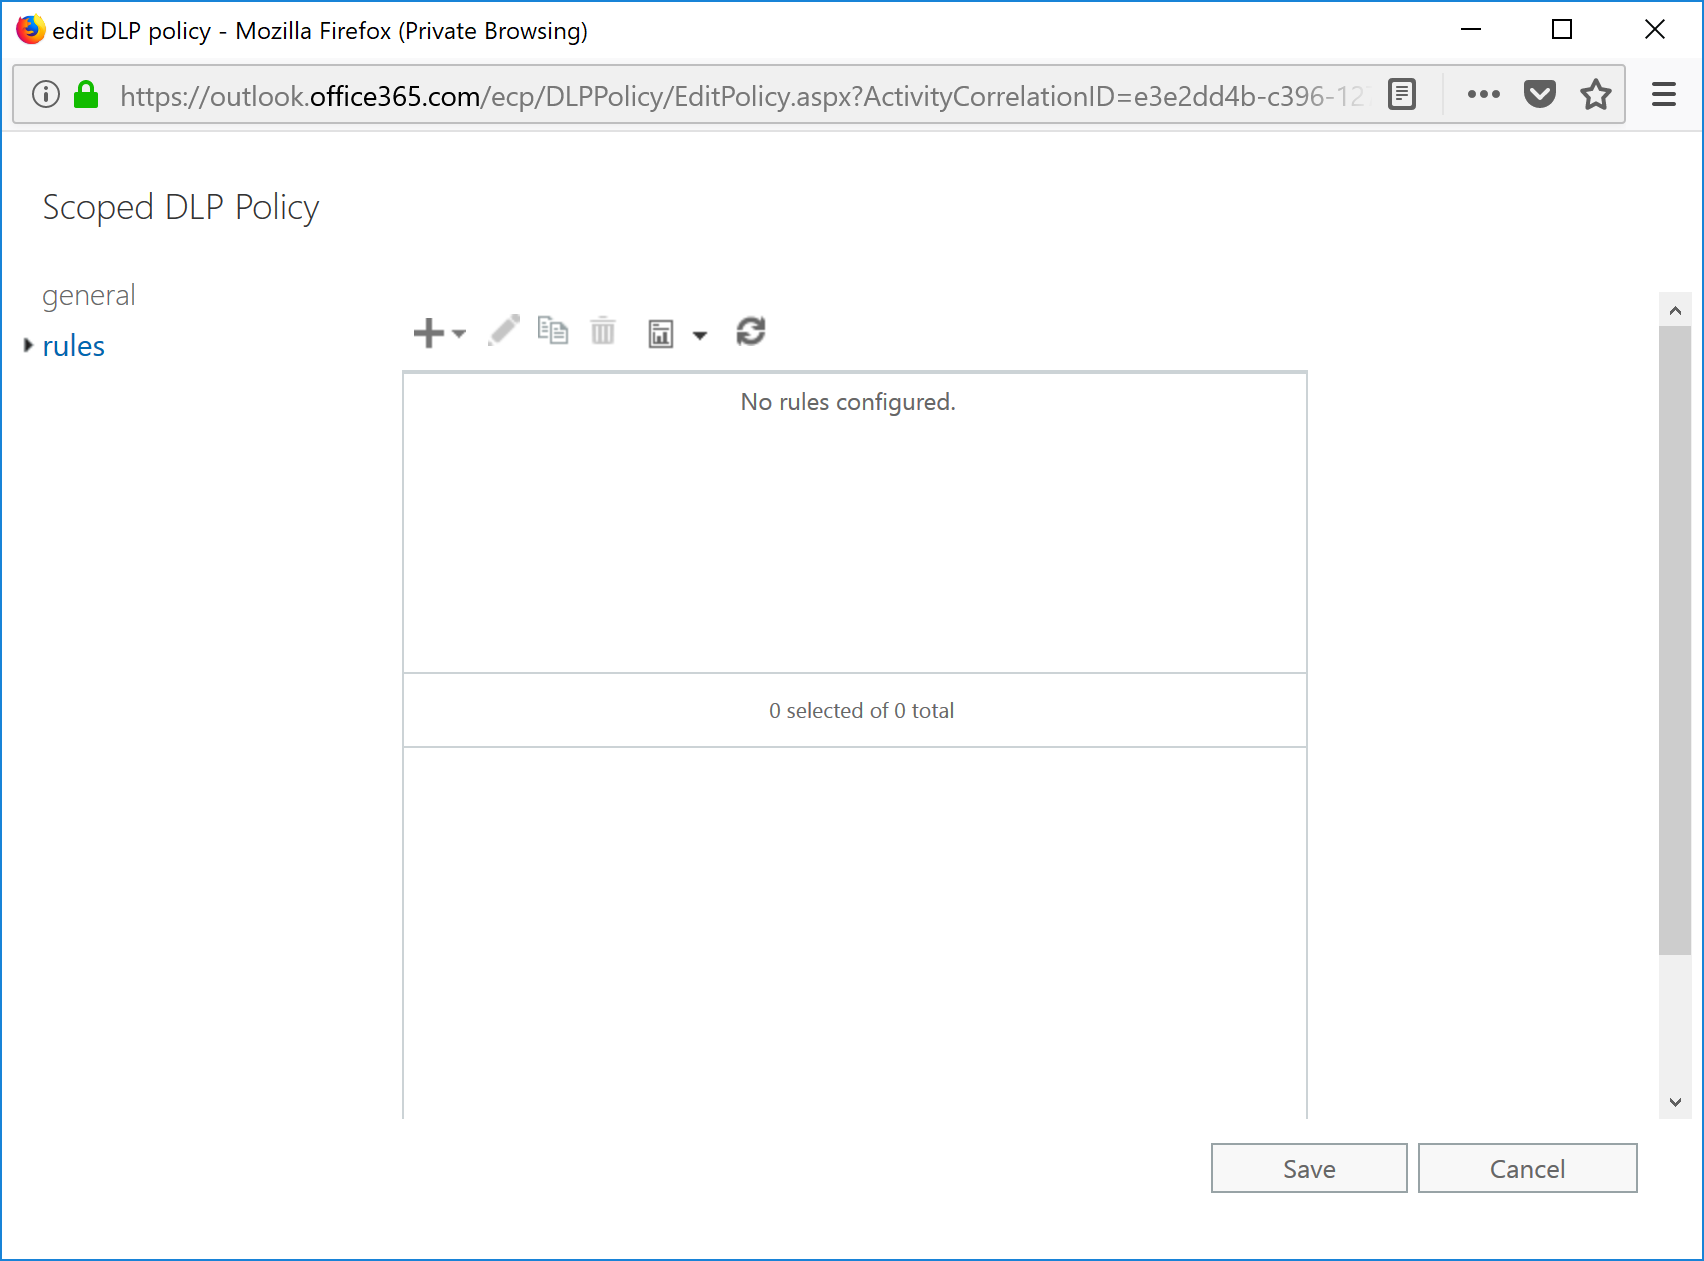
- Select the policy in the list, and then click the Edit (pencil icon) button.
- Select the Rules tab.
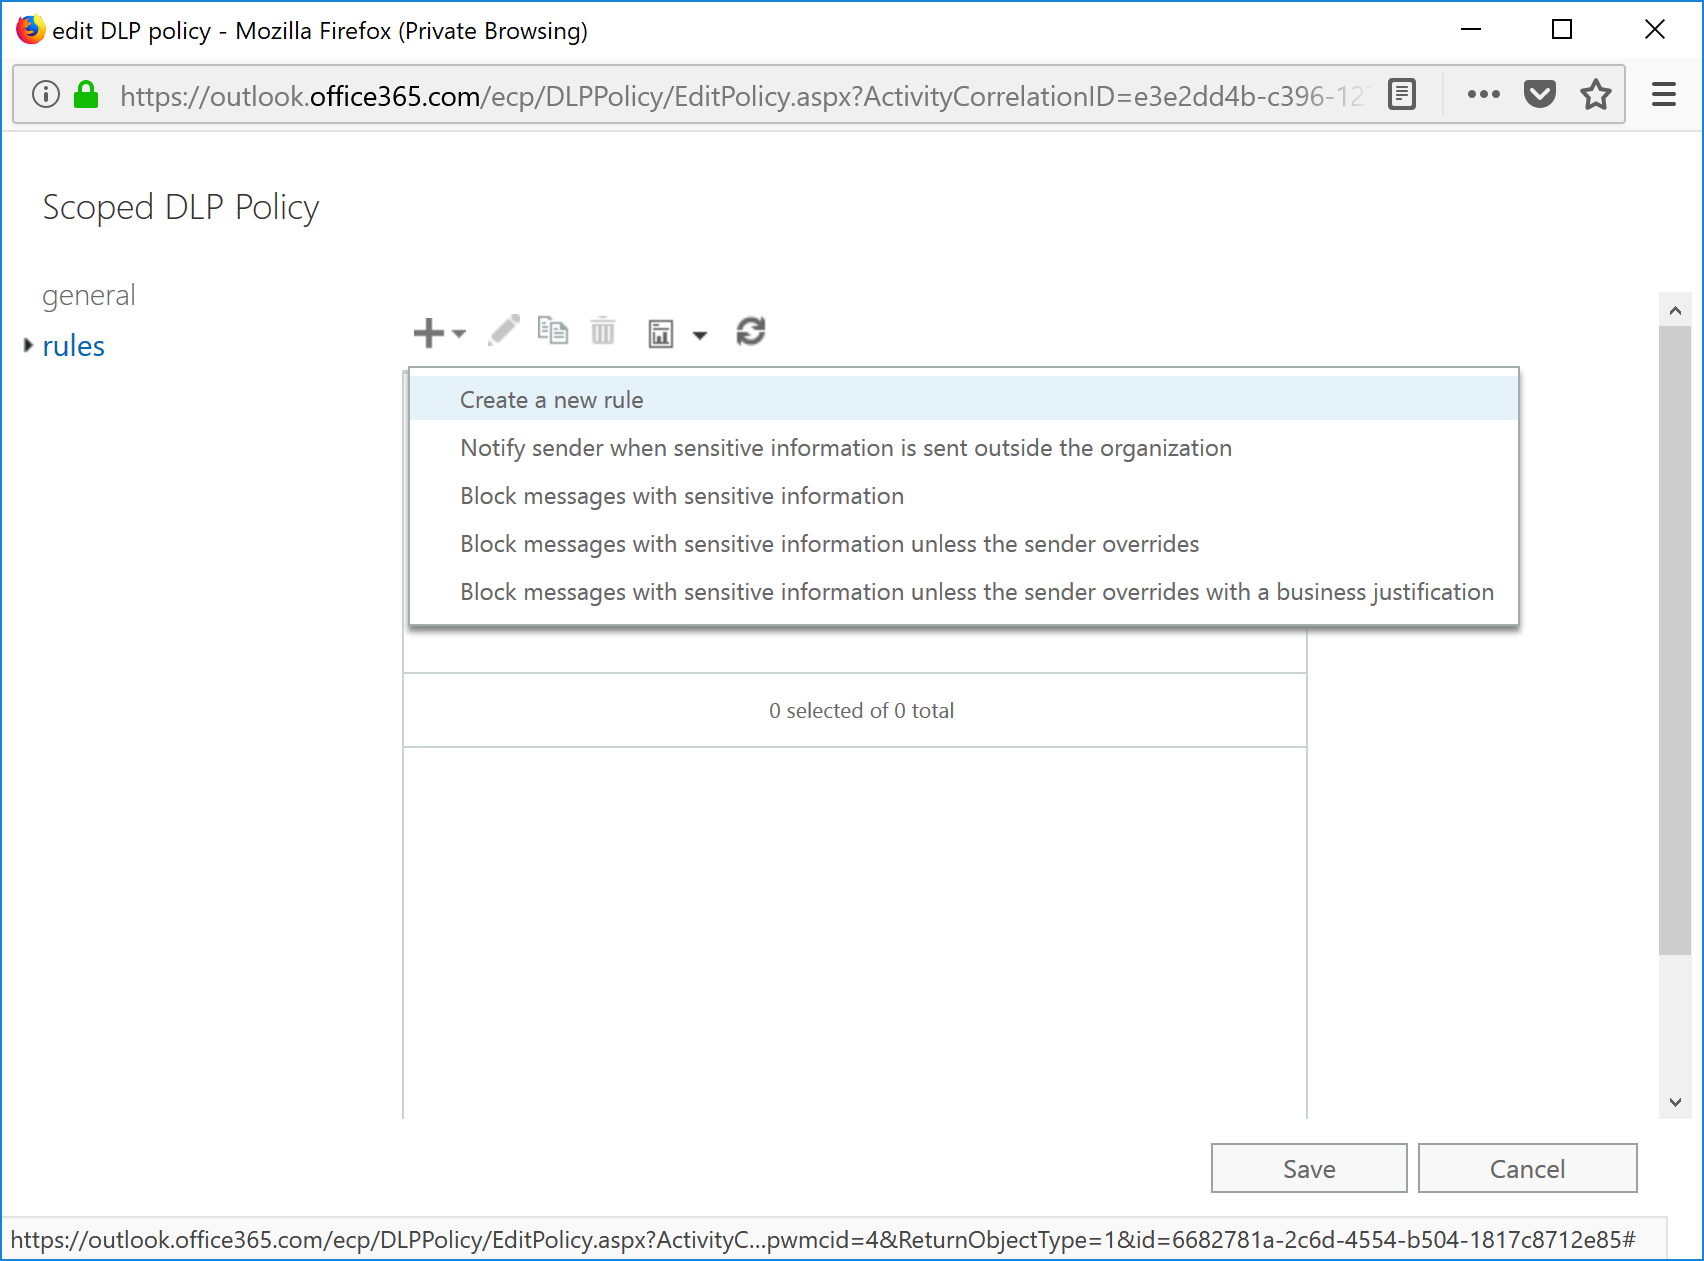
- Click + and select Create a new rule.
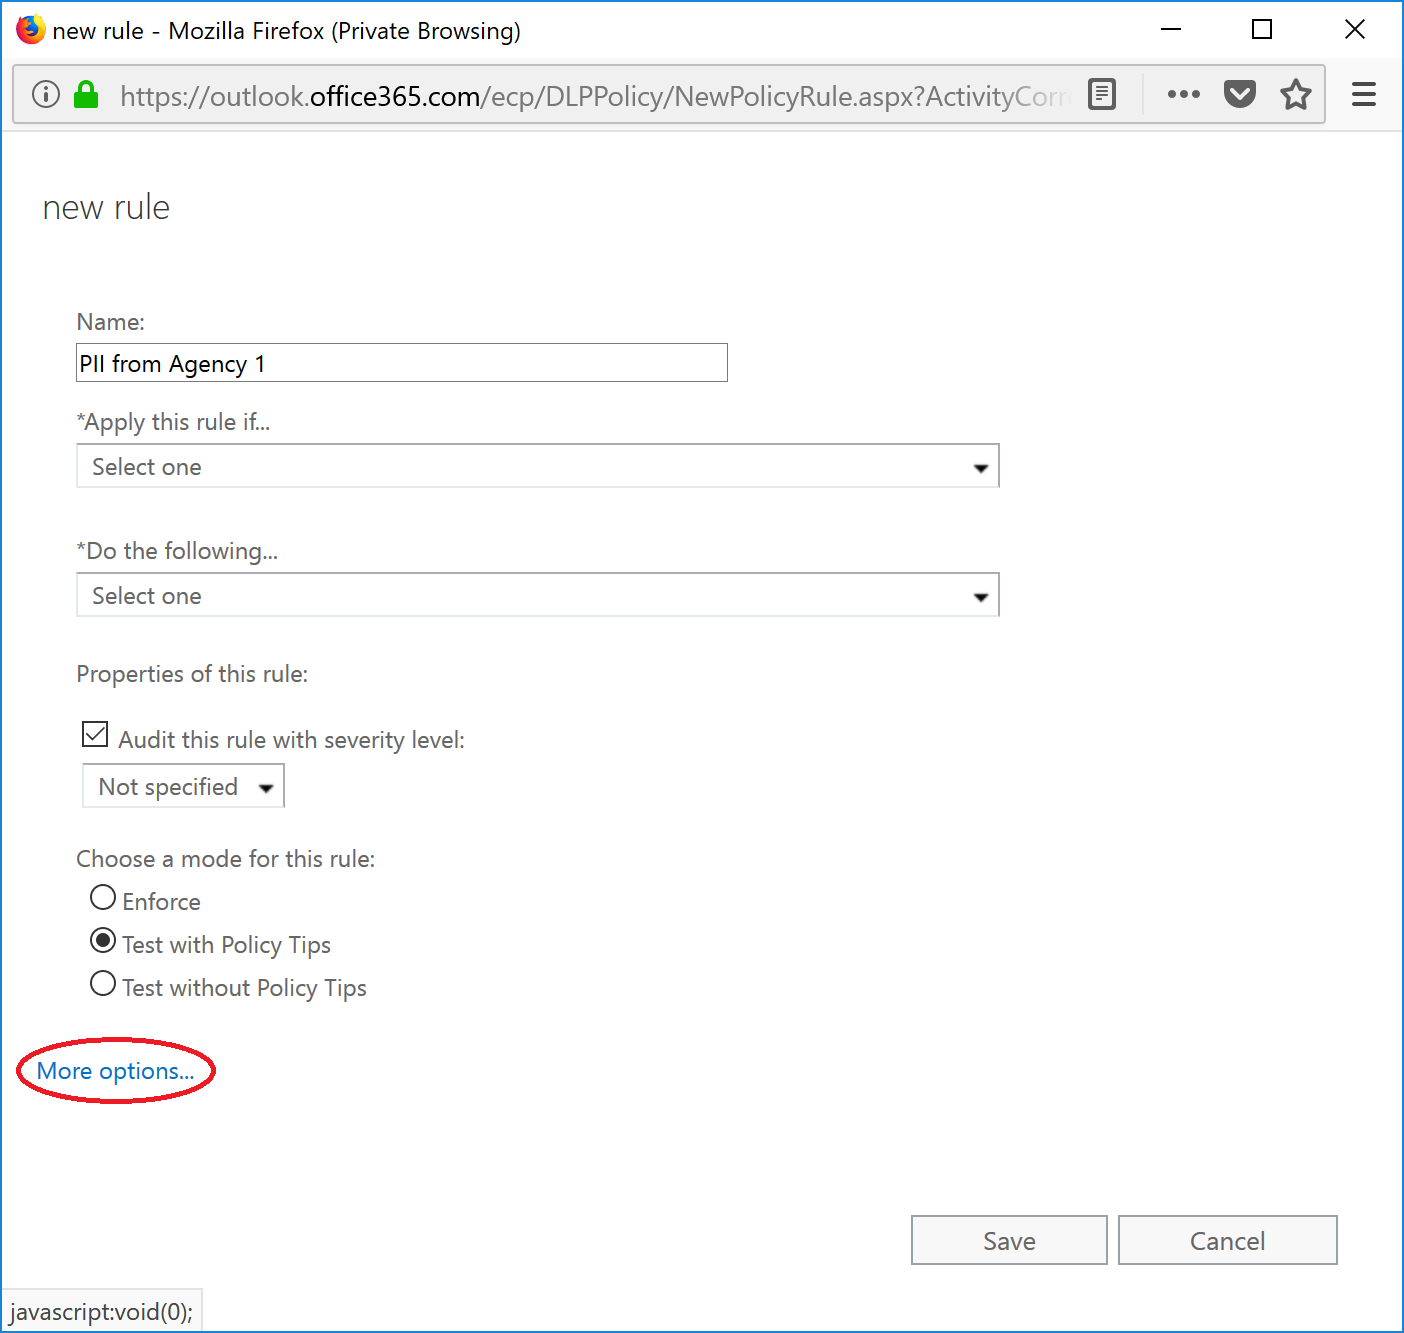
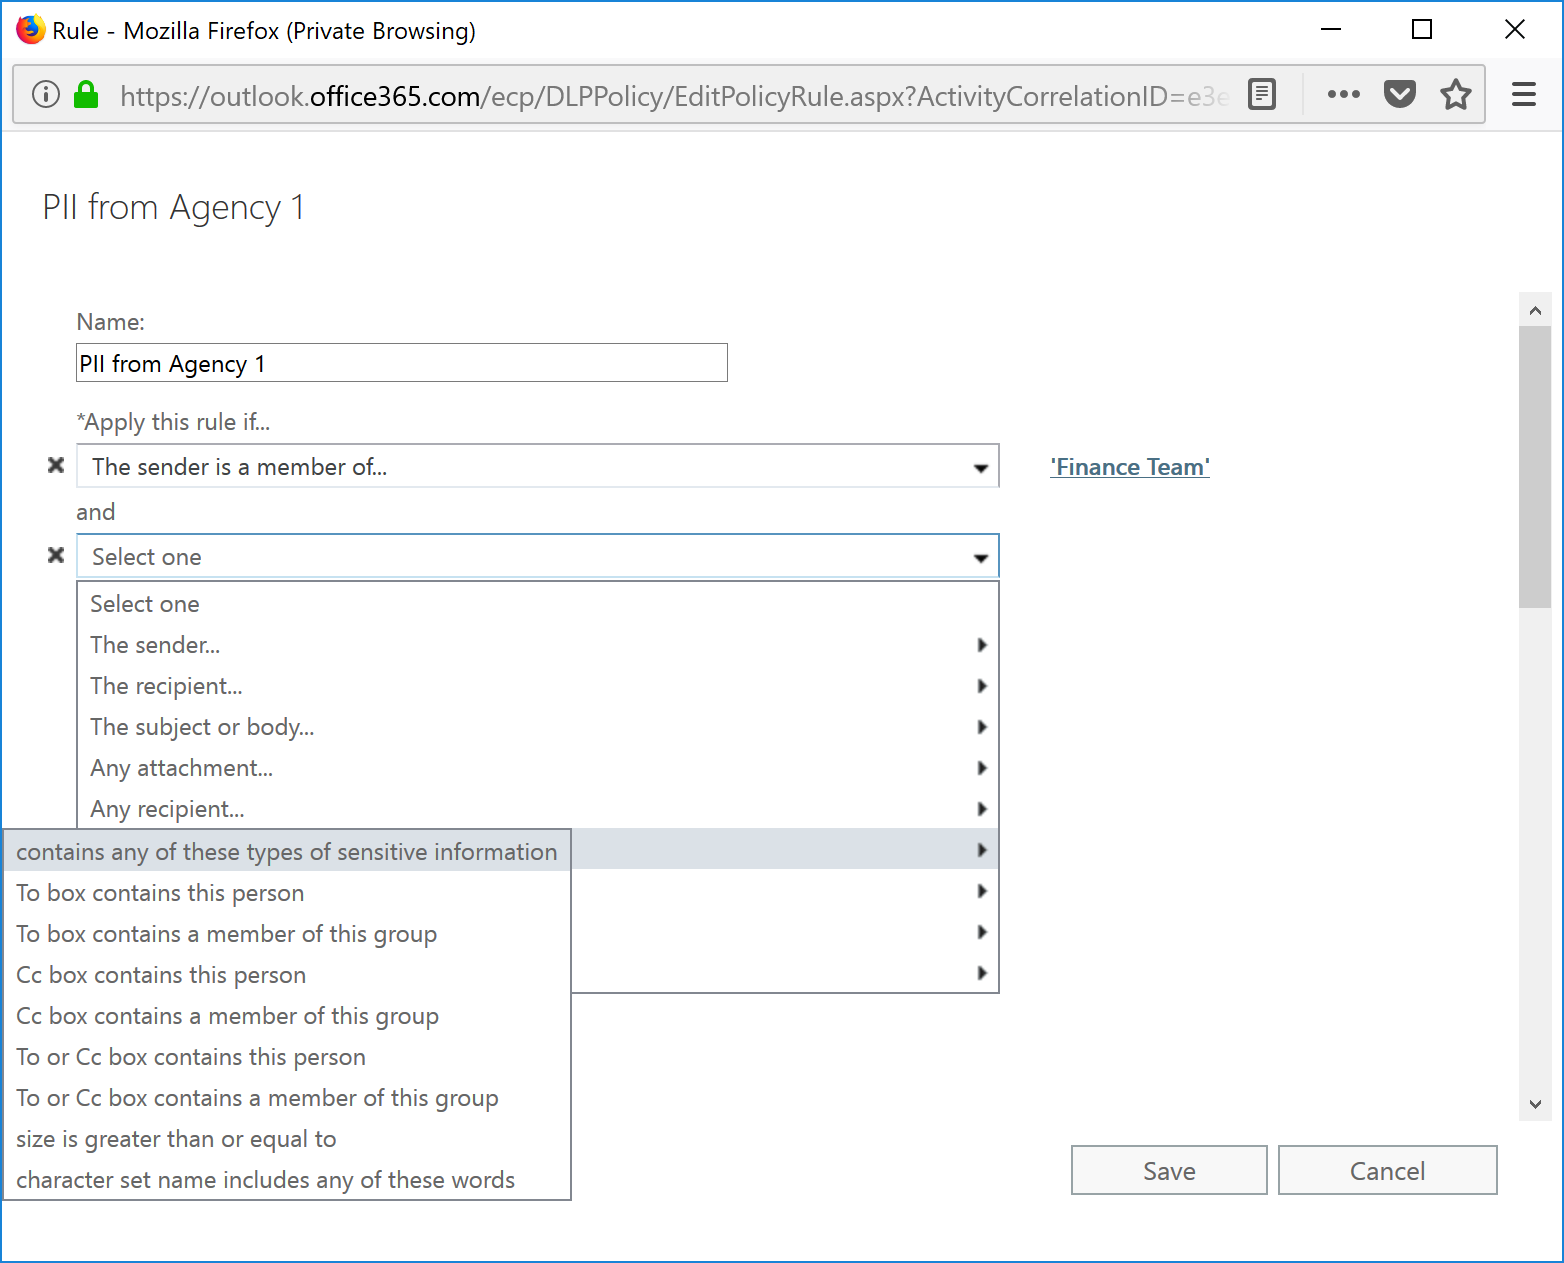
- Enter a name for the rule, and then select More options ... at the bottom of the page to expose more configuration options for the rule.
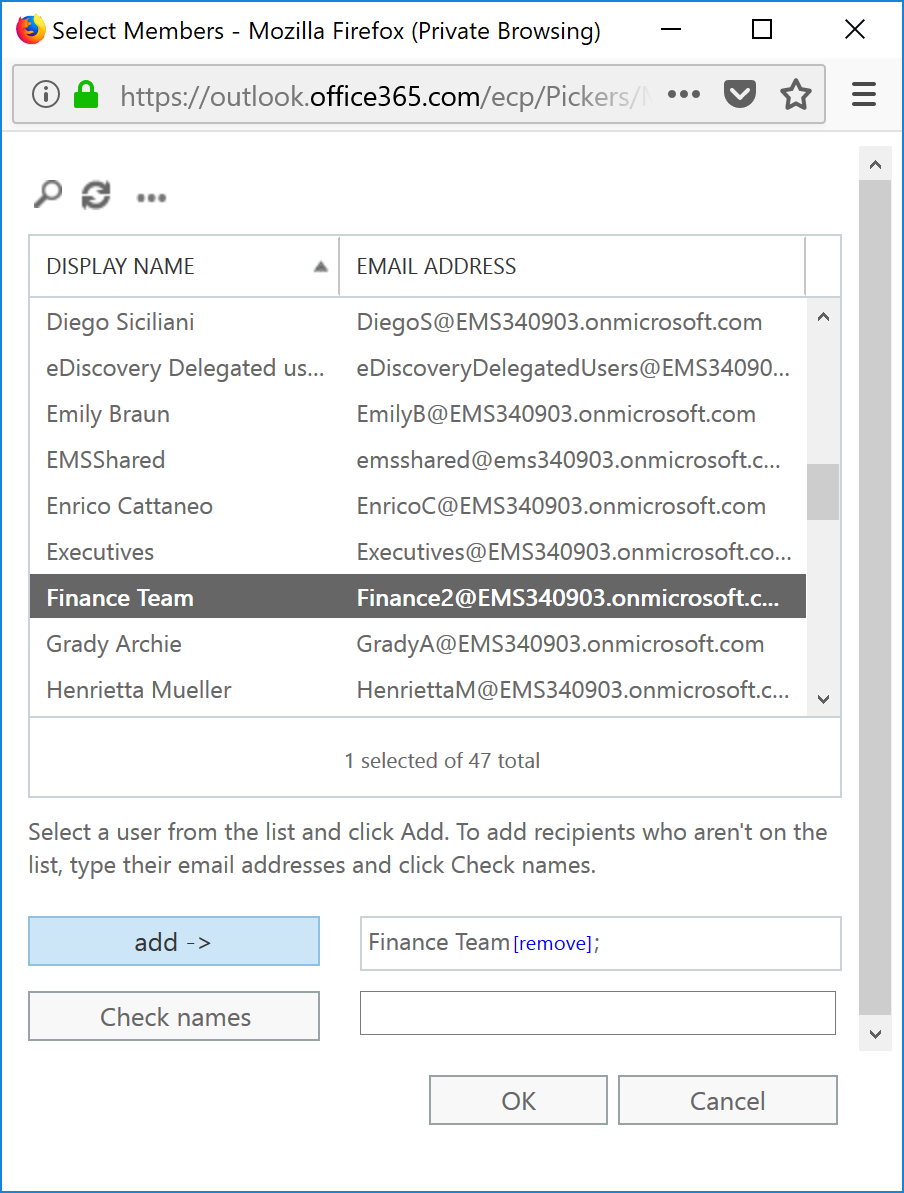
- Select a method to identify senders. For example, you can use text or pattern matches, domains, or additional properties. In this example, I'm going to select Sender is a Member of a Group . Note: If you want to use "Notify the sender with a policy tip" action, you cannot select Sender Domain Is or Sender Address Matches Patterns as conditions. You have to choose different selection criteria, such as "Inside Organization" or "Member of a group."
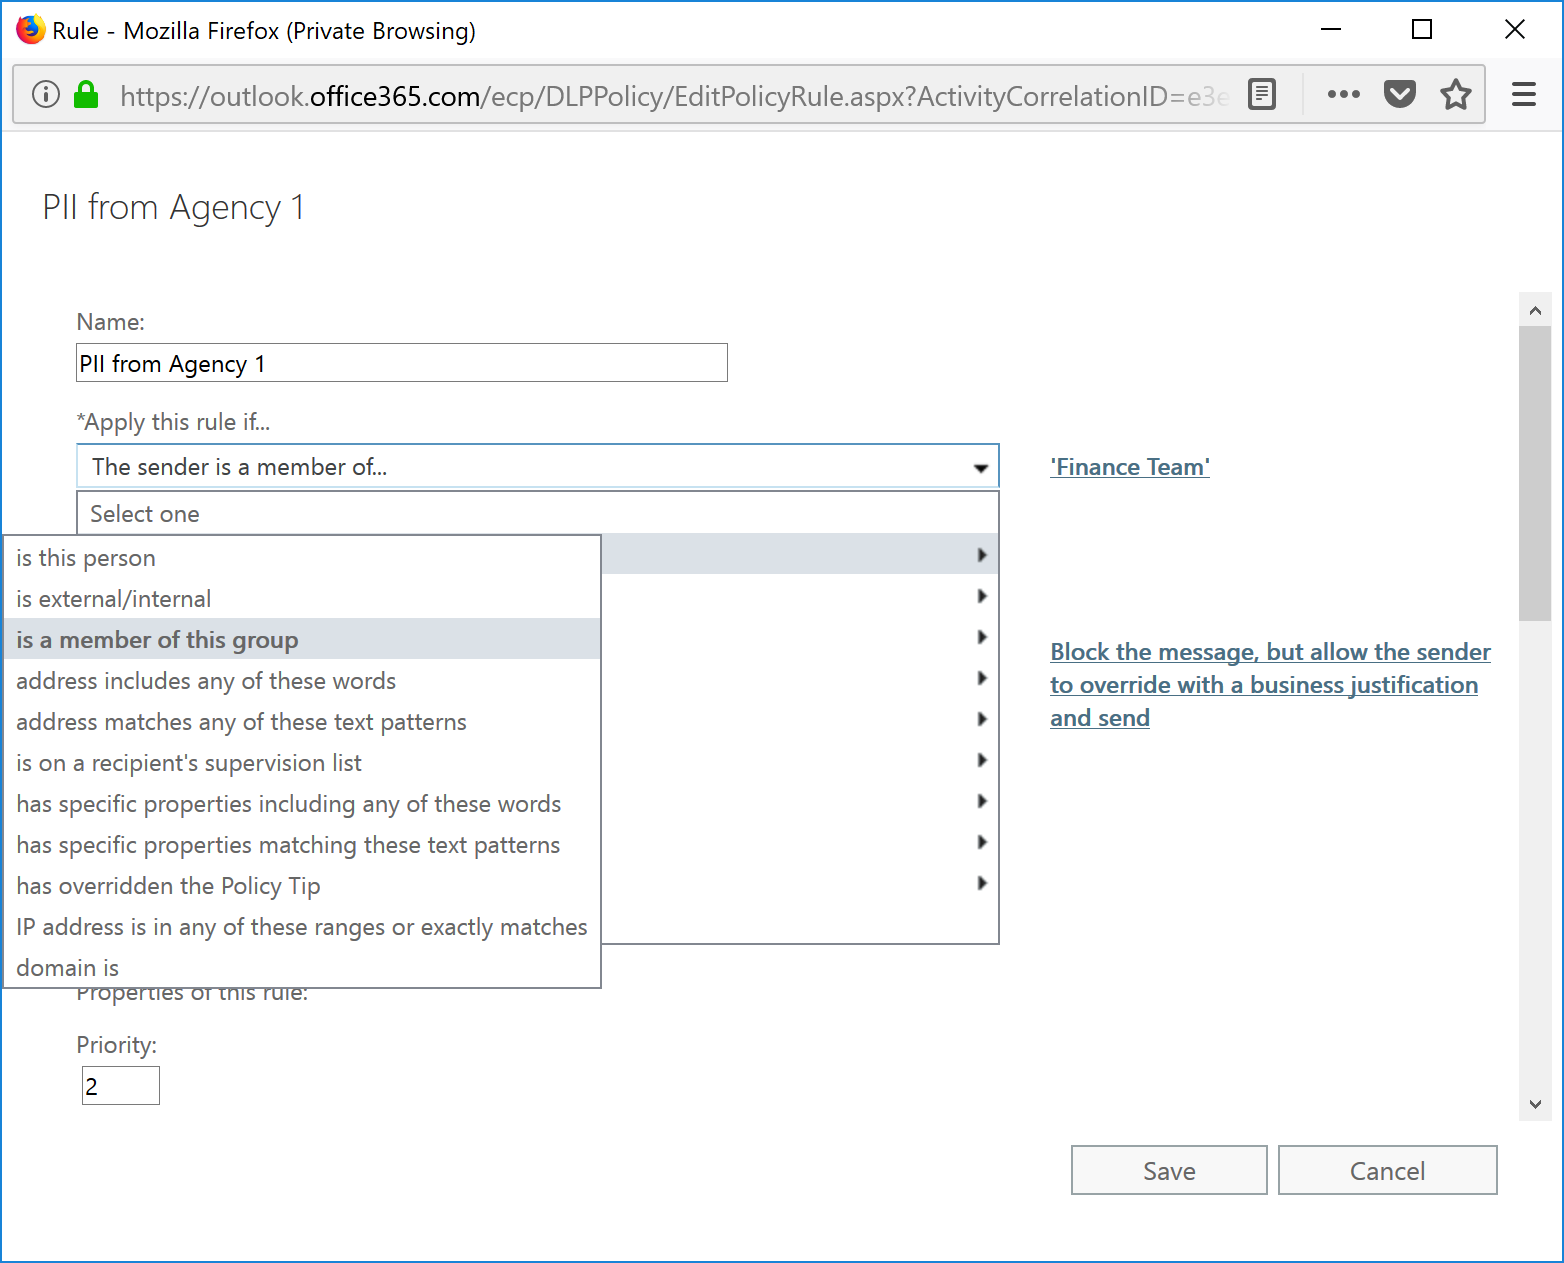
- Select a group, and then click the Add to add it to the list of groups to be included as conditions of this rule. Click OK when finished.
- Select the Add Condition button to add another condition to search for.
- Select The message ... and then select contains any of these sensitive information types.
- On the Contains any of these sensitive information types page, click + .

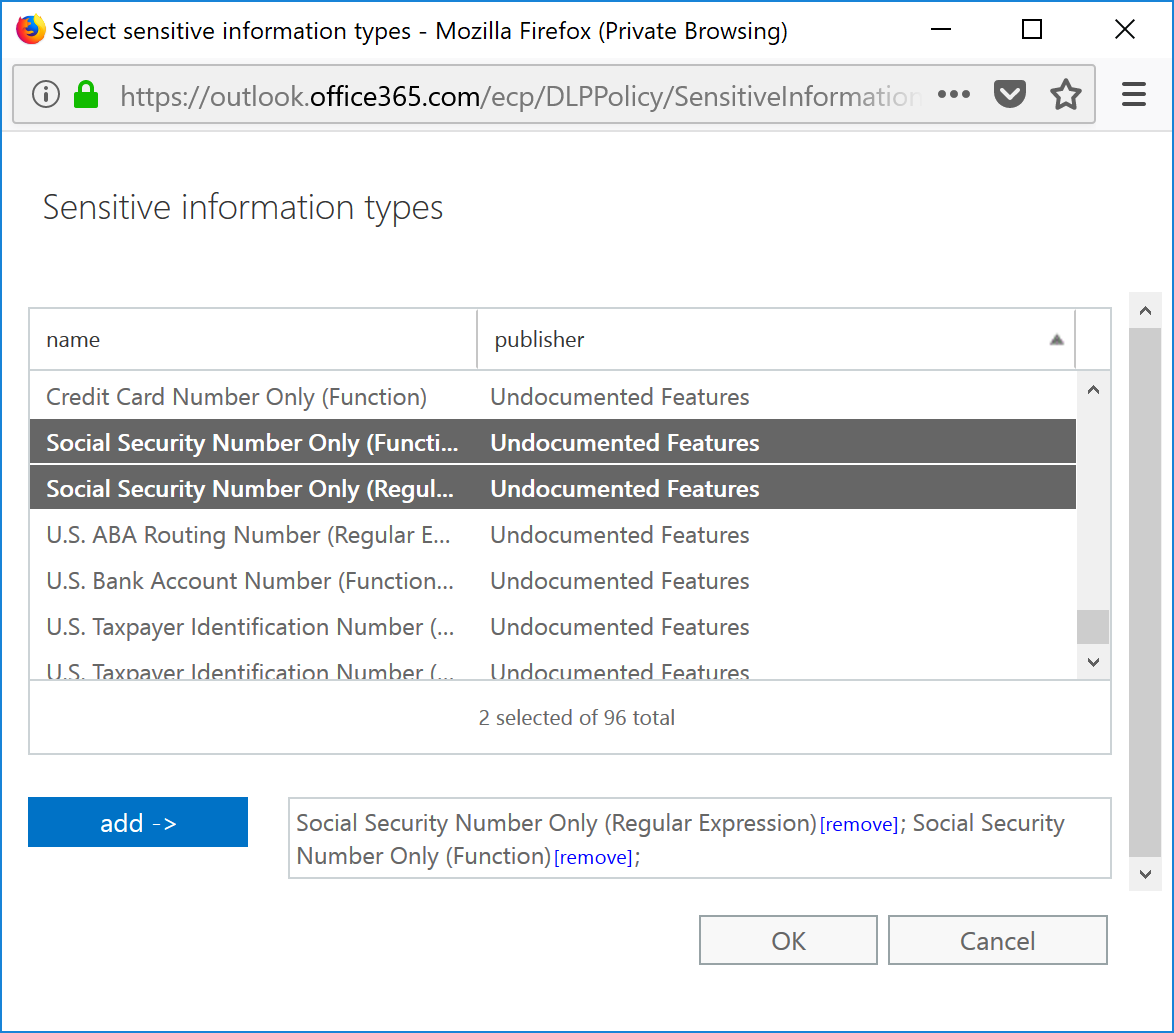
- Select the custom sensitive information types from the list, and then click Add.
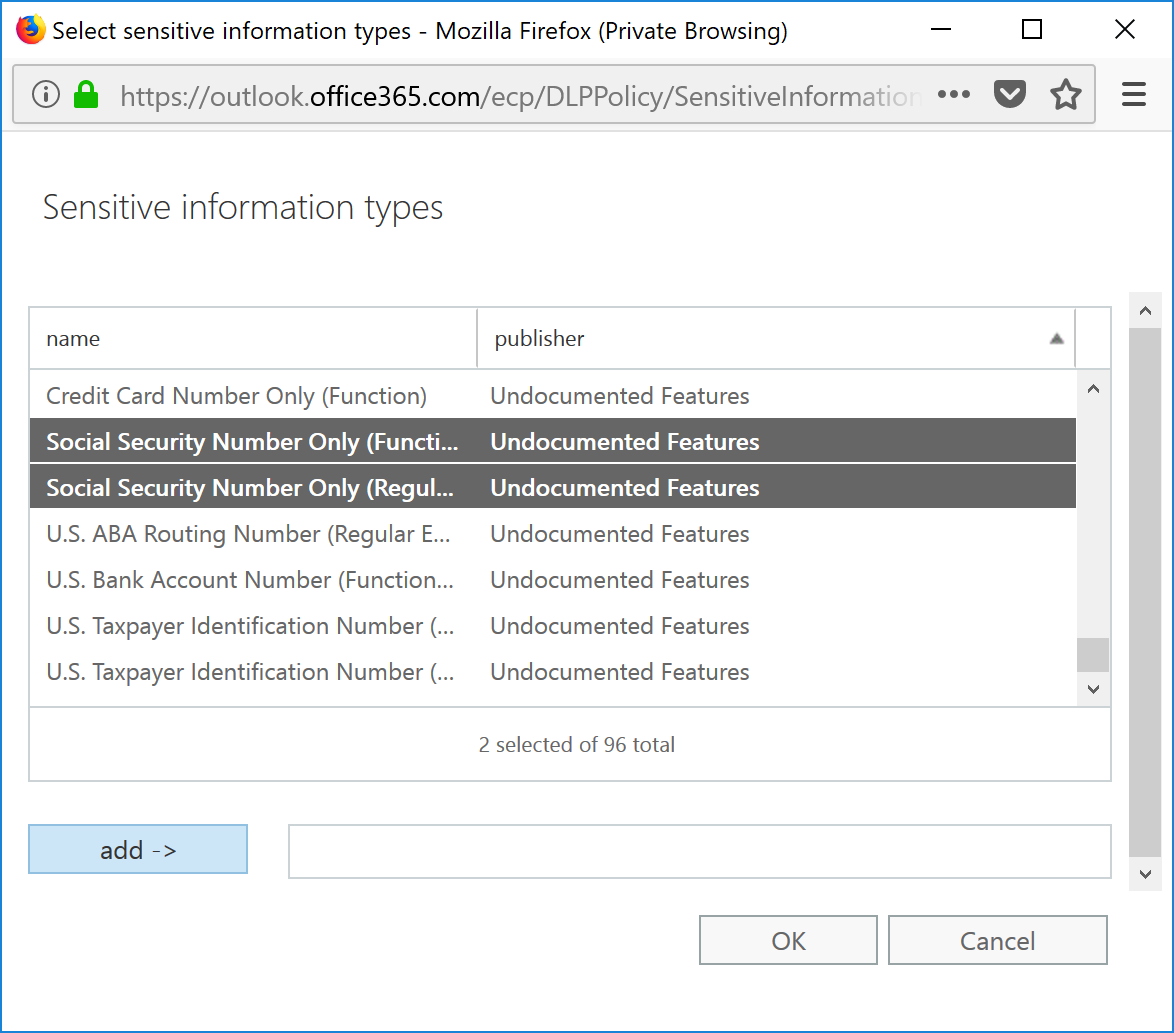
- Select OK to add the sensitive information types to the rule.
- Click OK to complete the rule conditions.

- Add one or more actions. Recommended actions might be to Forward the message for approval to a manager, Encrypt, or Notify the sender with a Policy Tip. In this example, I selected Notify the sender with a Policy Tip, and then selected Block the message, but allow the sender to override with a business justification and send.
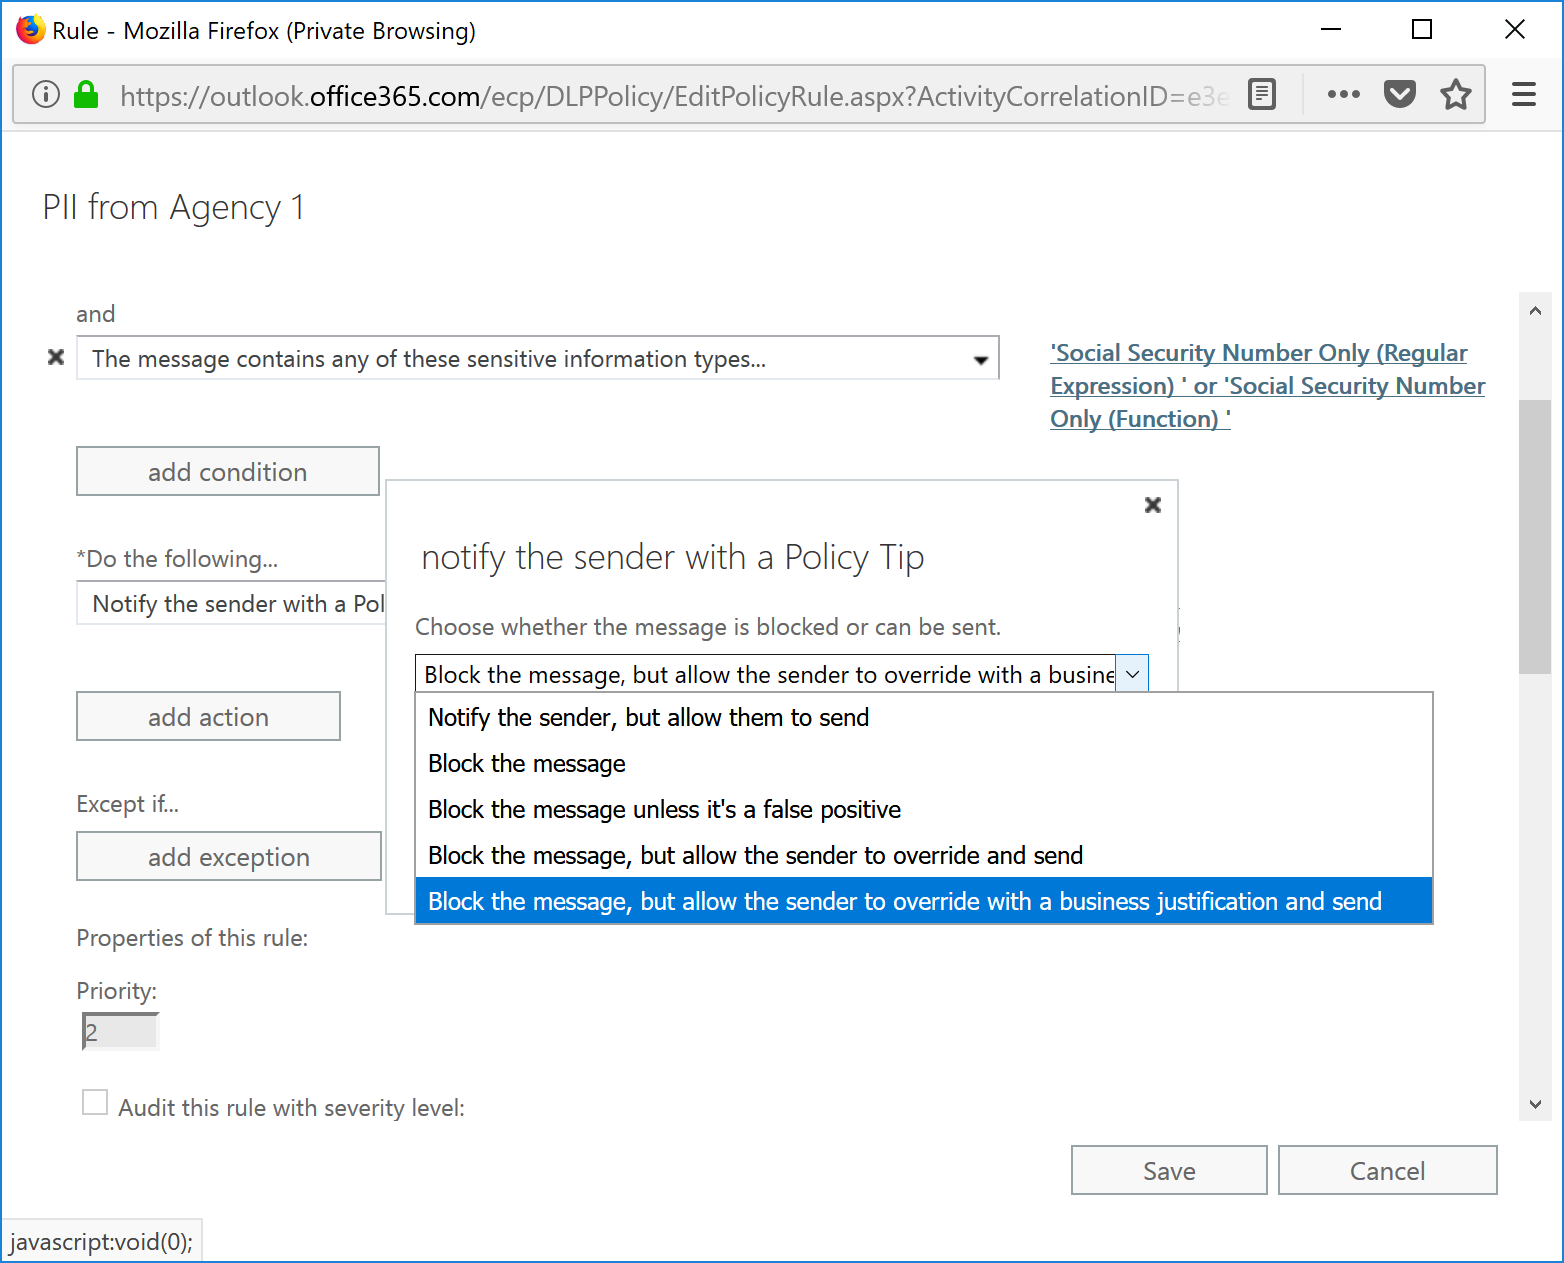
- Add an NDR that users will receive if an override justification isn't given and click OK.

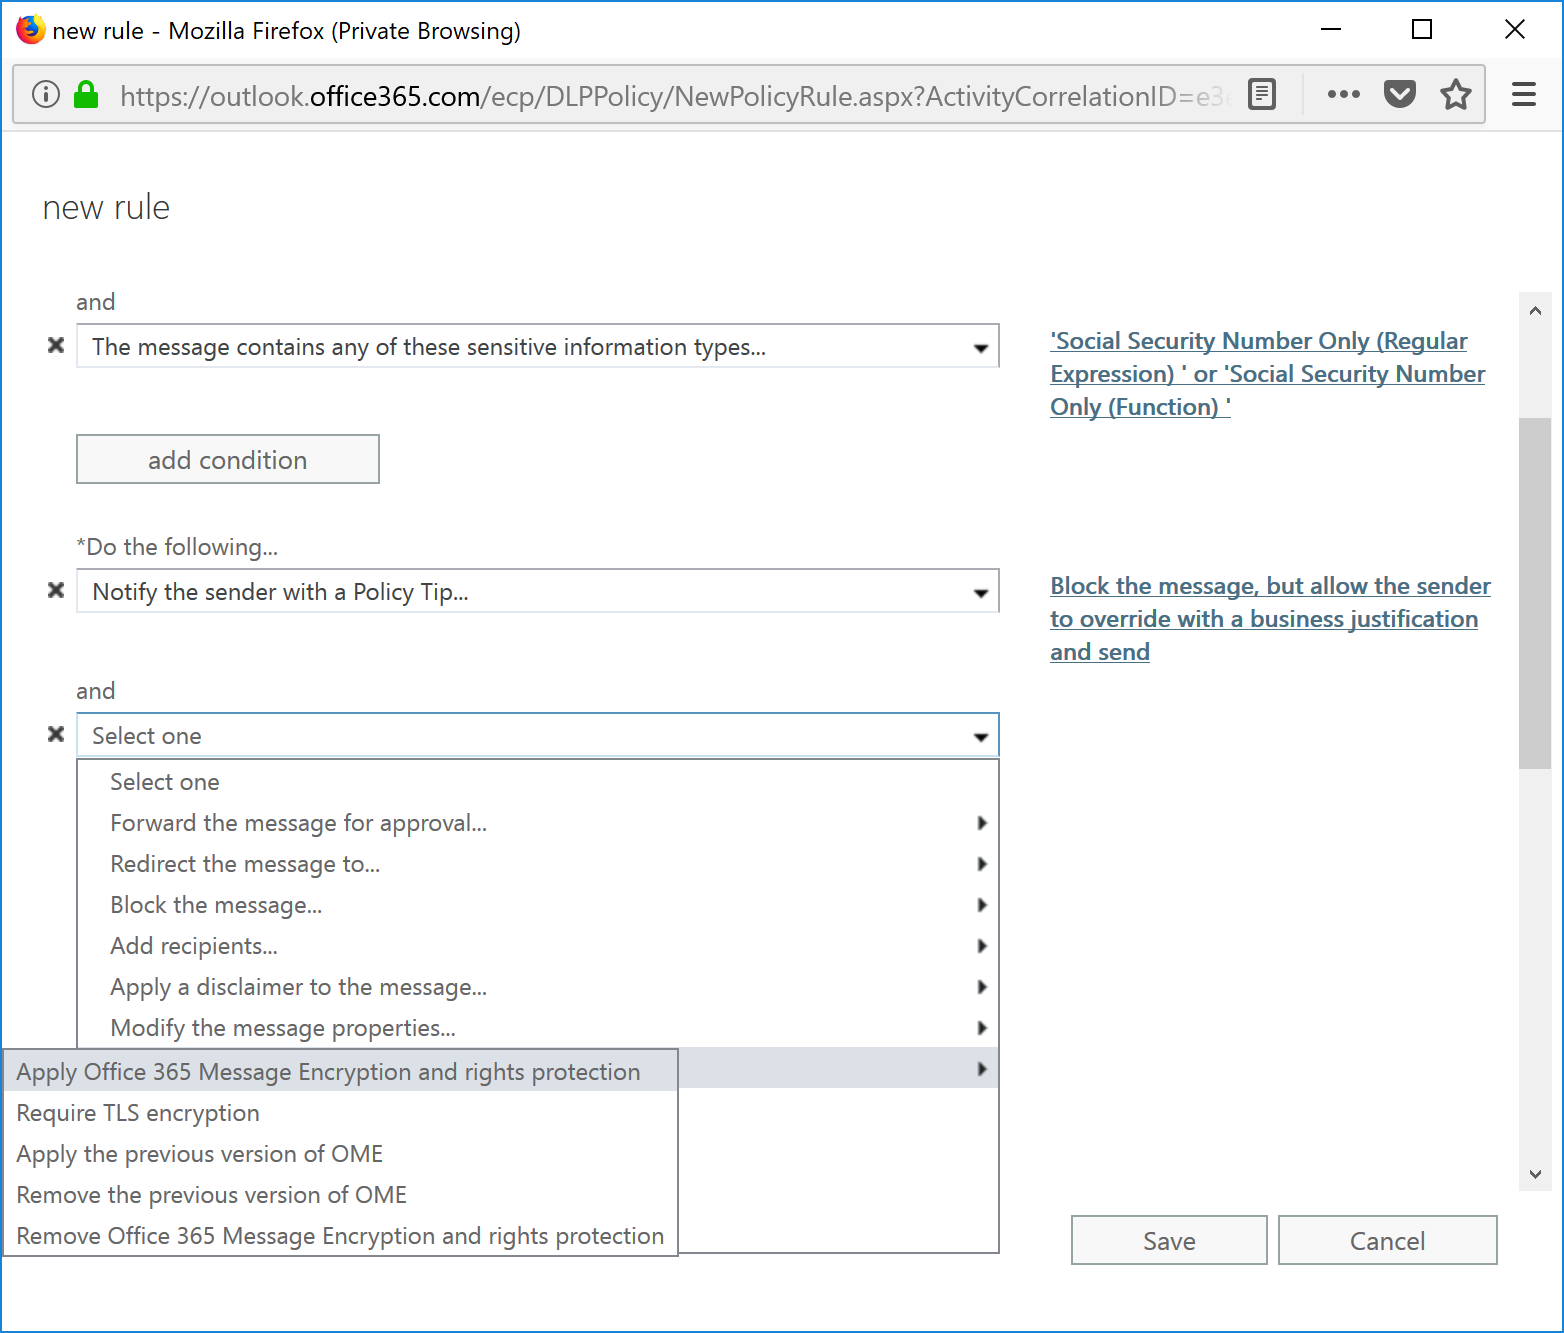
- Select Add Action if any additional action is needed. In this example, I'm going to select Modify the Message Security | Apply Office 365 Message Encryption and rights protection.
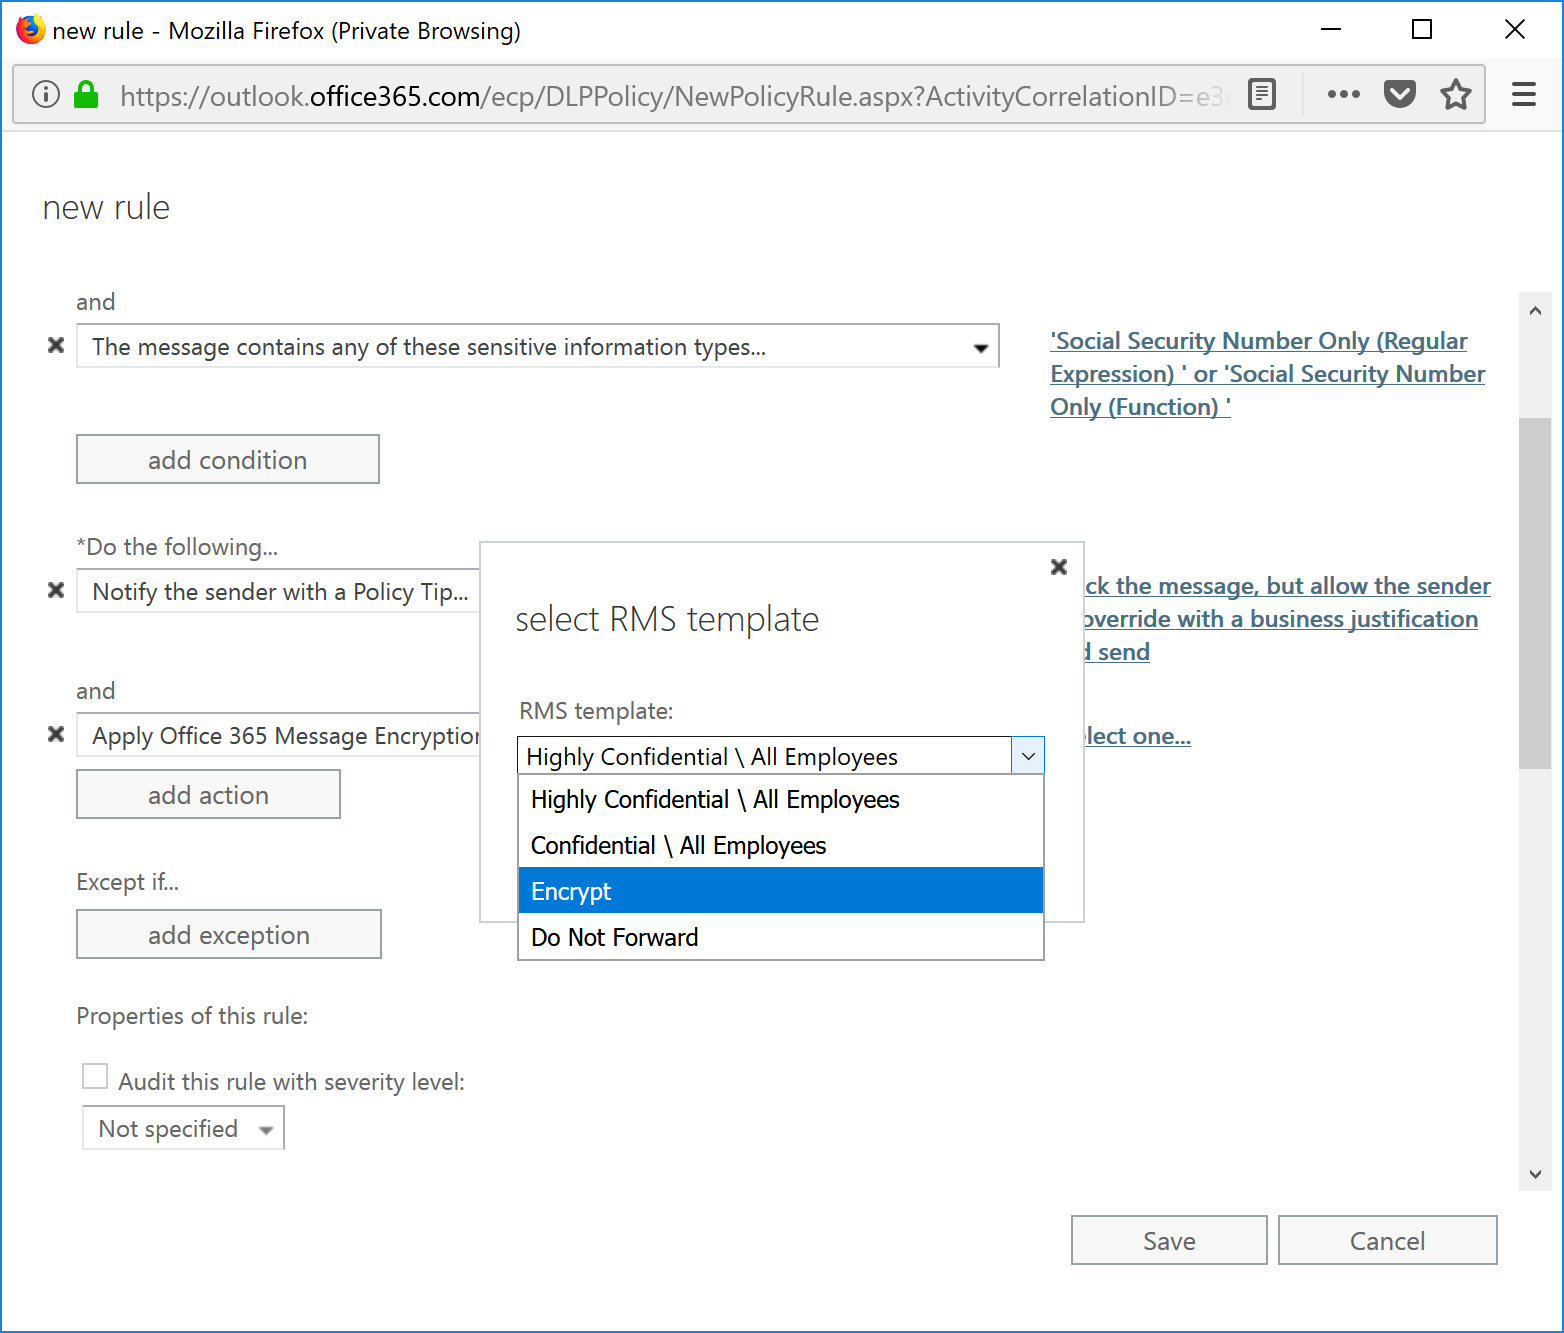
- Select a template and click OK.
- Add Exceptions, if any. I want to put the hammer down on folks, so no exceptions here.
- Select the mode for the rule. I generally start Test with Policy Tips to start, and then move to Enforce after making sure it triggers appropriately.
- Under Match sender address in message, select Header or envelope, and then click Save.
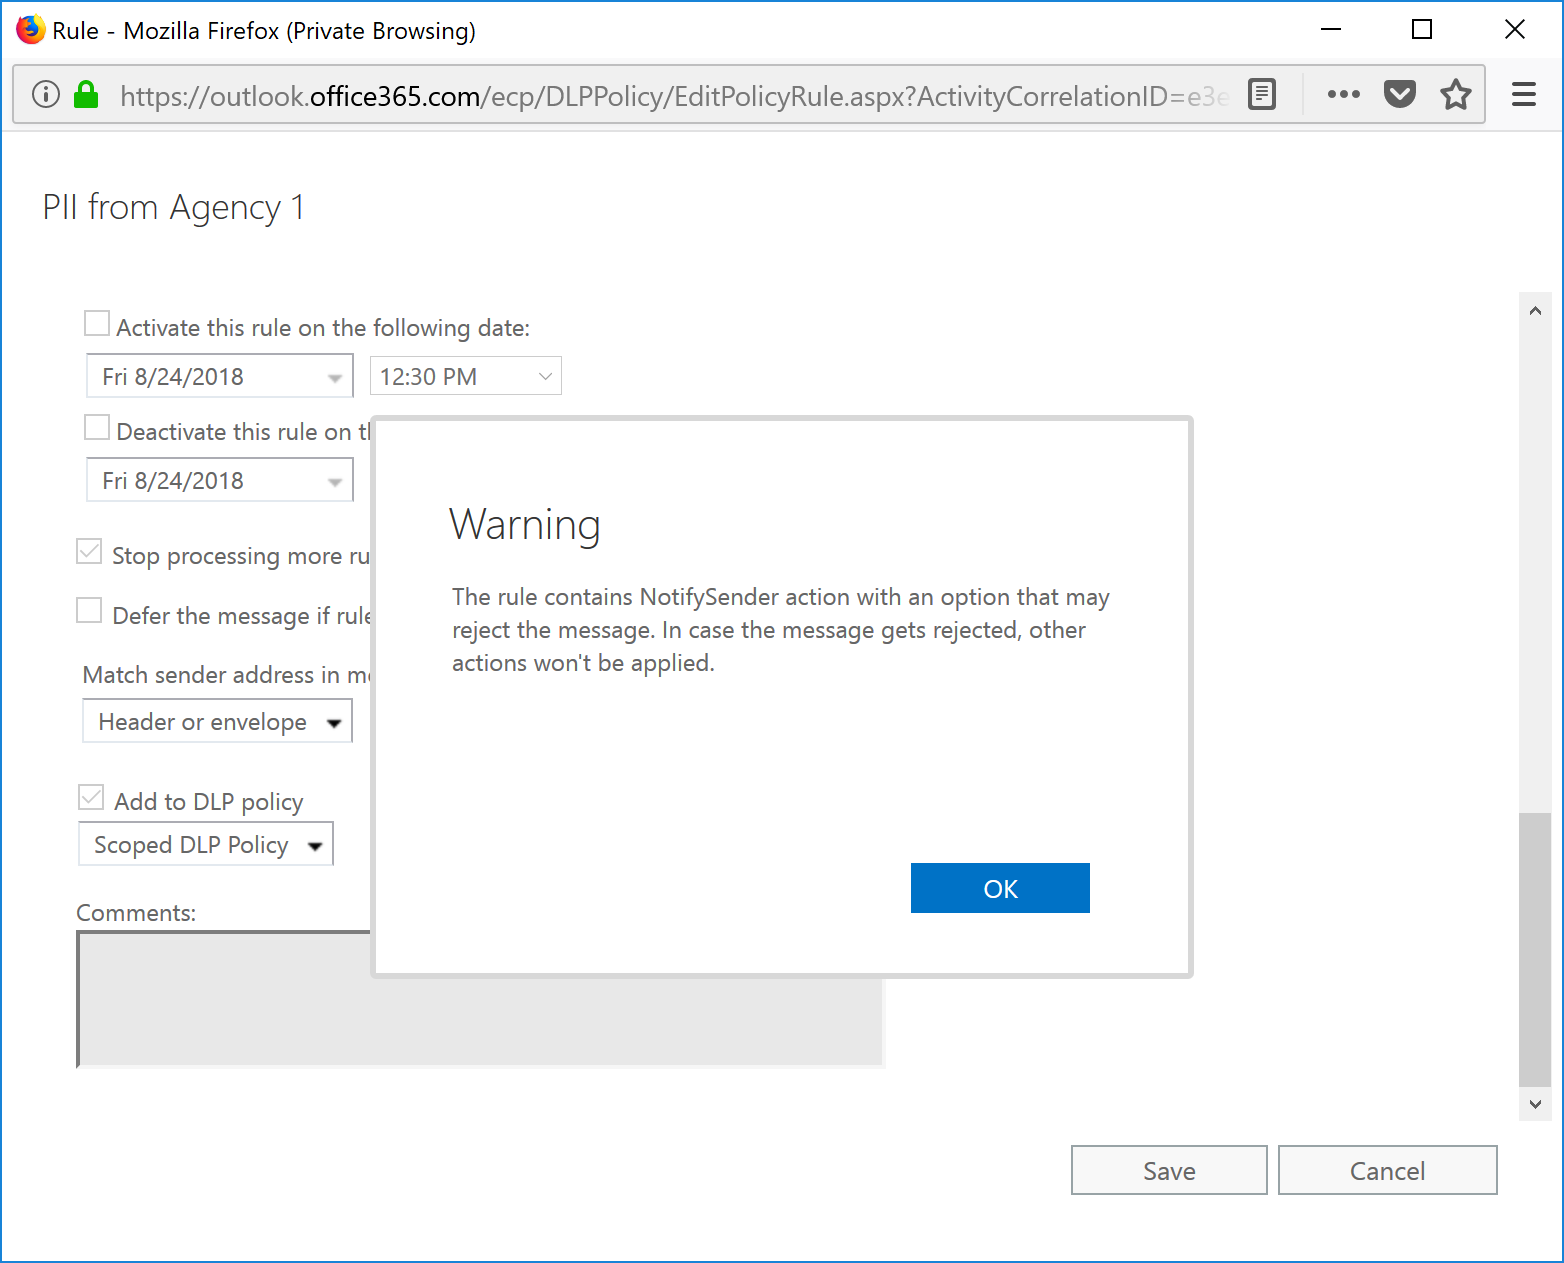
- If you have chosen an action that has a potential to NDR, acknowledge by clicking OK.
- Click Save.
- Annnnd done.