Let's Go Phishing - Spear Phishing, That Is
Over the last few weeks, we've released some great new features for Office 365 Advanced Threat Protection users. The Attack Simulator has three core components, each of which I'll cover in a series:
- Spear Phishing (Credential Harvest)
- Brute Force Password (Dictionary Attack)
- Password Spray Attack
For this post, I want to focus on the Spear Phishing campaign.
Setup
But first, we have to begin at the beginning. Before we can get off to the races attempting to compromise your users, we need to prepare you Office 365 environment.
To access the Attack Simulator setup, launch the Security and Compliance Center (https://protection.office.com/#/attacksimulator). You can navigate to Threat Management | Attack Simulator if you're already in the Security & Compliance Center.
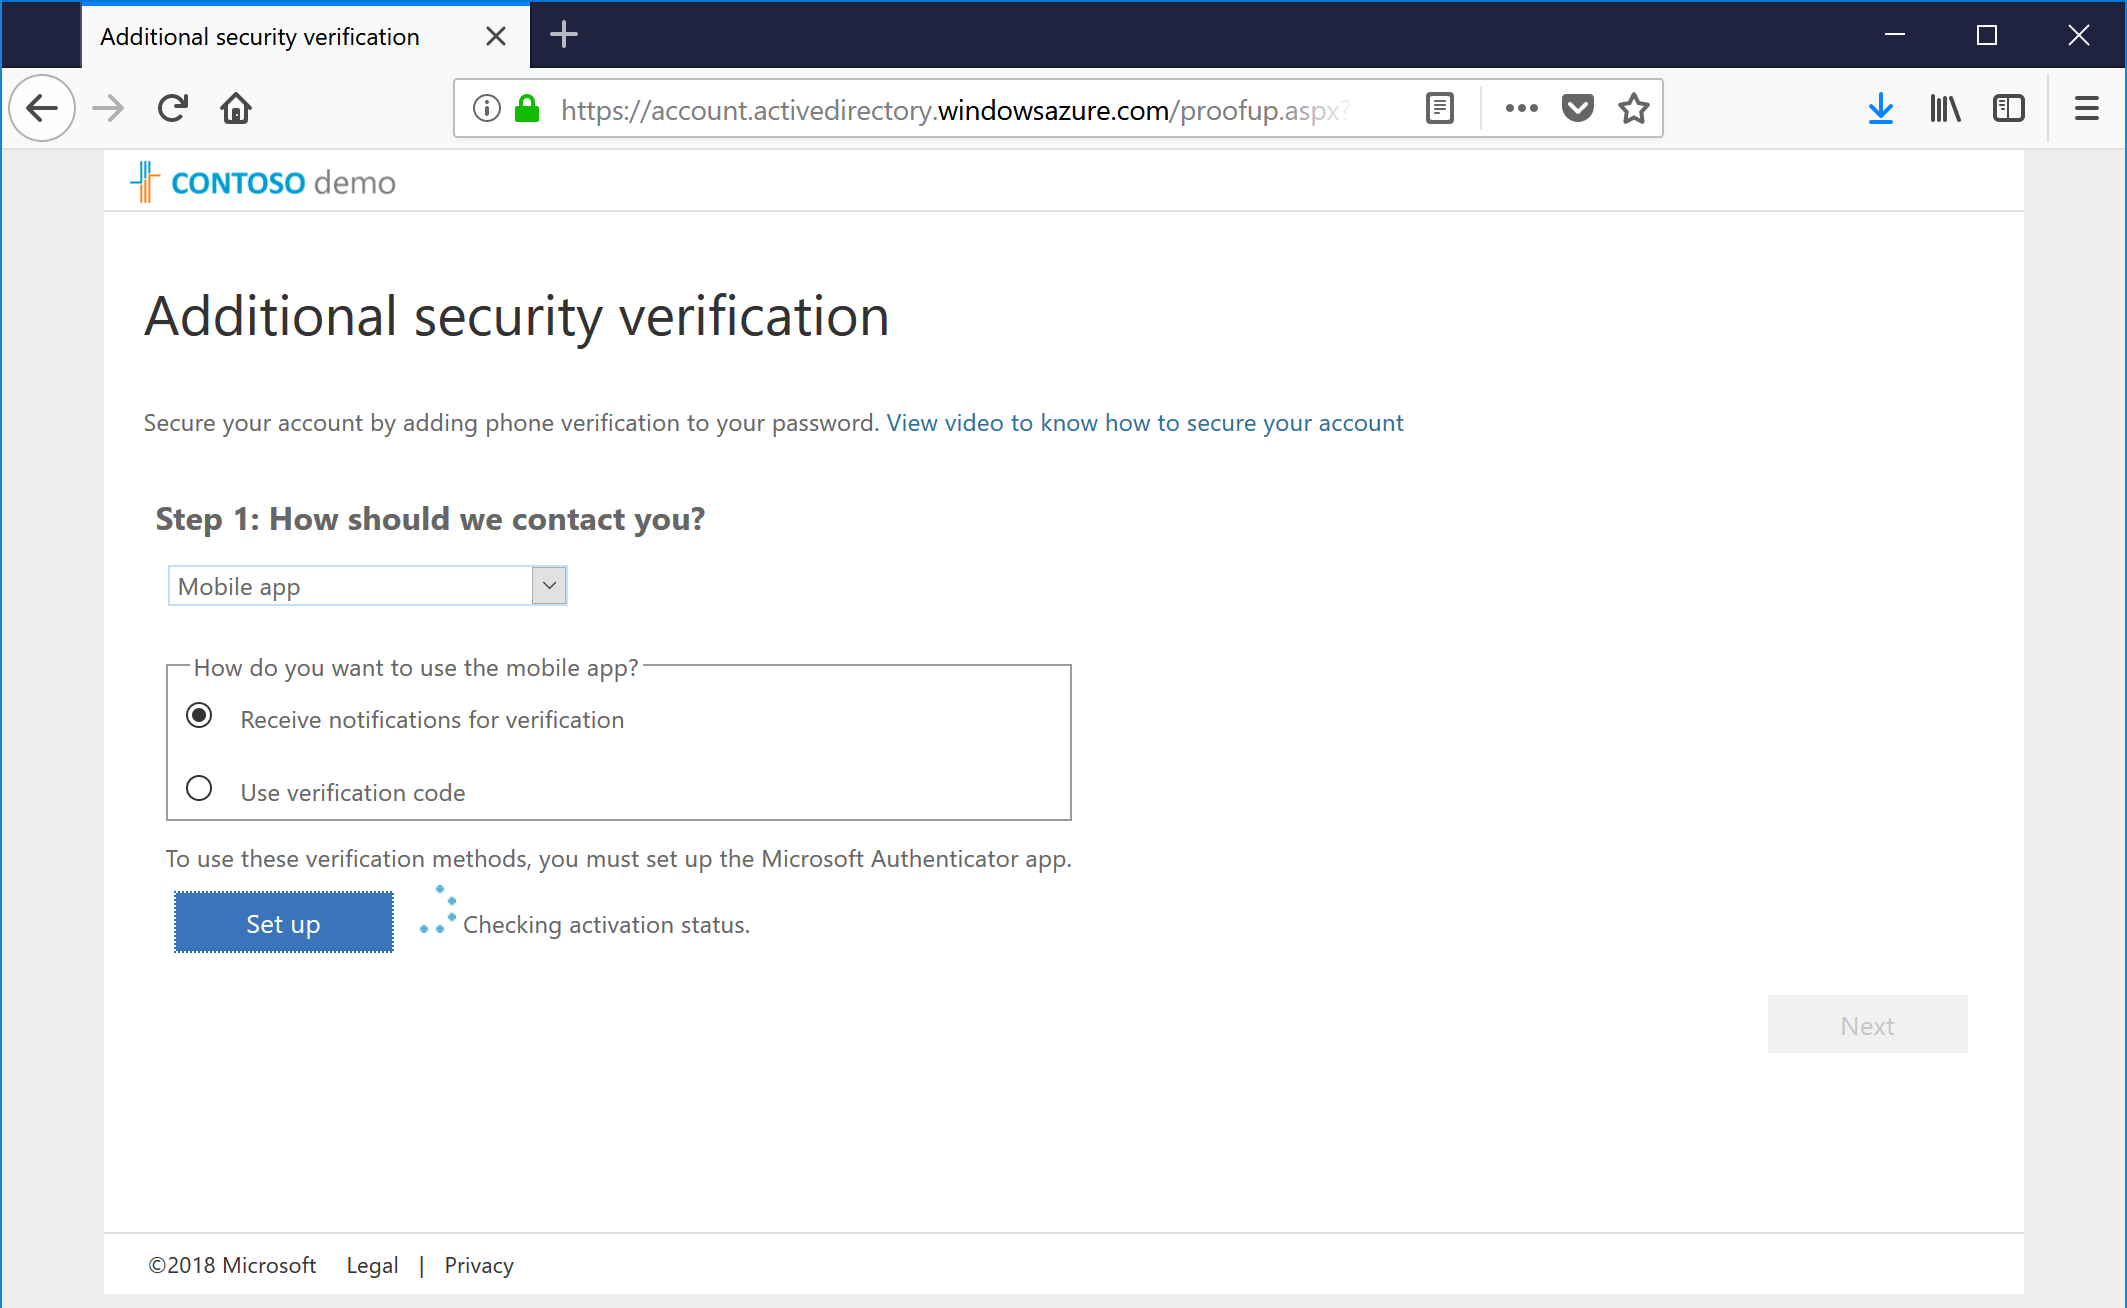
When you first get to the page, you might be prompted for two types of configurations that need to be setup: An overall setup process as well as message that your account needs to have mutlifactor access enabled in order to either start or stop attacks.
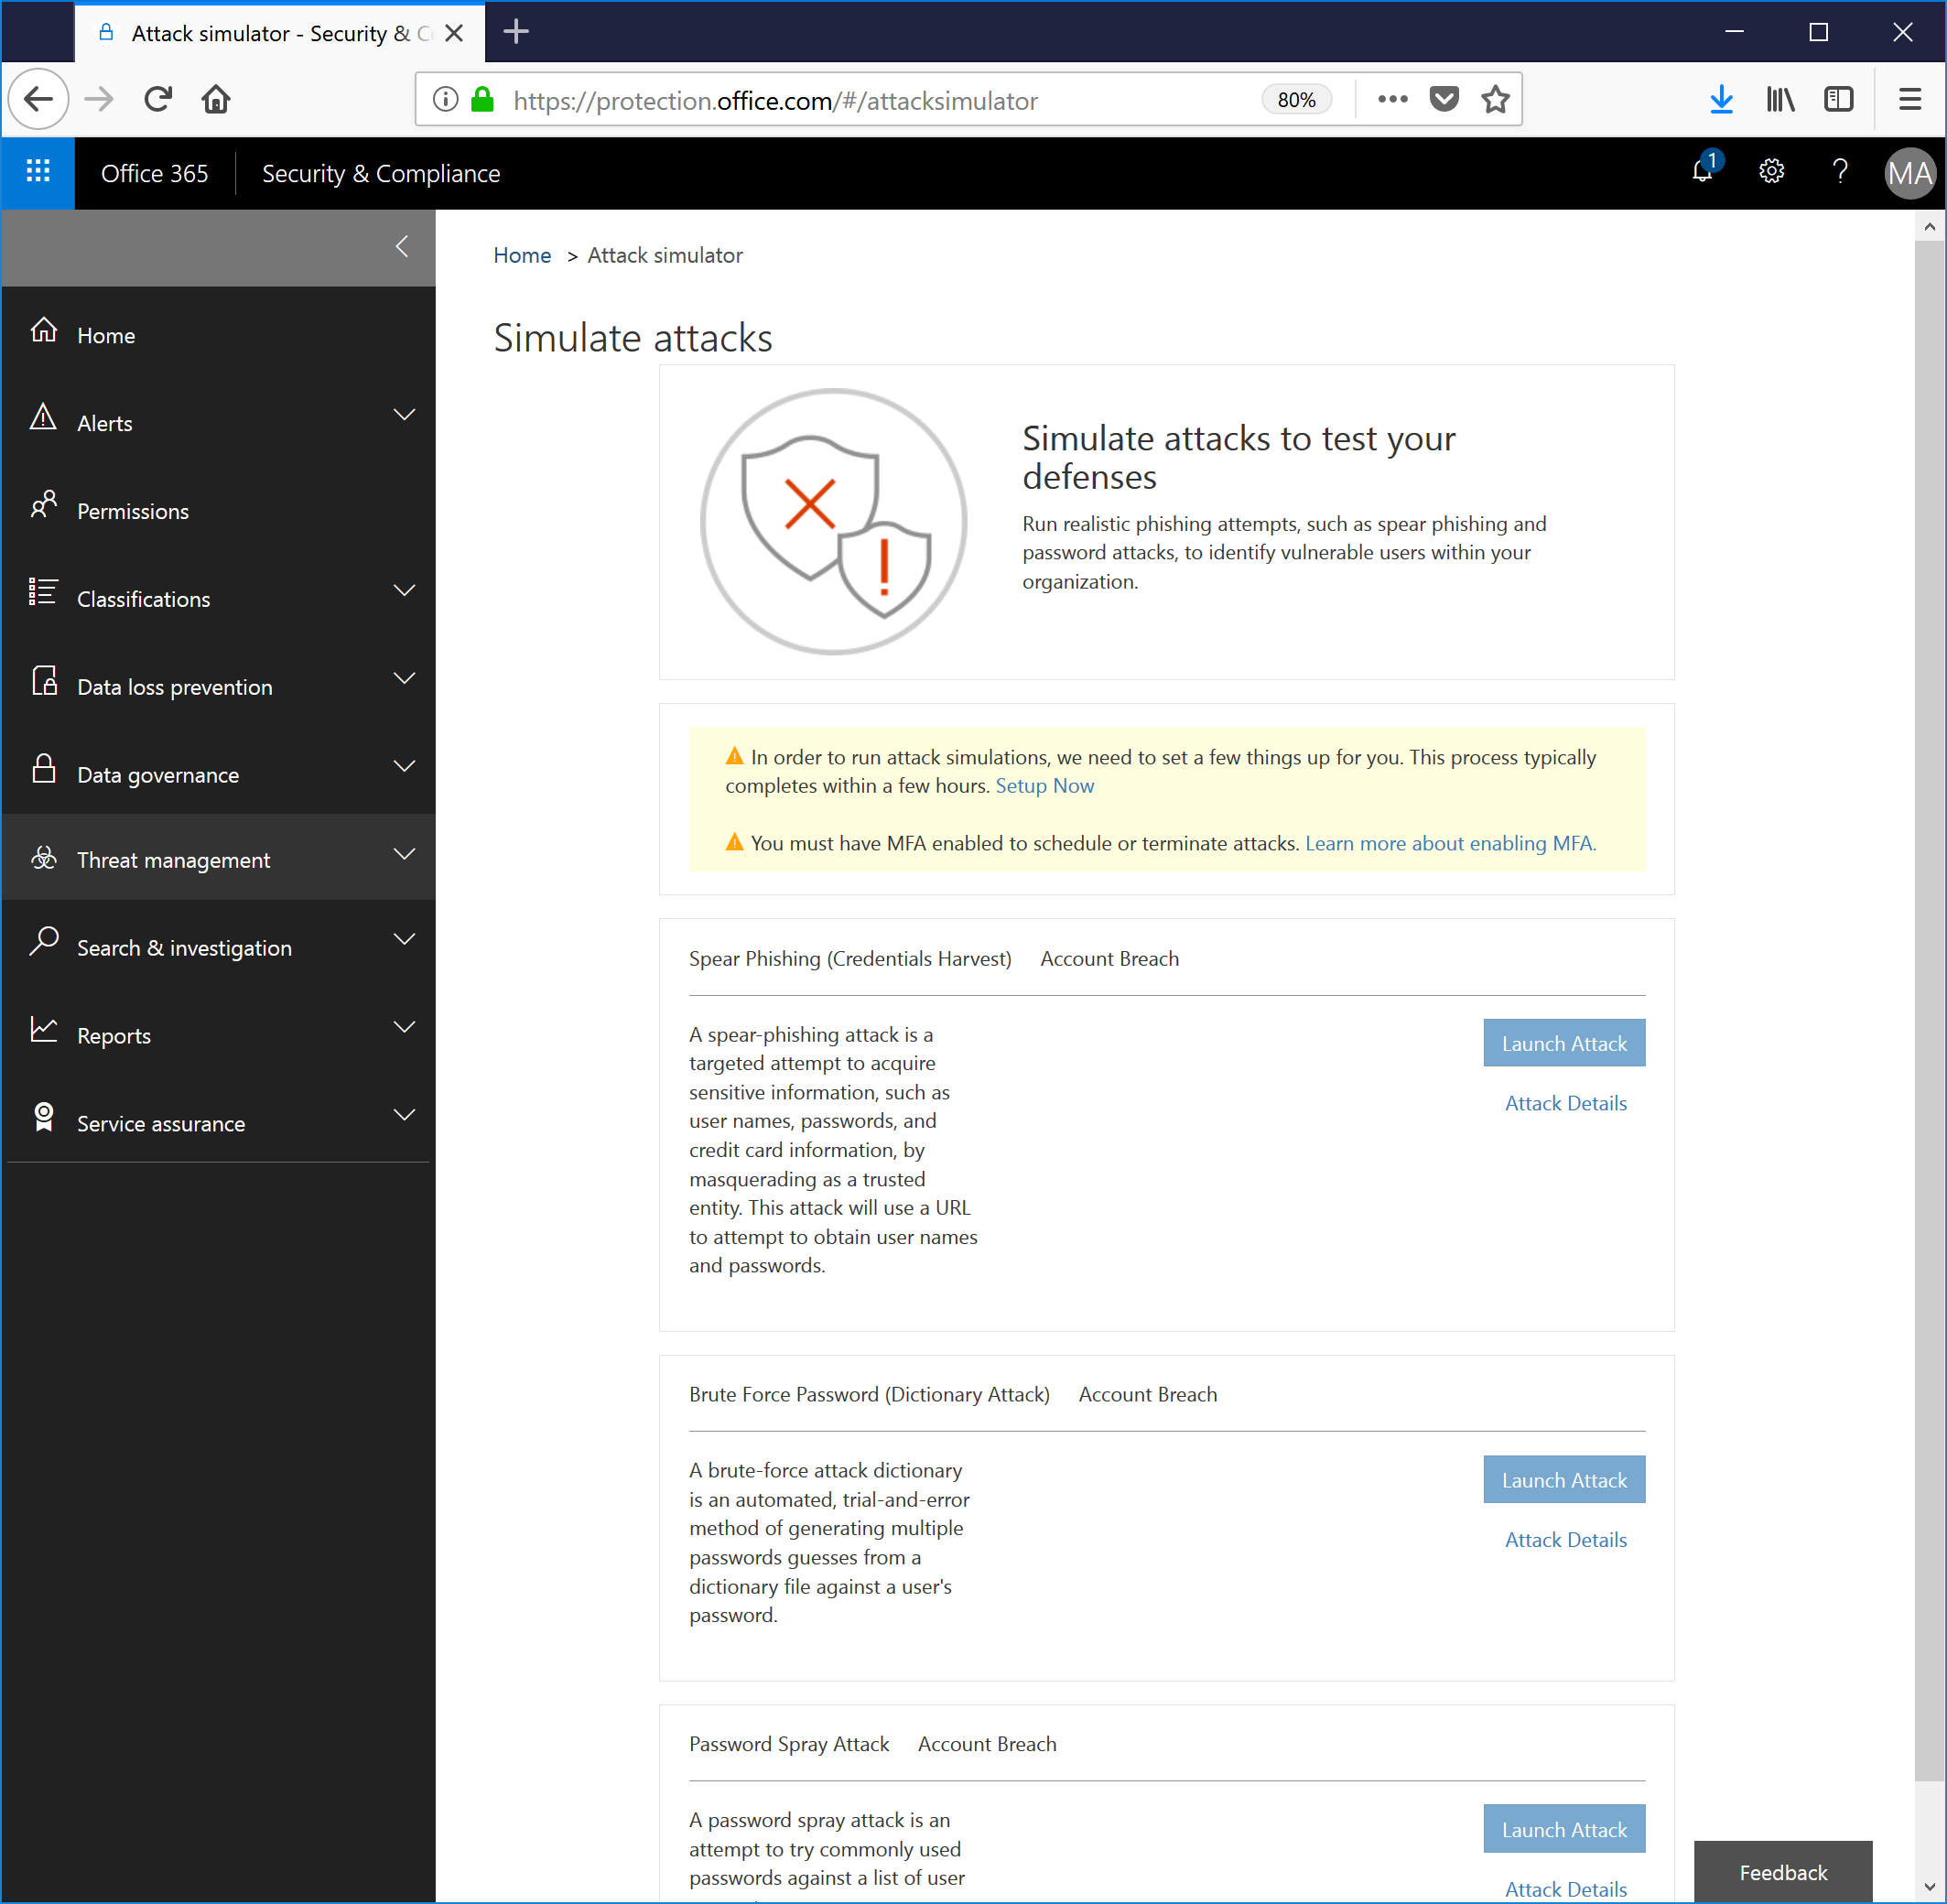
Tenant Setup
So, first thing's first--click the Setup Now link to begin configuring your tenant. Go get a cup of coffee, fiddle around with the how old robot, or just wait. I'm paid by the page view, so close this blog out and come back. Like 30 times.
Just kidding. I don't get paid for this part.
After I clicked Setup, screen displayed a spinning progress meter for about two minutes, and then returned this:
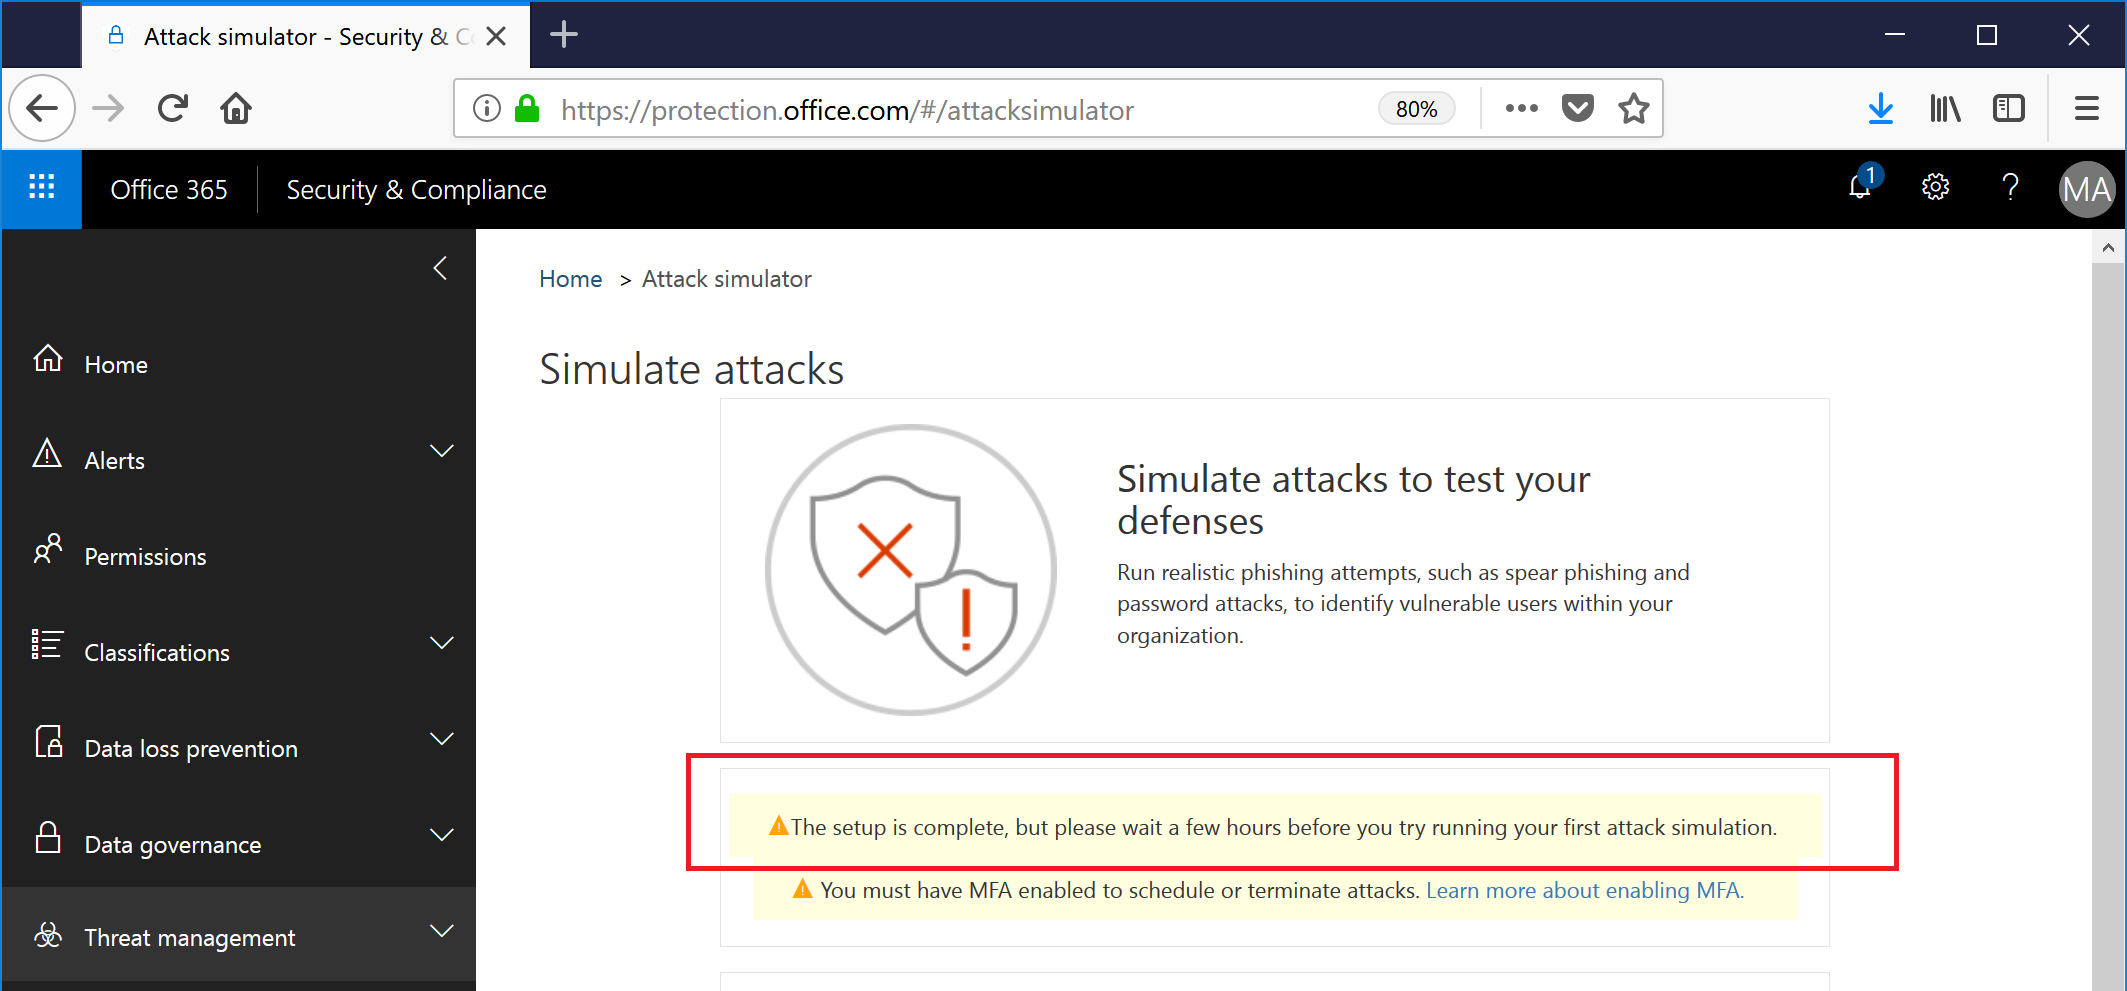
So, keep those page views coming. I'll see you in two hours. Pro tip: If you're testing this out in a demo environment with only a few accounts, you can refresh the page and the warning will go away. By the time we get everything set up in this demo and you've read this guide, about half an hour will have elapsed, and you should be good to start.
Next, we need to make sure our admin account (the one that we're using to run this) has multifactor authentication enabled.
Multifactor Authentication Setup
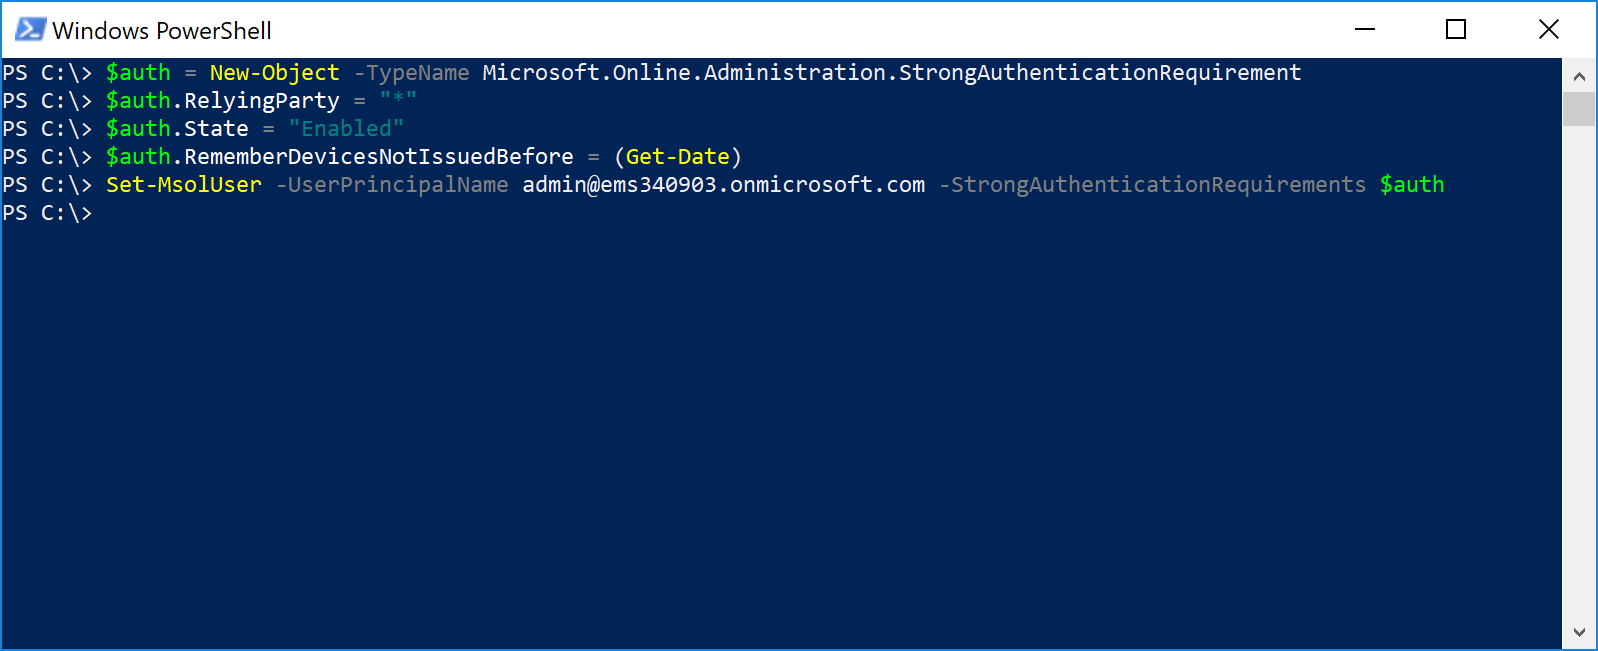
Multifactor authentication can be configured either via PowerShell or via the Office 365 admin center.
PowerShell method
The PowerShell way is pretty fast. Simply copy and paste, replacing <youraccount@tenant.onmicrosoft.com> with your actual logon ID:
 $auth = New-Object -TypeName Microsoft.Online.Administration.StrongAuthenticationRequirement
$auth.RelyingParty = "*"
$auth.State = "Enabled"
$auth.RememberDevicesNotIssuedBefore = (Get-Date)
Set-MsolUser -UserPrincipalName <youraccount@tenant.onmicrosoft.com> -StrongAuthenticationRequirements $auth
The output should just be a blinking cursor. No visible log messages or confirmation is expected. That's just how we roll.
Log out of your Office 365 admin center session.
Office 365 Admin Center
Since this has been documented a plethora of times, I'll just point you in the direction for now.
Completing the Mutlifactor Authentication Setup
- Once you run the enable your account for multifactor authentication, you'll need to sign out of the Security & Compliance Center, and then re-log in. Upon signing back in, you'll get something like this:
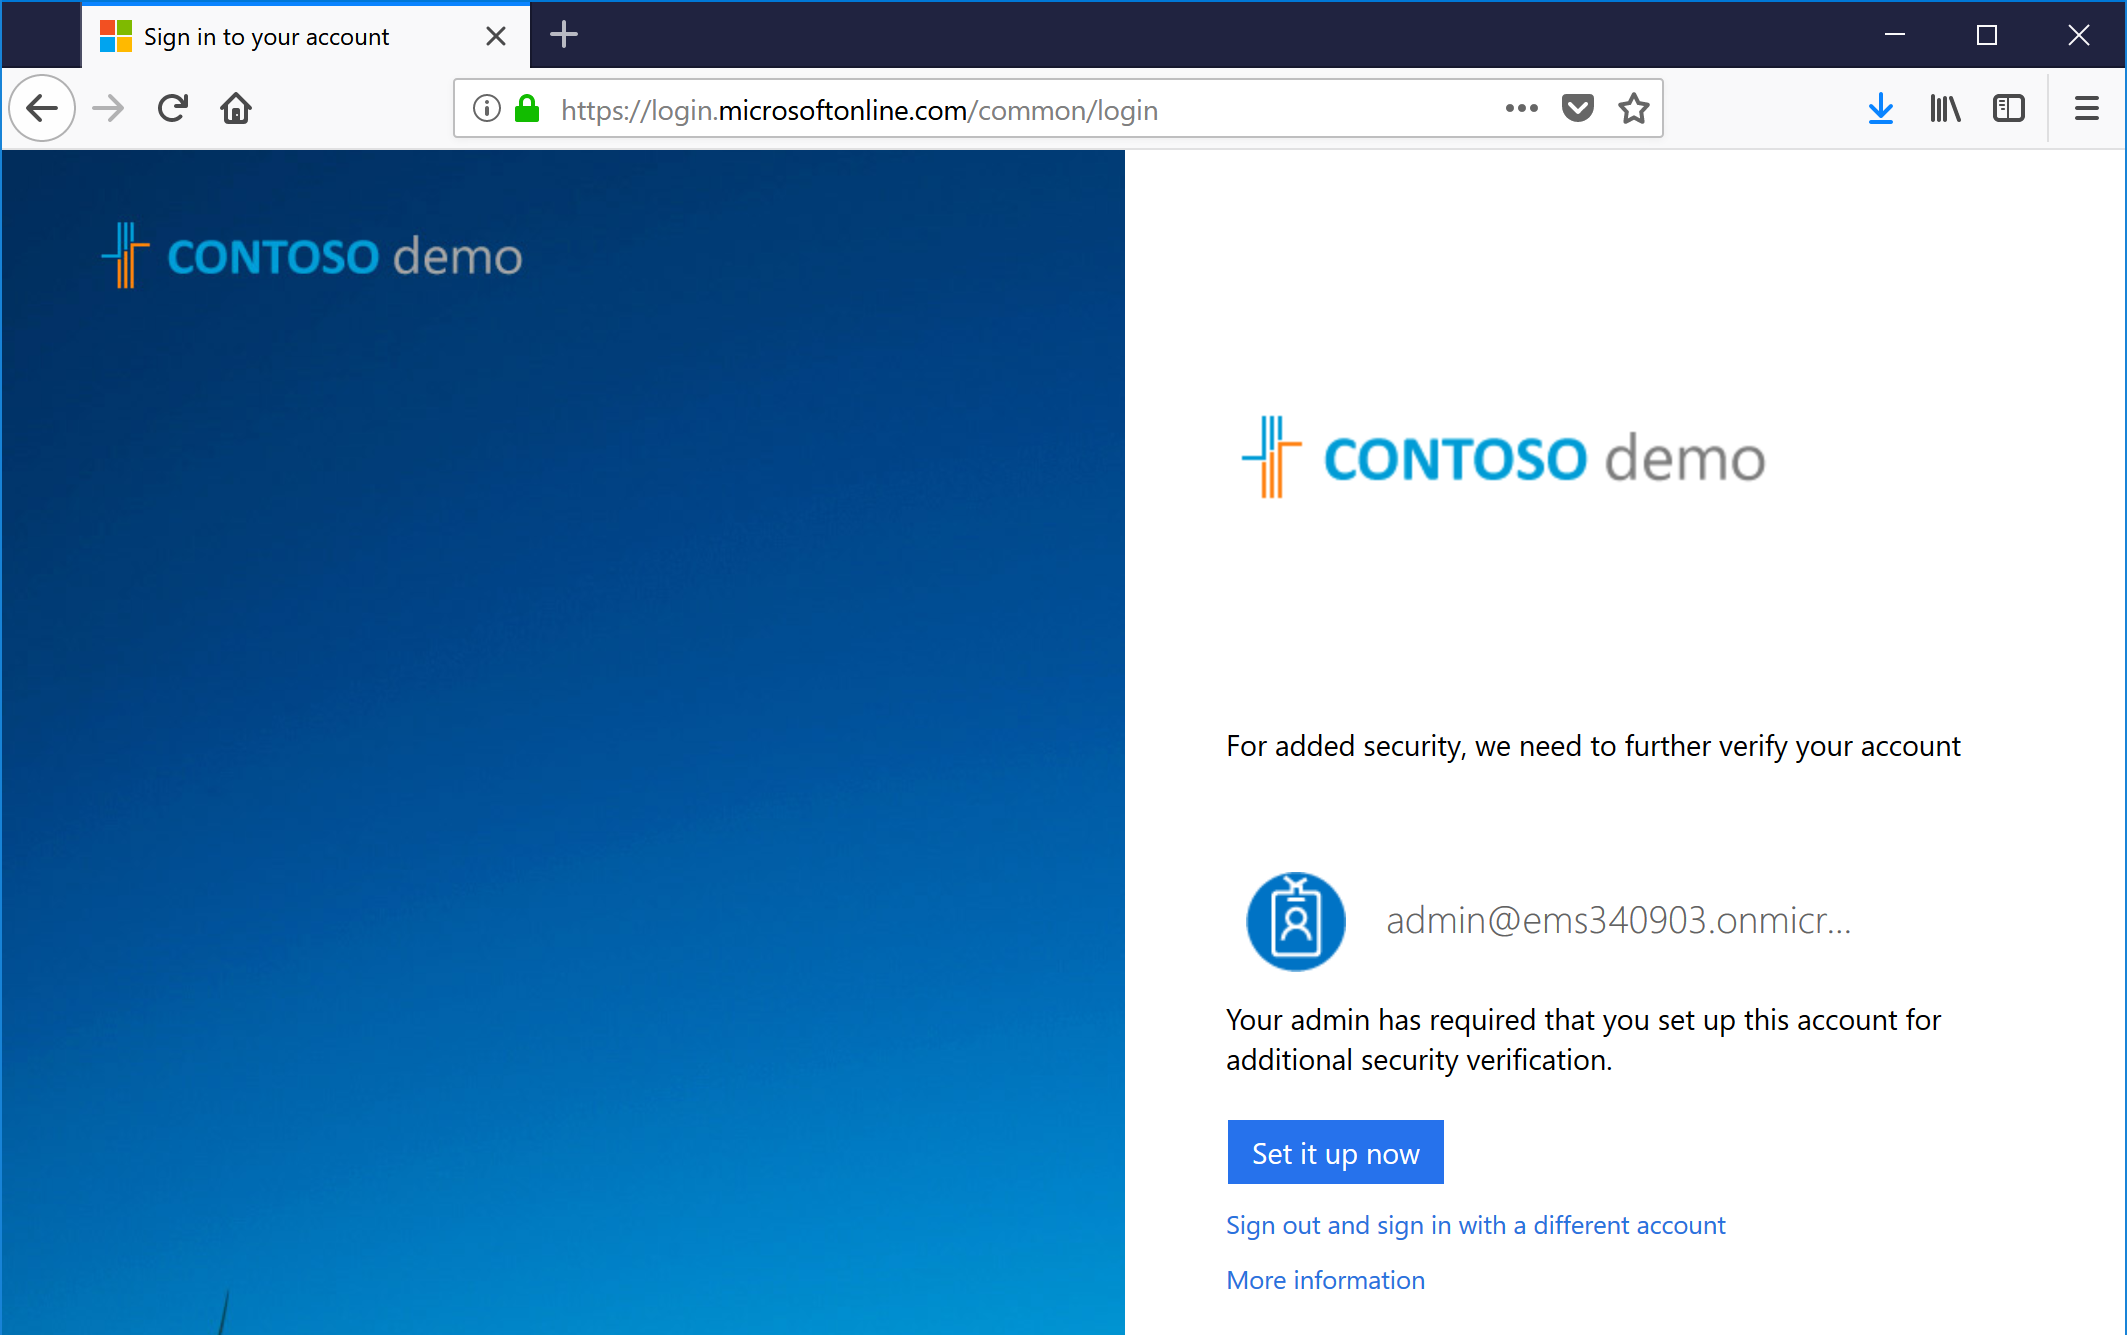
- Click the Set it up now button to begin your multifactor authentication setup.
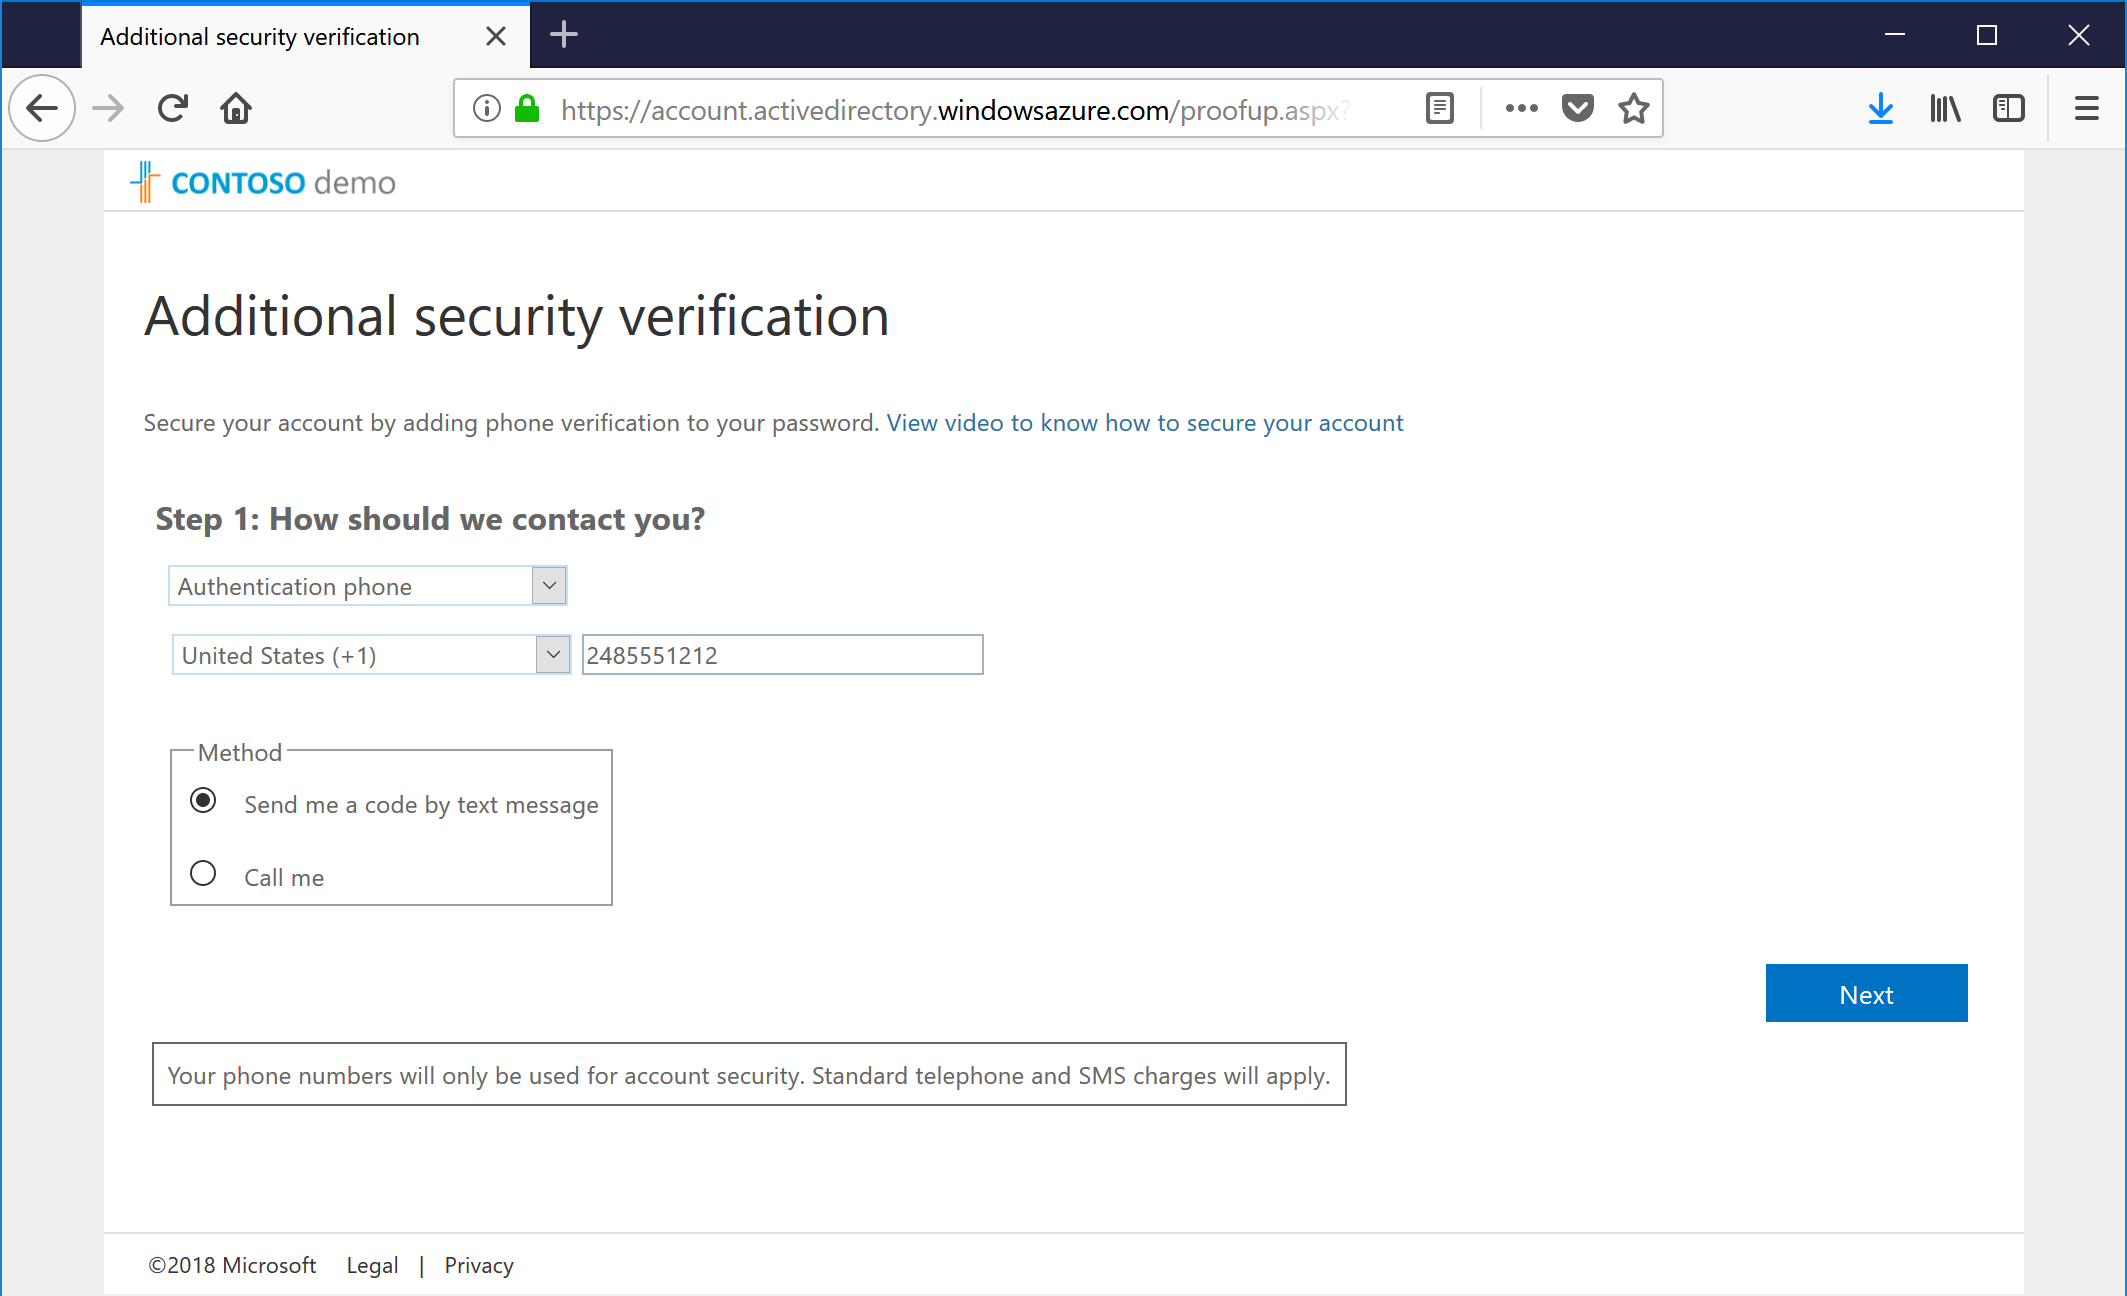
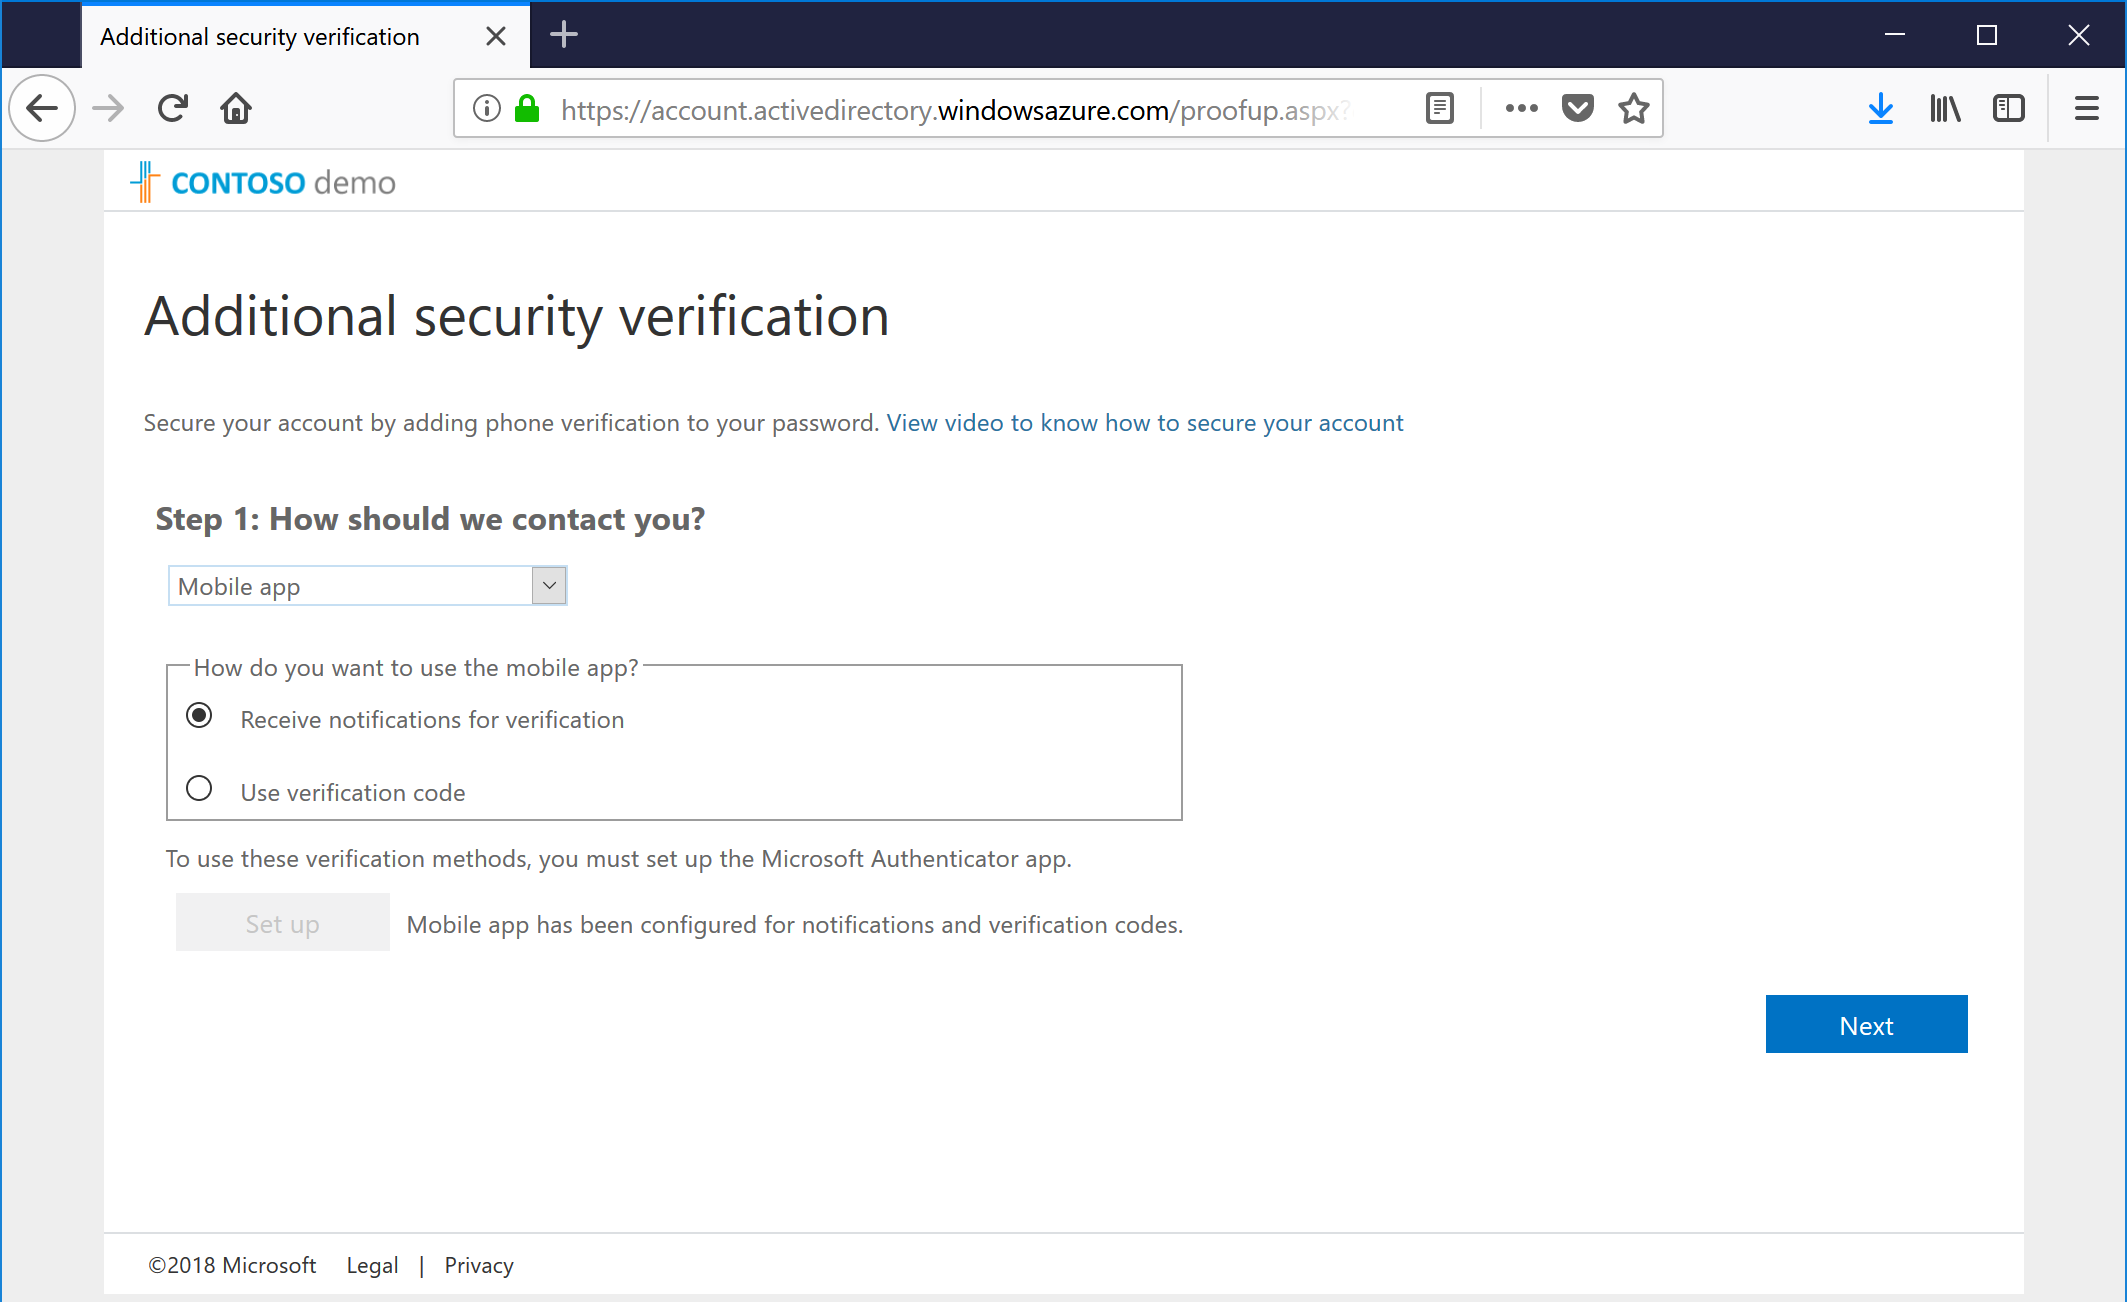
- Chose a verification method and click Next. In my case, I chose the authenticator app (because I like being able to use TouchID), but you can also choose an SMS One-Time Passcode or go old-school and do an actual phone call.
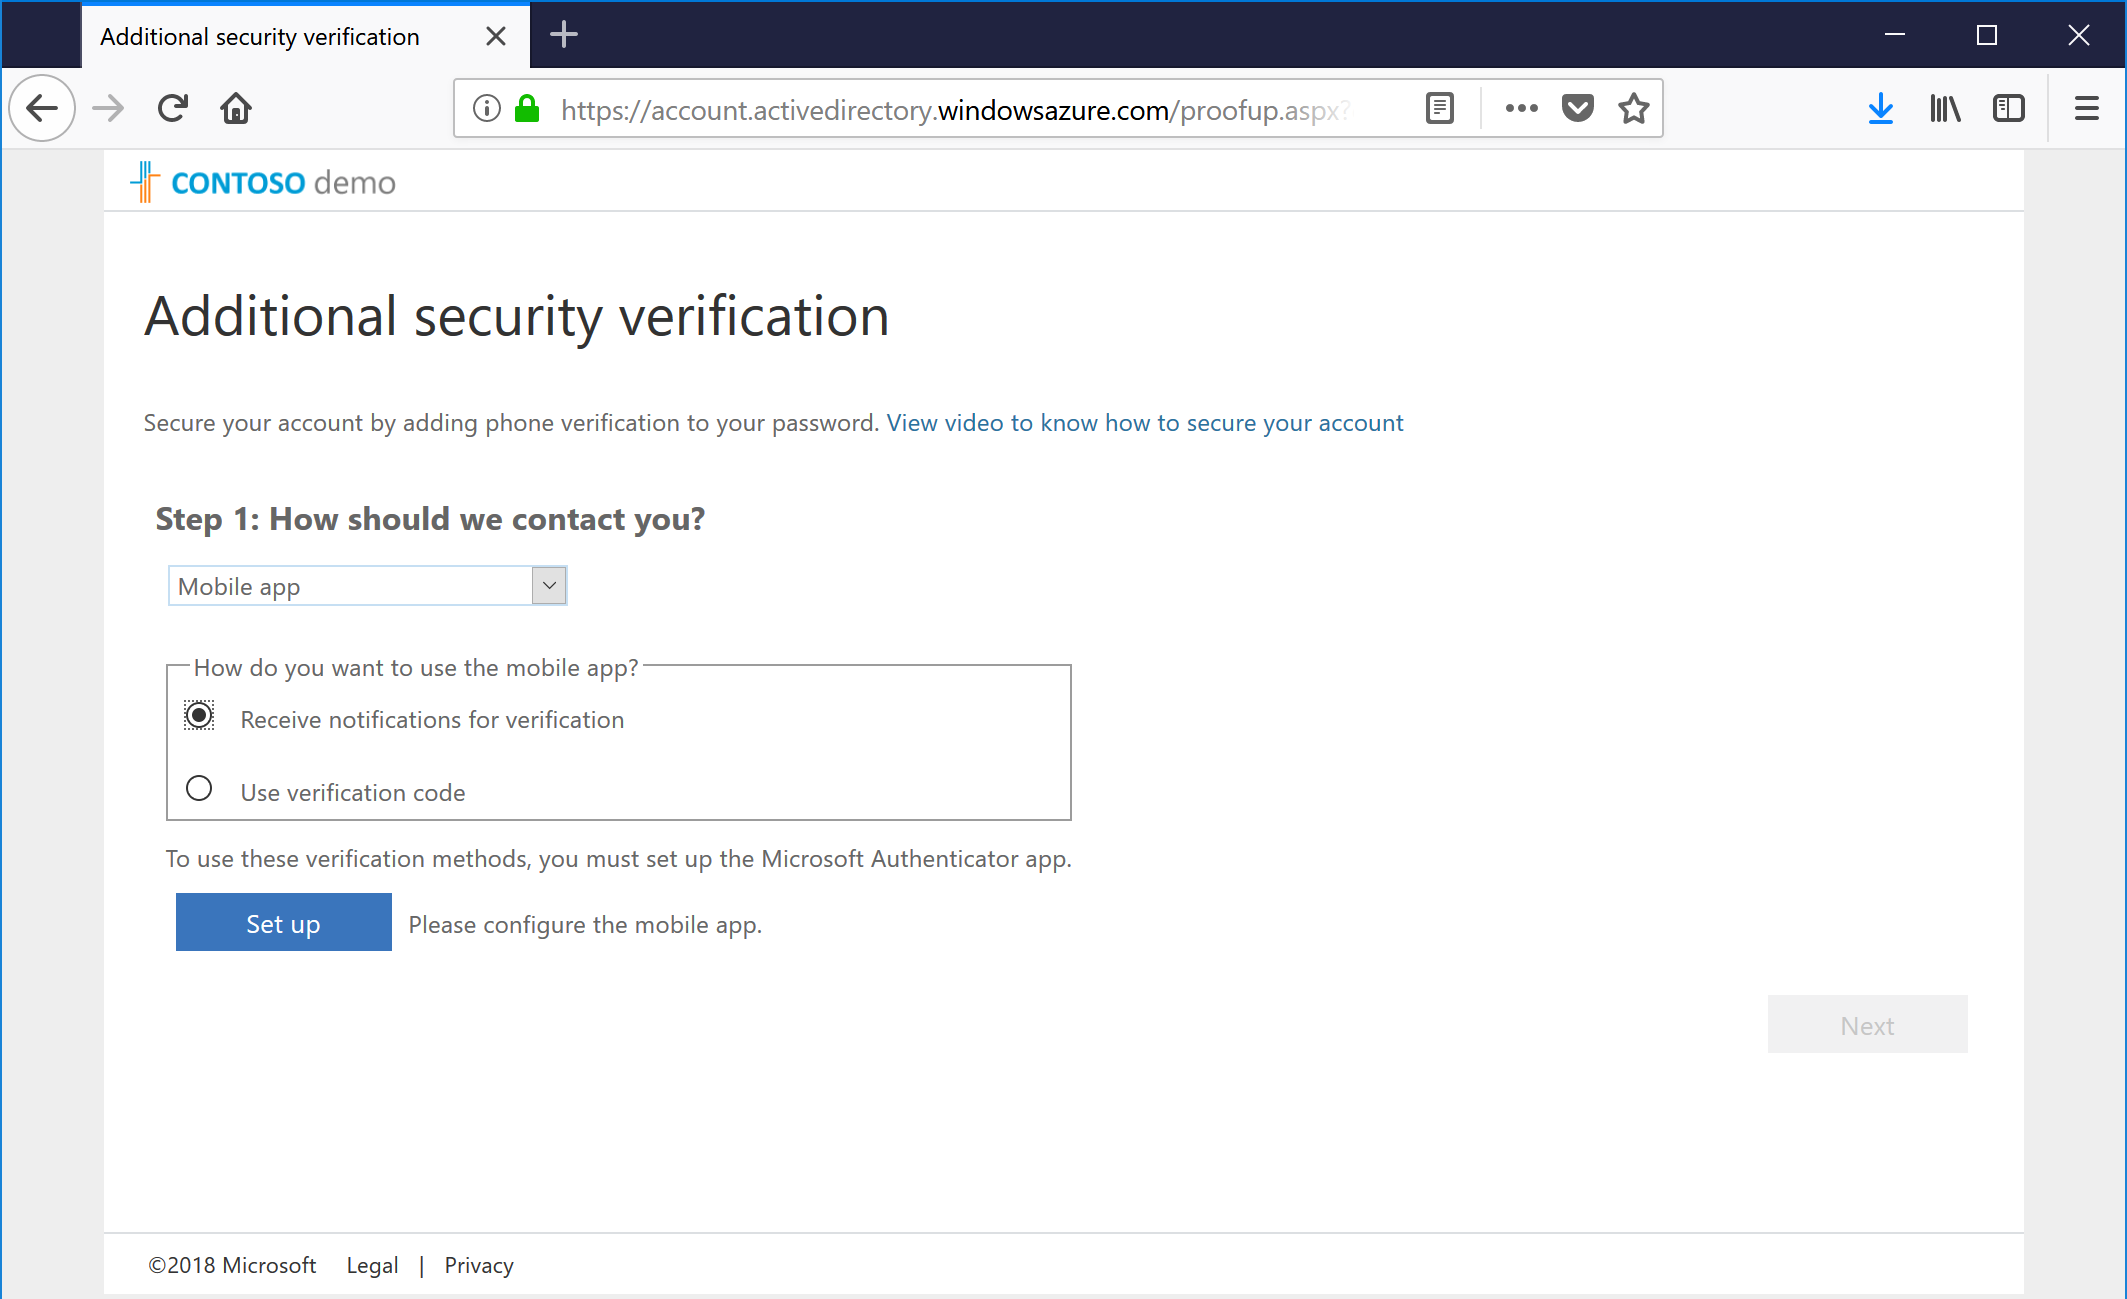
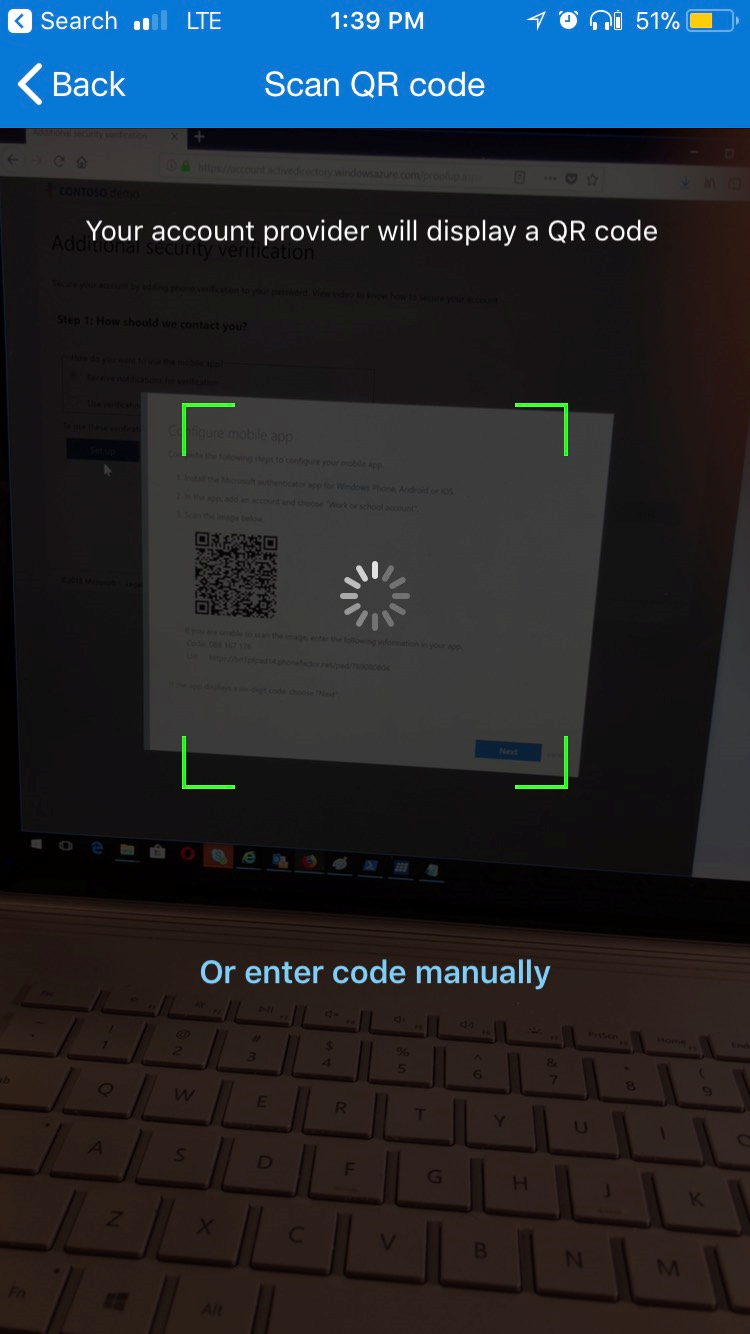
- If you choose the SMS text verification option, you'll get a text code to enter. If you choose the mobile app configuration option, you'll get a screen like the following (the QR code has been changed to protect the guilty):
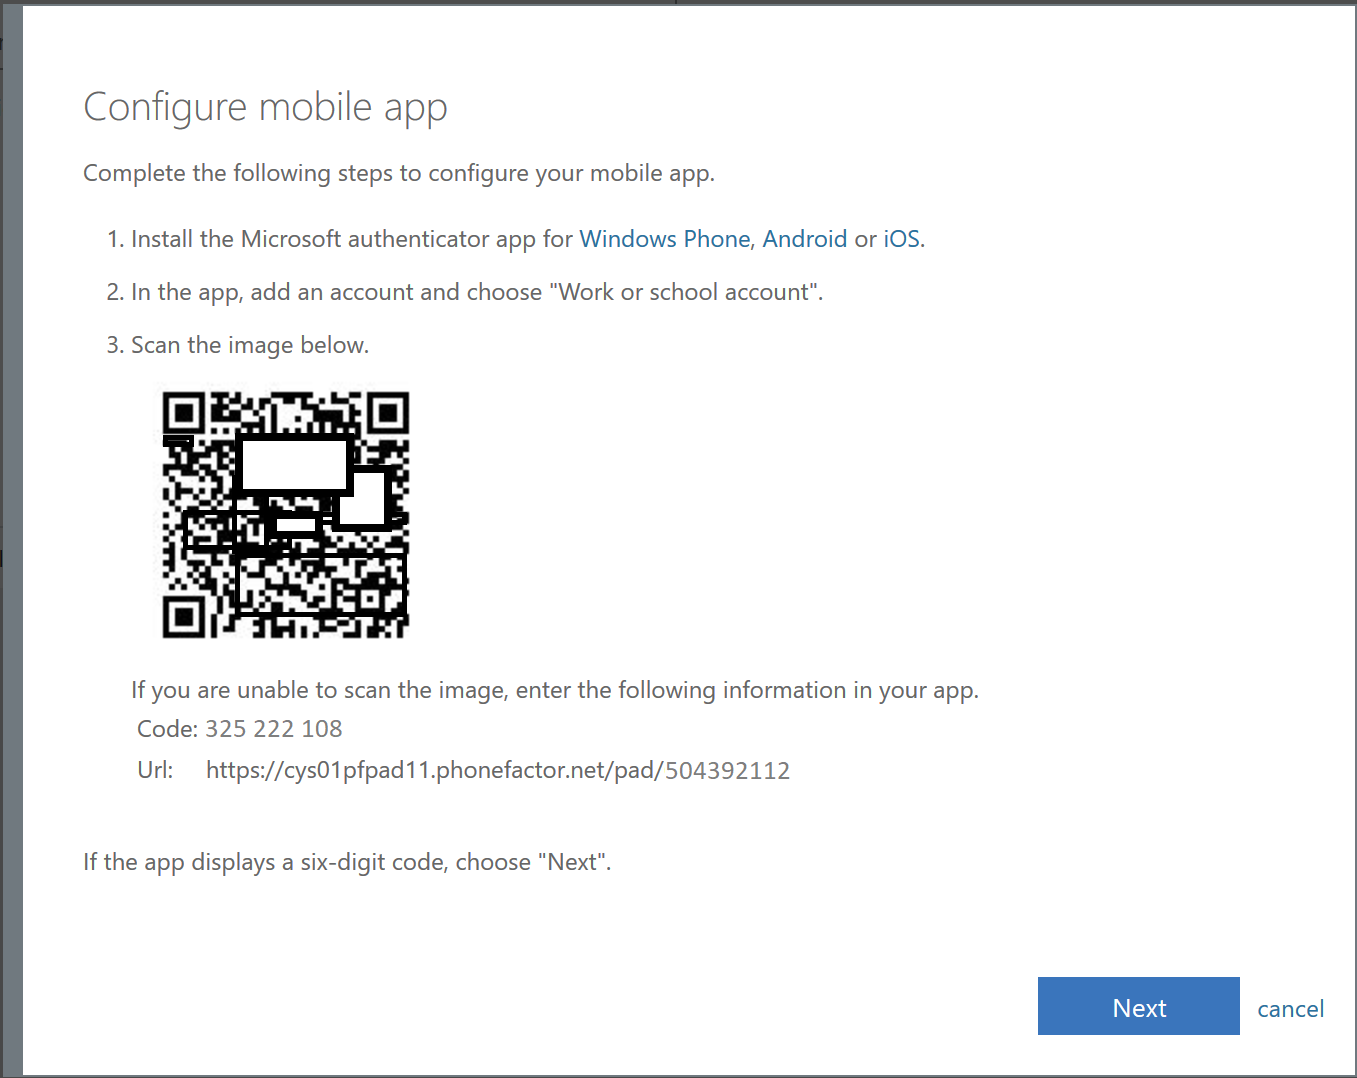
This should come as no surprise, but if you want to use the app verification method, you'll need to install the Authenticator App, which is available for iOS, Android, and Windows Phone. - Launch the Authenticator app.
- Tap the + button to add a new account.
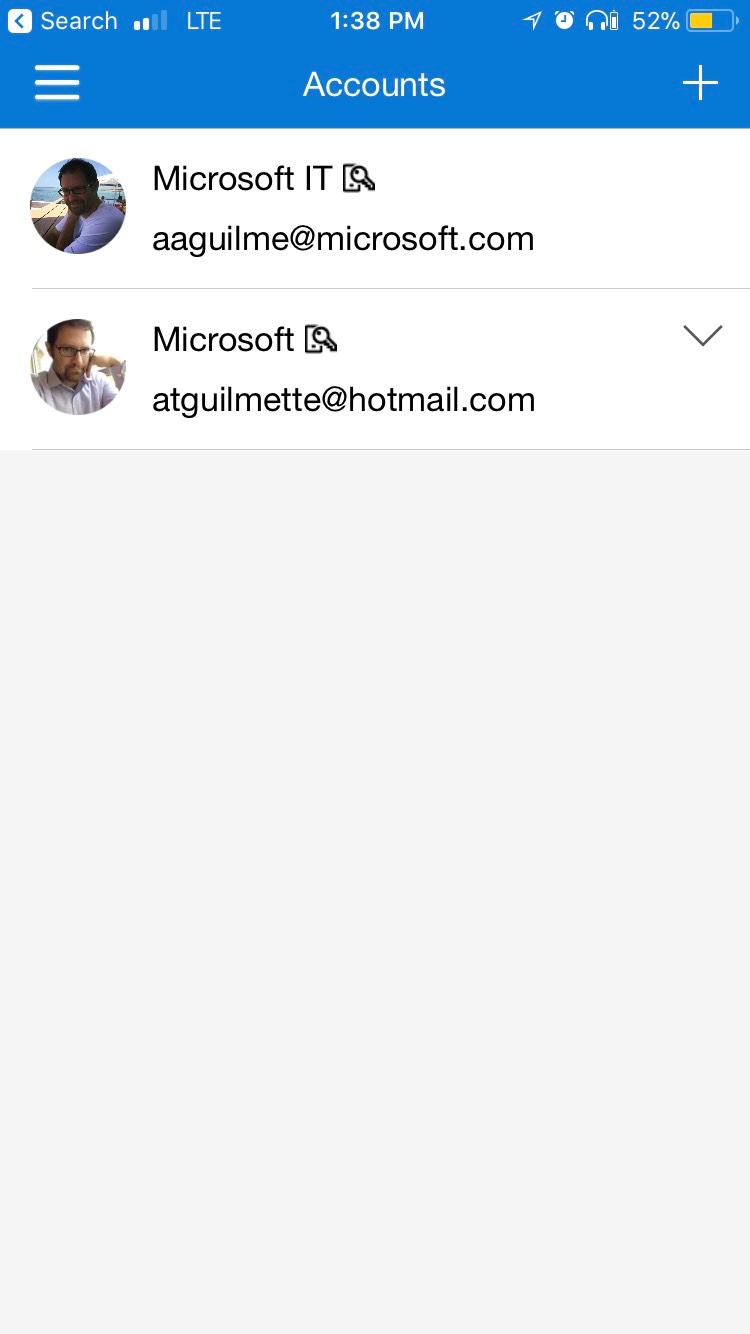
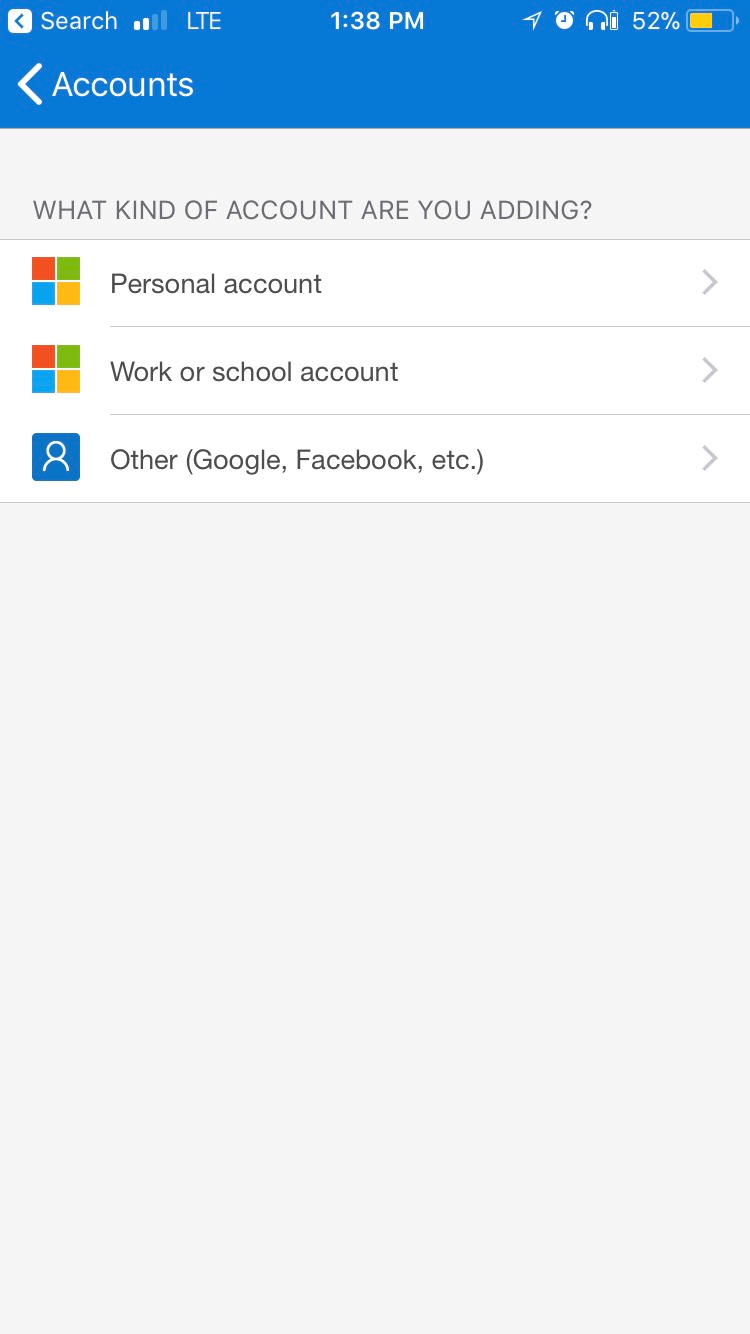
- Select Work or school account.
- Grant access to the camera and locate the QR code inside the green guides. If your camera can't focus on the QR code, you can tap the Or enter code manually link to enter the values displayed on the dialog box in Step 4.
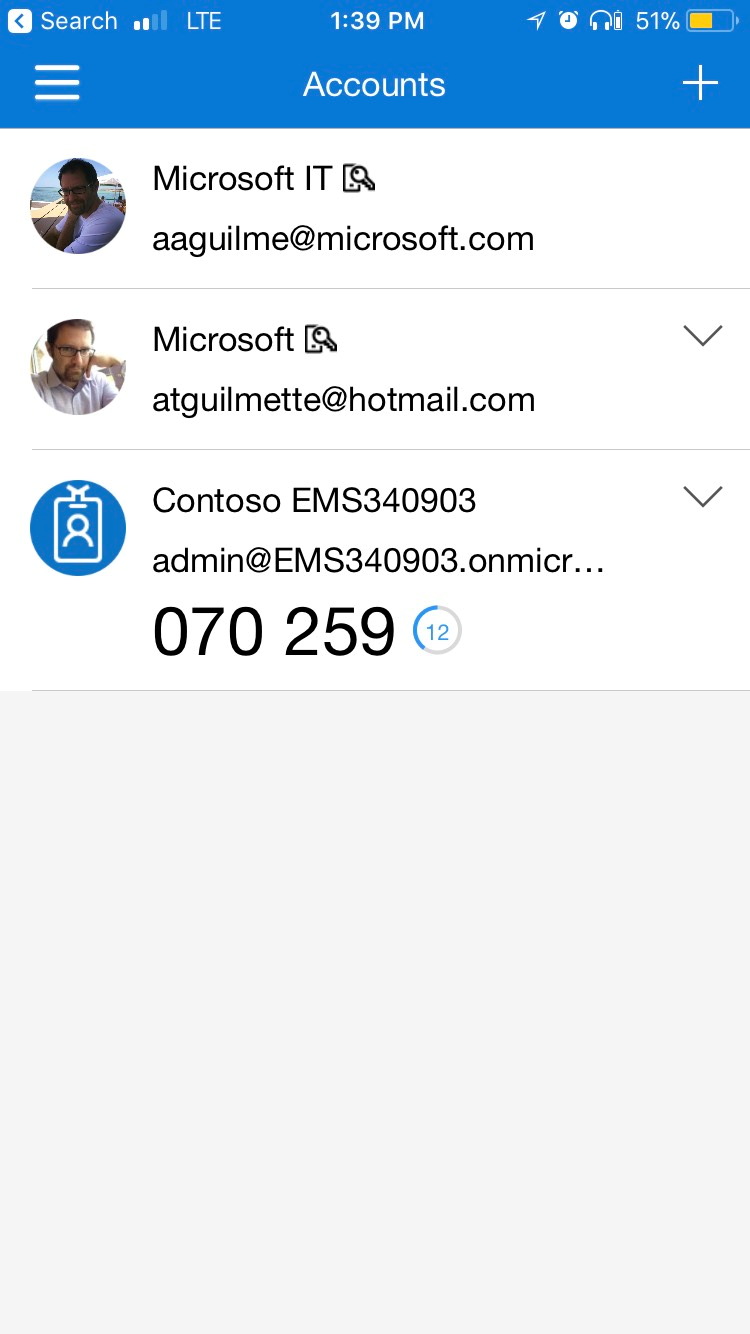
- Confirm that the account was added. It will start displaying a rolling code that can be used for authentication. If you haven't used this device with TouchID for other organizations, you can tap the v arrow next to your newly added account and configure phone sign-in.
- Back on-screen, you'll have to continue the multifactor authentication configuration. It should flash something like "checking activation status" if you're using the mobile app.
- After it's been completed, click Next.
- If you've chosen the app for mutlifactor authentication, you'll get a verification attempt as well that you'll need to respond to on your device.

- After you've responded, confirm your backup recovery method. We're all about the belt and suspenders here at Microsoft. Click Next after entering your phone number.

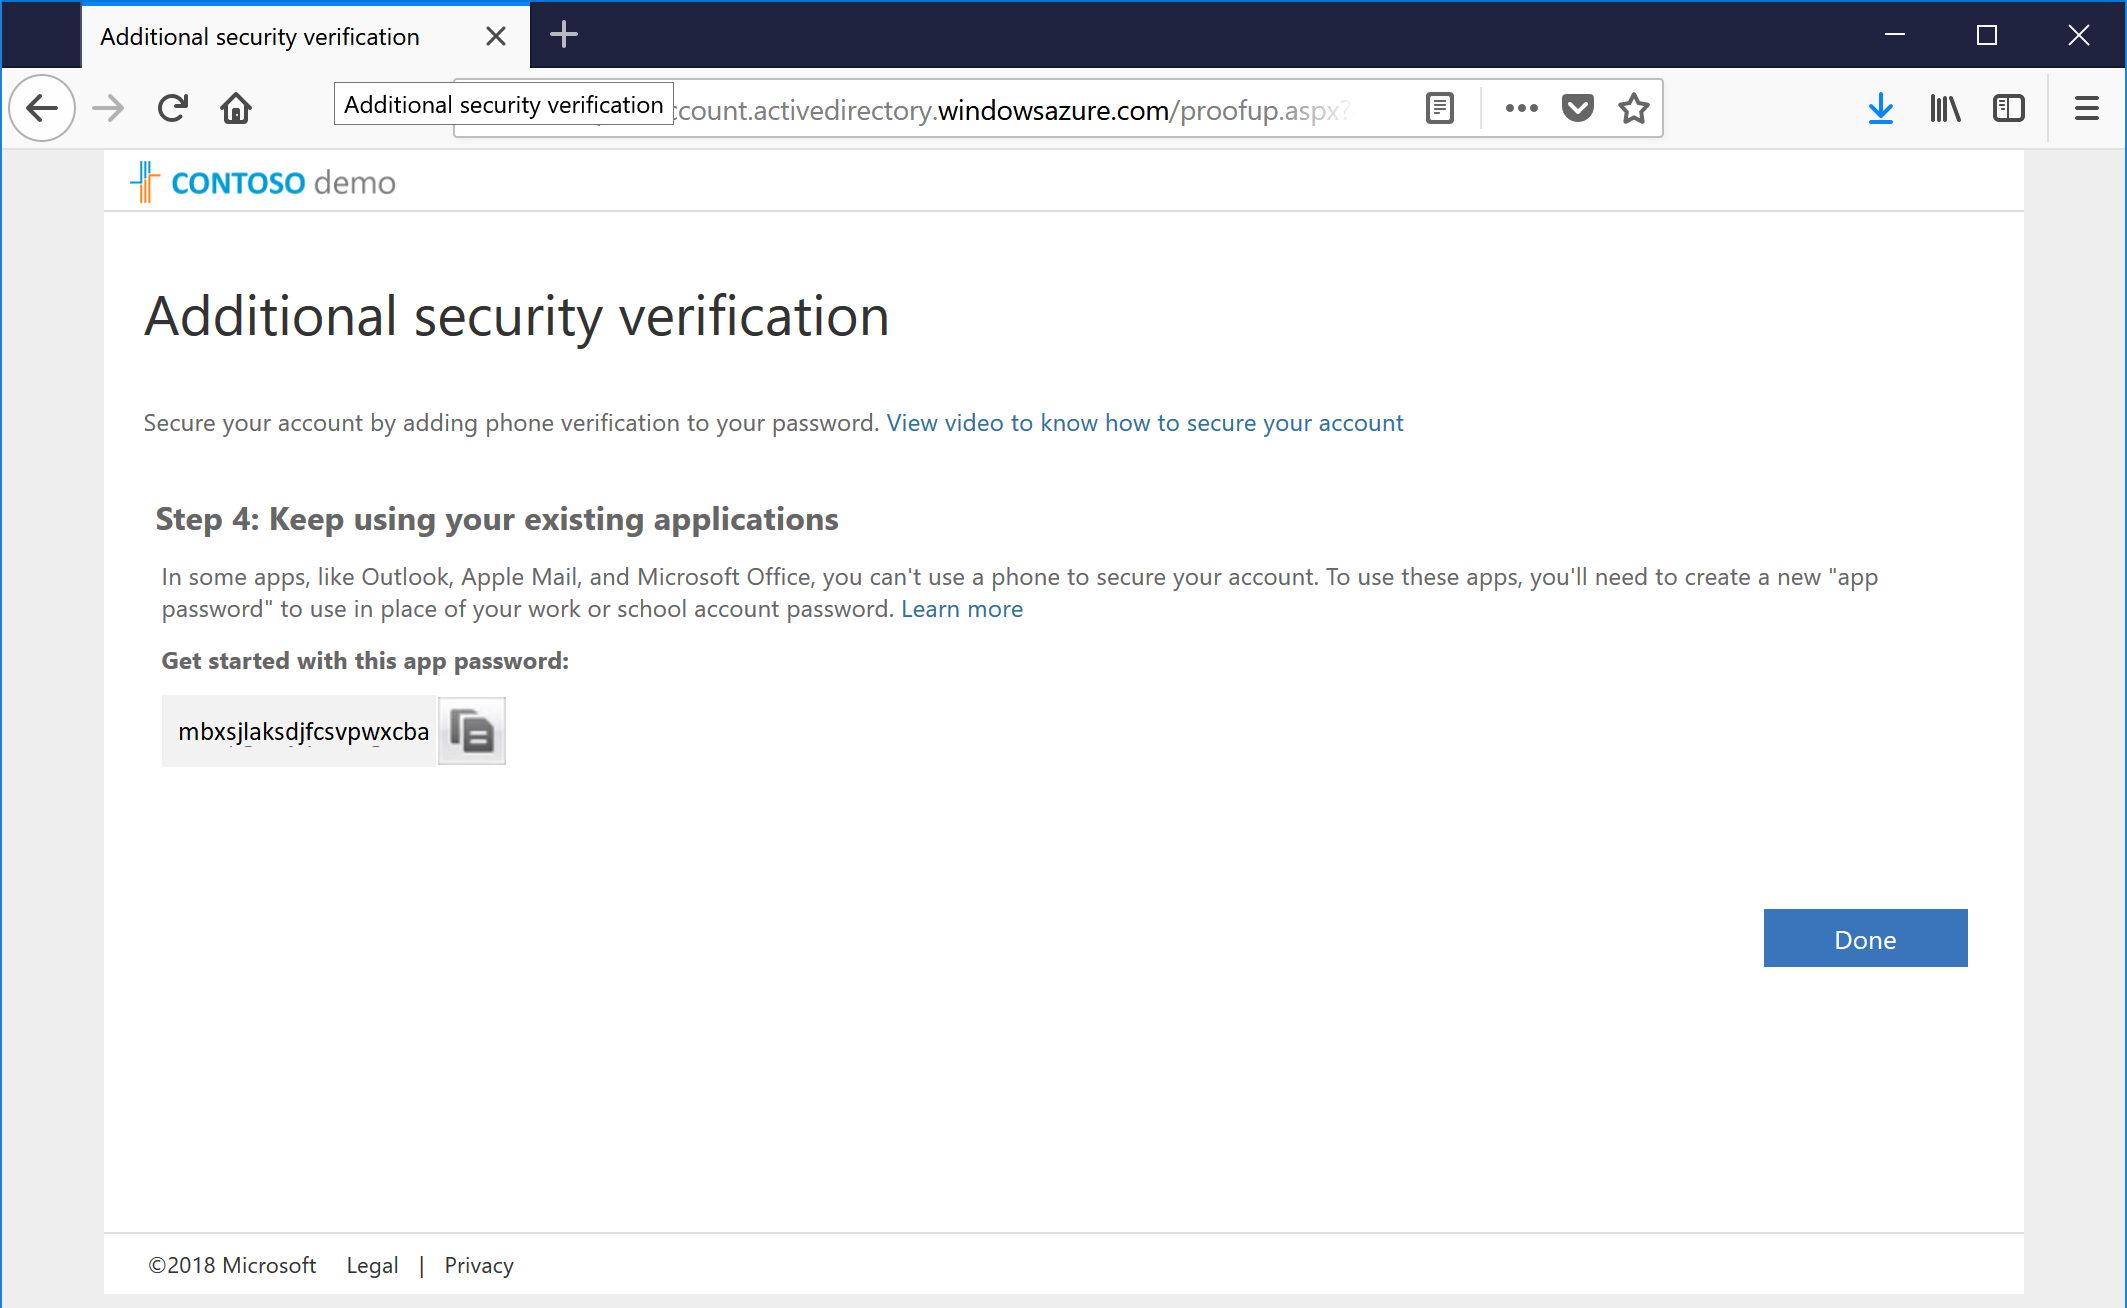
- As a final step, we give you an App Password, which you can use as the new password for legacy applications that don't support modern authentication libraries or multifactor authentication (such as third-party Active Sync clients or older native Active Sync clients for iOS and Android). Copy it down if necessary, and then click Done to complete the multifactor authentication setup.
- Go back and log into the portal again, this time using your new-fangled mutltifactor authentication.
Launching a Spear Phishing Attack
After you have completed both your tenant setup and your multifactor setup and have logged into the Security & Compliance Center using an account configured with multifactor authentication, you're ready to begin running simulations and campaigns against your users.
A phishing attack is generally designed to trick users into giving up personal details, such as user account credentials, banking account information, or credit card details. Rather than trying to create malware to take advantage of potential system vulnerabilities or dodge defenses, phishing attacks take the most direct approach to stealing data: asking. Some of the largest and most successful system breaches have utilized this method. And, if the credentials harvested are valid, attacks started through this method can go undetected for weeks, months, or even years (further underscoring the importance of multifactor authentication in stopping breaches).
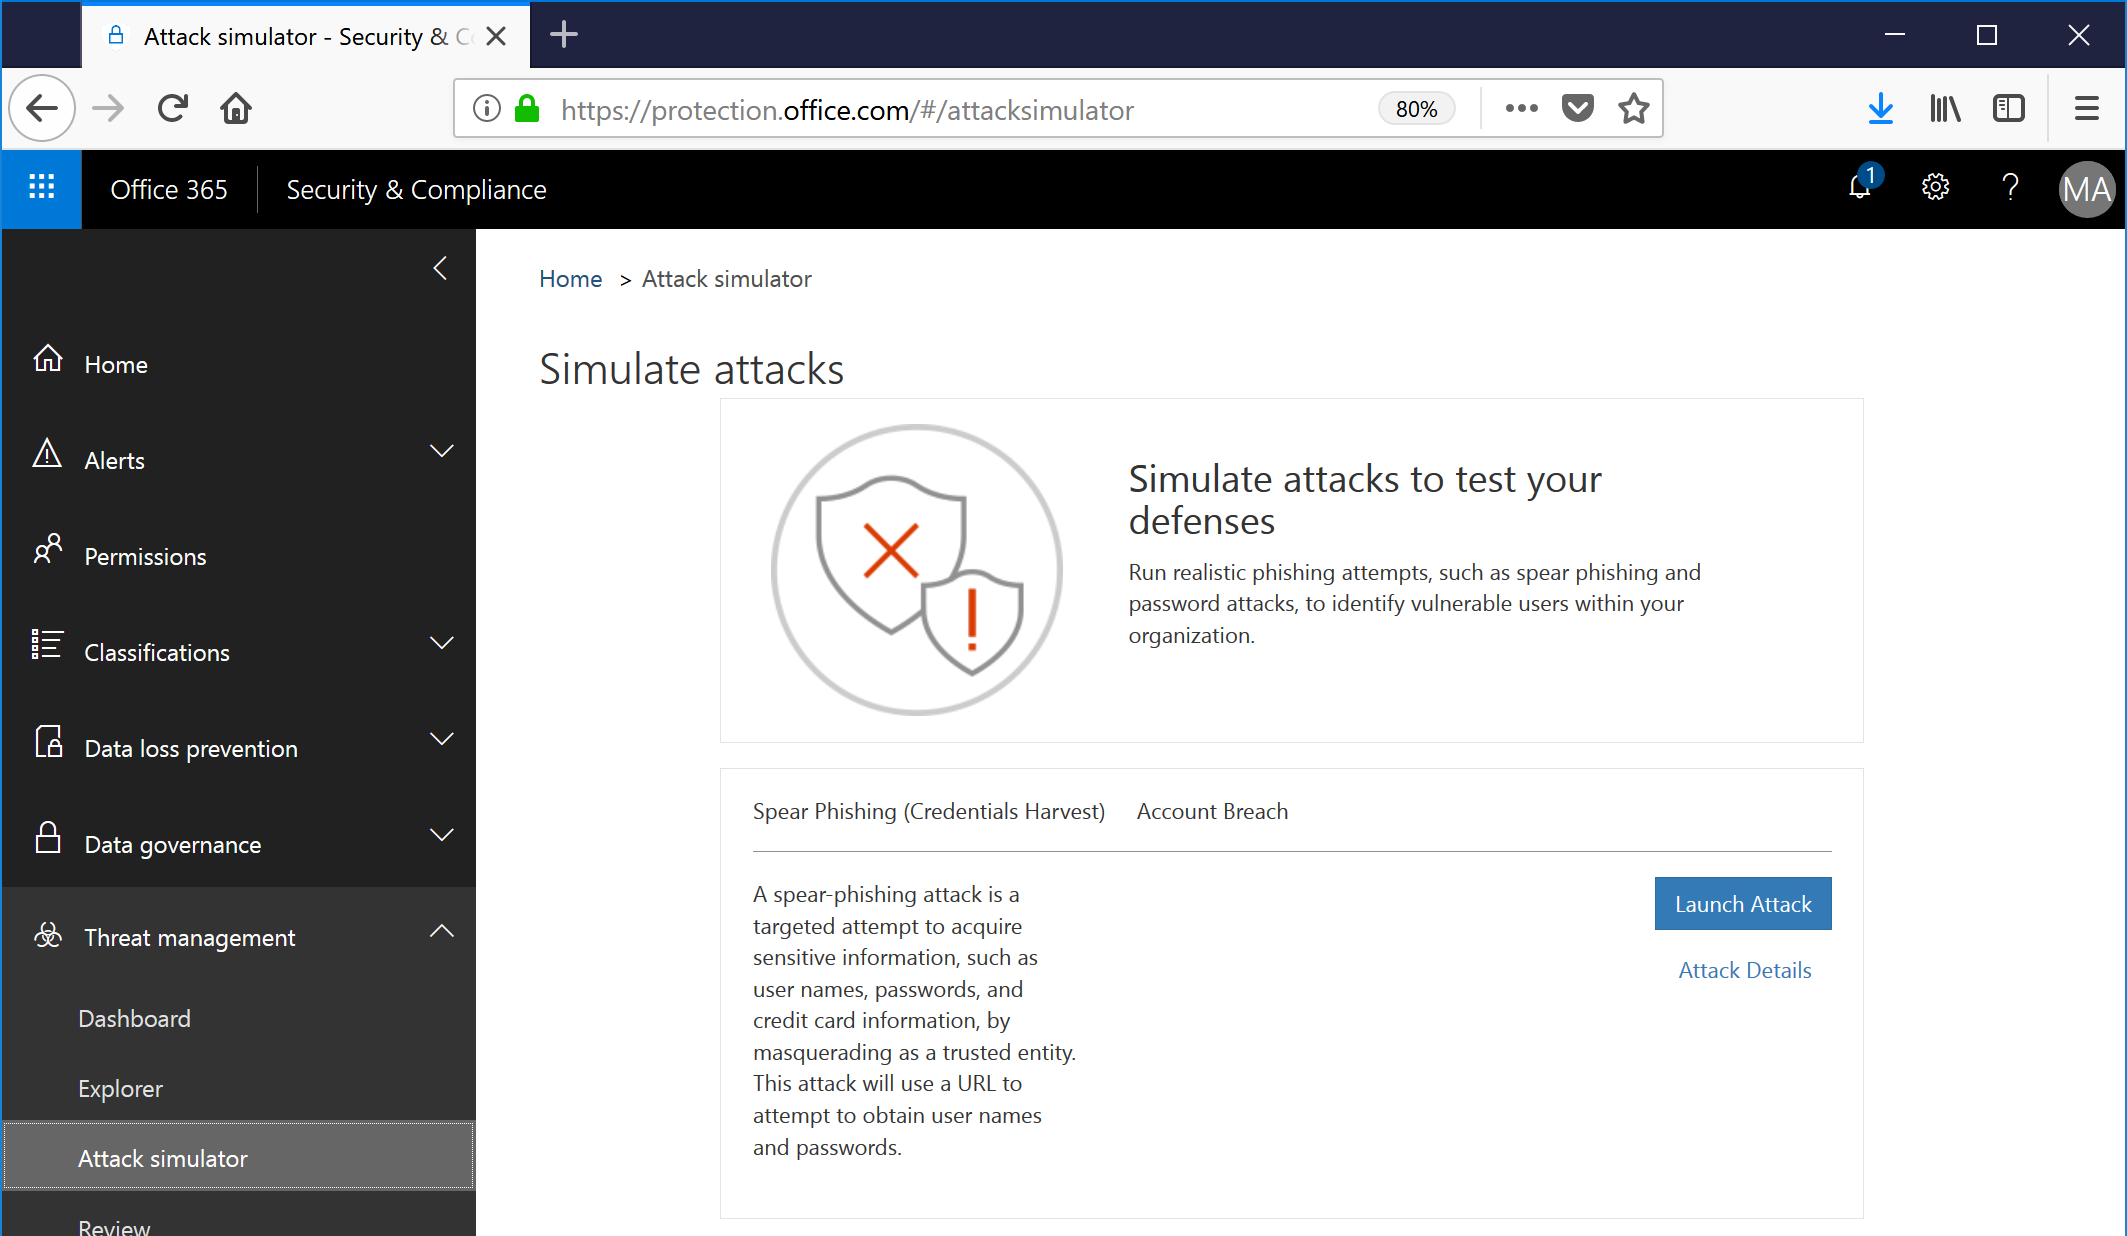
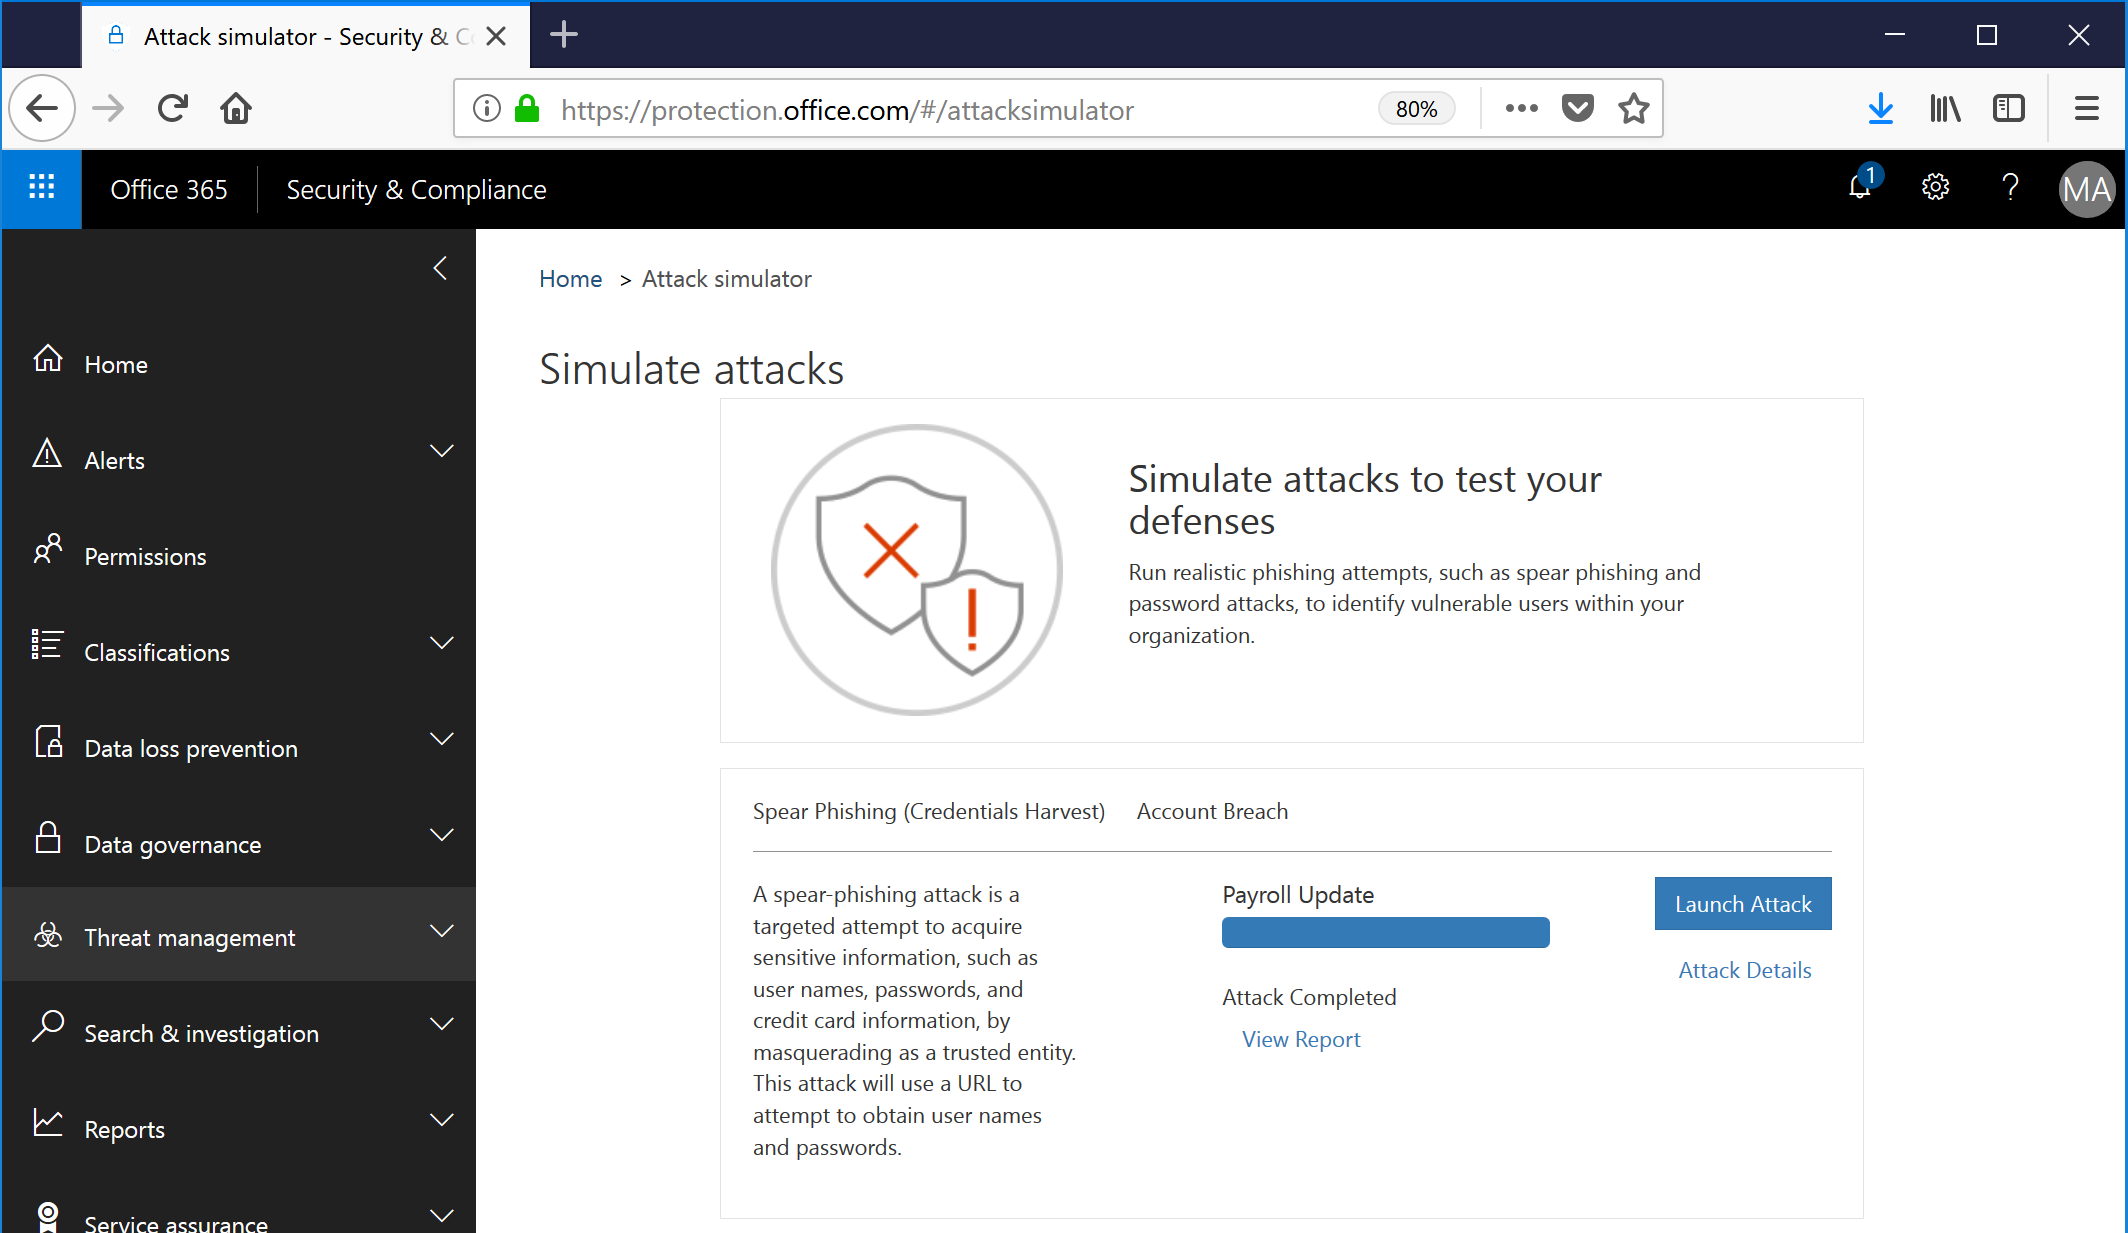
- To begin the Spear Phishing campaign, log into the Security & Compliance Center, expand Threat Management, and select Attack Simulator. Then, next to Spear Phishing, click Launch Attack.
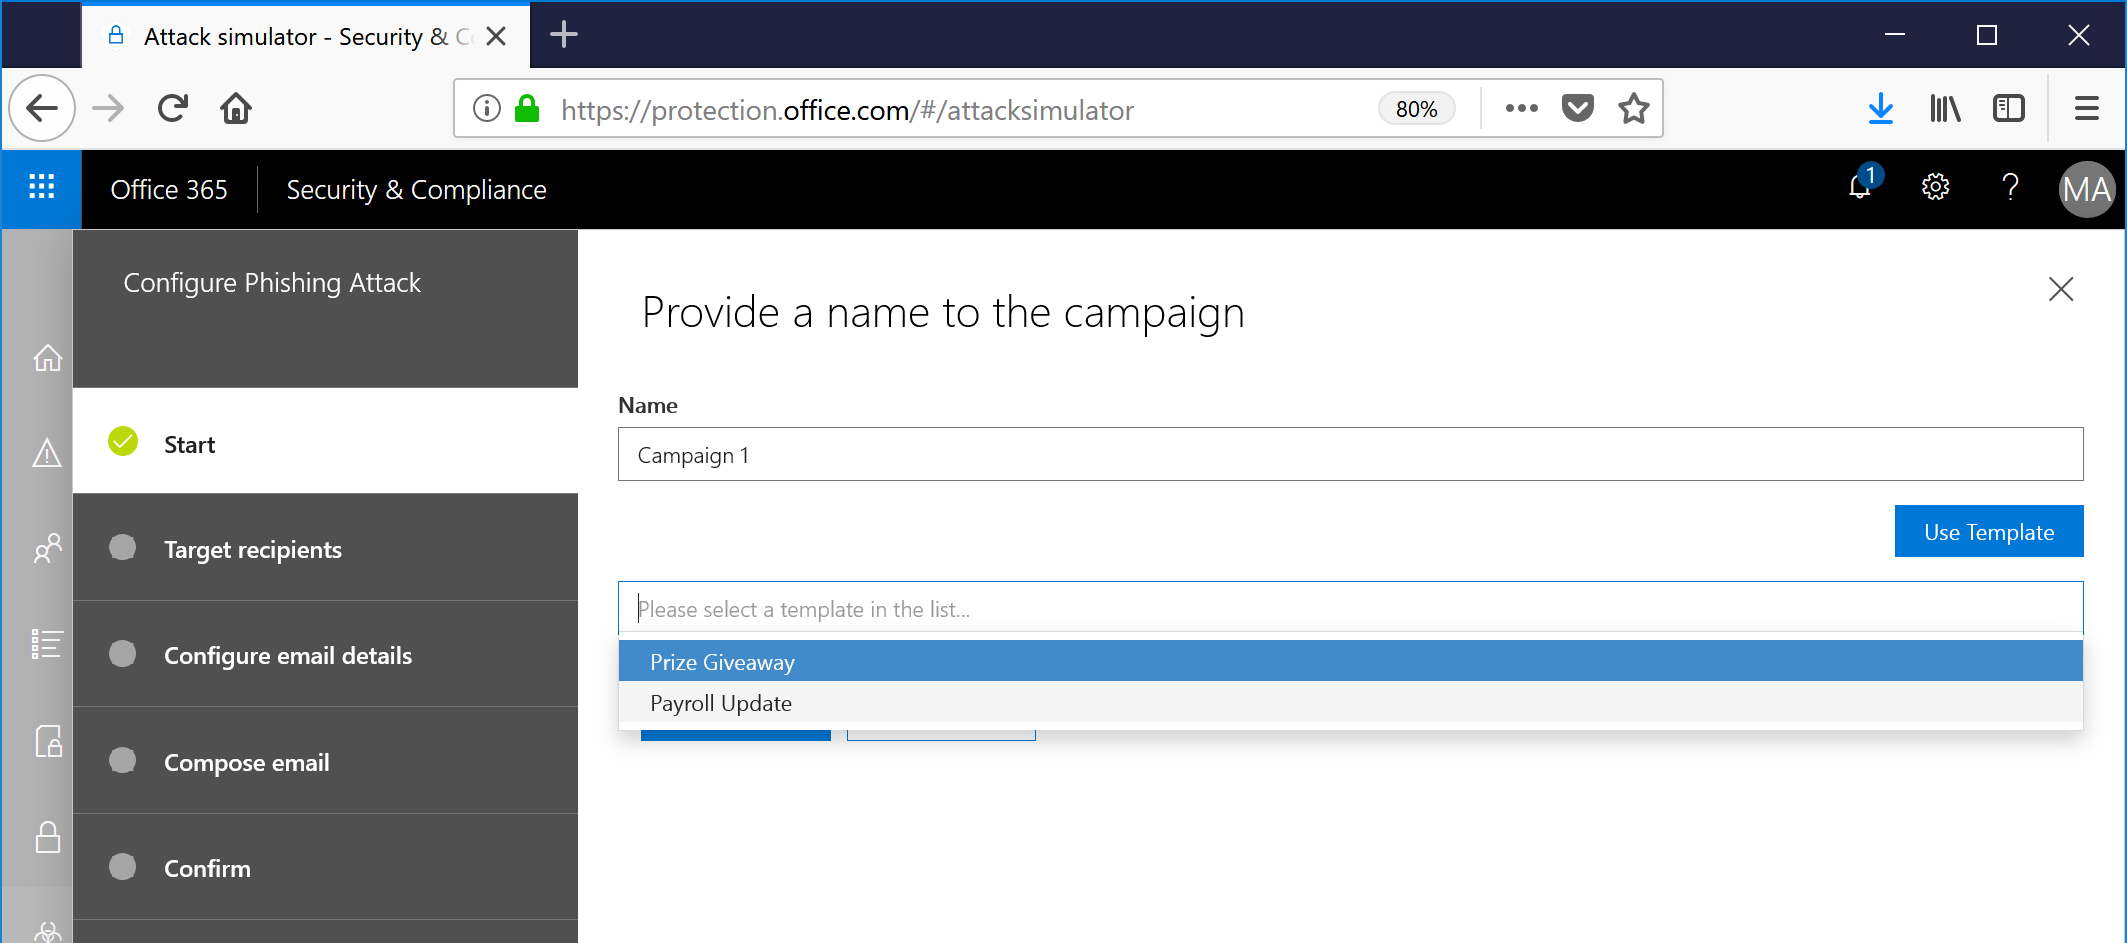
- Provide a name for the campaign.
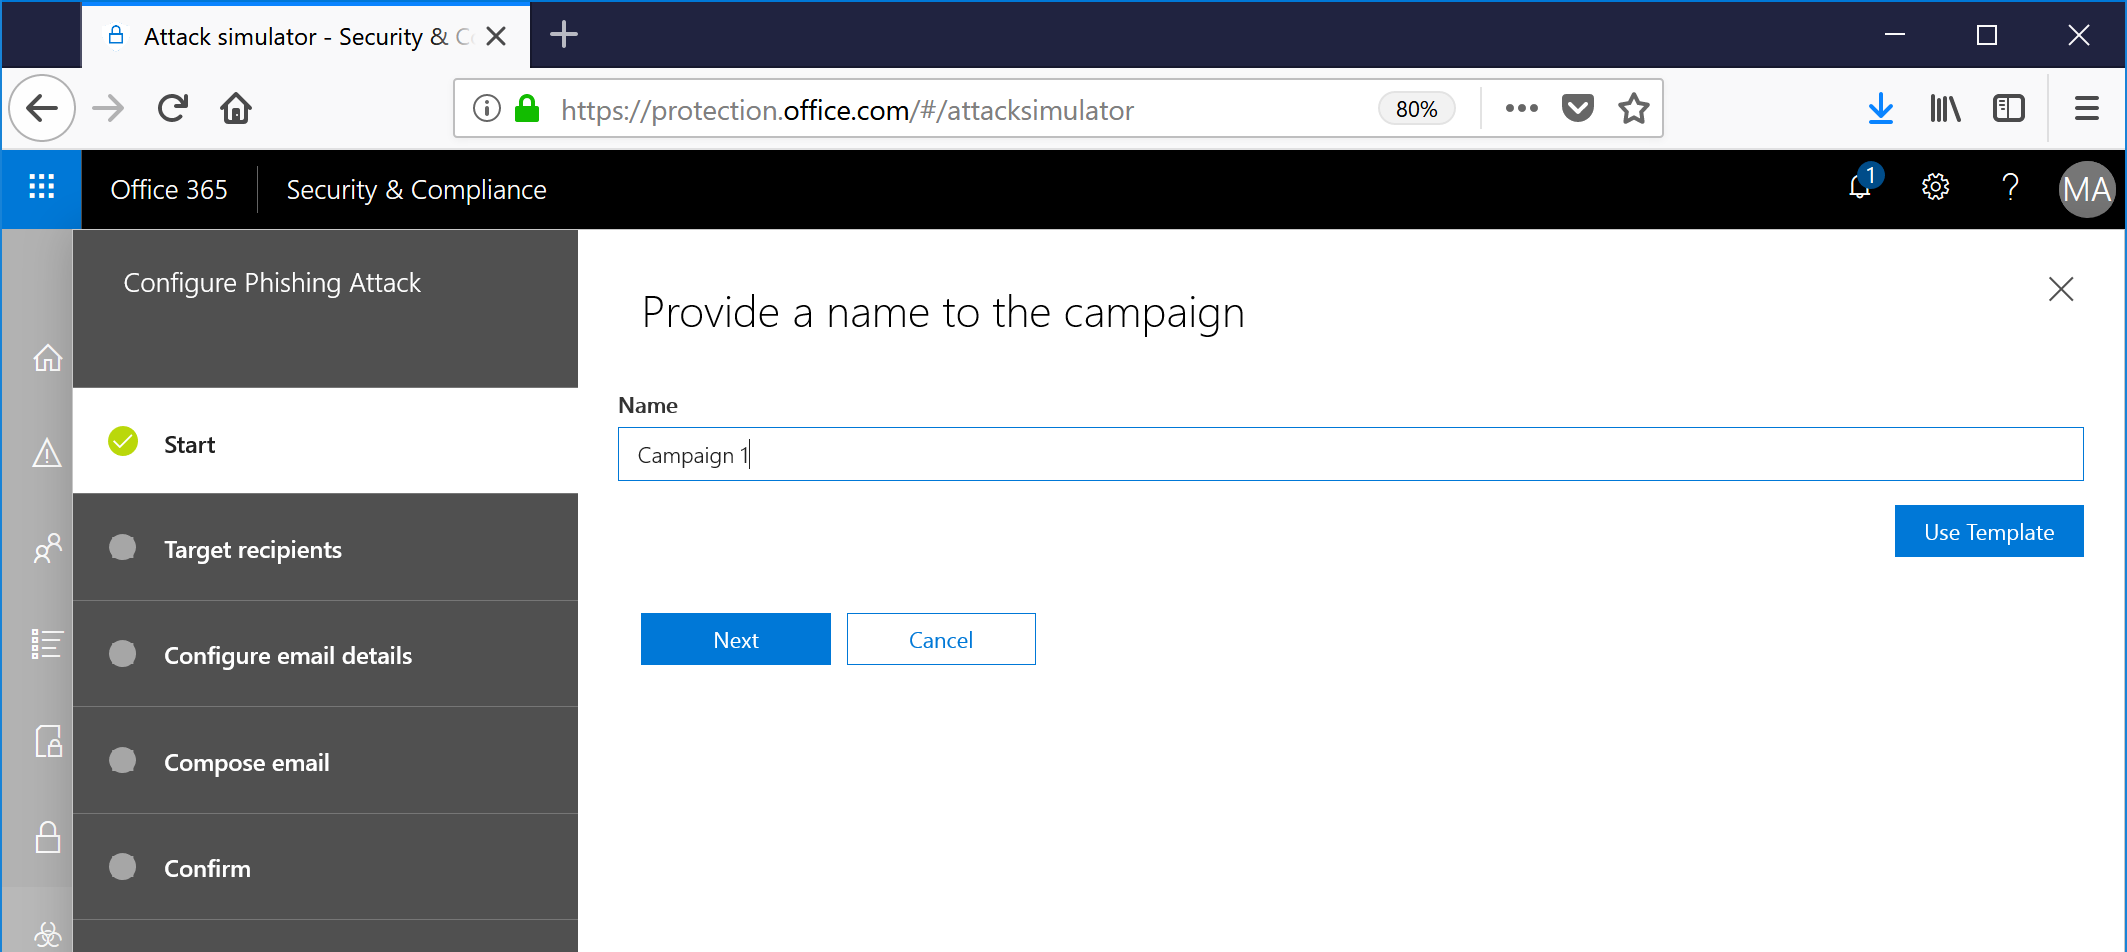
- At this point, you can proceed, or you can craft a more specific campaign by clicking the Use Template option. Since everyone is always interested in their paychecks, I'm going to give the Payroll Update template a whirl.
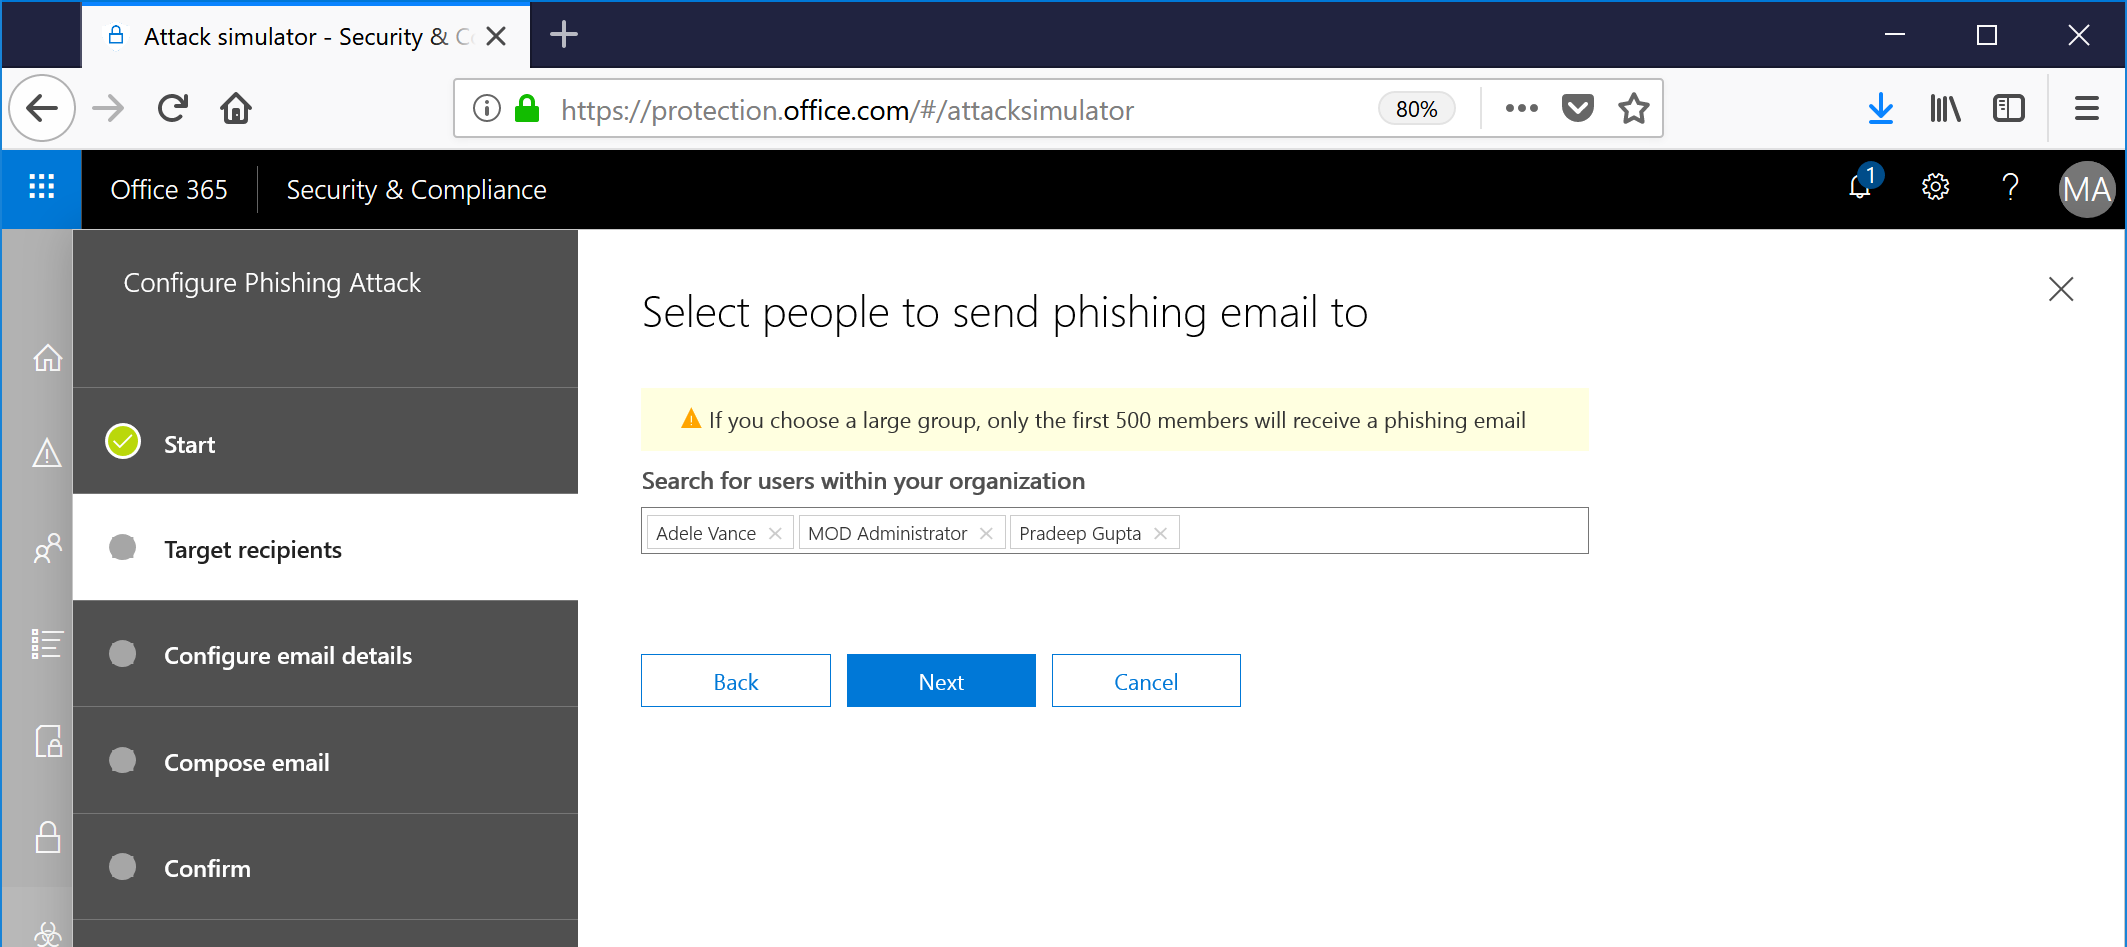
- Select a handful of users to target and click Next.
- Select some customization details. You can choose the subject of the email, the sender's return email address, sender's display name, a URL to direct users toward (all owned and maintained by Microsoft), and landing page for after the users have unwittingly clicked through. I've customized a few of these. When you're done, click Next.
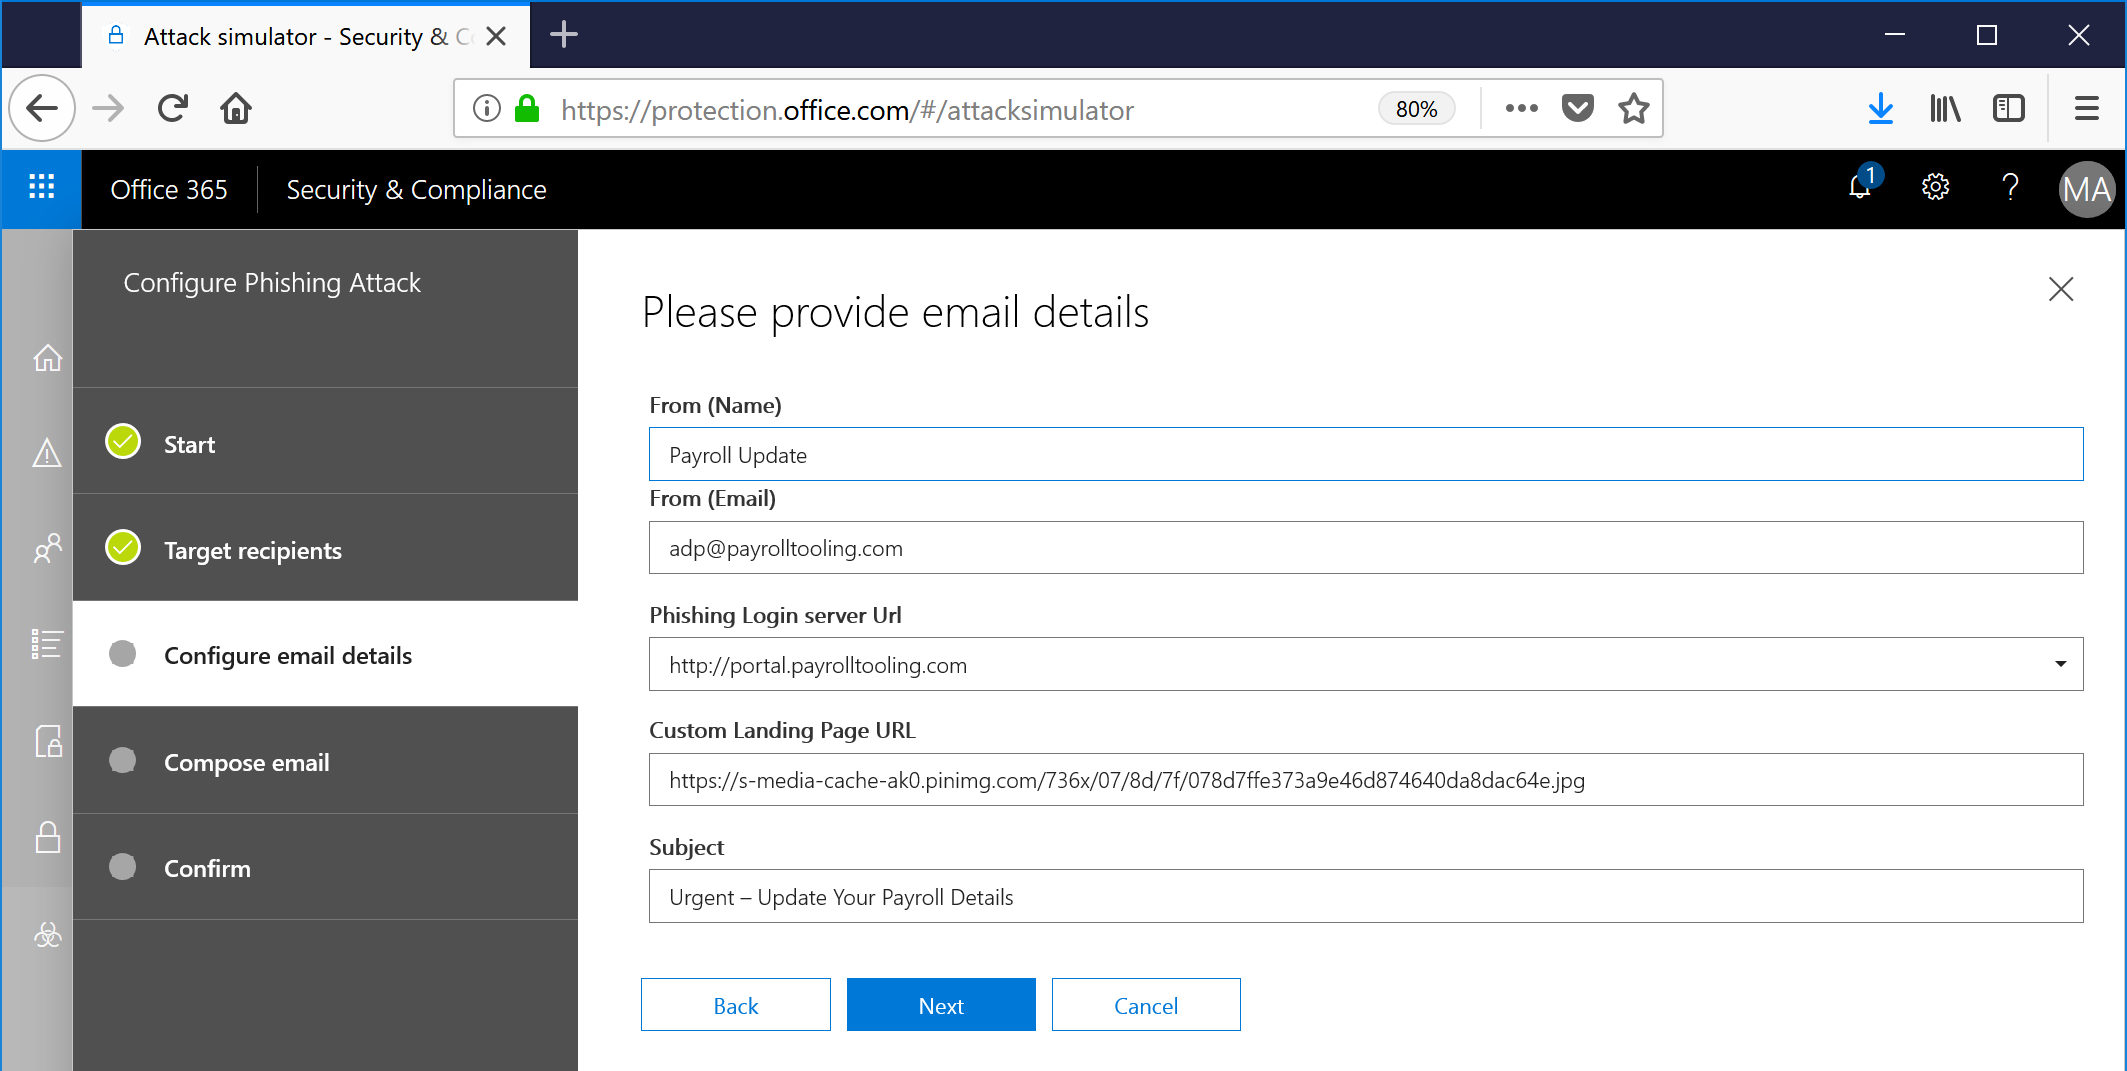
- In order to make these even MORE convincing, you have the ability to customize the text to your liking, using messaging that you've seen be effective against your own users. We give you some stock imagery, but you can easily click on the Source tab of the compose message window and provide additional formatting, images, or whatever floats your boat. When you feel you've been devious enough, click Next. The two important tokens you want to make sure your message includes are ${username} and ${loginserverurl} . Username is, well, the end user. And LoginServerUrl is the URL that was selected from the previous menu that the user will be directed to.

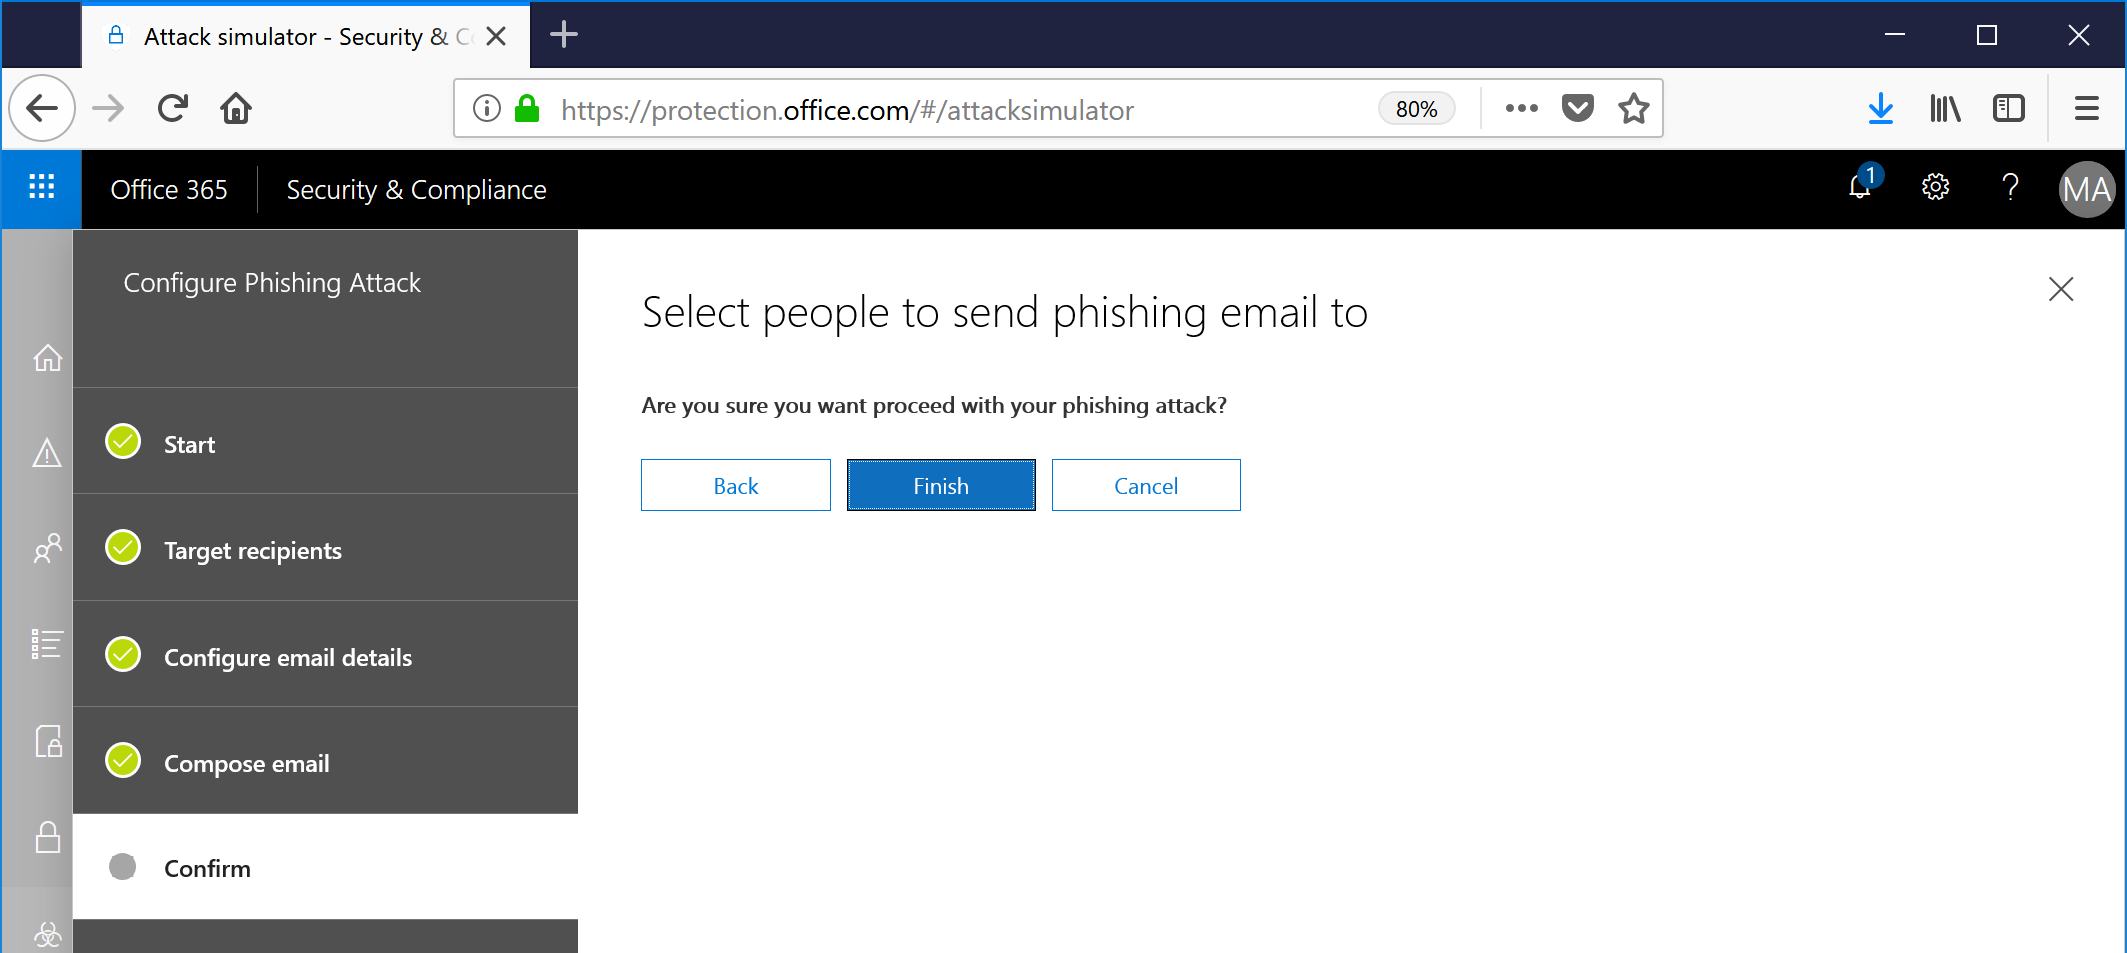
- And finally, click Finish to send it.
Being on the Receiving End of the Spear
So, now you know how to create one. But, I know what you're thinking--what is the end-user experience?
That's exactly what we're going to dive into next.
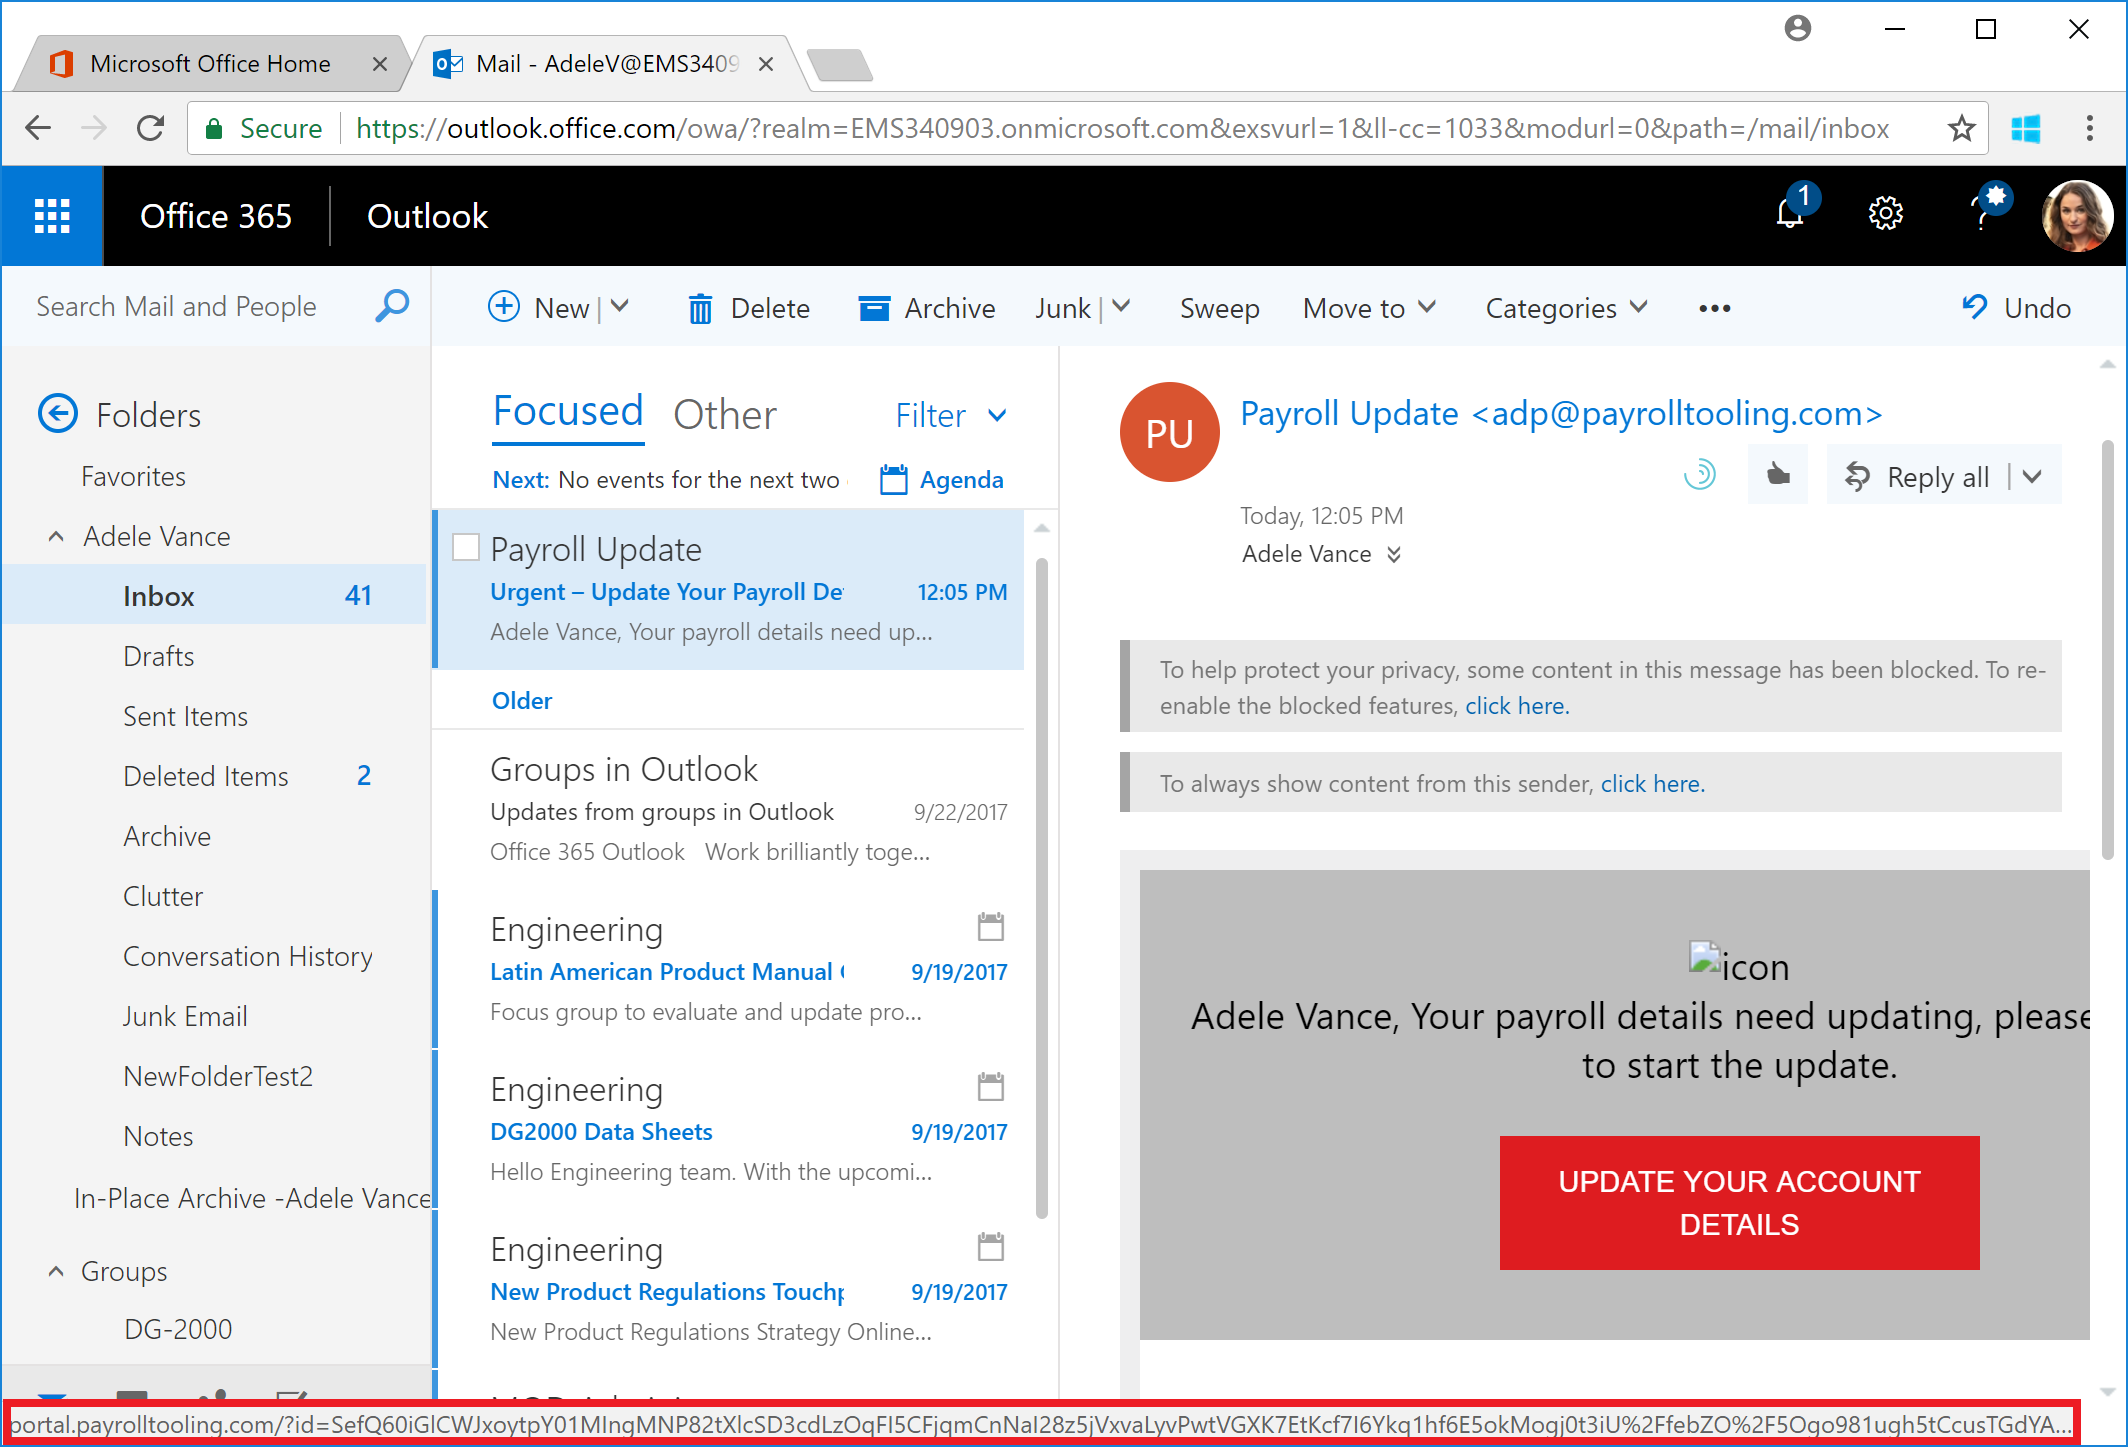
As you saw in my example, I targeted a couple of users. One user in particular, Adele Vance, has been known in my demos to be kind of click-happy.
Upon logging into Outlook as Adele, I'm presented with the following email. As it's from an "unknown sender" at the moment, Outlook is displaying the message with some images blocked. Outlook does this for protection, but we know the users are going to unblock the images. I hovered over the "UPDATE YOUR ACCOUNT DETAILS" box, and have highlighted the URL.
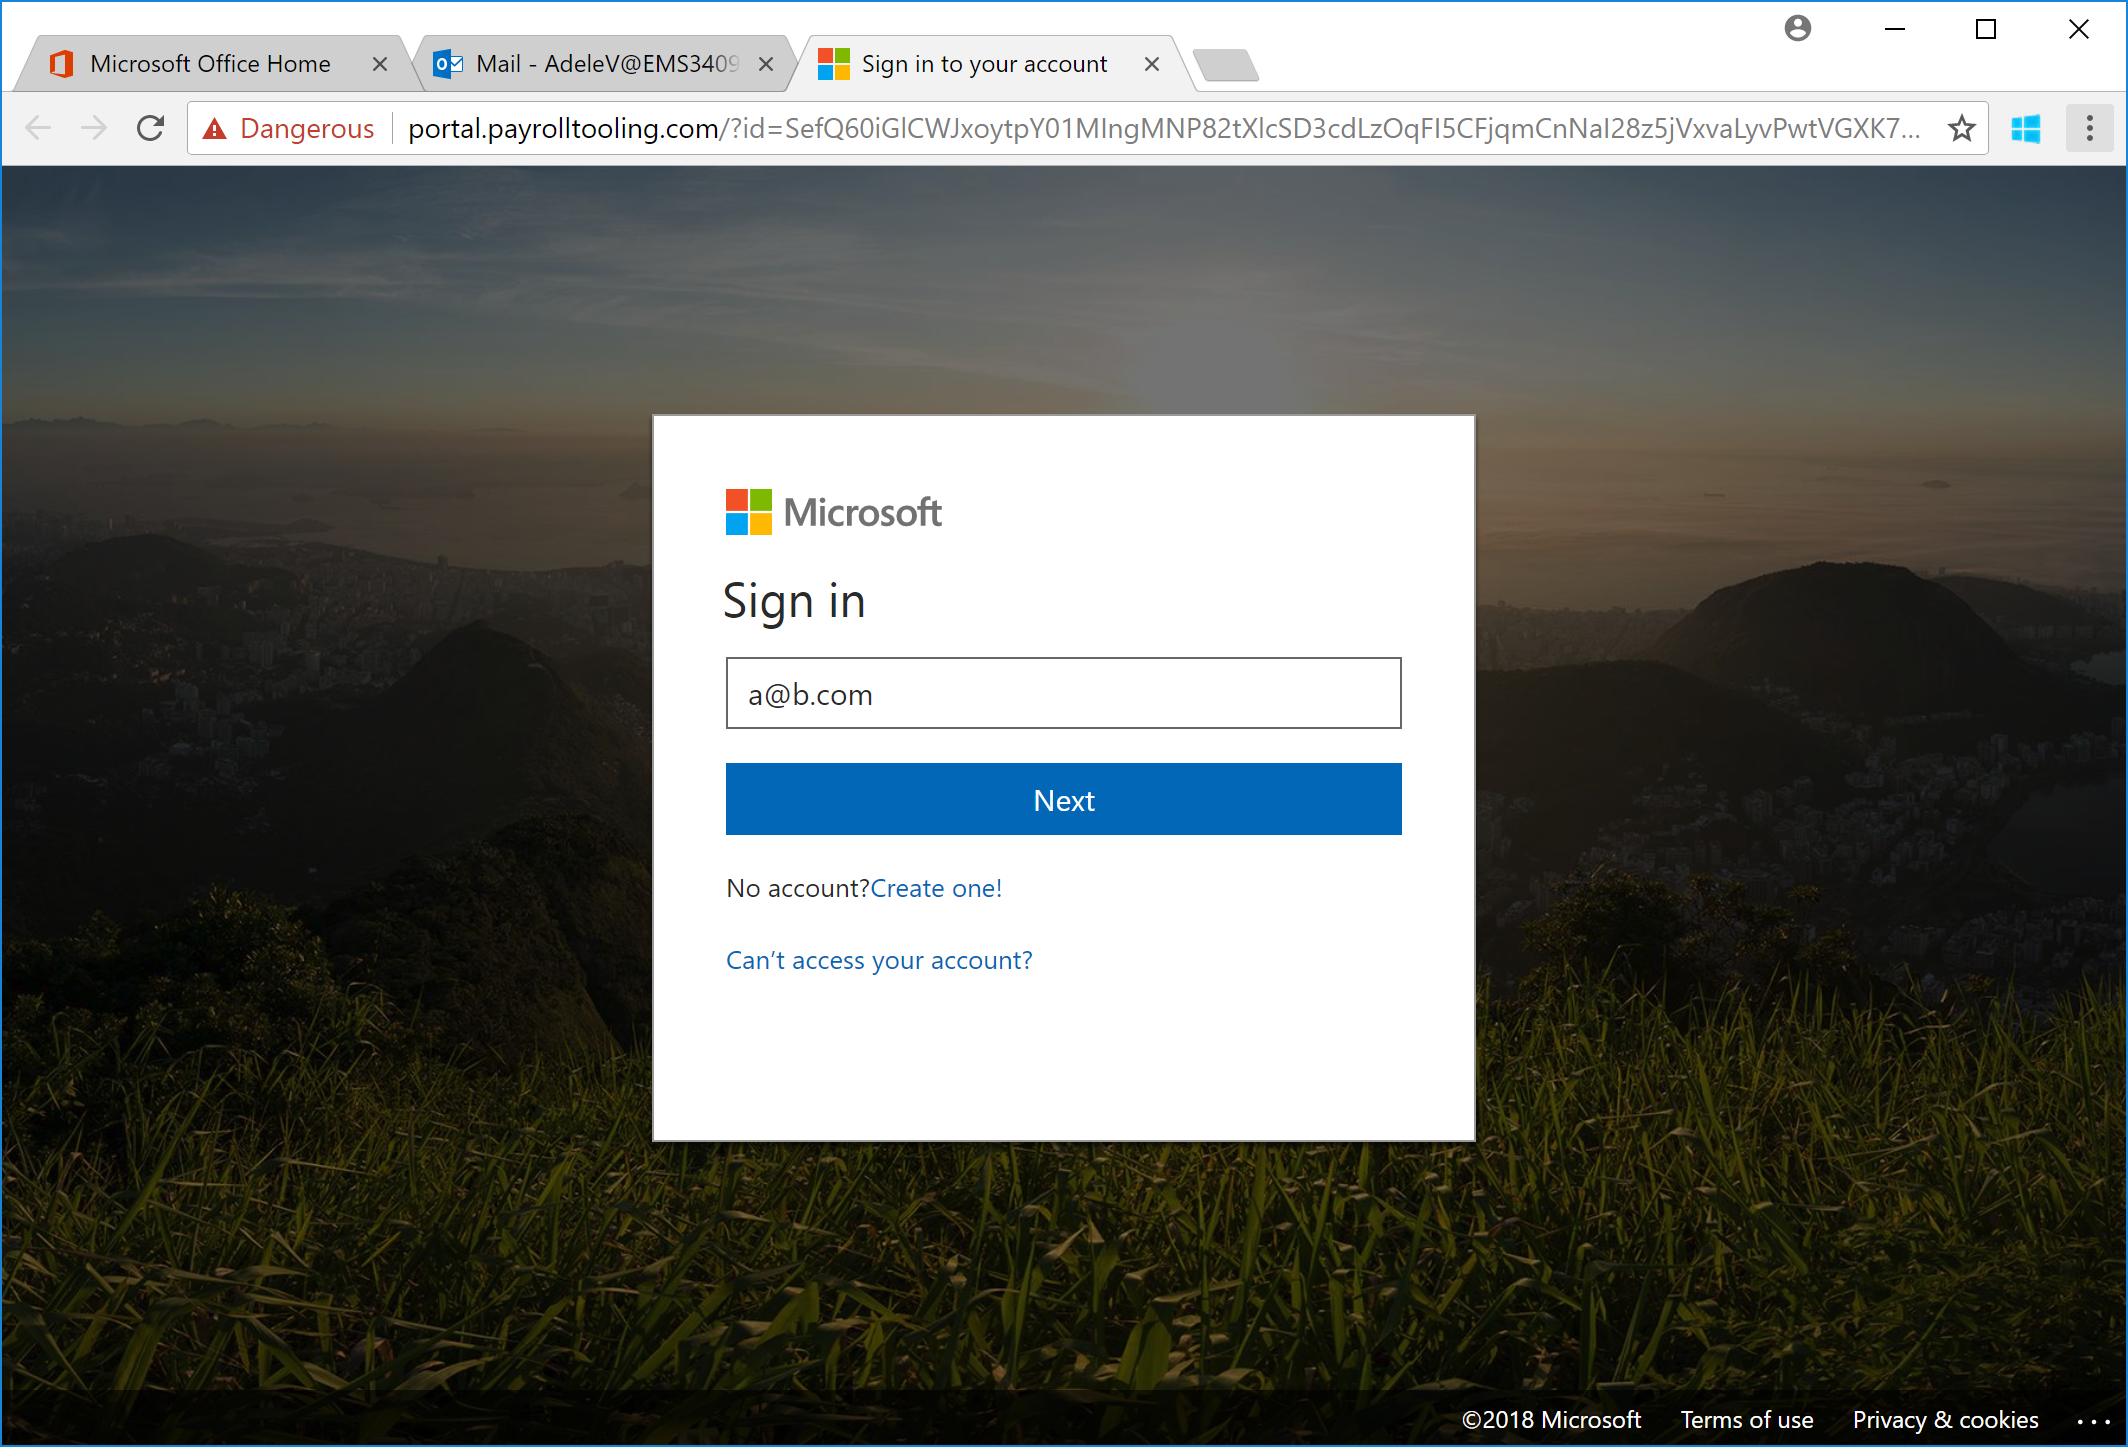
Clickers gonna click, so I do.
The user is presented with a very official-looking Office 365 sign-on screen. The realism is uncanny. Since it's a phishing site, we can enter ANYTHING in here.
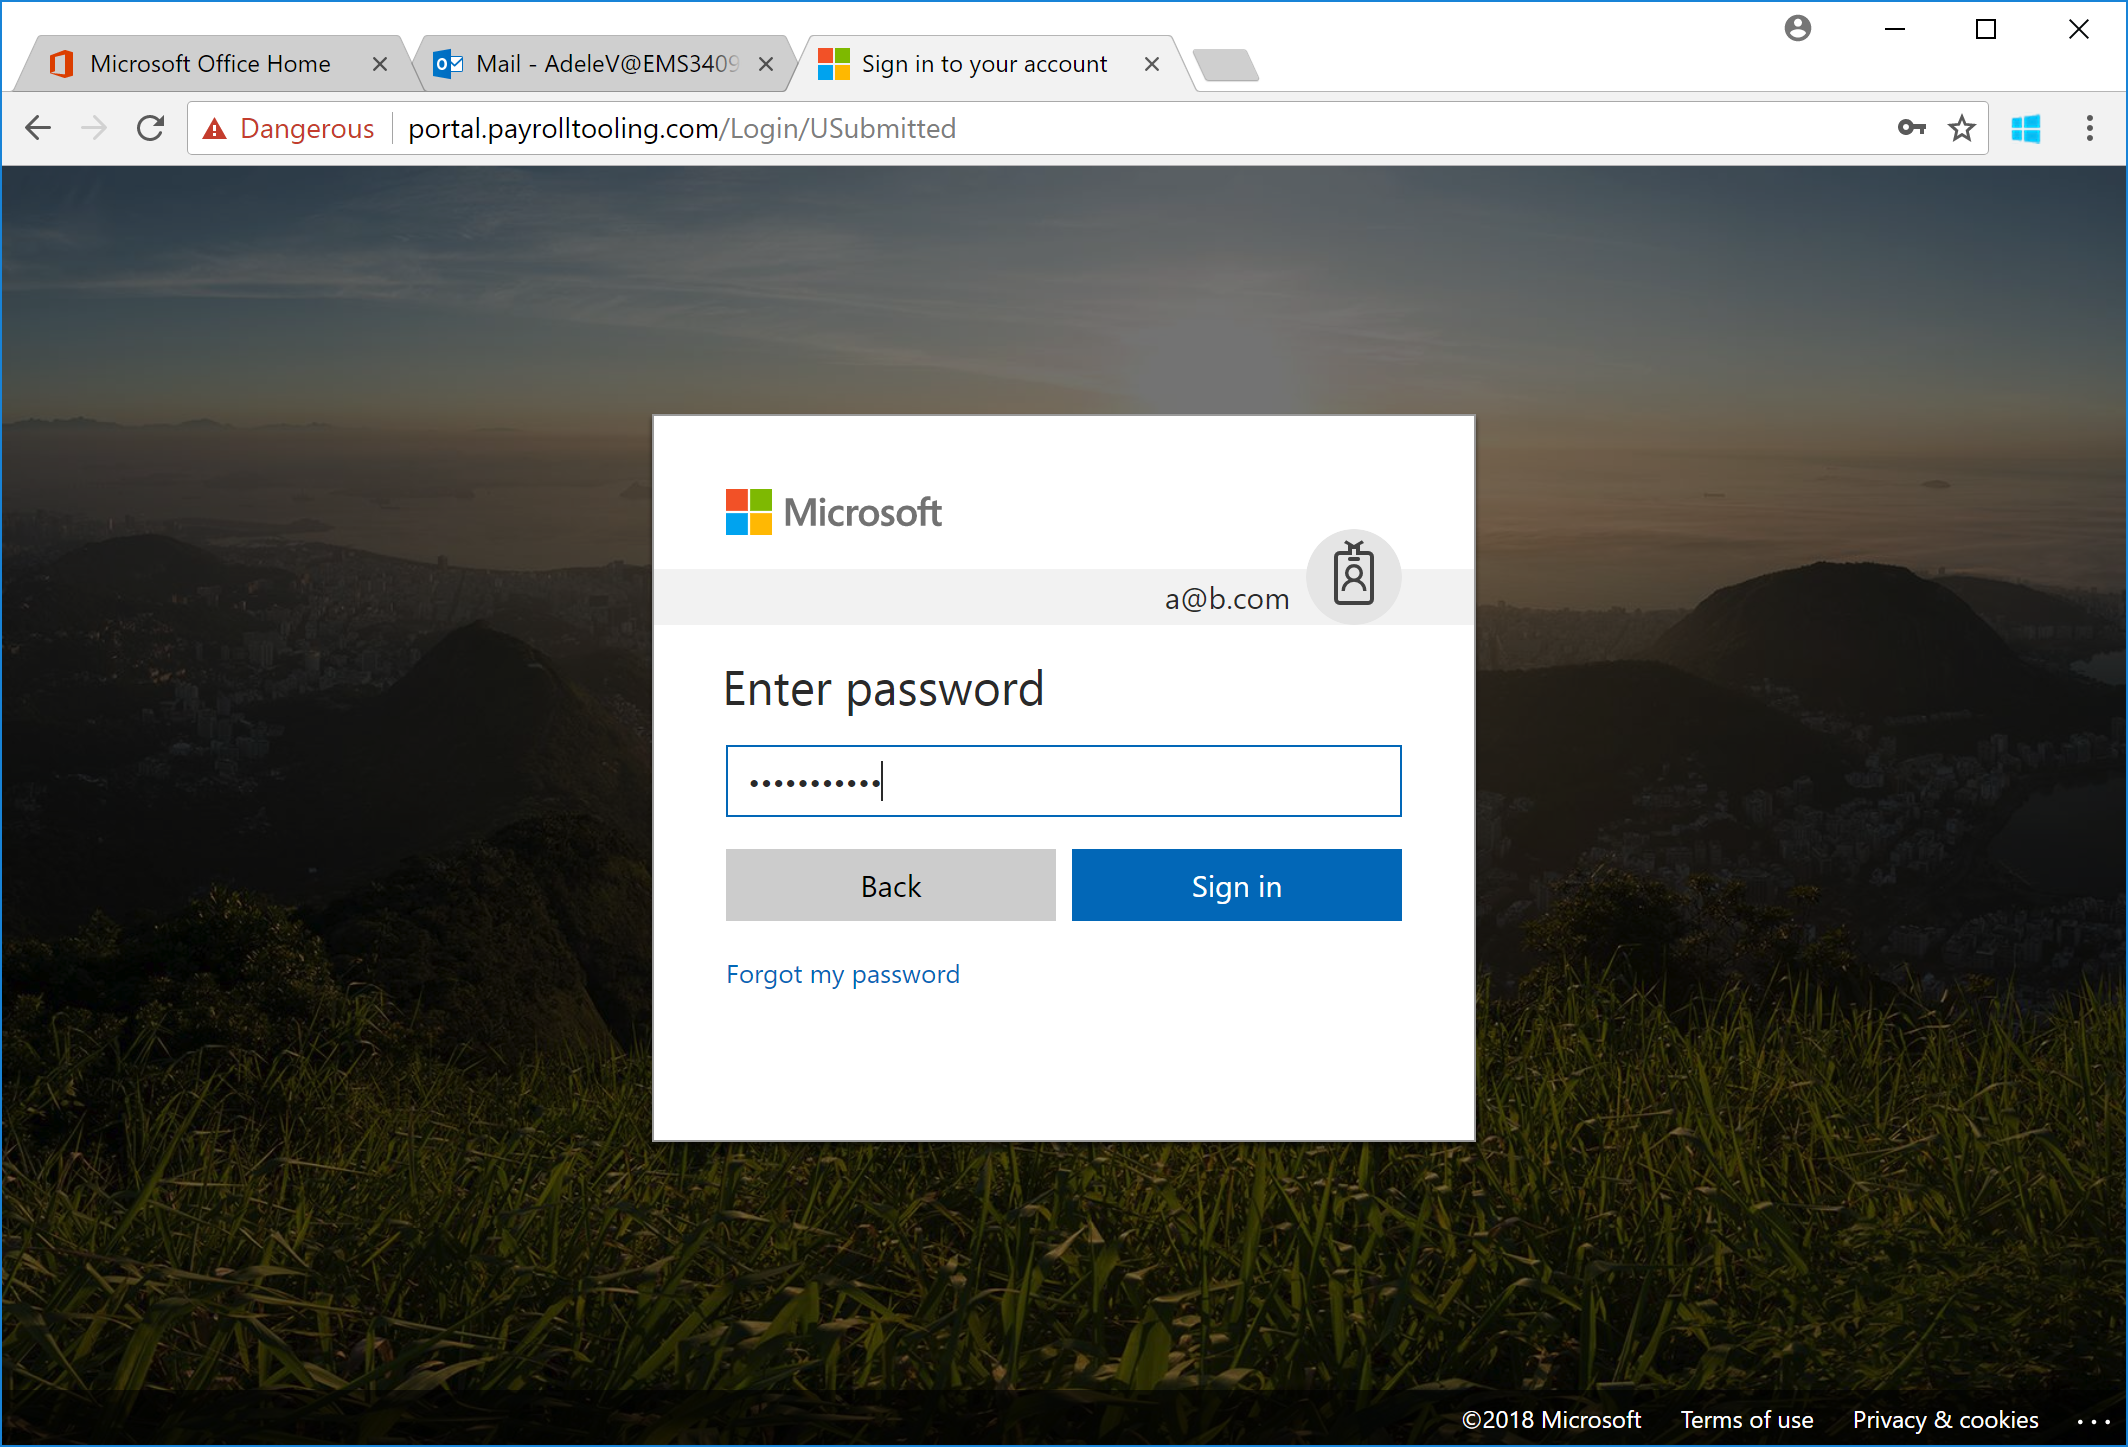
And again with the password:
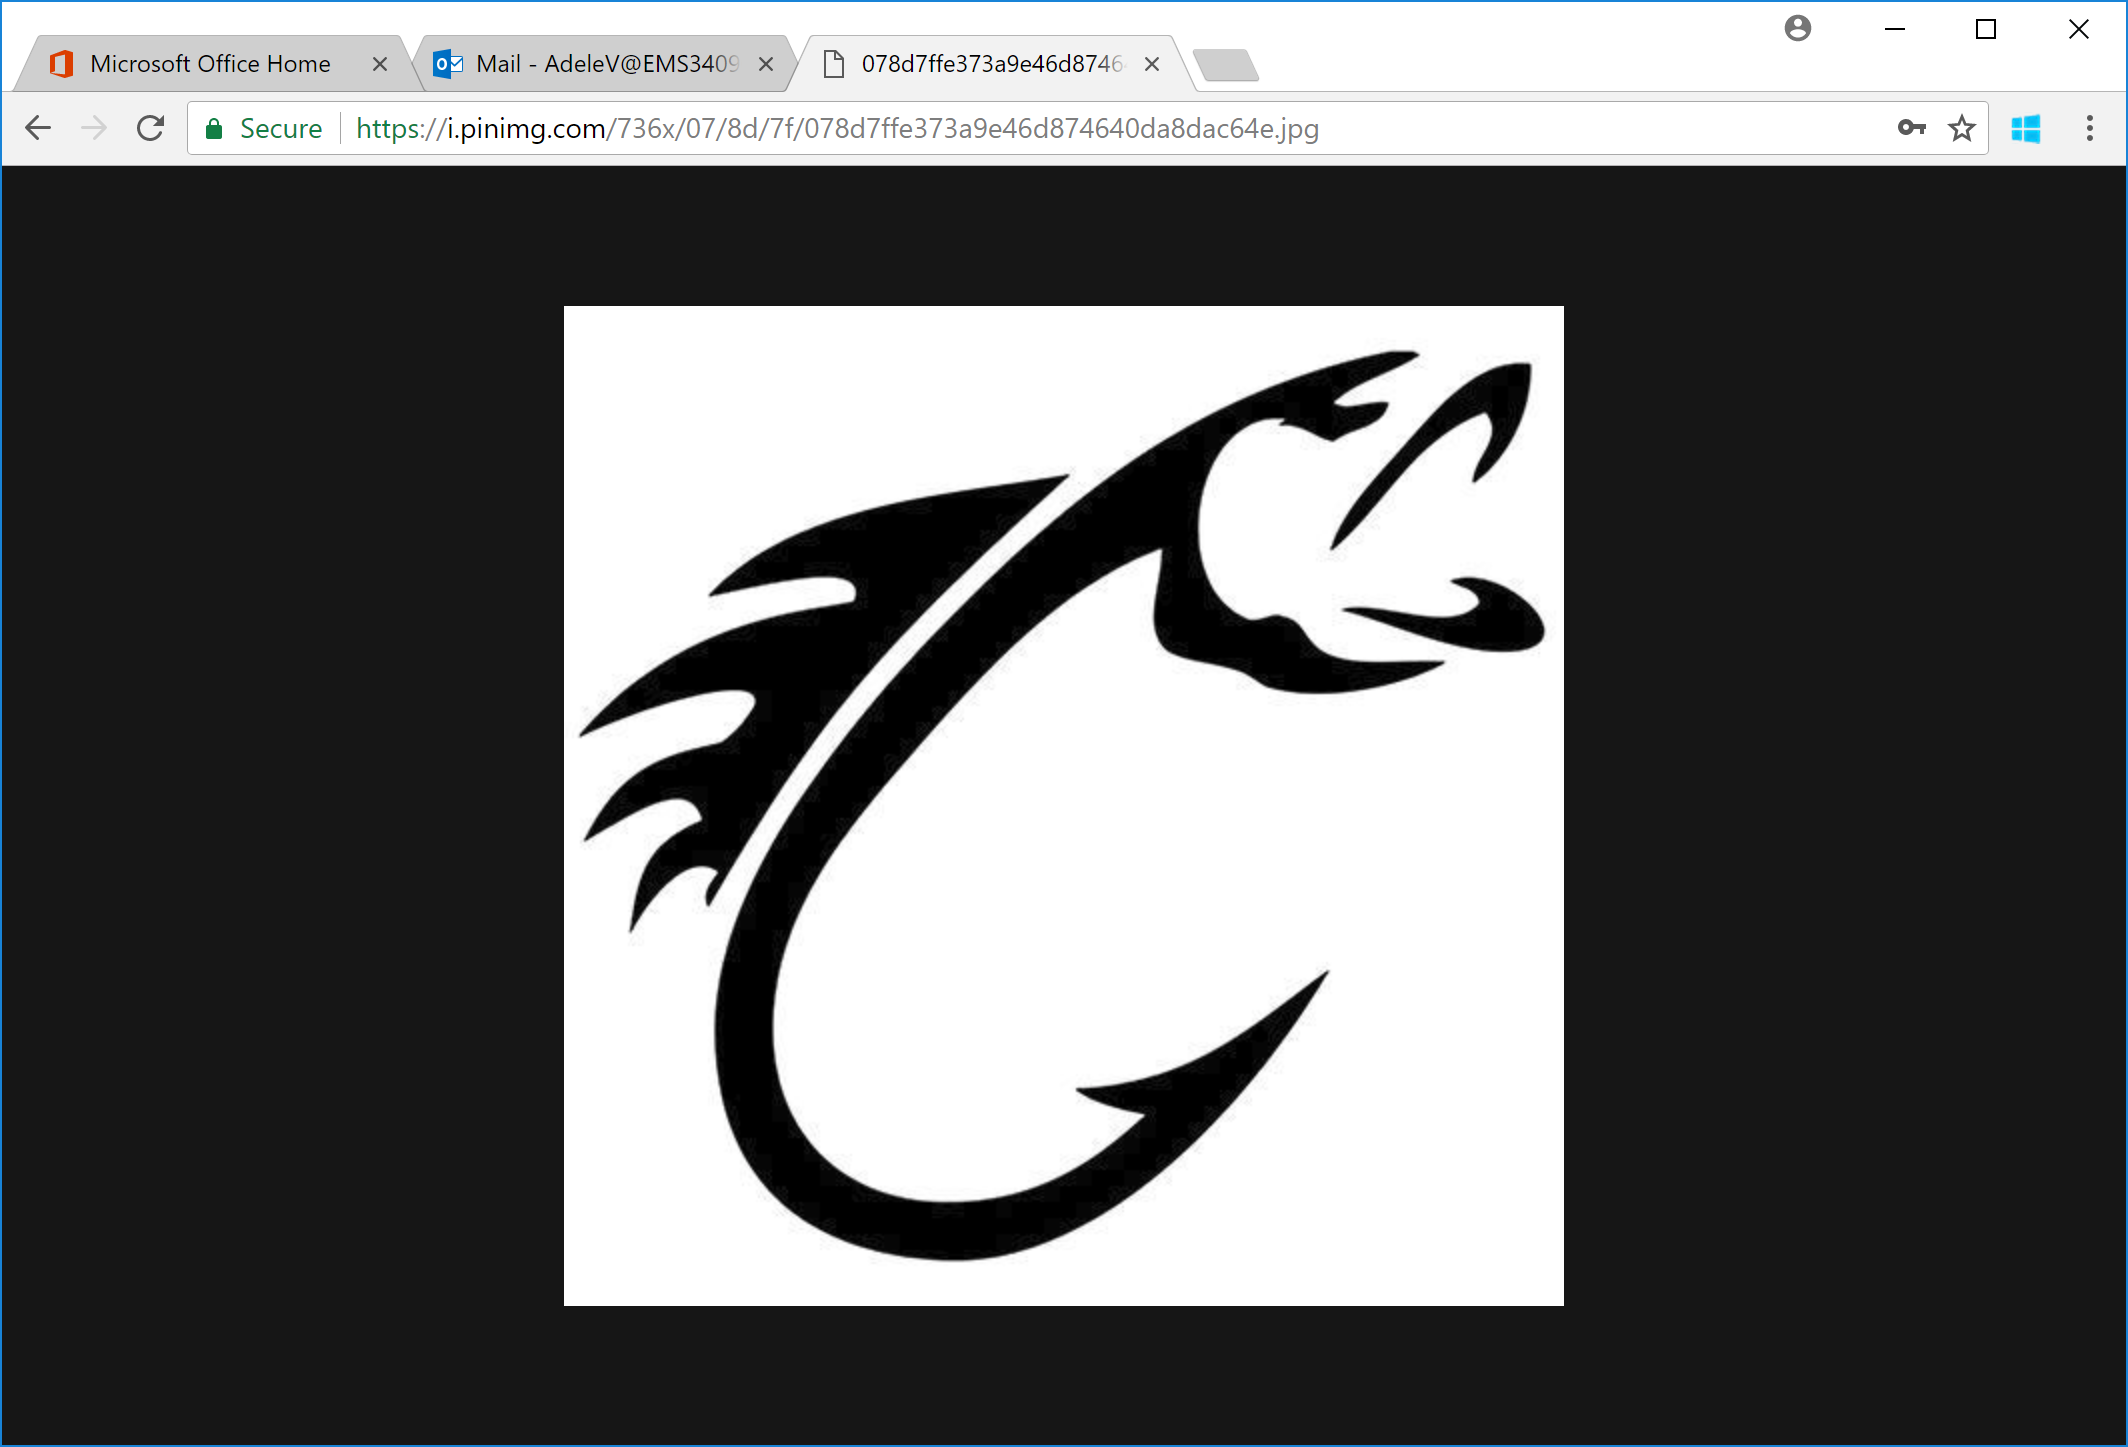
And, after the user has entered their data, they are redirected to the URL specified originally in the phishing campaign. In this case, I sent Adele to....
Circling Back
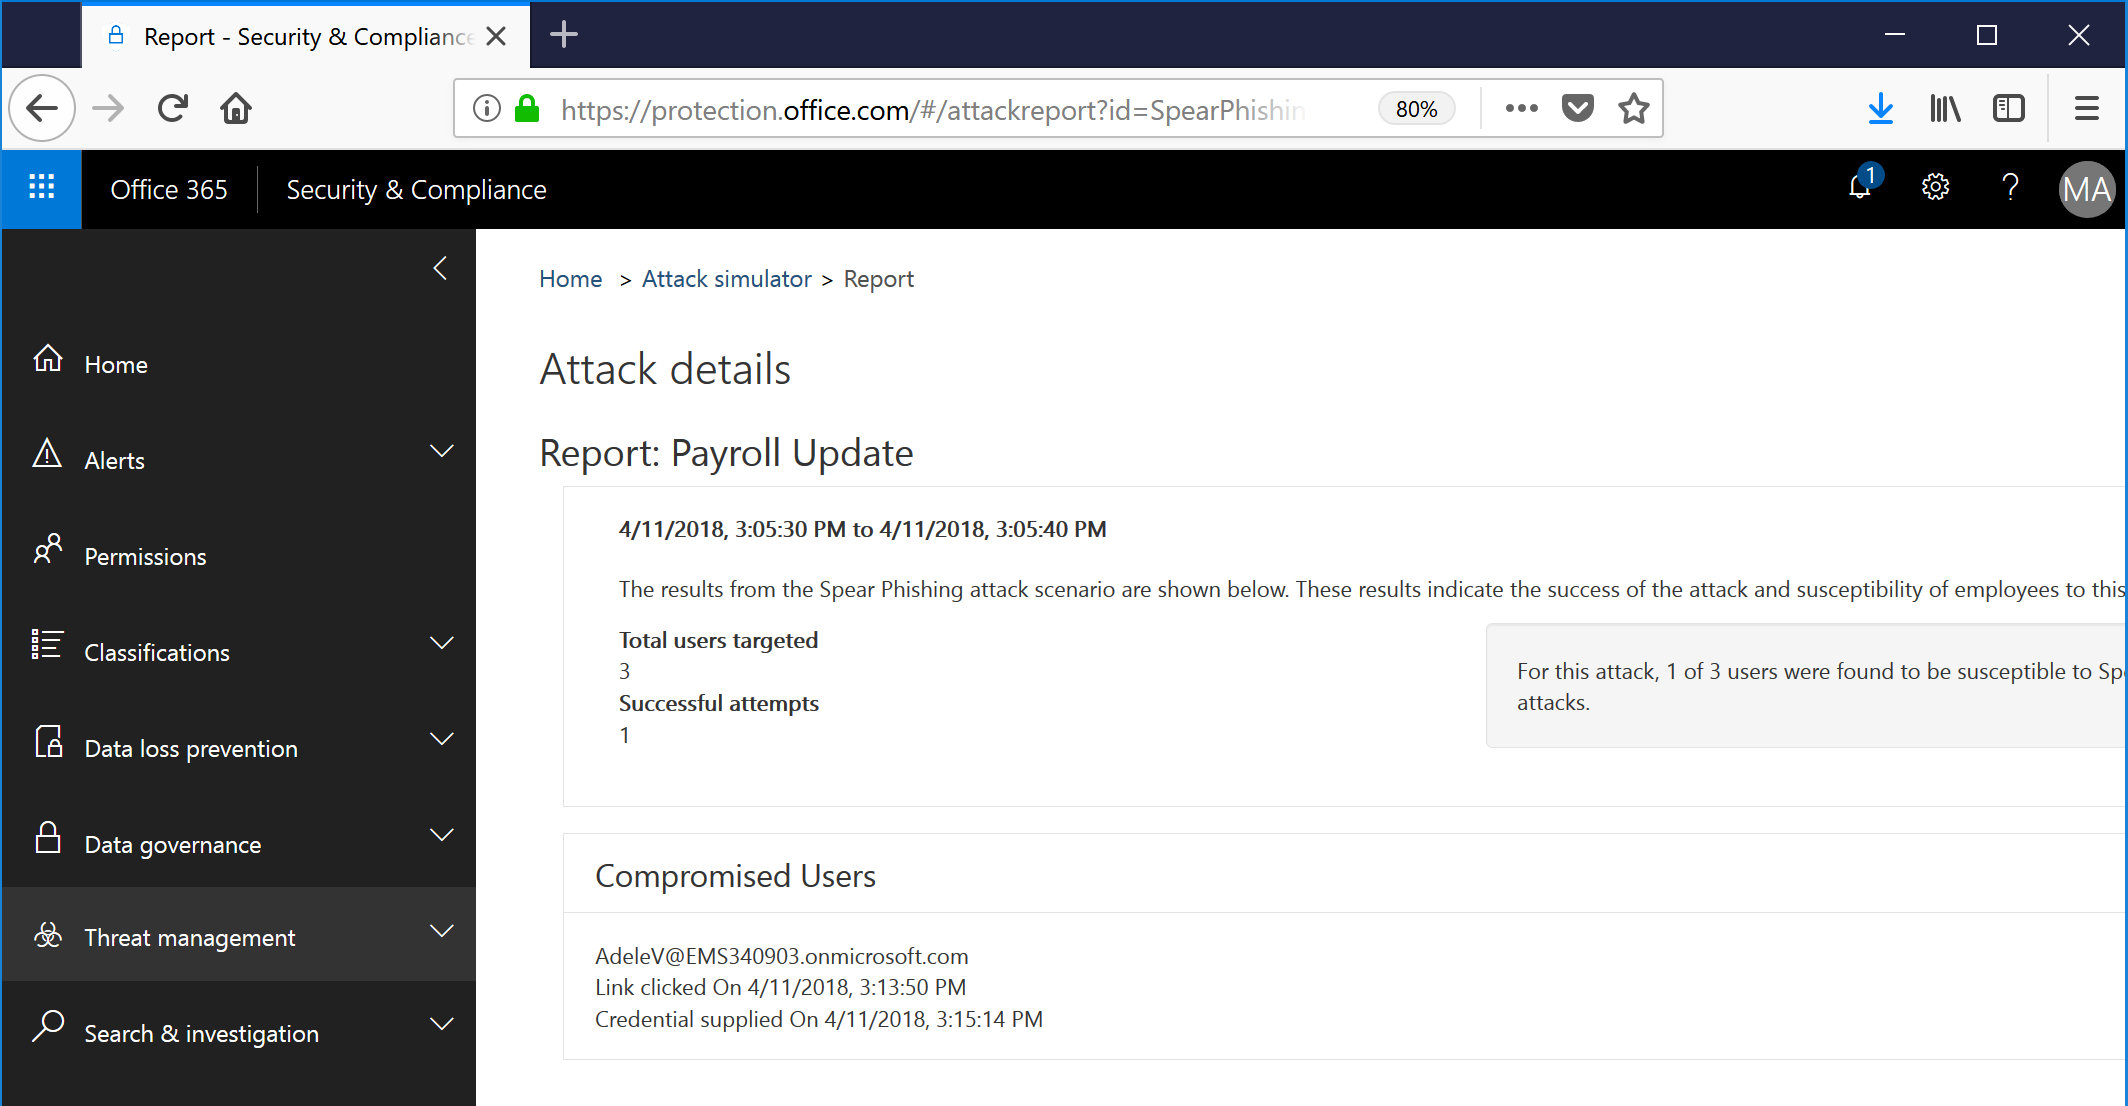
At some point after you've sent out your campaign, you're going to want to check on how many Adele's you have in your environment. I wish nothing but the--wait, I think I might have to pay a royalty for that one.
Go back to the Security & Compliance Center and refresh the Attack Simulator page. It should now look like this:
Click on the View Report link to be taken to a ... pony. Sadly, not a pony. You can view the report of how many users were targeted, how many users clicked through and supplied credentials, and who they were.
The phishing will continue until morale improves!