Using AI to answer your customers' questions

 By Martin Beeby, Technical Evangelist, Microsoft UK
Artificial Intelligence is revolutionising and disrupting how business is done, and the implications will create significant challenges and opportunities for the way businesses communicate with their customers. That’s why we have created a new show called Introducing AI, the first episode of which will be streamed today. It goes into detail about the ways in which you can use AI, but if you can’t wait and want to discover AI for yourself, why not build your own intelligent Question and answer bot right now?
Sage accounting recently added a 'question and answer' feature to their bot, Pegg. Pegg is an assistant who can answer questions about payroll year end, using the same underlying technology that I’m going to show you in this tutorial. Your bot can work on a website like Sage’s and can even be deployed to Facebook Messenger, Skype, Microsoft Teams and Slack.
Step 1 : Login and create a service
Head over to https://qnamaker.ai and sign in using a Microsoft account. Click on 'Create new service'.

Step 2: Add your questions and answers
You will need to give your service a name. I’ve called mine “Introducing AI”.
One of the basic requirements in writing your own bot service is to give it some questions and answers. If your company has an FAQ page then you can add that URL to your service. Otherwise, you can upload an Excel spreadsheet of questions and answers. For my bot I’m going to use the URL: https://thebeebs.co.uk/introducing-ai-faq, which is a sample FAQ I have created for this tutorial.
Once you have filled in the form, click 'Create'.
Step 3: Publish the service
The system will now add any questions and answers it finds to the Q&A maker Knowledge Base. The model will be trained against these questions and you are now able to publish. Press the 'Publish' button, and after a few minutes you will see a screen where you need to review the changes you are going to make to your service. If you're happy with everything, click on the 'Publish' button again. After a few more minutes you will be given a web address for your bot service.
Step 4: Test the bot
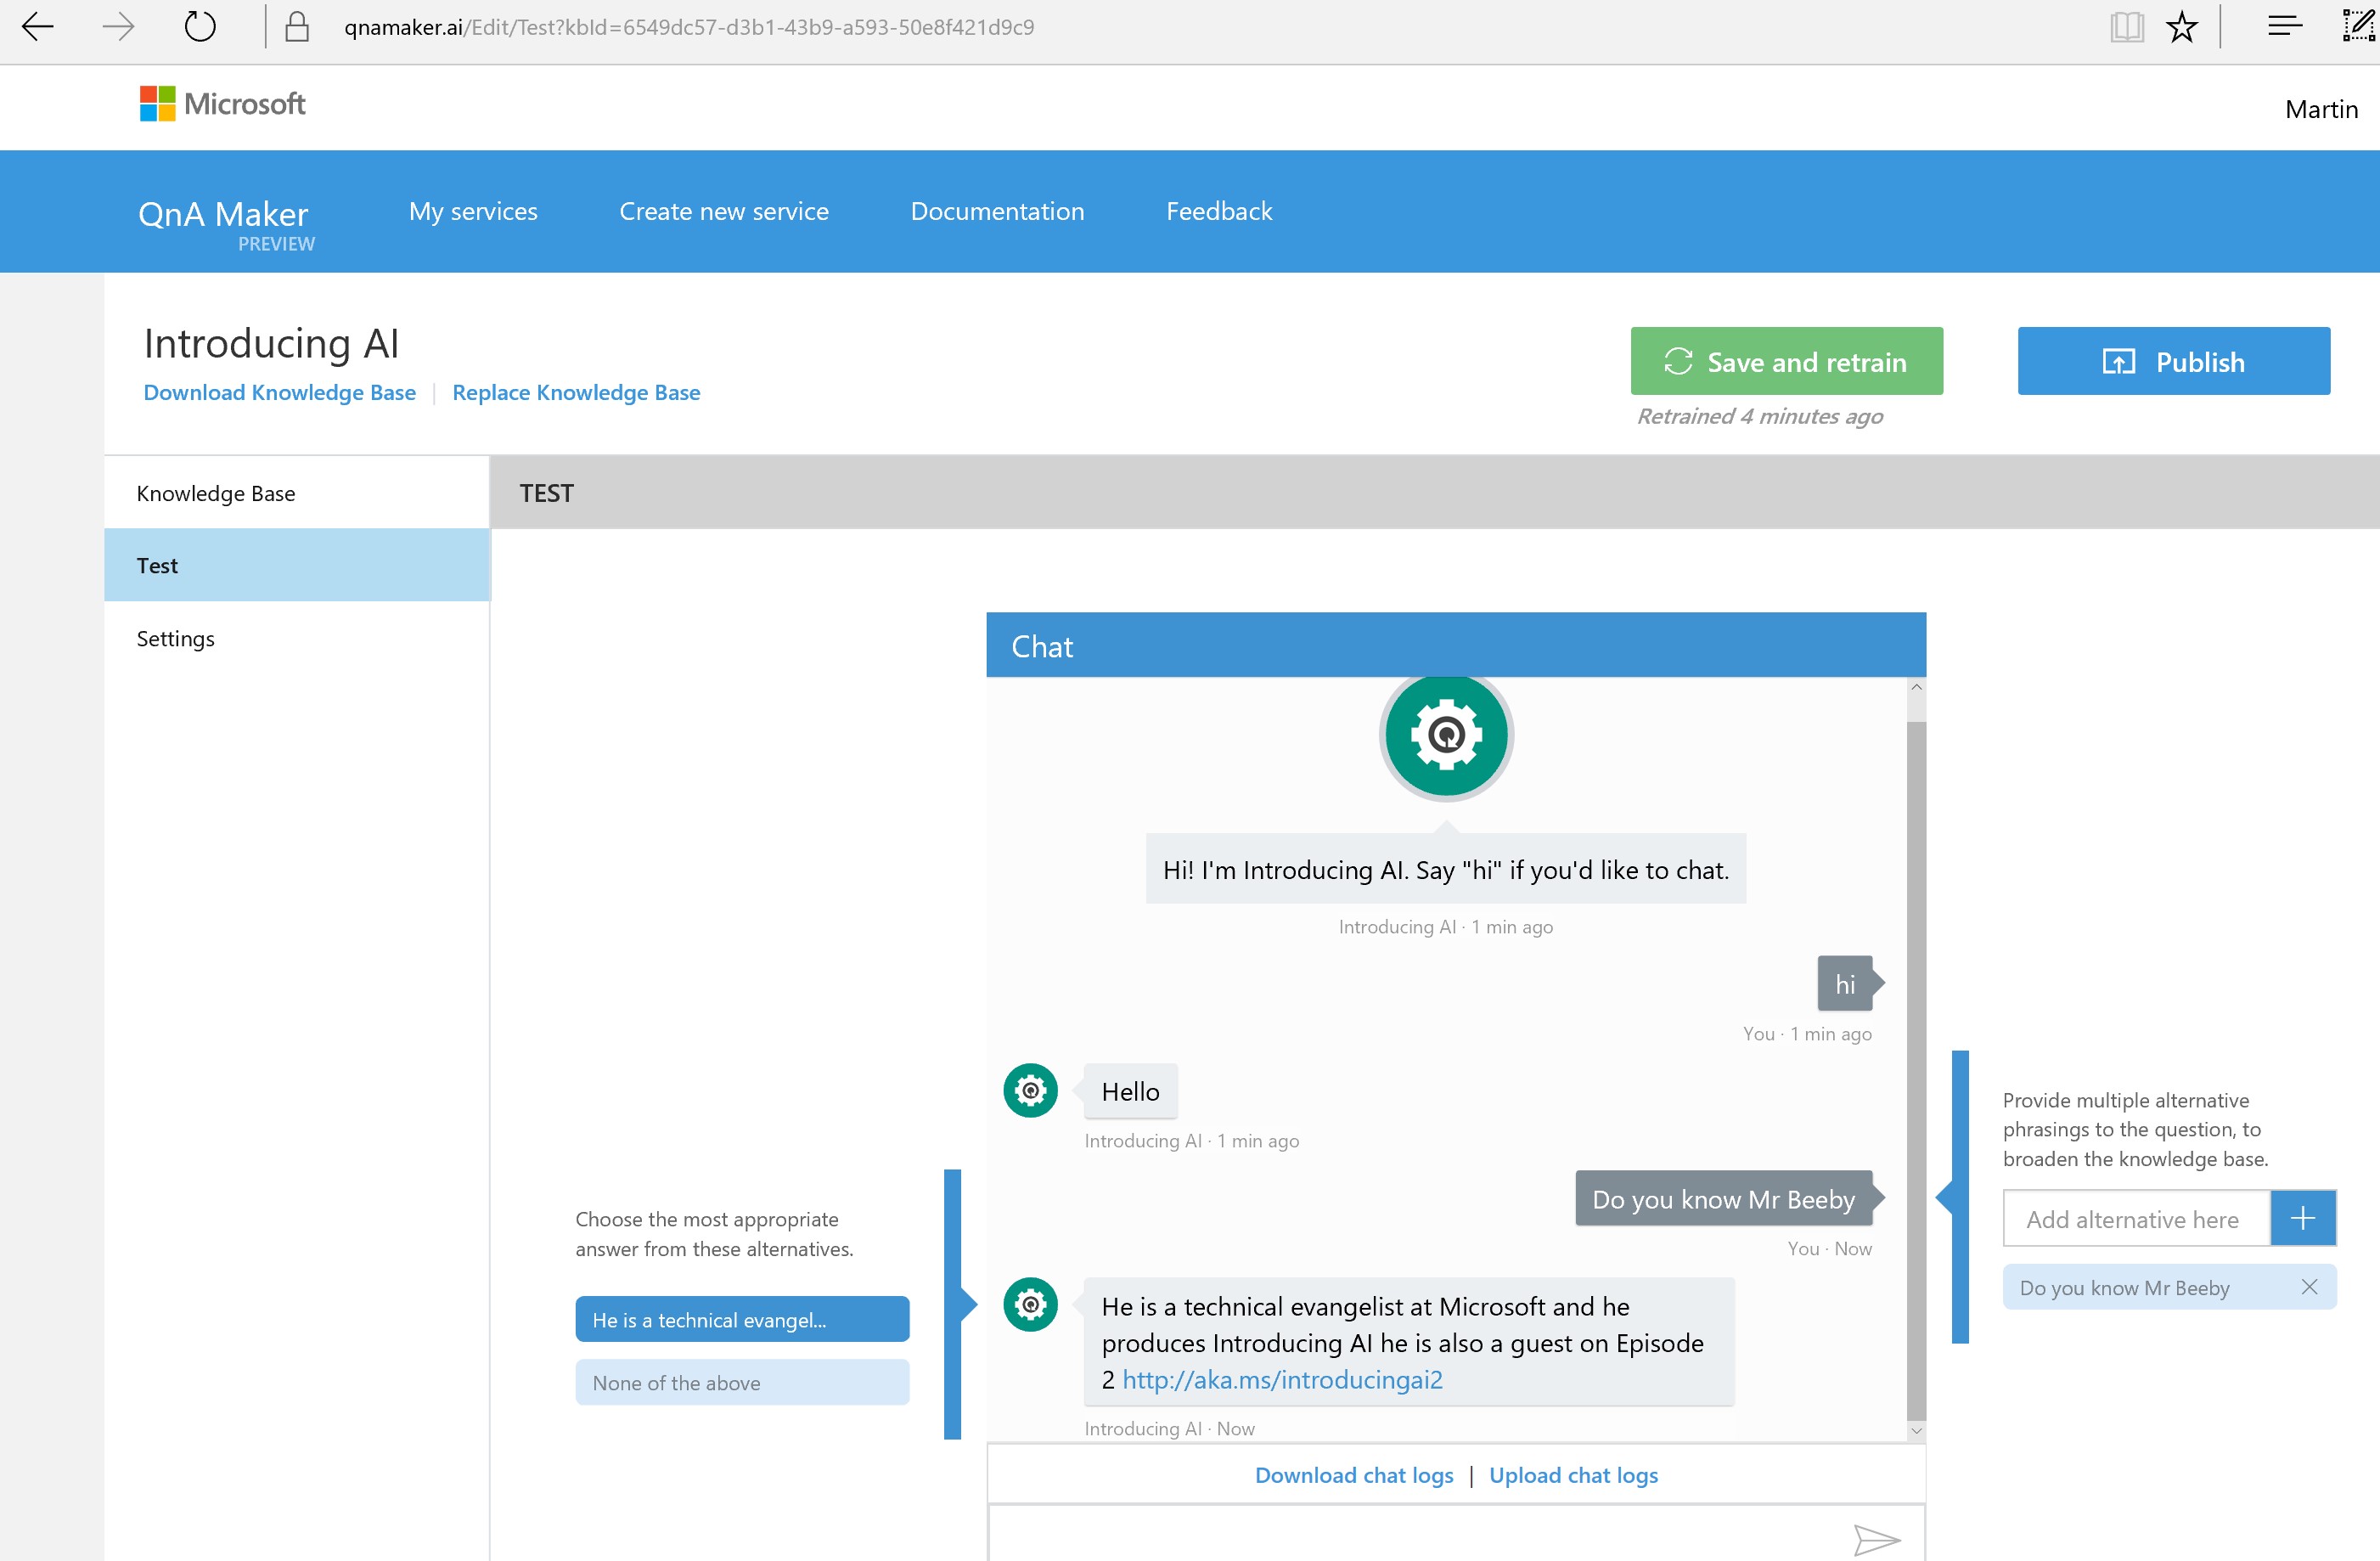
You can now click on the 'Edit Service' button. When the page loads you'll see a 'Test' tab on the left.
This test area allows you to use a web-based bot to interact with the service, allowing you to start asking the bot questions. Below I have asked, “Do you know Mr Beeby” and the bot replies with the answer I gave for the question “Who is Martin Beeby”. The bot service is using machine learning to figure out the most likely response and giving me a good (and correct) answer to my question. In this interface you can train the service on what answers it should give to specific questions and you can add new responses for questions that your current Q&A doesn’t handle.
Step 5 – Adding the service to a public bot
Now that you have a bot service you can easily add it to the bot framework, using an Azure function to use it in Skype, Facebook and other chat systems. To do this, check out the Azure Bot Templates for a Question and Answer bot. You can light up the QnA Bot in Skype and other messaging apps in a few clicks, then share them with anyone.