Mastering Identity with Azure Active Directory – Episode 6: Managing your applications
The sixth part of John Craddock’s series into Azure Active Directory shows you how to add your own applications to Azure AD. This opens up a world of possibilities for secure access to your applications by providing authentication and access control for your users, partners, and customers.
By John Craddock  In this series, I will take you through the key aspects of Azure Active Directory, and you will discover how by using Azure AD you can build identity solutions for the future. The series is about the technology rather than the marketing hype. It’s also something I cover in more depth in my masterclass, which is a deep-dive into the technologies and goes into the real technical detail. For an introduction to this series and some background on myself, see Episode 1: Introductions all round.
Caveat: To the best of my knowledge the information was accurate at the time of writing this blog but changes to Azure AD and the portals are frequently happening, and the precise details may change.
Episode 6: Managing your applications
Welcome to my first blog in 2017, I wish you all the best for the New Year. As always, the holiday period was filled with much merriment and overindulgence, and it always strikes me that you need a holiday to get over the holiday. This year has started with a bang; we are just about to announce dates for the masterclass in Norway, Sweden, Belgium, and The Netherlands, a new Azure AD project is starting and after all the years of speaking at conferences, someone likes my voice! I now have an agent for voiceover work, Voicefox.
Enough of my chatter, let’s get down to business. Although it’s possible to configure Azure AD to support applications using SAML or WS-Federation for authentication, in this blog I am going to discuss OpenID for authentication and OAuth 2.0 for delegation.
In Episode 2 of the blog, It’s all about protocols, Figure 4 and the accompanying description illustrated hybrid-flow. For your convenience, I have reproduced Figure 4 below (for details of the steps refer back to Episode 2). The user authenticates to the application (client) using OpenID Connect, and both an id_token and code are returned. The id_token is accepted as proof of user authentication by the application, and the code can be exchanged by the application for an access_token to a backend API, in this example the Azure Graph API. In Figure 4 the access_token allows the application to access the GraphAPI using the identity of the user, it would also be possible for the application to access the Graph API using its own identity (client credentials).
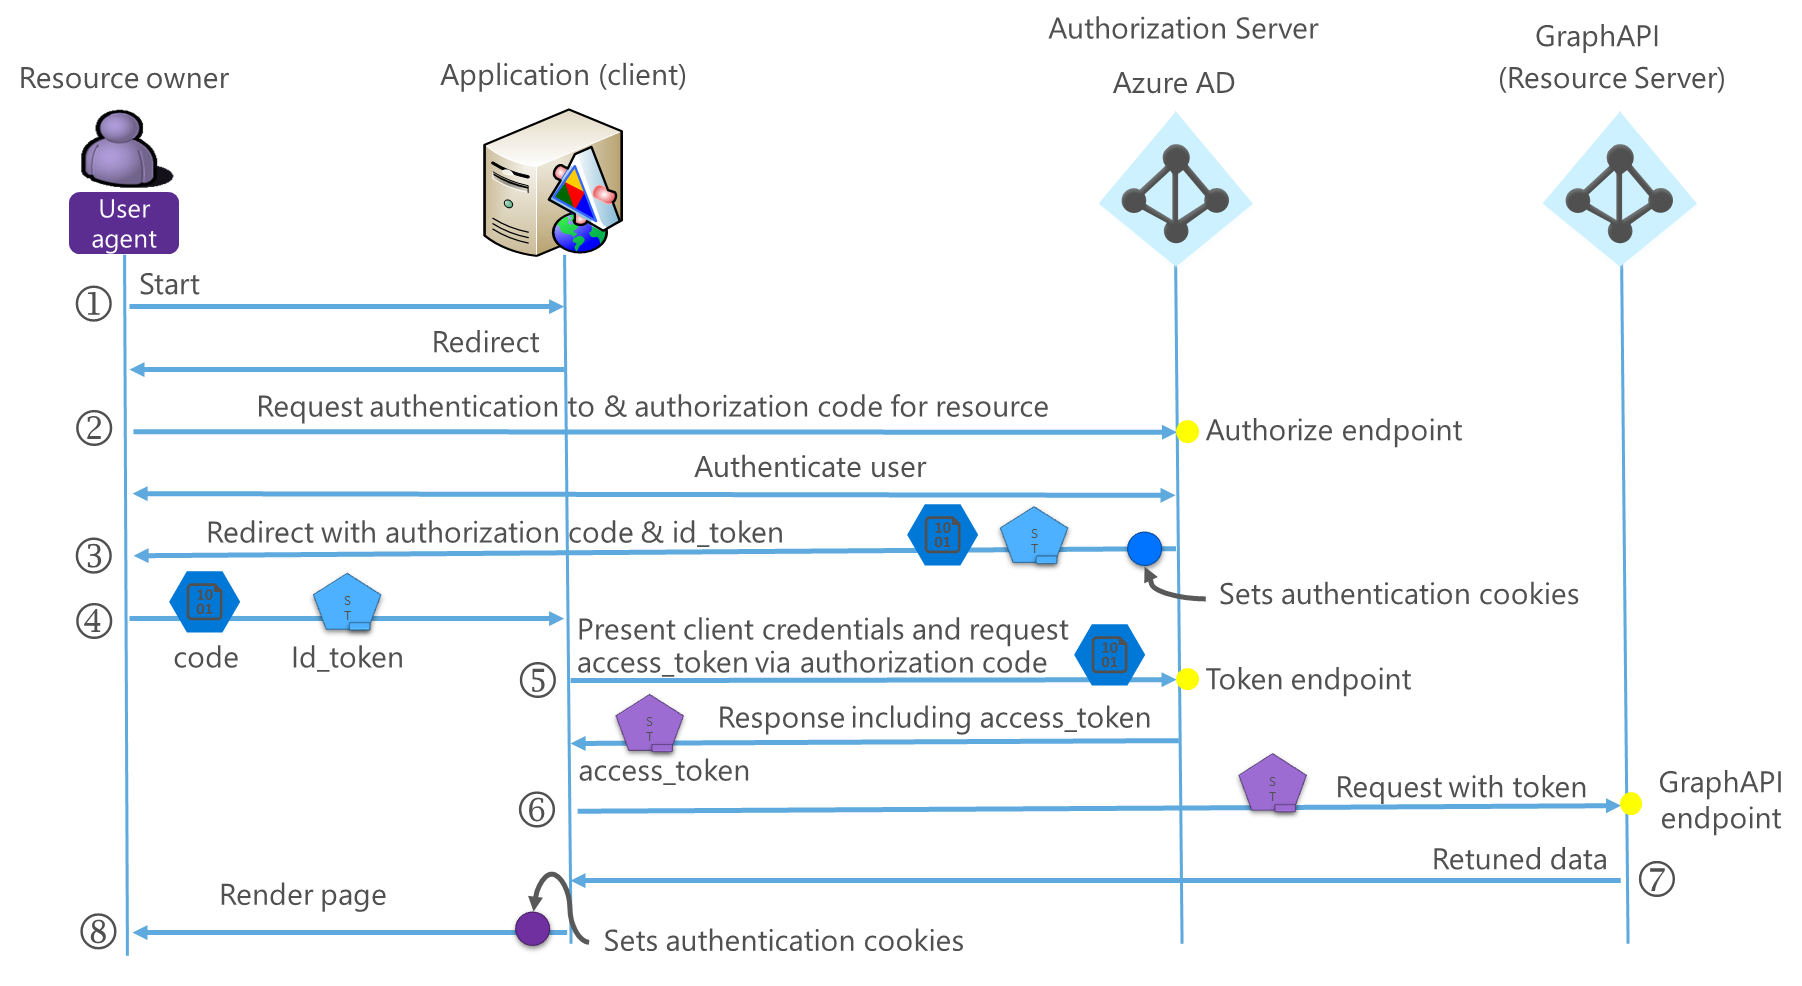
Figure 1: Hybrid-flow
To use Azure AD for authentication, we need to configure the both application and Azure AD parameters. To use Azure AD for identity, the application will need to know/define the following:
- Azure AD authorization endpoint
- Redirects user to the endpoint for authentication
- Return URL
- The URL that Azure AD will use to return to the application after authentication
- The Application ID (Called the Client ID in the Classic portal)
- This uniquely identifies the application to Azure AD
- Generated by Azure AD
- The Key (client Secret)
- This is effectively a password that is used in combination with the clientID to authenticate the application to Azure AD
- Generated by Azure AD
- The application needs to authenticate when requesting the conversion of a code to an access_token or requesting an access_token using its own identity
- This is effectively a password that is used in combination with the clientID to authenticate the application to Azure AD
- Azure AD token endpoint
- The application accesses this endpoint to request an access_token
- The public signing key for the id_token
- Used by the application to validate the id_token signature
- Logout endpoint
- This uniquely identifies the application to Azure AD
The application can automatically configure the endpoints and obtain the public signing key by accessing the discovery endpoint at https://login.microsoftonline.com/\<tenantID>/.well-known/openid-configuration, see Figure 2.
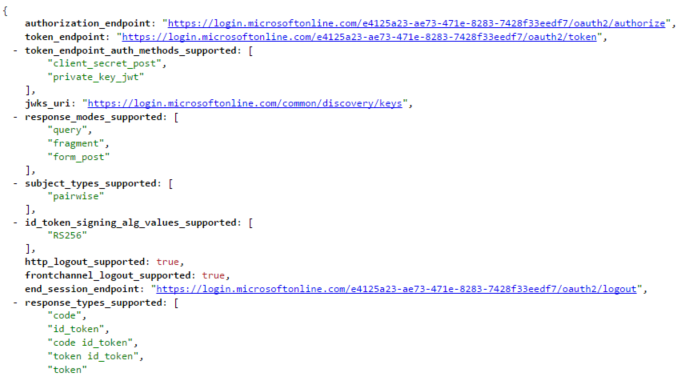
Figure 2: Section of OpenIDConnect Discovery, displayed using JSONVIEW in Chrome
When the application is added to Azure AD, you are creating an application template that defines all of the application settings. When a user first accesses the application, a service principal is created from the template to represent the application in the Azure AD tenant. The application template is configured via the UI and a manifest, see Figure 3. In the Classic Portal, the manifest needs to be downloaded, edited and uploaded, in the new portal the manifest can be edited directly.
You might be wondering why an application template is created. This is so that a service principal can be created in other tenants to represent the application when the application is configured as a multi-tenant application.
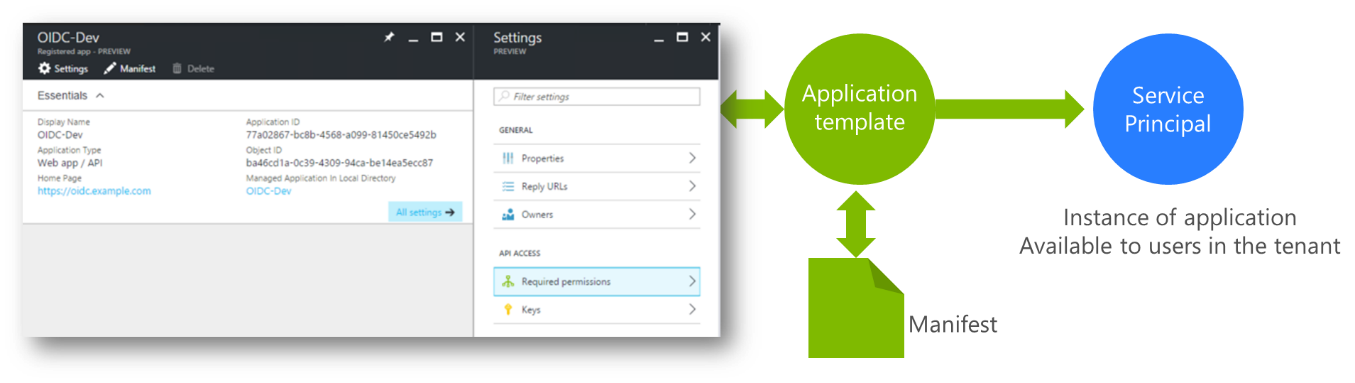
Figure 3: Application template
Figure 4 shows the majority of the possible configuration settings for an Azure AD application template.
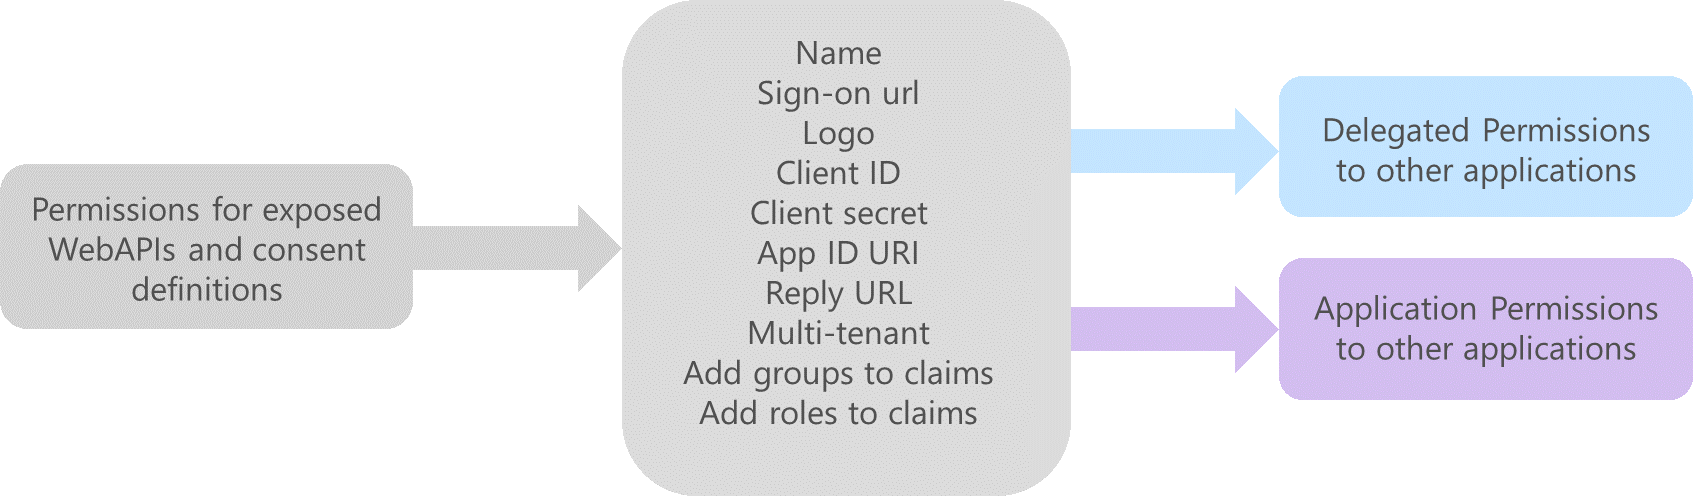
Figure 4: Azure AD application configuration
The central block in Figure 4 shows the settings that are required for the application to redirect the user for authentication and request access_tokens. Groups and roles can be added to the id_token and these settings are managed through the manifest. If the application that we are adding to Azure AD exposes WebAPIs then we can define a list of access permissions that can be requested, left block in Figure 4.
On the right-hand side of Figure 4 you can see the permissions to backend applications (APIs) that can be set. The actual permissions that will be available depends on how the backend applications have been defined in Azure AD. Permissions can be set for our application to access the backend APIs using the identity of the authenticated user (delegation) or using the identity of our application (client credentials). See Figure 5 for to see how the permissions are set via the UI.
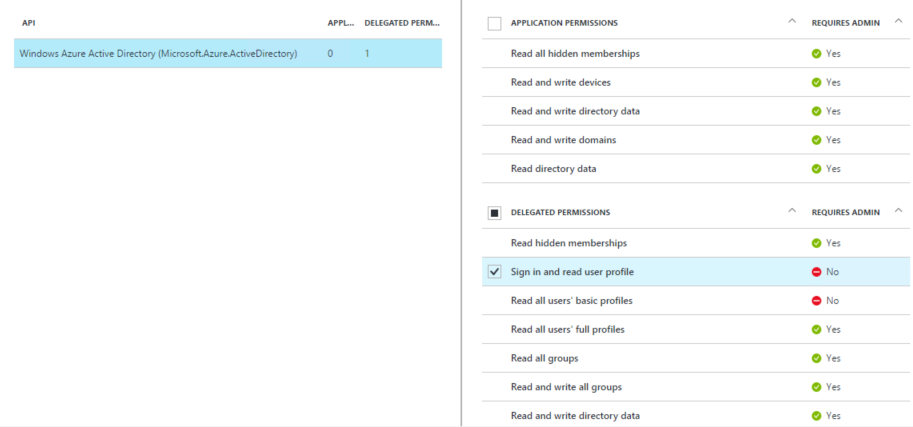
Figure 5: Setting the permission to the Azure AD Graph API
If delegated access is required for the backend APIs, the user may be required to consent to the application accessing the backend APIs using the user’s identity. When an Azure AD Global Administrator creates an application template which uses delegated access to backend APIs, consent is automatically granted regardless of who logs on. If a user (developer) creates the application template, they will be prompted to consent to the application accessing the backend APIs using their identity when they access the application . A consent dialog is shown in Figure 6.
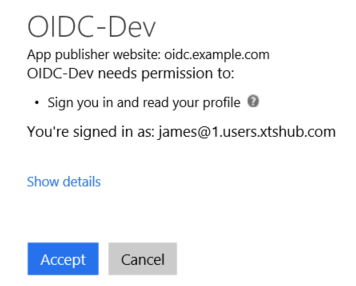
Figure 6: Consent dialog
Some consents require an Administrator to agree. For instance, when performing a write operation on the directory. An application can also provide a redirect url that includes “prompt=admin_consent” which allows an administrator to consent for all users. Figure 7 shows an admin consent dialog - if you read the last paragraph you will see that consent can be given for all users.
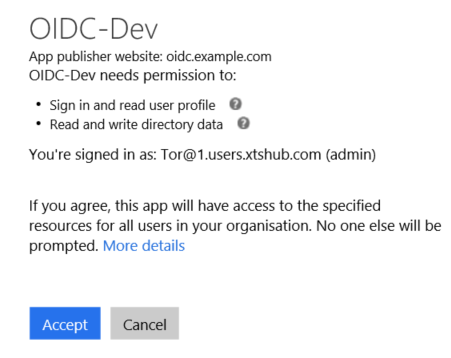
Figure 7: Admin consent
That pretty much covers publishing an application. Please watch the video below where I show you how to add an application to the portal as a developer. That’s it until next time.
For details of all the episodes in this series, look here. To learn and become skilled in implementing identity systems based on Azure AD, on-premises AD and AD FS join me at one of my Masterclasses. To find out more visit XTSeminars.