Guest Post: How to use Fine-Grained Passwords in Windows Server 2012
This post is brought to you by Ed Baker, Windows Server Instructor at Firebrand Training
Prior to Windows Server 2008, to allow different groups of users to have different password requirements or lockout policies, the user would have to implement multiple domains or password filters. Both of which were complex and costly.
In the 2008 flavour of the Operating System, Microsoft provided a work-around to this. This was also complex and convoluted, to say the least. It was almost as if it had been grudgingly allowed, but was so difficult to implement that most of us wouldn’t bother trying.
The R2 implementation added some ease-of-use functionality, but with Server 2012 Microsoft has finally embraced the concept as a day-to-day admin requirement.
What’s the purpose of Fine-Grained Passwords?
Well, for a large organisation with many levels of user and security, it is often necessary to set different requirements for the password complexity and for the lockout policy. For example, the office admin assistant may not require the same levels as the research and development department.
The solution in Windows Server 2012 is implemented entirely through the Active Directory Administrative Center (ADAC). ADAC was available in Server 2008 R2 but was generally ignored by ‘true admins’. It is essentially a GUI front-end to PowerShell Cmdlets - allowing creation, editing and deletion of any Active Directory object in the ntds.dit database.
ADAC is back, and it’s on a mission. The tool is now the only place to carry-out several important administrative functions (apart from PowerShell version 3.0, where you can now do just about everything to do with Server management and administration).
How do I get this working?
To implement Fine-Grained Passwords you have to deploy a Windows Server 2012 Domain Controller, with the domain functional level set at Windows Server 2008 or above. You can now accomplish this task in ADAC (provided you ‘run as administrator’).
To be able to develop your skills in this area, it is also best practice to create a number of test groups and users, so that any changes you make do not impact on your day-to-day work. It’s better to test this on a sandbox set up, but if one is not available, having test accounts, groups and OUs will prevent any disasters.
In the scenario below, I have set-up FGP_User1, FGP_User2, FGP_GP1, FGP_GP2 - you can name yours as you choose. This can be done in AD Users and Computers, in ADAC or in PowerShell 3.0.
Now fire-up the Server Manager application…
In the application, select Tools and ADAC. In the ADAC window select Tree View (easier to see what’s important), then select the domain you want to work with. Expand the tree until you can select the System container, expand that and select Password Settings Container.
Right-click and select: New à Password Settings.
 |
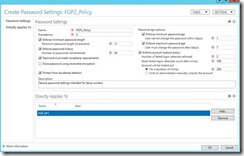
The Create Password Settings window opens. There are several mandatory selections, most of which are pre-selected - you have to enter name and precedence. (Note: the lower the precedence number, the higher its priority!)
Here you can amend all the settings for this password object (Length, Lockout etc. - see image below).
Best practice is to enter a description of the policy, then click Add in the Directly Applies To area. Select your previously created group from the AD, and make sure that your policy has all the correct settings which relate to the password and lockout.
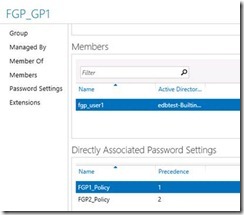
In this example I have added my User to a group with two FGP policies applied with different precedence settings
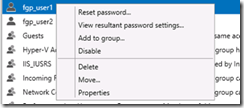
To determine which the valid password setting object is, select the user concerned, and right-click:
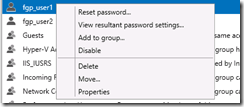 |
Choose View resultant password settings... This opens the policy that is active. For those of us who lived with the old way – this is a huge leap forward in usability.
Editing and deleting policies
Editing a policy is as simple as expanding the AD tree and selecting the correct policy within the Password Settings container. Right-click Properties; or double-click opens the policy for editing.
To delete a policy (not forgetting that by default AD objects are protected against accidental deletion) remove the check from the Protect From Accidental Deletion box. Save the policy, then right-click it and select Delete.
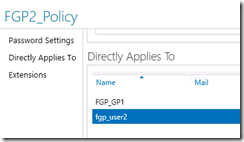
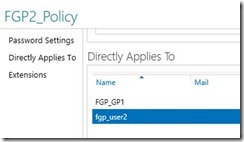
Unlike Users, it is not possible to enable or disable a policy. If it exists, it is active for any object that it is directly applied to. Don’t forget you can apply Policies to users or groups, as can be seen in the following image. This also allows you to see what will be affected when you delete the policy.
 |
 |
Part of the Big Five
This is set to be one of the Windows Server 2012 ‘Big Five’ areas of functionality. The ability to add and remove Fine-Grained Passwords at will - with little difficulty or deep-down AD knowledge - is a huge boost to those who have asked for the feature year-on-year.
To refresh your memory, when this feature was first implemented in Windows Server 2008, it was necessary to use ADSIEDIT to create the new Password Settings Object AND all the attributes of that object (in this case Length of Password, Lockout details, etc.). It was also necessary to set the ‘applies to’ objects in ADSIEDIT. Not a friendly tool at the best of times.
Microsoft has implemented a much-wanted feature and developed a tool that now has much more usability than its first few variants.
And remember, ALL of these steps can be carried out with PowerShell 3.0, with relative ease.

