PPKGs Part 1 - Creating Simple Windows 10 1607 Provisioning Packages
The world of IT is moving fast and it's only getting faster. You may have seen blog posts before about creating Windows 10 Provisioning Packages, but did you know there's a really easy way to do it using a wizard these days?
In the 1607 version of the Windows 10 ADK, a new button appeared in Windows Imaging and Configuration Designer labelled "Simple provisioning" which will whizz you through configuring the most common settings: Device Name, Product Key (edition upgrade), Wi-Fi profile, Domain Join and Local Administrator account.
In my pre-Microsoft days it was pretty common for my boss to come over with the latest tablet we were evaluating and ask me to upgrade it to Enterprise Edition and join it to the domain. If we had provisioning packages back then it would've saved me a lot of time!
In this first part of a three part series I've written an easy guide to show you how to create a simple provisioning package using the wizard.
In Part 2 I'll show you how I test provisioning packages at the OOBE stage of Windows Setup in a Hyper-V virtual machine and then in Part 3 I'll show some of the functionality in the advanced editor such as installing a certificate, installing apps, and removing some of the built in applications.
First you need to download and install the Windows ADK from:
https://developer.microsoft.com/en-us/windows/hardware/windows-assessment-deployment-kit
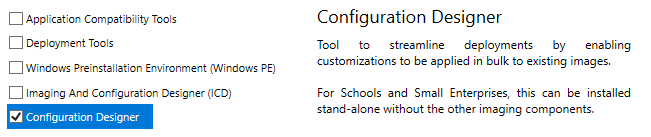
You need to make sure you've ticked the "Configuration Designer" box for install. If all you're doing is creating provisioning packages, it's all you need.
This guide is using the 1607 version of the ADK which is required for Windows 10 1607.
Once you've got the Configuration Designer installed, you'll find it under the "Windows Kits" group in your start menu. It looks like this: 
And here is the opening screen:
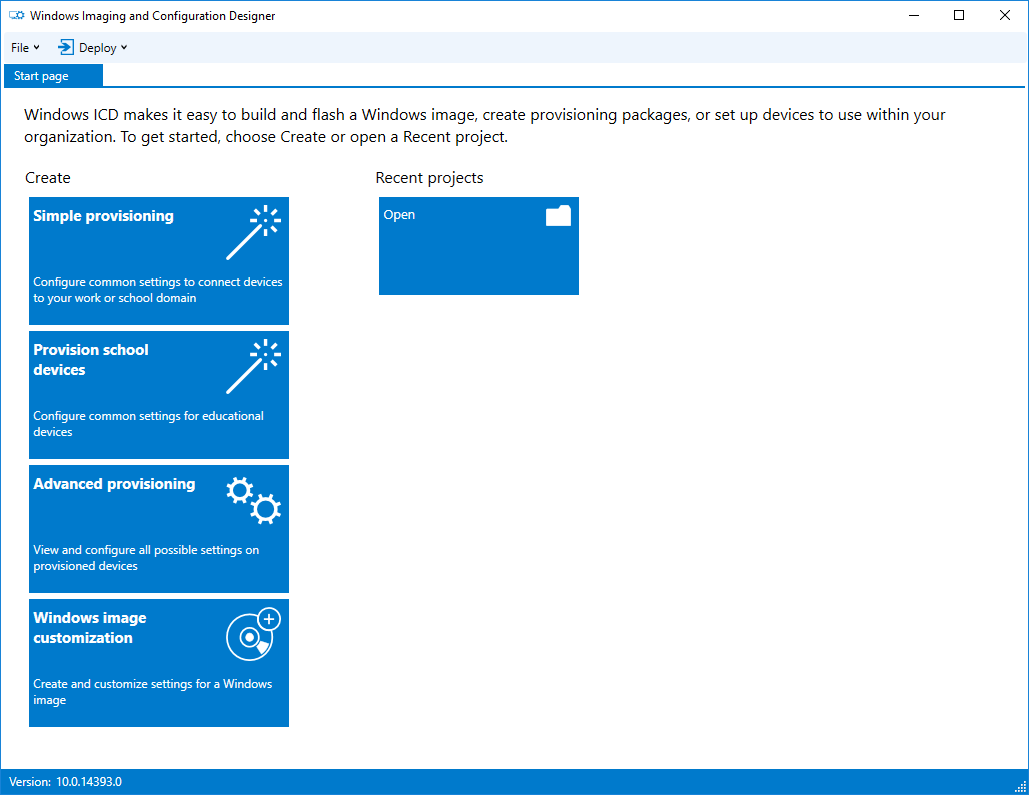
Click on the "Simple provisioning" button and give the project a name and description like so and click Finish:

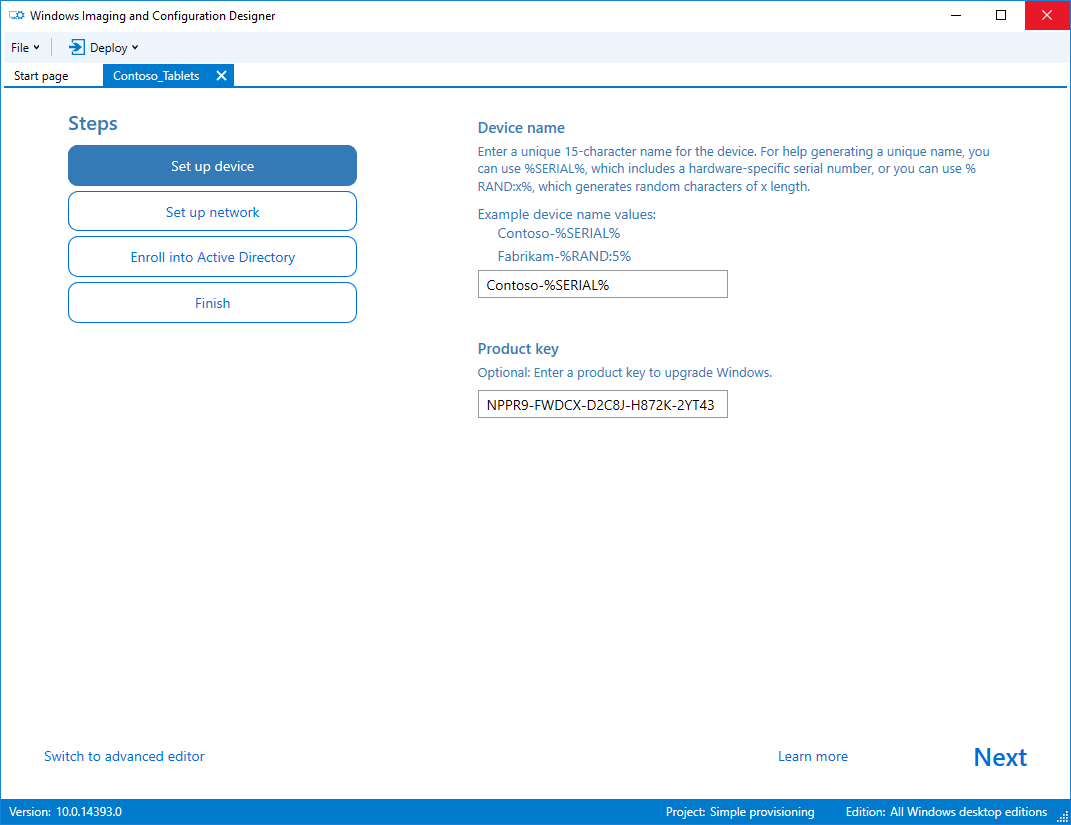
Now we see the first screen of configuration options where we can configure the device name and enter a product key to change the edition of windows. You can use %SERIAL% to use the device serial number, or you can use %RAND:x% where x is a number of random characters (remember the total maximum length is 15 characters.)
The product key box is where you would put in your Windows 10 Enterprise key.
If you are using KMS or Active Directory-based activation then you would use the "GVLK" KMS Client Setup Key from here: https://technet.microsoft.com/en-us/library/jj612867(v=ws.11).aspx
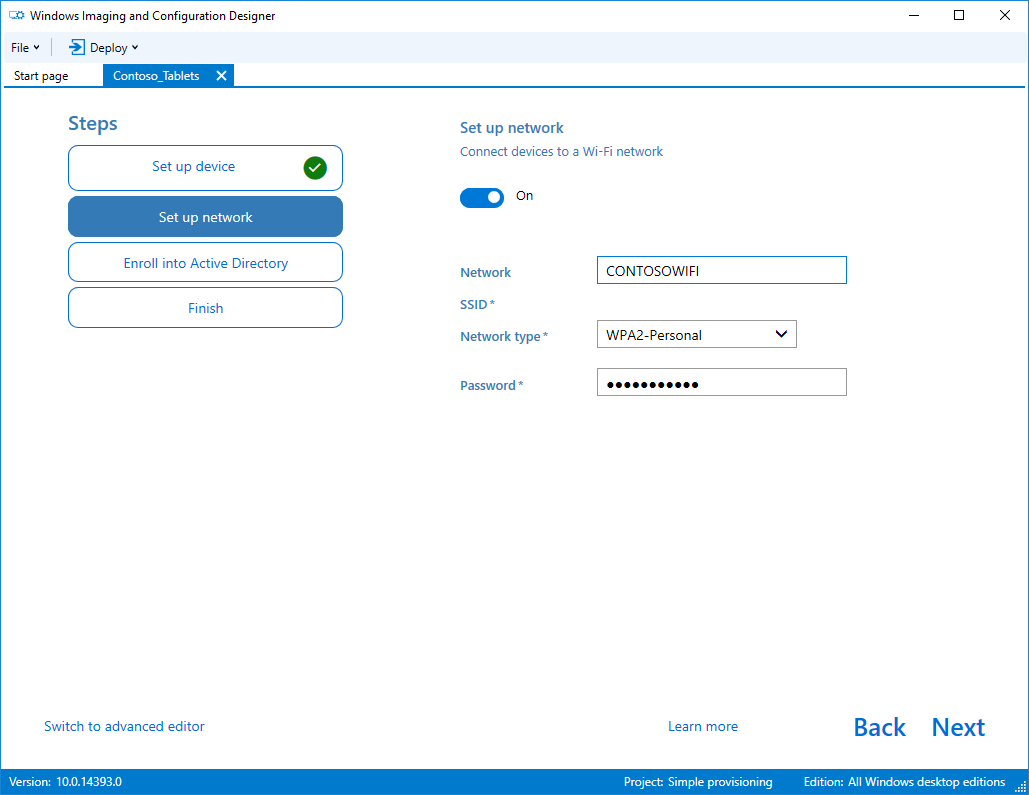
Click next and then you're presented with the screen where you can configure a wireless network by entering the SSID, defining the security type and where required the password to the wifi network. The only network types (security) available here in simple provisioning are Open or WPA2-Personal.
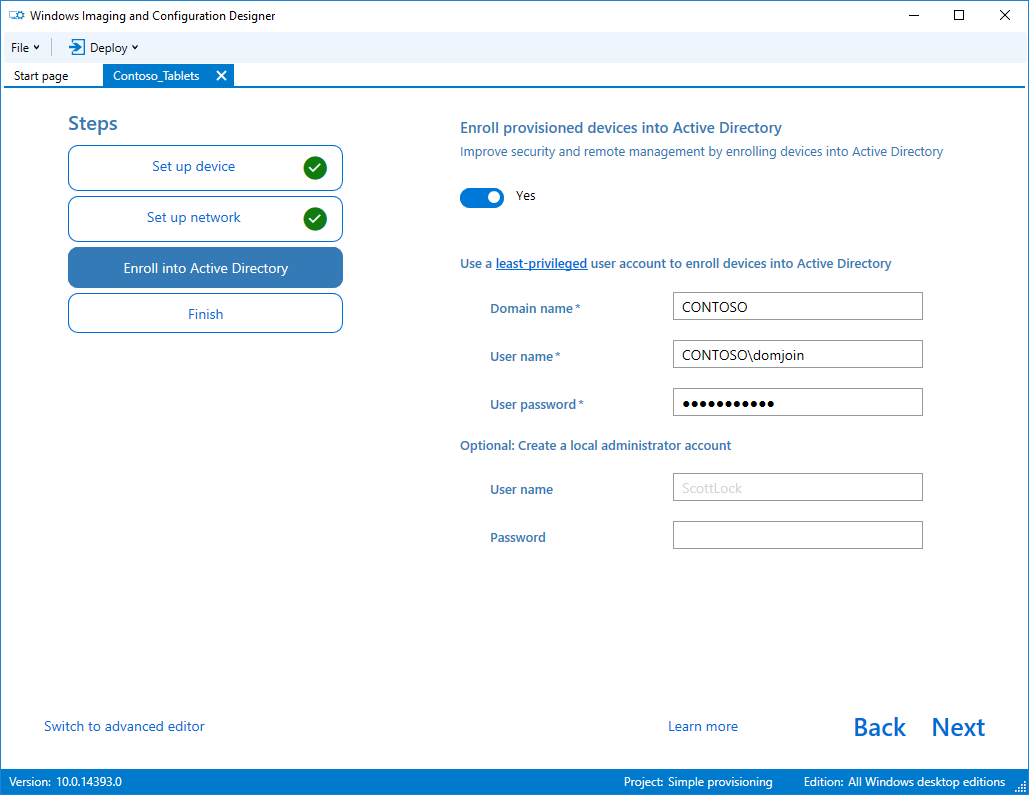
Once you've clicked Next on the Network page we get to the "Enroll into Active Directory" page. Here you specify the domain to join & the credentials used to join it. It is highly recommended (best practice) you use an account that has had the ability to join the domain delegated to it and has no other access (Don't use a domain admin account!) If required there is the option to create a local administrator account and set a password (this may be useful where you're applying the provisioning package at OOBE and want a local account available.)
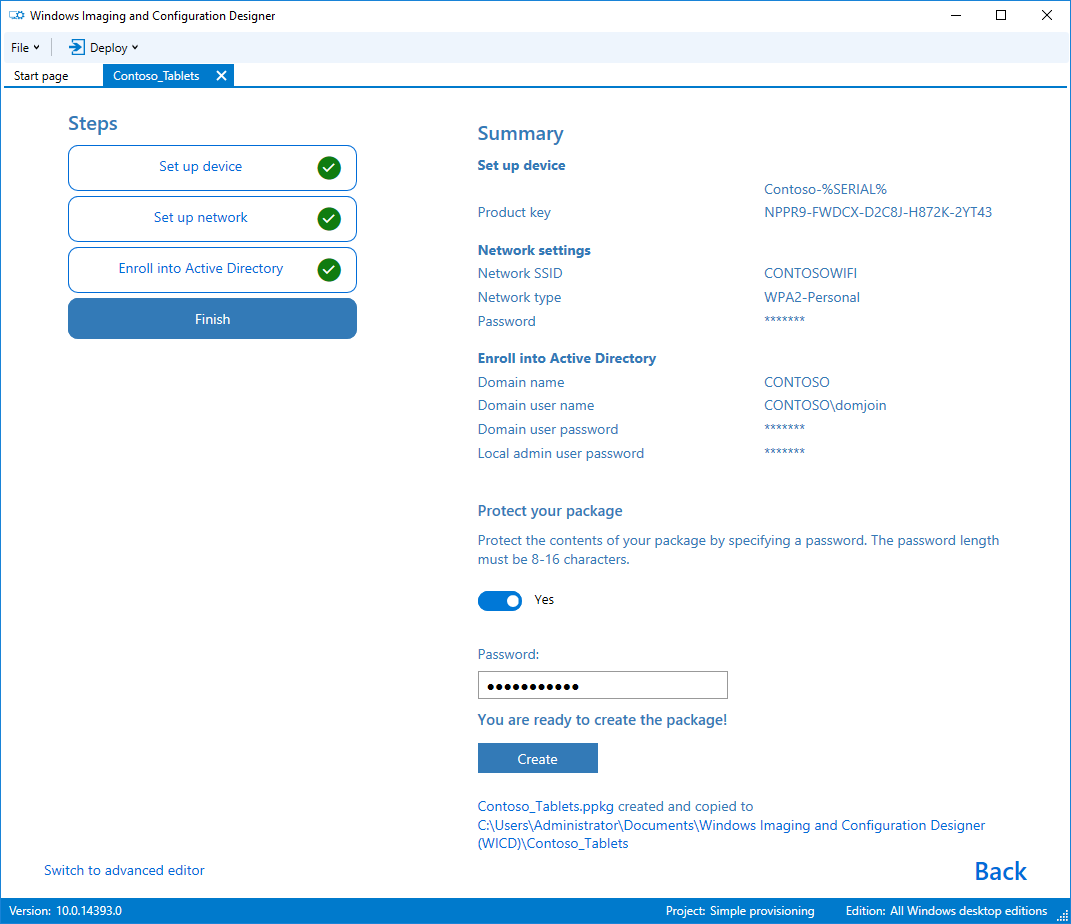
Okay with that done, click next and we're presented with the Finish screen which displays a summary of the settings. It is highly recommended you protect your package with a password otherwise anyone who was to get hold of the provisioning package would be able to use it to say join your wifi network and join the domain. Once you've entered the password click "Create" and the package will be created and copied to the path displayed.
You can now take the .PPKG file from that folder and apply it to a device! Join me in Part 2 where i'll show you how you can test your provisioning packages in a Hyper-V VM.