Kick start with connecting to Microsoft Dynamics CRM 2013 programmatically
Hi Folks,
I am redesigning this blog to get things interesting for people who want to kick start things in CRM 2013.
This post will help people who are new to Microsoft Dynamics CRM development and want to connect to Microsoft Dynamics CRM 2013 programmatically. You can connect to CRM 2013 in different ways well in this post I would tell you the easy way to get this rolling.
In this example I would like to show creating a simple .Net application which connects to Microsoft Dynamics CRM 2013. The prerequisite for this will be you need to download the Microsoft Dynamics CRM 2013 SDK.
Let us get started:
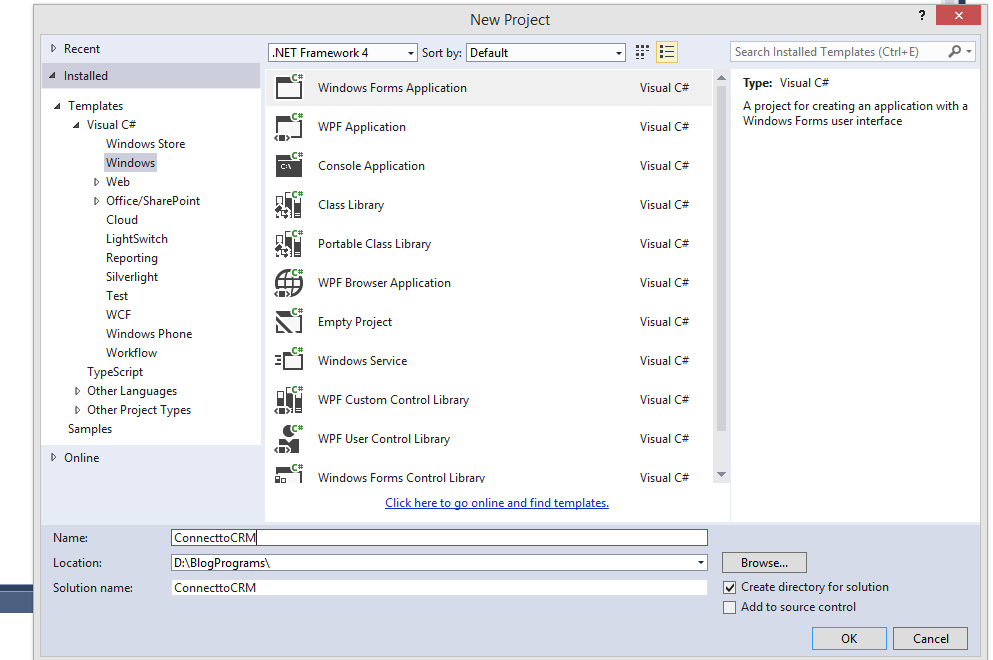
Step 1: Open your Visual Studio and click on new project and select Windows Forms Application as shown below:
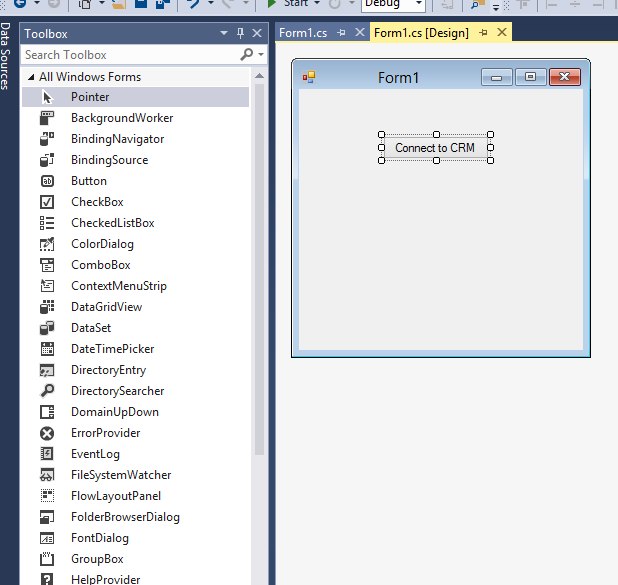
Step 2: Now navigate to your designer area and add a button to the form. Let us name this as connect.
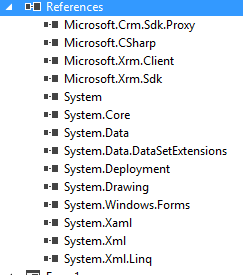
Step 3: Now add the following references into your project. a) Microsoft.Crm.Sdk.Proxy b) Microsoft.Xrm.Client c) Microsoft.Xrm.Sdk (these 3 assemblies are available in your bin folder of Microsoft Dynamics CRM SDK.) d) System.Xaml.dll (This assembly is available in .Net framework assemblies. (C:\Program Files (x86)\Reference Assemblies\Microsoft\Framework\.NETFramework\v4.0\System.Xaml.dll) e) PresentationFramework.dll (C:\Program Files (x86)\Reference Assemblies\Microsoft\Framework\.NETFramework\v4.0\PresentationFramework.dll) f) PresentationCore (C:\Program Files (x86)\Reference Assemblies\Microsoft\Framework\.NETFramework\v4.0\PresentationCore.dll) g) WindowsBase (C:\Program Files (x86)\Reference Assemblies\Microsoft\Framework\.NETFramework\v4.0\WindowsBase.dll) h) System.Runtime.Serialization.dll (C:\Program Files (x86)\Reference Assemblies\Microsoft\Framework\.NETFramework\v4.0\System.Runtime.Serialization.dll) i) System.Data.Services.dll (C:\Program Files (x86)\Reference Assemblies\Microsoft\Framework\.NETFramework\v4.0\System.Data.Services.dll)
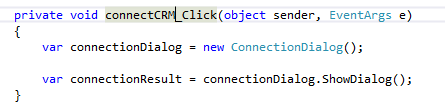
Step 4: Now it is time to write some simple code. Open your form designer double click on the button created to write some event handler. Place the following code in the event handler. Here connectCRM is the button ID.
Step 5: Well now you are almost there. Now hit on F5 or run the application from Visual Studio. Click on connect to CRM button which will open the below screen.
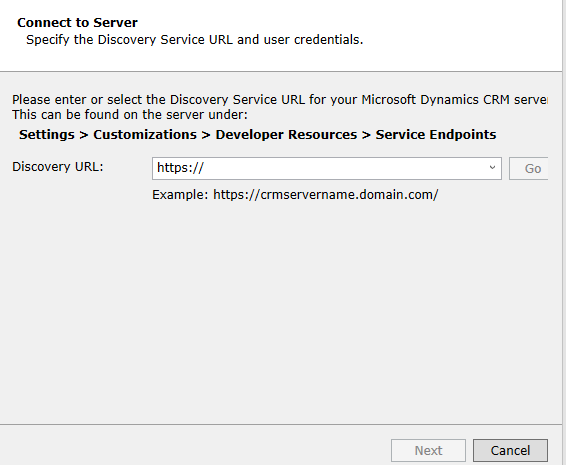
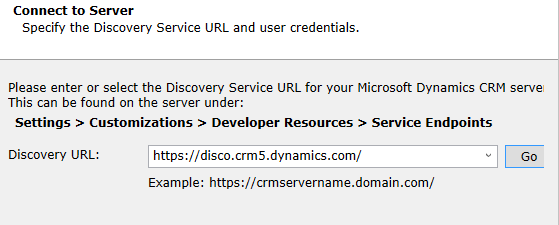
Step 6: Enter the discovery URL. This is available in Settings – Customizations --- Developer Resources. In this example I am connecting to online CRM:. Now click on GO.
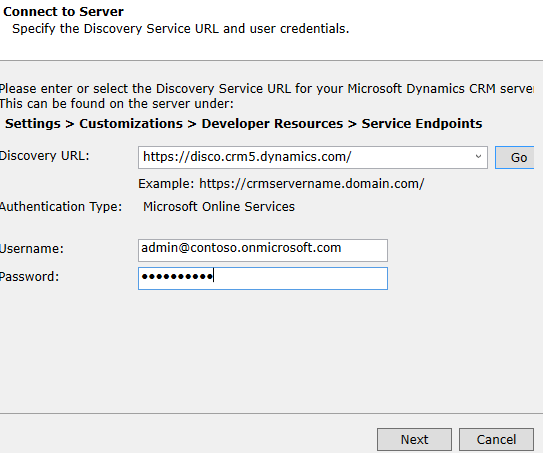
Step 7: Enter the details of username and password:
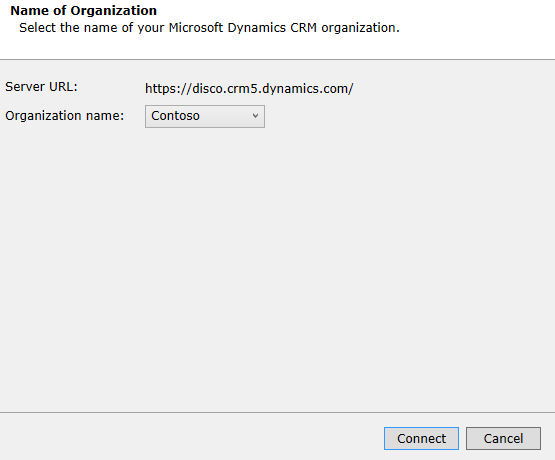
Step 8: After successful authentication you can see the list of organizations you can connect. Now select the organization and get connected.
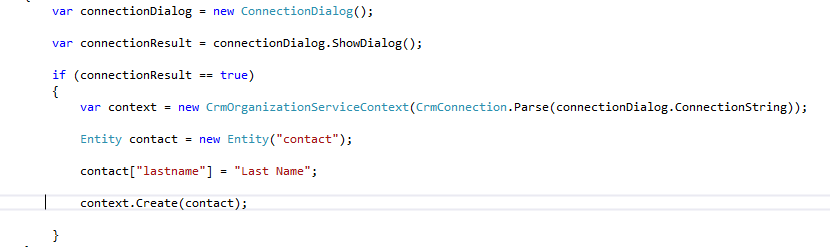
Step 9: Now we are successful in connecting to CRM. Let us try to make some operation with it. Stop debugging your application and let us go back to CS file to modify it. You can see the below image for the additional modifications that can be done in your code to create a new contact in CRM.
That is all!!! You have successfully connected to CRM and created a record!!