How to add refiners to your search results page in SharePoint 2013
This is a blog post in the series, “Set up a Search Center in SharePoint 2013”.
In the previous blog post, I showed you how to identify refiners, and told you about refinable managed properties. In this post you’ll learn:
- How to map a crawled property to a refinable managed property
- How to initiate a reindexing of a list or library
- How to configure the Refinement Web Part to use custom refiners
- How to add counts to refiner values
How to map a crawled property to a refinable managed property
In my Search Center scenario, I knew that I wanted to use the following refinable managed properties:
| Refiner to use | Refinable managed property |
| Manager | RefinableString01 |
| Internal Writer | RefinableString02 |
| Editor | RefinableString03 |
| Content Type | RefinableString04 |
| Requested Publish Date | RefinableDate01 |
The procedure to map a crawled property to a refinable managed property is the same for all refiners. In the procedure below, I’ll show you how you can do this. As an example, I’ll show you how I mapped the crawled property that represents Internal Writer to the RefinableString01 refinable managed property.
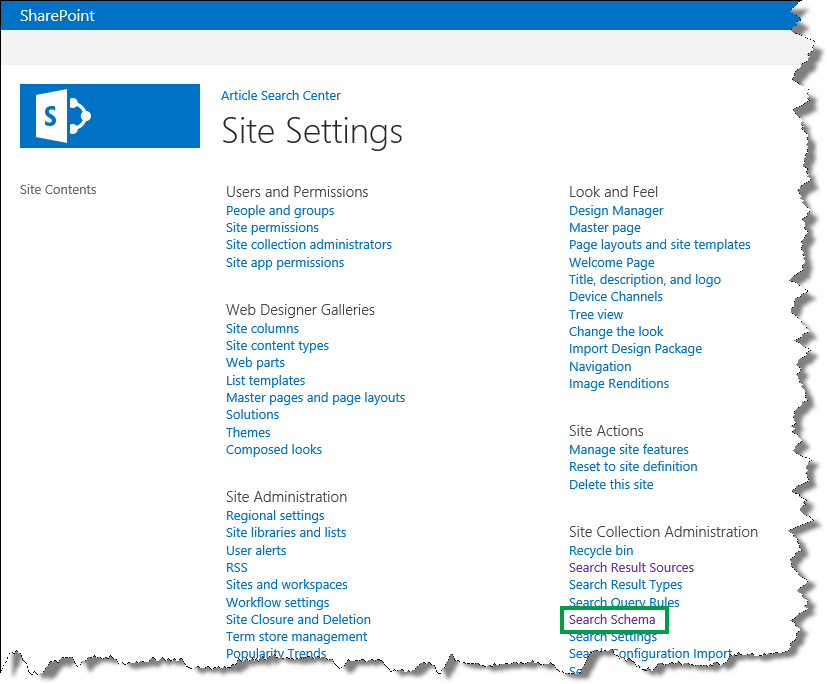
- On your Search Center, on the Site Settings page, select Search Schema.
In the Managed property field, type the name of the refinable managed property to which you want to map a crawled property, and then click the arrow button.
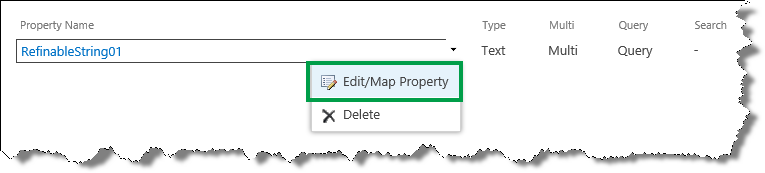
In my scenario, I typed RefinableString01.

- From the Property Name field, select Edit/Map Property.
- On the Edit Managed Property page, click Add a Mapping.

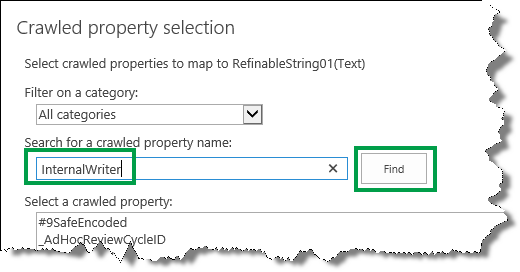
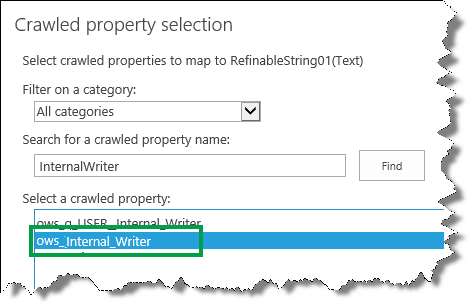
In the Crawled property selection dialog box, use the Search for crawled property name field to search for the crawled property that you want to map to this refinable managed property.
In my scenario, I knew that I wanted to use the site column called Internal Writer. Crawled properties don’t contain spaces, so I left the space out and entered InternalWriter.
Two crawled properties were found: ows_q_USER_Internal_Writer and ows_Internal_Writer.
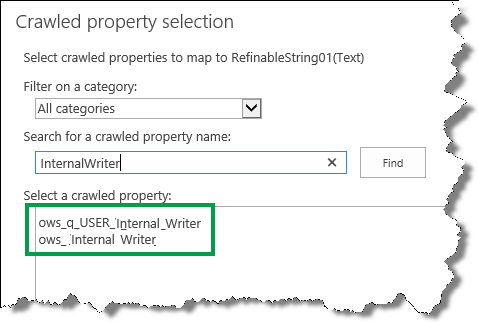
If you now look like a big question mark, trust me, I understand your confusion. This part is quite tricky. There are actually two crawled properties (very strange since we only have one Internal Writer site column), so which one should you choose to map to the refinable managed property?
OK, let's take a closer look at what’s going on. The difference between the two crawled properties is the prefix. One has a ows_q_USER_ prefix, and the other ows_.
Now here’s the important part: When mapping a crawled property to a refinable managed property, you should select the crawled property with the ows_ prefix!
In another blog post I talk about the naming convention for crawled and managed properties. For more information, see From site column to managed property – What’s up with that?
Select the crawled property with the ows_ prefix, and click OK.
In my scenario, I selected ows_Internal_Writer.
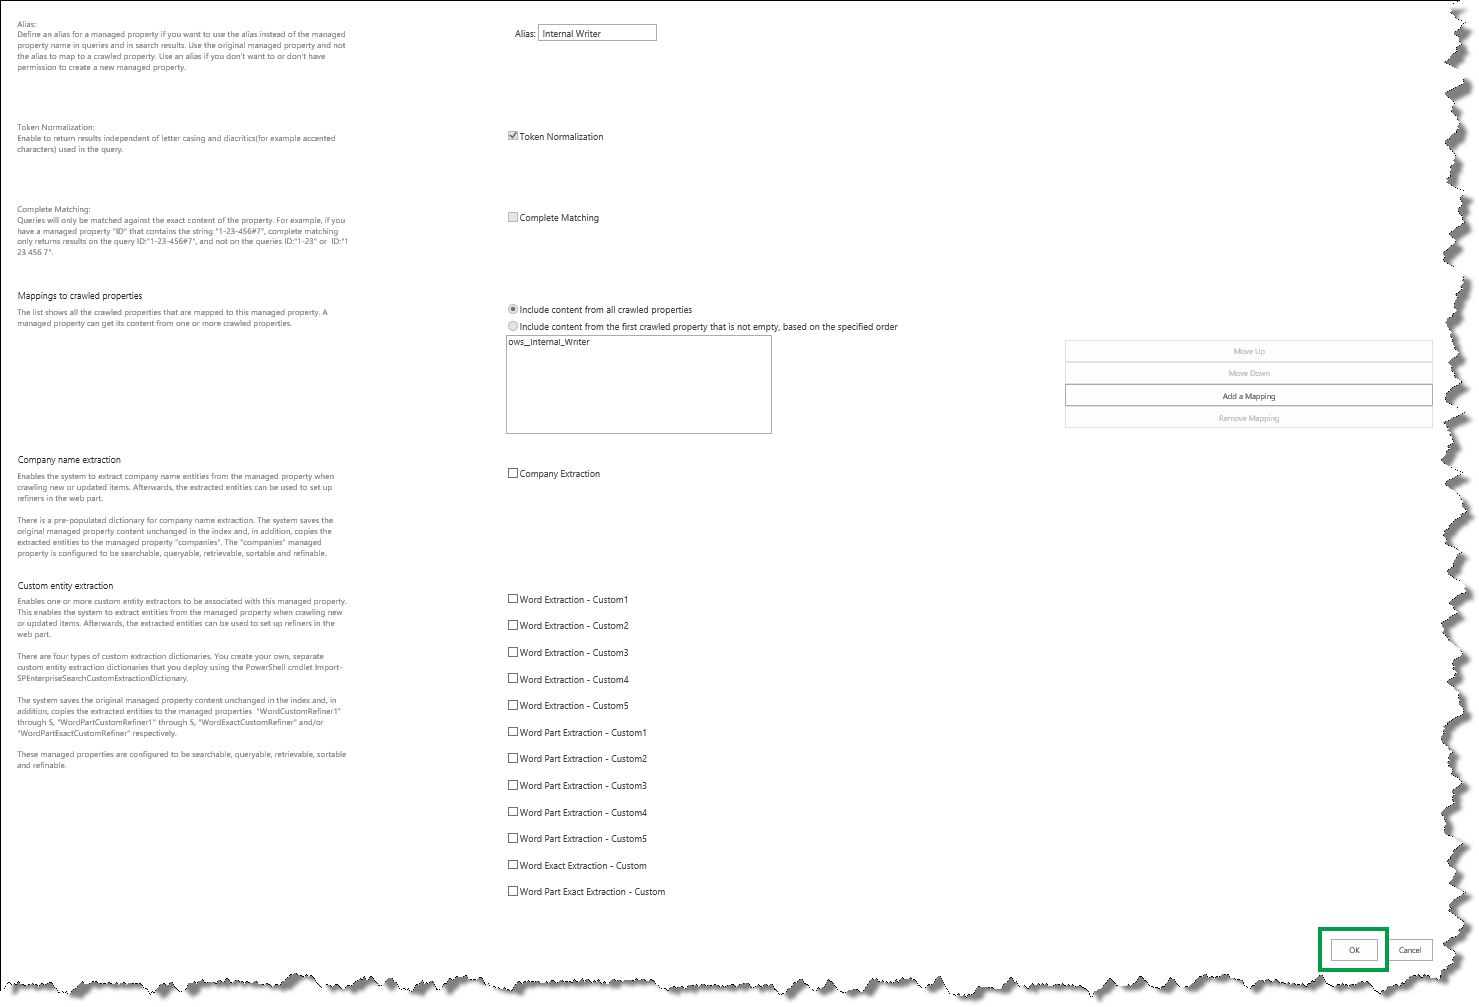
On the Edit Managed Property page, notice that the crawled property has been added to the Mappings to crawled property field.

In the Alias field, enter a name for the refiner.
In my scenario, I entered InternalWriter.

It's important to understand that the alias that you enter here is not the refiner name that will be shown on your search results page. This alias is meant to make your life a bit easier when you’re configuring refiners in the Refinement Web Part (I’ll show you how to do this in the procedure below). Remember, you can't change the name of the refinable managed property, so when you do the configuration, you’ll have to deal with quite a few refinable managed properties that have similar names; RefinableString01, RefinableString02 etc. So the alias is a good reminder of which value you mapped to the property.
- To finish the mapping, click OK.
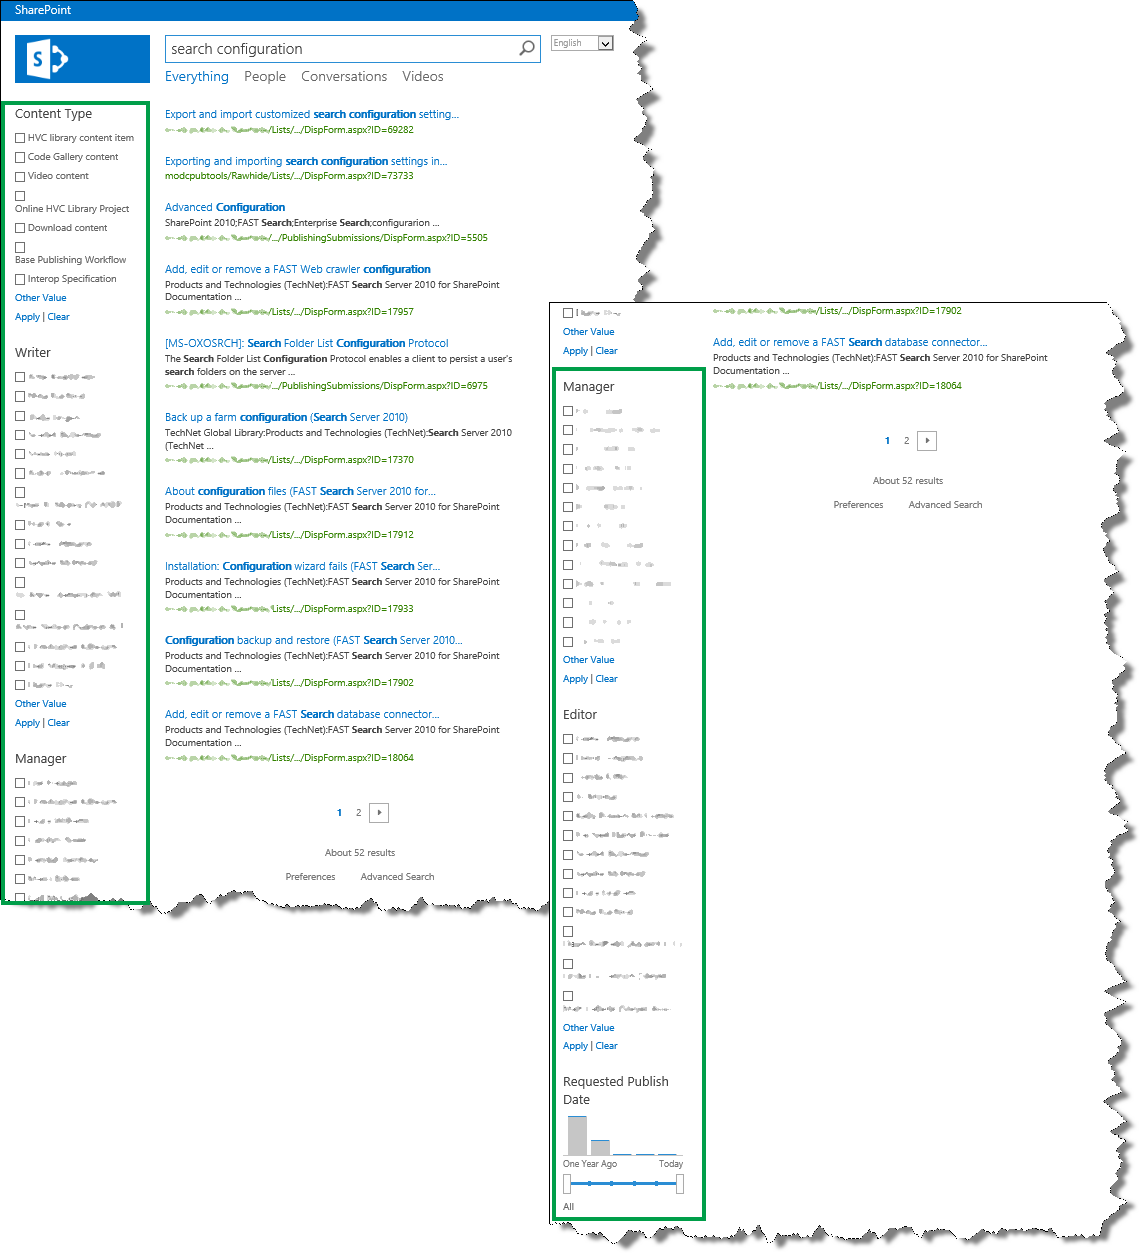
I repeated the steps from the procedure above for the remaining four refiners. The screenshots below show my final result.


How to initiate a reindexing of a list or library
When you’ve mapped all the rfinable managed properties that you want to use, you have to do a reindexing of your list or library. I showed you how to do this in a previous blog.
How to configure the Refinement Web Part to use custom refiners
By default, the Refinement Web Part is included on the search results page. In the previous blog post I showed you how to configure the Search Results Web Part to use a new result source. The two refiners Author and Modified date were also displayed.
To display custom refiners, here’s what you should do:
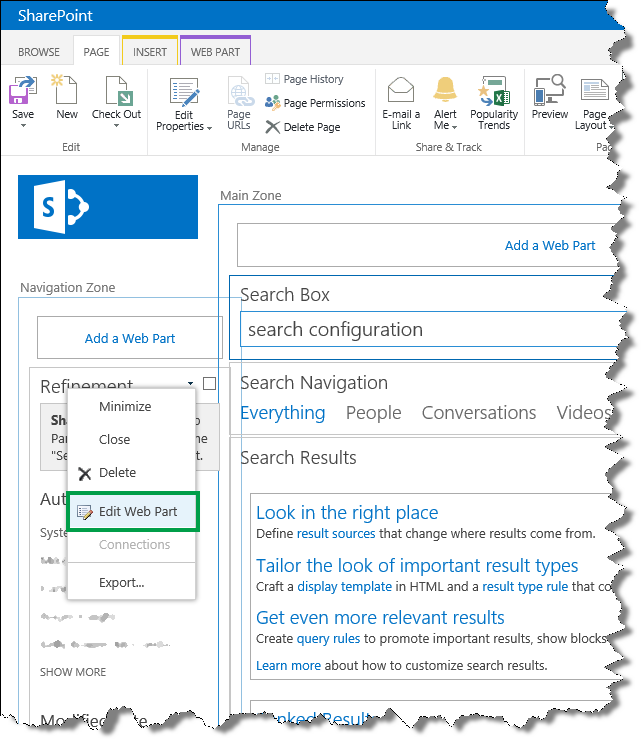
- On the search results page, click the Settings menu, and then click Edit Page.
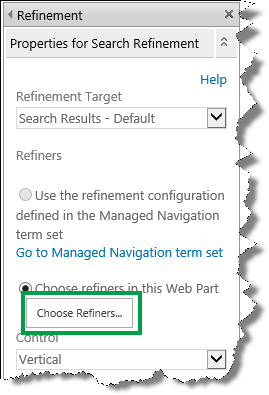
- In the Refinement Web Part, click the Web Part Menu, and then click Edit Web Part.
- In the Web Part tool pane, click Choose Refiners.
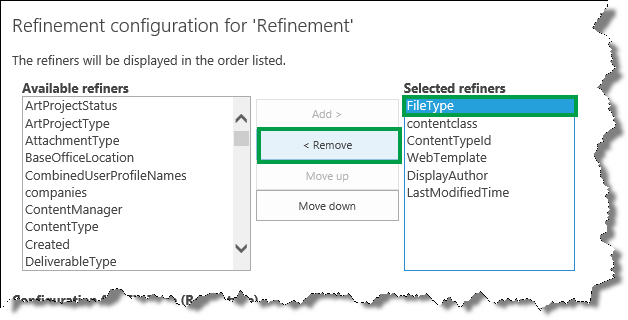
In the Selected refiners section, select the refiners that you don’t want to display on your search results page, and click Remove.
In my scenario, I removed all the default refiners.
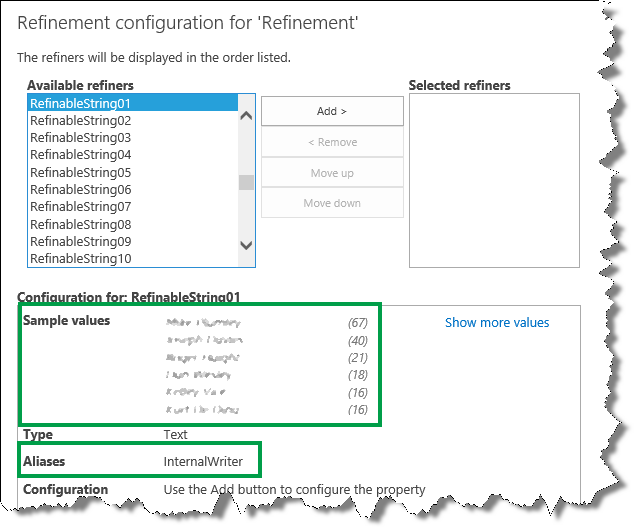
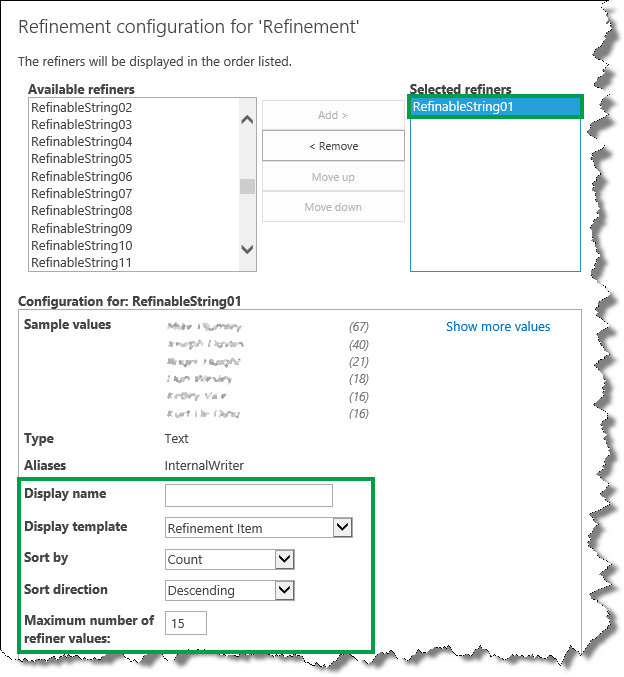
In the Available refiners section, scroll down and select a refinable managed property.
In my scenario, I selected RefinableString1. This is the refinable managed property that I mapped to the crawled property ows_Internal_Writer. Notice that sample values are shown (a good sign that we’re on the right path), along with the alias InternalWriter.
- Click Add.
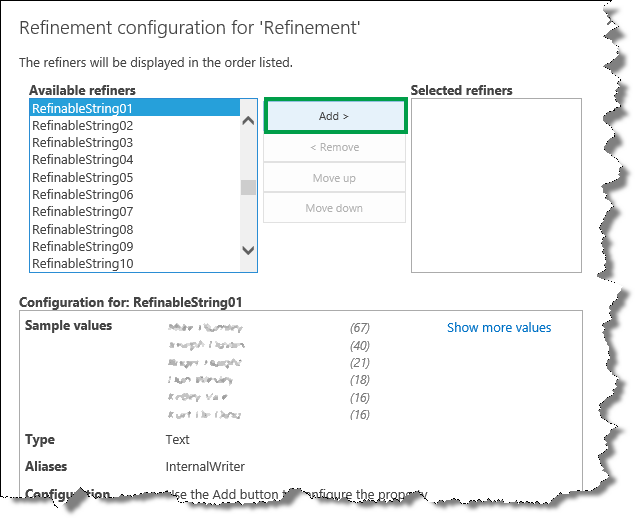
This moves the RefinableString01 property over to the Selected refiners section. When a refiner is moved over to the Selected refiners section, additional configuration options are shown (I'll go through them in steps 10 and 11).
Repeat steps 5 and 6 to add all the refiners that you want to use on your search results page.
In my scenario, I added the five refinable managed properties I configured in the previous section.

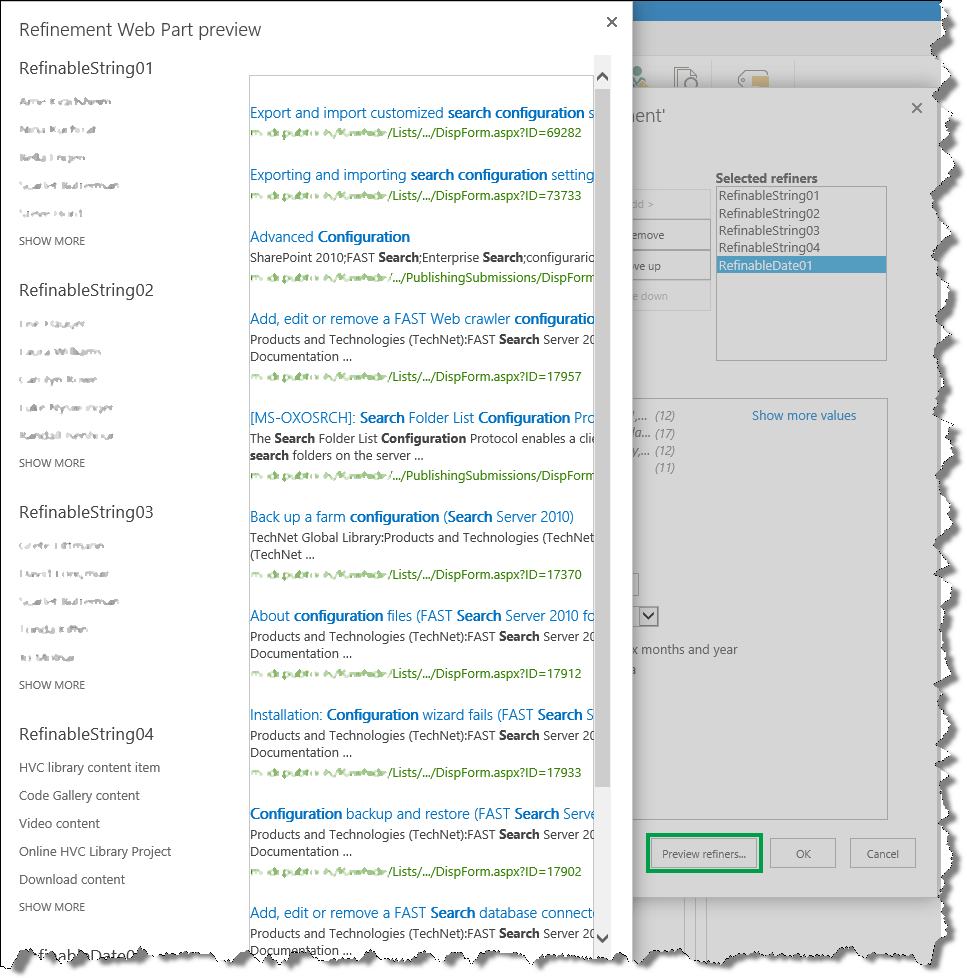
- To preview the refiners, click Preview Refiners.
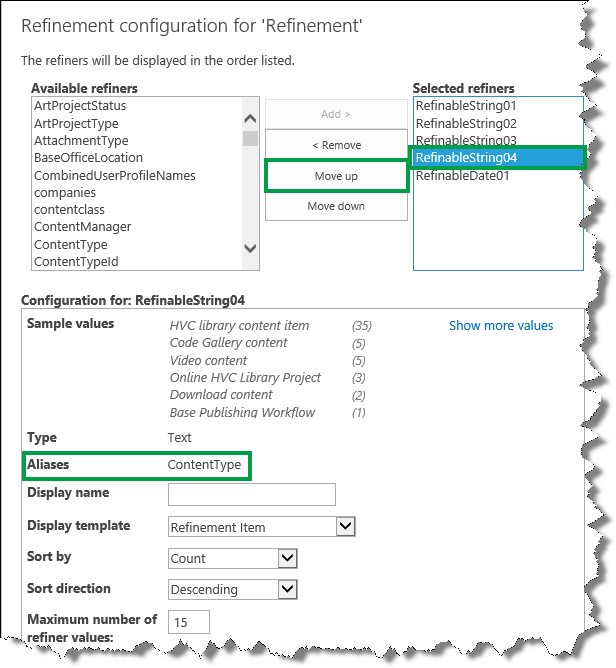
To change the display order of refiners, select the refiner you want to move, and then click the Move up or Move down button.
In my scenario, I selected RefinableString04 (notice the Alias name), and selected Move up until it was the first property in the Selected refiners section.
- To enable users to select multiple refiner values, from the Display template menu, select Multi-value Refinement Item.
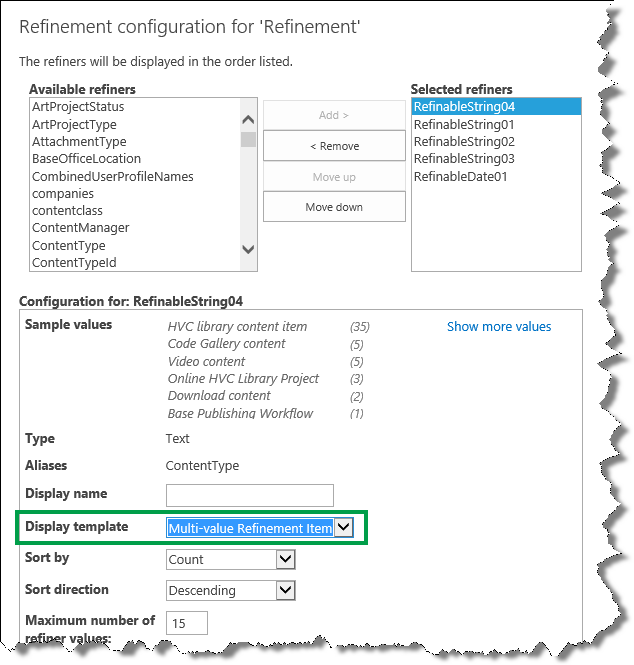
I clicked Preview refiners again, and verified that the ContentType refiner (RefinableString04) was displayed first, and that it had checkboxes that would enable users to select multiple refiner values.

I repeated this step for the refiners RefinableString01, RefinableString02 and RefinableString03.
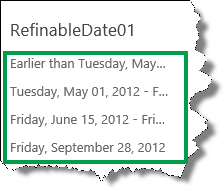
But I wasn’t quite satisfied with the way my RefinableDate01 refiner was displayed. Remember, this refiner represents Requested publish date. By default, the refiner values are shown in a list, which makes it difficult for users to see the date range.
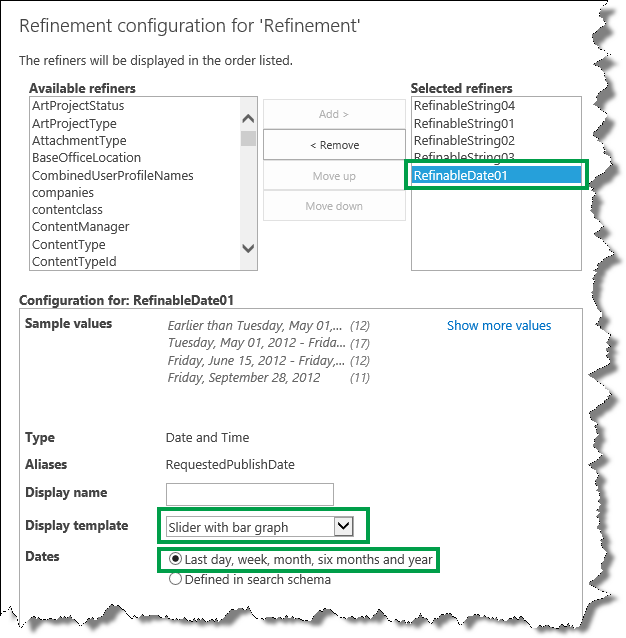
To display the refiner values in a more user friendly way, in the Refinement configuration dialog box, from the Display template menu, I selected Slider with bar graph. In the Dates section, I selected Last day, week, month, six months and year.
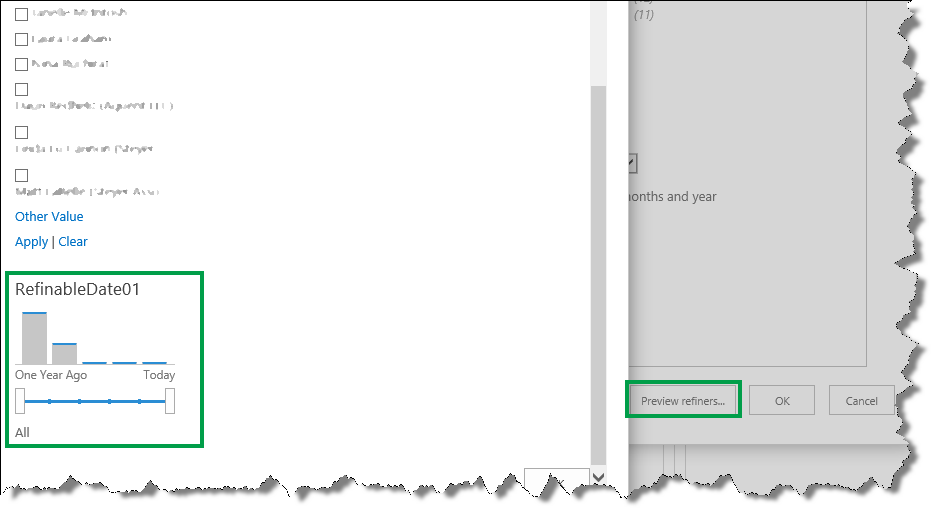
When I now previewed my refiners, the values for the Requested Publish Date refiner (RefinableDate01) were nicely displayed as a graph.
But there was one more thing that I had to improve: the refiner display names. RefinableString01, RefinableString02 etc. does not make much sense to users.
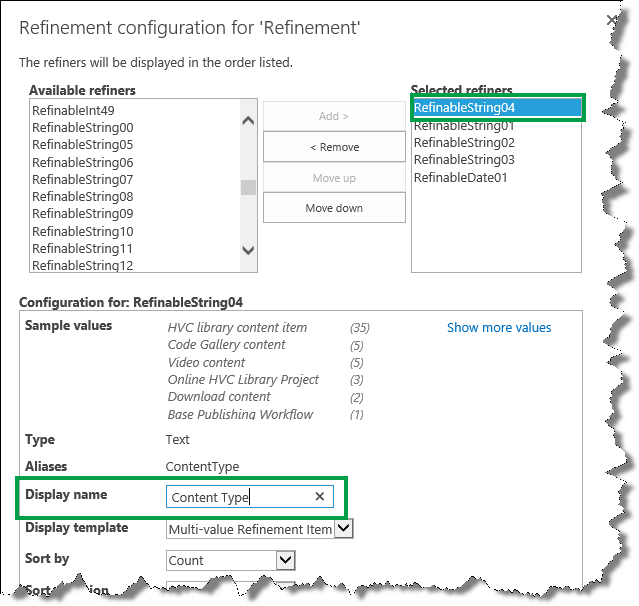
To change the refiner display name, in the Display name field, enter the name you want to be displayed for each refiner.
In my scenario, for the RefinableString04 refiner, I entered Content Type.
Repeat this step for all your refinable managed properties.
To save the configurations, click OK in the Refinement configuration dialog box, and then OK in the Web Part tool pane.
Save the page.
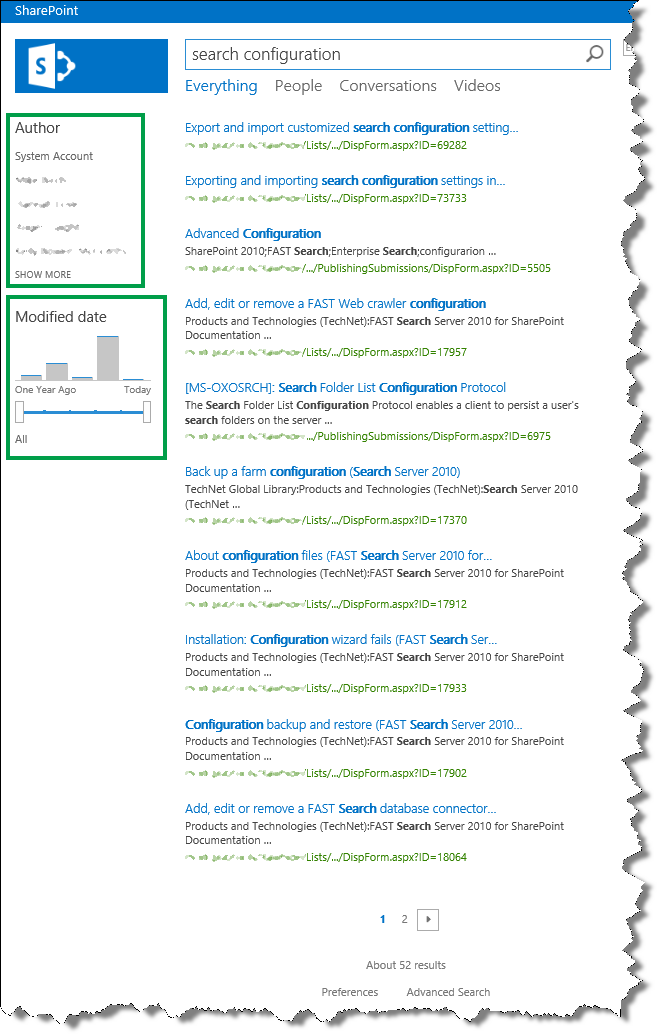
In my scenario, the five refiners were now nicely displayed on the search results page.
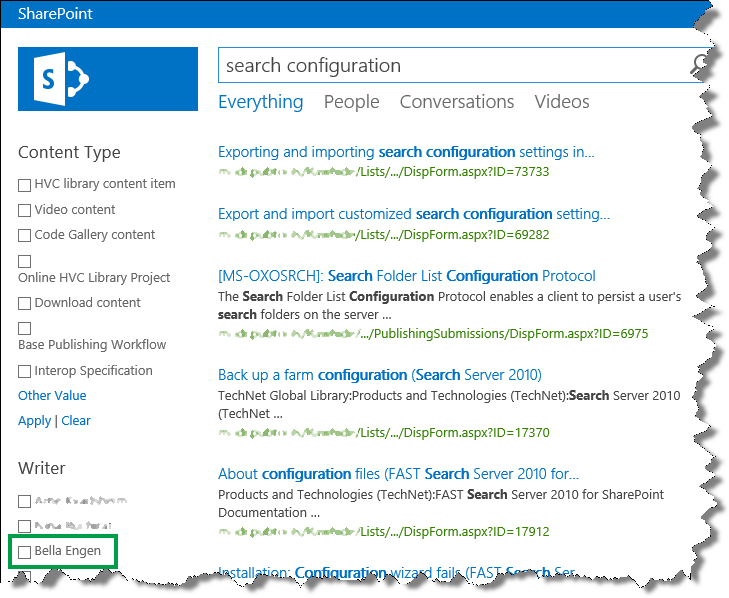
However, there was one small detail that would make the refiners even better. Right now users couldn’t see any numeric details for the refiner values. For example, I could see that I (Bella Engen) was a writer of articles that had to do with search configuration, but I couldn’t see how many articles.
To see this information, I need to add counts to the refiner values.
How to add counts to refiner values
To add counts to refiner values, you’ll have to edit a display template. When you work with display templates, you'll make life a lot easier for yourself if you map your network drive. By doing this, you’ll be able to work with display templates from Windows Explorer. I describe how you can map your network drive in this blog article.
In your mapped network drive, go to Display Templates --> Filters.
To add counts to refiners where it’s only possible to select one refiner value at a time, open the HTML file Filter_Default. To add counts to refiners where it’s possible to select multiple refiner values, open the HTML file Filter_MultiValue.
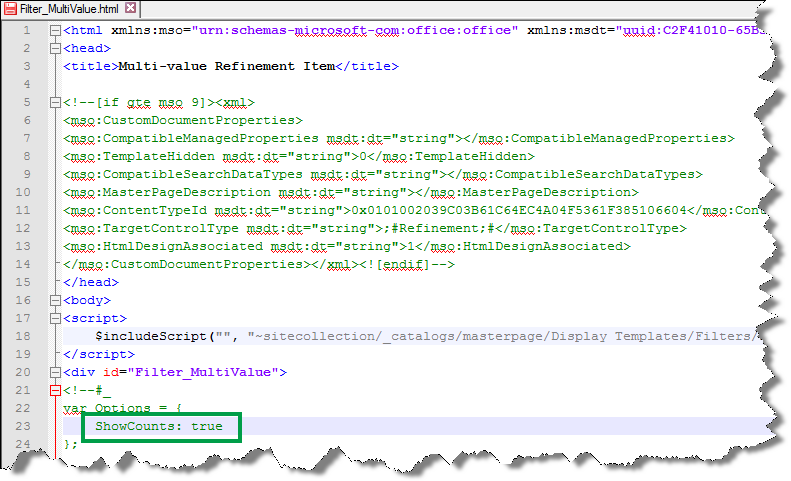
In my scenario, I had configured the refiners so that users would be able to select multiple refiner values, so I opened the file Filter_MultiValue.
Change the value for ShowCounts to true.
- Save the file.
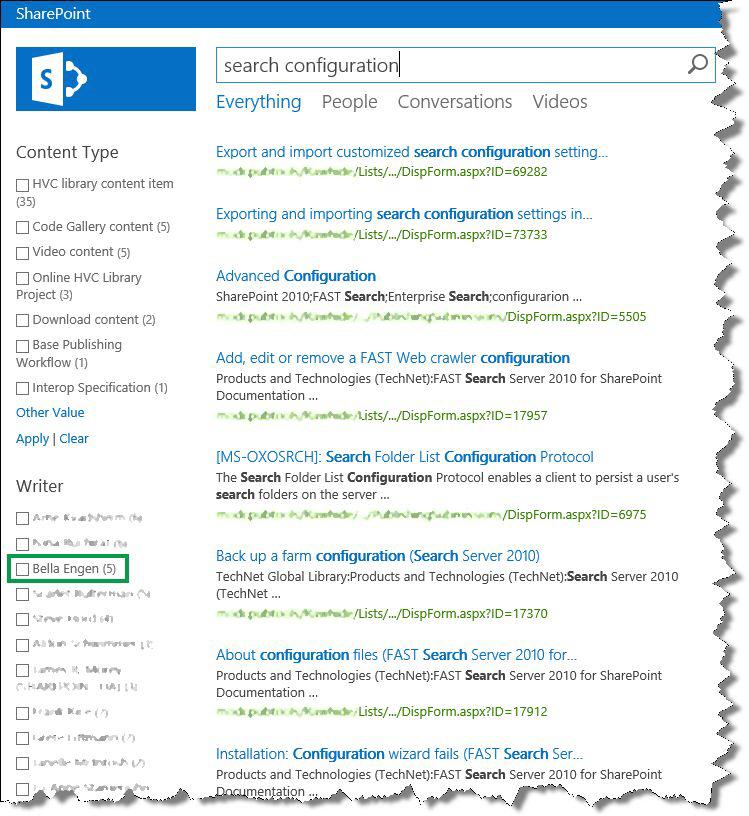
To verify that refiner counts are displayed, enter a query in your search center.
In my scenario, I could now see that I (Bella Engen) was the writer of 5 articles that had something to do with search configuration. Nice!
Next blog article in this series
How to add a custom search vertical to your search results page