Stage 15: Add refiners for faceted navigation to a publishing site
This is a blog post in the series “How to set up a product-centric website in SharePoint Server 2013.” In this series, I'll use data from a fictitious company called "Contoso" to show you how to use search features to set up a website based on product catalog data.
Note: Most of the features described in this series are not available in SharePoint 2013 Online.
For an overview of the blog posts in this series, go to How to set up a product-centric website in SharePoint Server 2013.
Quick overview
In the previous blog posts, we identified and configured the refiners we want to use for faceted navigation. In this blog post we'll learn:
- How to add a Refinement Web Part to a page
- How to configure a Refinement Web Part to use refiners for faceted navigation
- How to change a refiner display name
- How to add counts to refiner values
Start stage 15
How to add a Refinement Web Part to a page
Browse to the page where you want to add the Refinement Web Part (RWP). In our scenario, let's browse to Cameras.
- Click the Settings menu, and then click Edit Page.
- In the Web Part Zone where you want to add the Web Part, click Add a Web Part.
- In the Categories list, click Search.
- In the Parts list, click Refinement, and then click Add.
In our scenario, we'll add a RWP to Zone 2.
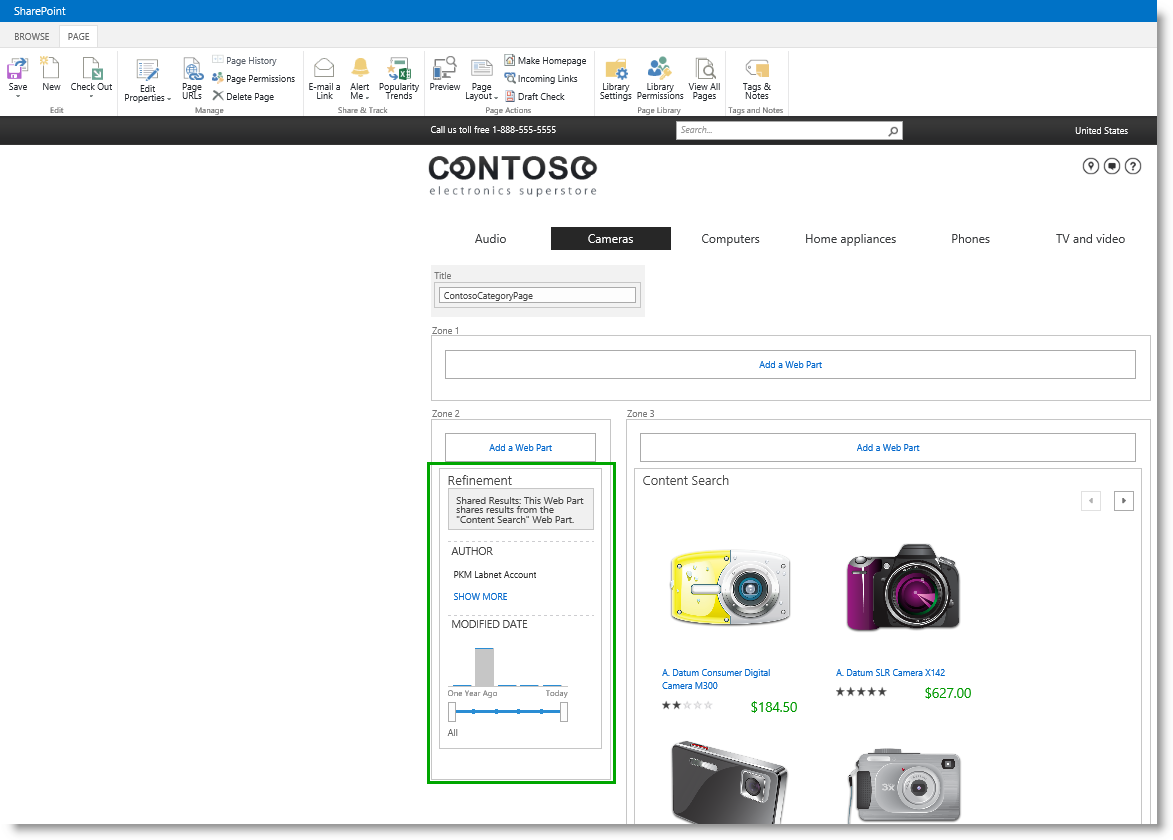
When you add the RWP to a page, it will display a couple of default properties such as "Author" and "Modified date". We don’t want to use these refiners. We want to use the refiners we configured for faceted navigation, so we'll have to configure the Web Part accordingly.
How to configure a Refinement Web Part to use refiners for faceted navigation
- In the Web Part, click the Web Part Menu, and then click Edit Web Part.
- In the Web Part tool pane, in the Refiners section, select Use the refinement configuration defined in the Managed navigation term set.
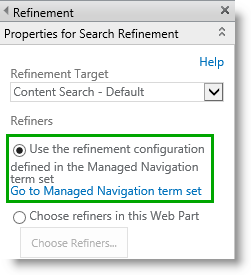
- Click OK and save the page.
And just like that, we’ve added refiners to our page. Nice, don't you think?

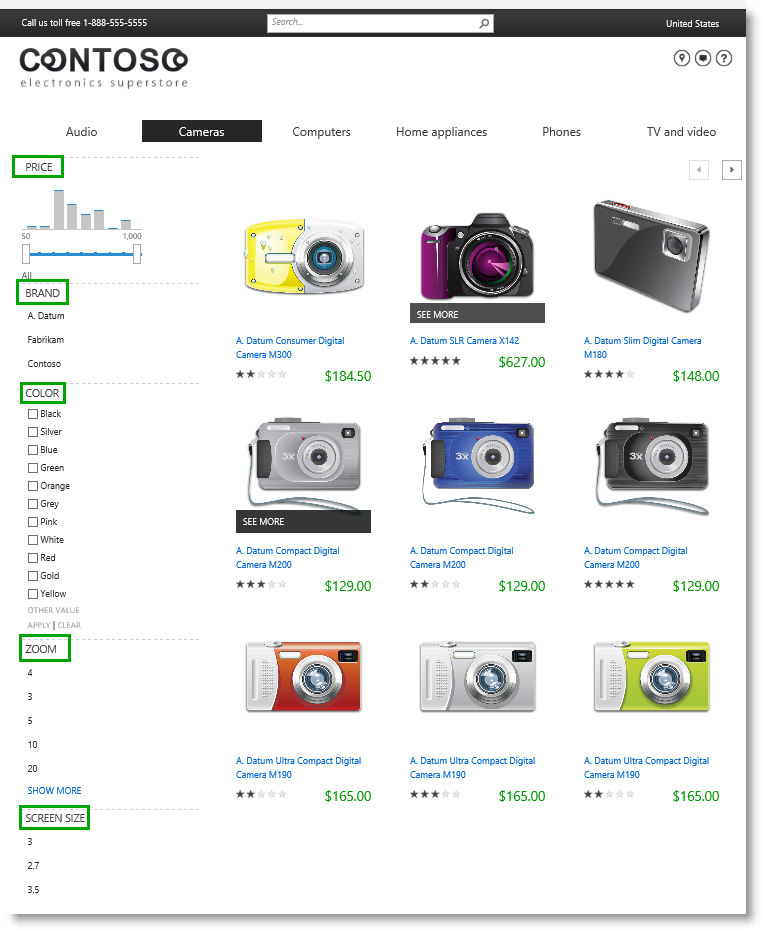
To verify that our refiners actually work, select Green and Orange from the color refiner, and click APPLY. In an instant, only green and orange cameras display on the page.
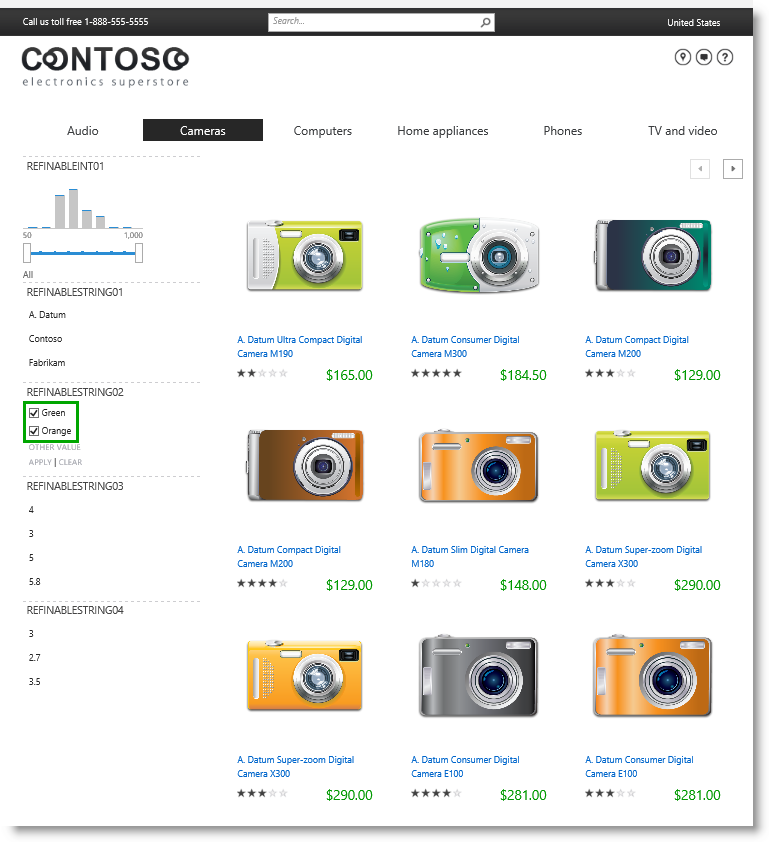
So, we’ve verified that our refiners work, however, we're not quite there when it comes to user-friendliness. As things stand, the refiners are displayed as REFINABLEINT01, REFINABLESTRING01, REFINABLESTRING03 etc. As you might recall, these are the names of the refiner-enabled managed properties we used when we configured the refiners. To visitors, these names make no sense at all, so we'll have to fix them by changing their refiner display names.
How to change a refiner display name
To change a refiner display name, you have to modify a JavaScript file in the master page gallery. Because we’ve mapped our network drive, this is a simple process.
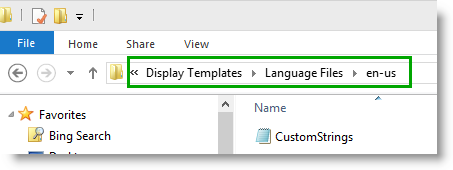
- In your mapped network drive, go to Display Templates --> Language Files.
- Go to the folder that that corresponds with the language of your site, which in our scenario is en-us.
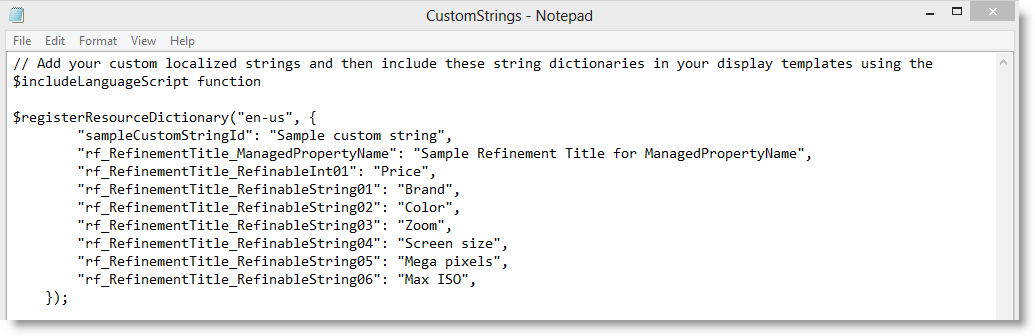
- Open the CustomStrings.js file.
- For each refiner-enabled managed property that you want to change the display name of, use the following syntax:
"rf_RefinementTitle_ManagedPropertyName": "Sample Refinement Title for ManagedPropertyName",
For example, in our Contoso scenario, the refiner-enabled managed property RefinableInt01 contains a Price refiner. To give this refiner a nice display name, we'll add the following line to the java script file:
"rf_RefinementTitle_RefinableInt01": "Price",
In our Contoso scenario, for the refiners we have configured for the "Audio" and "Cameras" category, our CustomString.js file will look like this:
- Save this file, and refresh the Cameras page to verify that our refiners now have nice, user-friendly display names.
If we browse to the Digital cameras category, we can see that the category-specific refiner MEGA PIXELS is displayed.
![]()
So, our category-specific refiners now display for the correct category, and they all have user-friendly names. However, there is another small detail that would make our refiners even better. Right now we can't see any numeric details for the refiner values. For example, we can't see how many cameras are of the color Silver, or how many cameras have 14 mega pixels. To see this information, we need to add counts to the refiner values.
How to add counts to refiner values
- In your mapped network drive, go to Display Templates --> Filters.
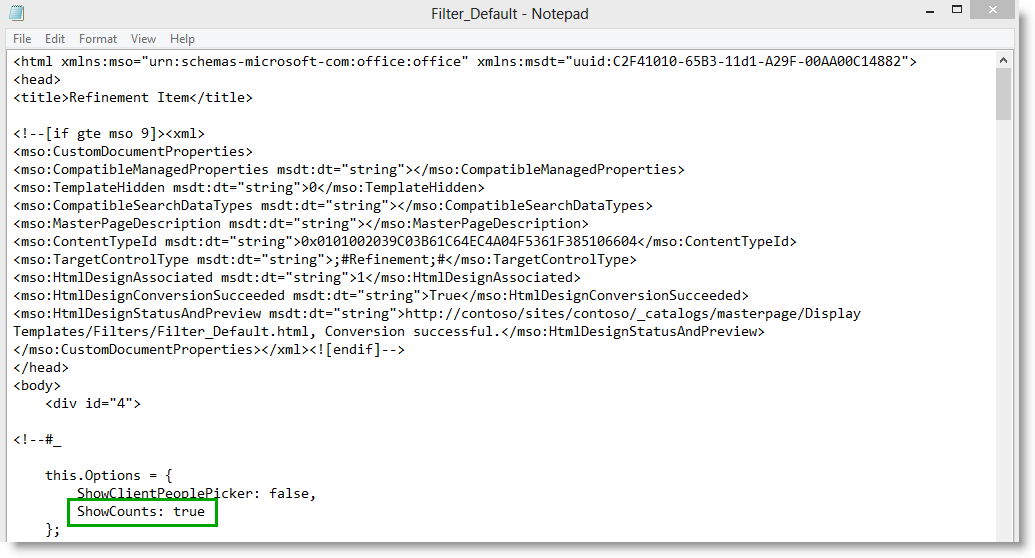
- Open the HTML file Filter_Default.
- Change the value for ShowCounts to true.
- Save the file, and refresh the Cameras page to verify that refiner counts are displayed. You’ll see that refiner counts only display for refiners where it’s only possible to select one refiner at a time.
- To add refiner counts to refiners where it’s possible to select multiple refiner values, open the HTML file Filer_MultiValue, and repeat steps 3 and 4.
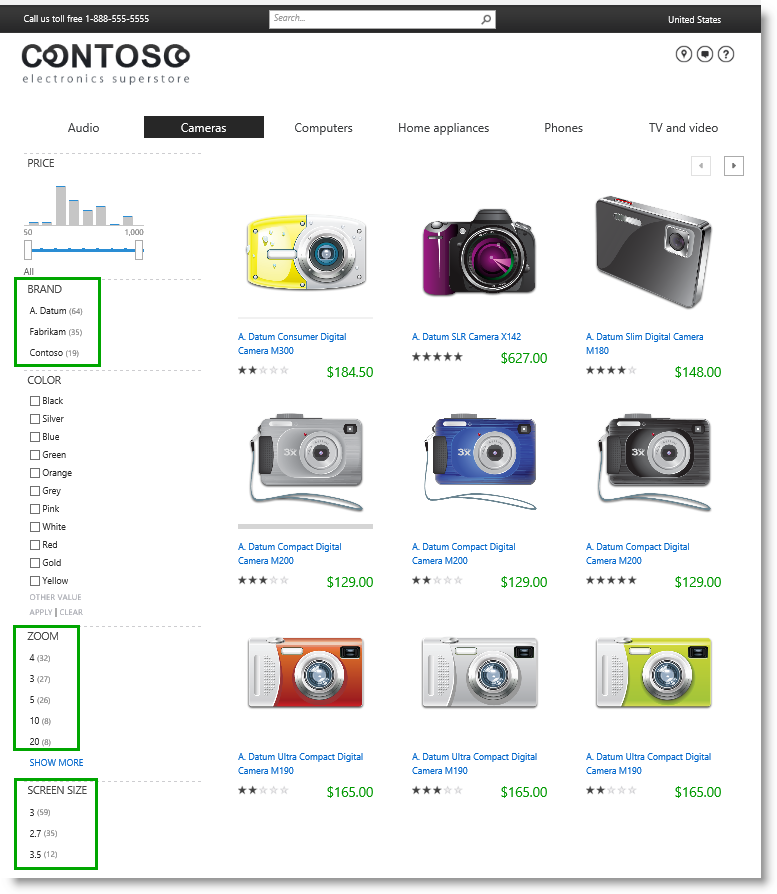
Now when we refresh the Cameras page, all of the refiner values have counts. Nice!
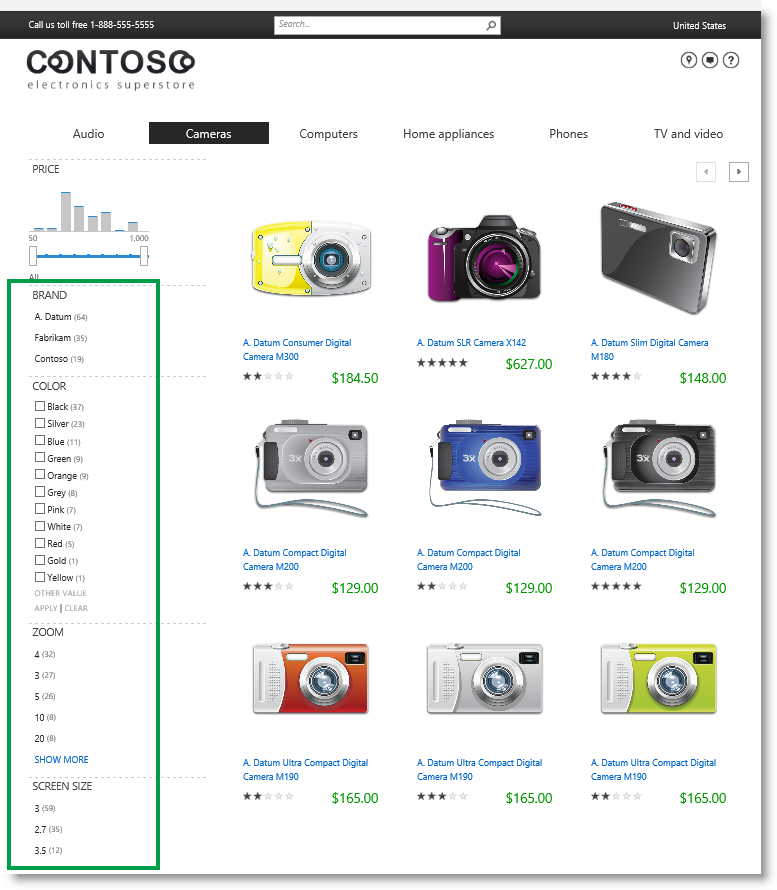
So, when visitors come to our Contoso site, they can use category-specific refiners to easily find the product they’re looking for. But there’s still one more thing missing: when visitors are on a top level category page, for example Cameras, they can't easily see which subcategories are under Cameras. Luckily, there is a Web Part that will take care of this for us. I will show you how to add this Web Part in the next -- and last -- blog post of this series.
Next blog post in this series Stage 16: Add a Taxonomy Refinement Panel Web Part to a publishing site
Additional resources Configure Search Web Parts Scenario: Create SharePoint sites by using cross-site publishing in SharePoint Server 2013