Stage 6: Upload and apply a new master page to a publishing site
This is a blog post in the series “How to set up a product-centric website in SharePoint Server 2013”. In this series, I'll use data from a fictitious company called "Contoso" to show you how to use search features to set up a website based on product catalog data.
Note: Most of the features described in this series are not available in SharePoint 2013 Online.
For an overview of the blog posts in this series, go to How to set up a product-centric website in SharePoint Server 2013.
Quick overview
As described in Stage 5: Connect your publishing site to a catalog, we connected the publishing site to our catalog. When we connected, SharePoint Server 2013 automatically created some pages for us, on which some search results where shown. These pages all have the standard SharePoint look, so now it is time to give it a "Contoso look".
In this blog post, we'll learn:
- About the master page
- About the Master Page Gallery
- How to map a network drive
- How to turn off versioning for the Master Page Gallery
- How to upload a new master page
- How to apply a new master page
Note: This blog post will not cover how to create a master page. It will only cover how to upload and apply an already finalized master page file and other design files that are stored locally on my computer. These files are not available for download.
For information about how to create a master page, see Overview of Design Manager in SharePoint 2013 and How to: Convert an HTML file into a master page in SharePoint Server 2013.
Start stage 6
About the master page
When visitors browse our Contoso site, they'll see different content on different pages. The displayed content is a combination of a master page and page layouts.
A master page defines the common layout and interface that you see on all your webpages, such as logo, title and navigation menu.
Layout and interface for the individual pages, such as the home page, or the page that displays Audio products, are handled by page layouts. I'll talk more about them in later blog posts.

In previous versions of SharePoint, you had to design master pages in ASP.NET. These master pages also had to include SharePoint specific markup, such as controls and content placeholders.
In SharePoint Server 2013, you can create a master page in HTML format, and SharePoint Server 2013 will convert this into an ASP.NET page for you. This means that when you design your master page, you can do this in your favorite HTML editor, focus on HTML, CSS and JavaScript, and you don't have to worry about ASP.NET or SharePoint-specific markup.
When you add an HTML master page to SharePoint Server 2013, an associated ASP.NET master page will be automatically created. Because the two files are associated, any changes you make to the HTML master page will be automatically updated in the associated ASP.NET master page .
For more information, see Overview of the SharePoint 2013 page model.
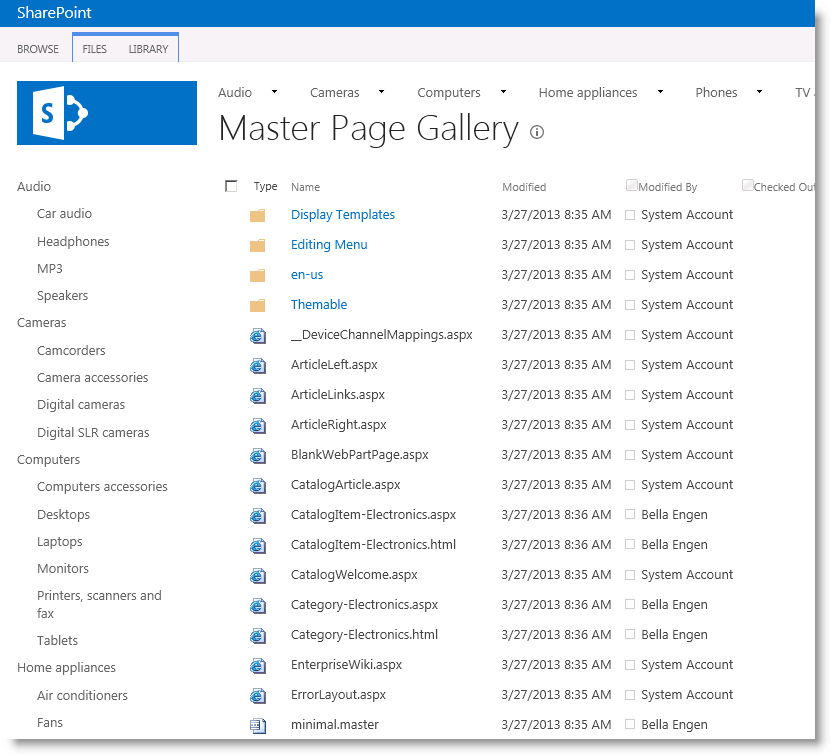
About the Master Page Gallery
In our scenario, we have an HTML master page and some design assets, such as a CSS file and images, that we want to upload and apply to our Contoso site. All these files are stored on my local computer.
SharePoint expects to find design files in the Master Page Gallery, so this is where we should upload the files. To get to the Master Page Gallery, go to Site Settings --> Master pages and page layouts.
You can use the Upload Document button to upload a single file to the Master Page Gallery. However, using this button every time you want to add a document can be somewhat cumbersome. To make life easy for yourself, you can map your network drive. This will enable you to drag and drop files into the Master Page Gallery with Windows Explorer.
How to map your network drive
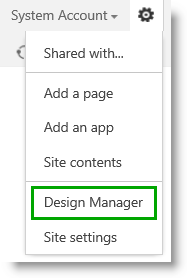
- From Settings menu, select Design Manager
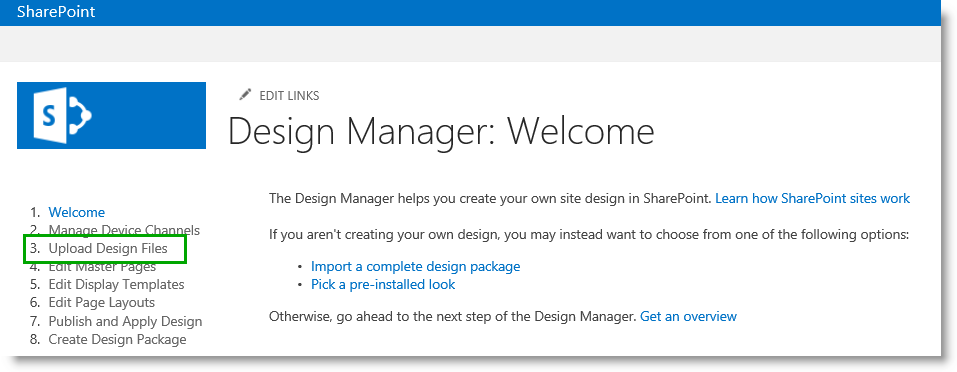
- On the Design Manager Welcome page, click 3. Upload Design Files.
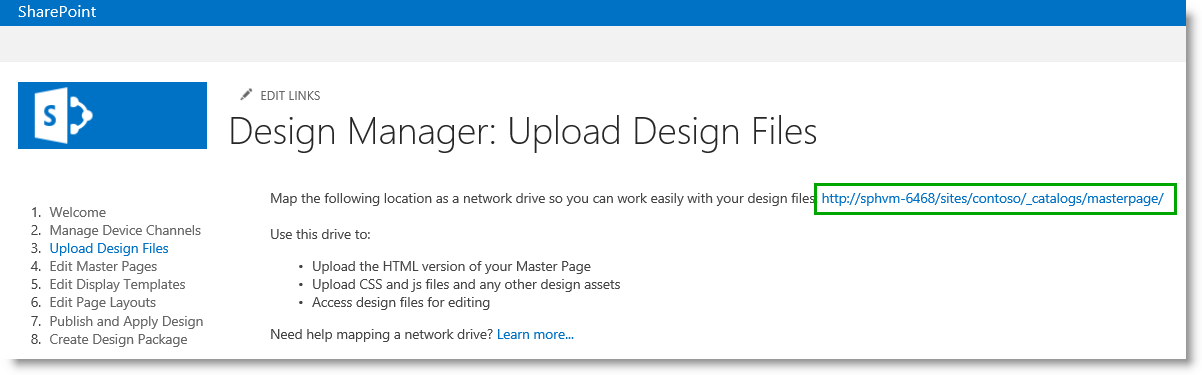
- On the Upload Design Files page, copy the URL to your design files.
Note: The next steps will vary depending on your computer's operating system. My computer is running Windows 8, so I will show you how to map your network drive from Windows 8.
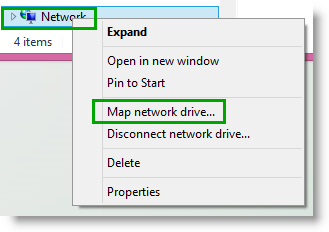
- Open Windows Explorer. Right click on Network, and select Map network drive.
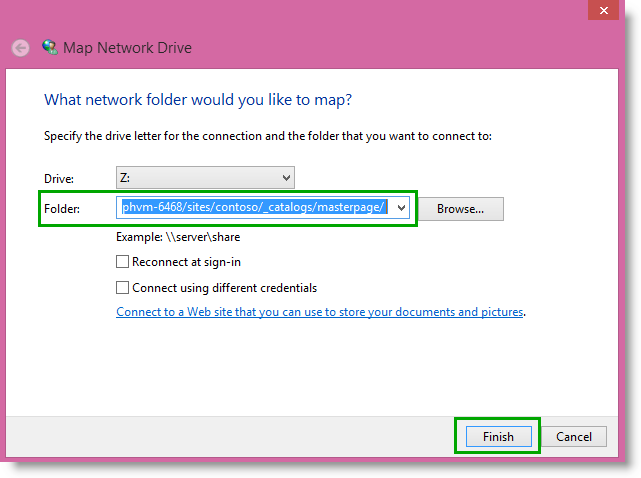
- In the Folder field, paste the URL that you copied in step 3. Click Finish.
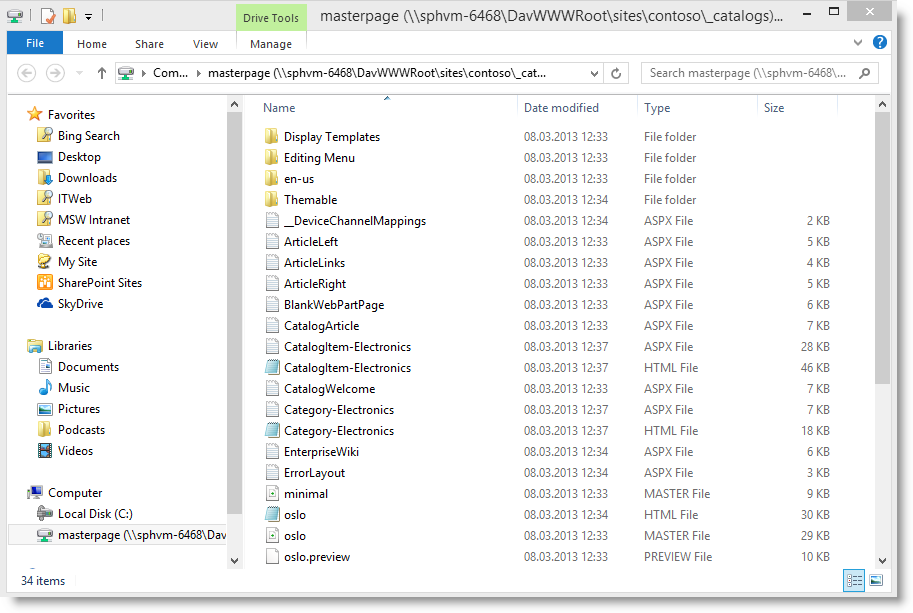
- An explorer window with your Master Page Gallery content opens.
How to turn off versioning for the Master Page Gallery
In our scenario, I am not using SharePoint workflows for approval. My files have already been approved, so before I upload a new master page, I want to turn off versioning for the Master Page Gallery.
To turn off versioning for the Master Page Gallery:
- On the LIBRARY tab, click Library Settings.
- On the Settings page, click Versioning settings.
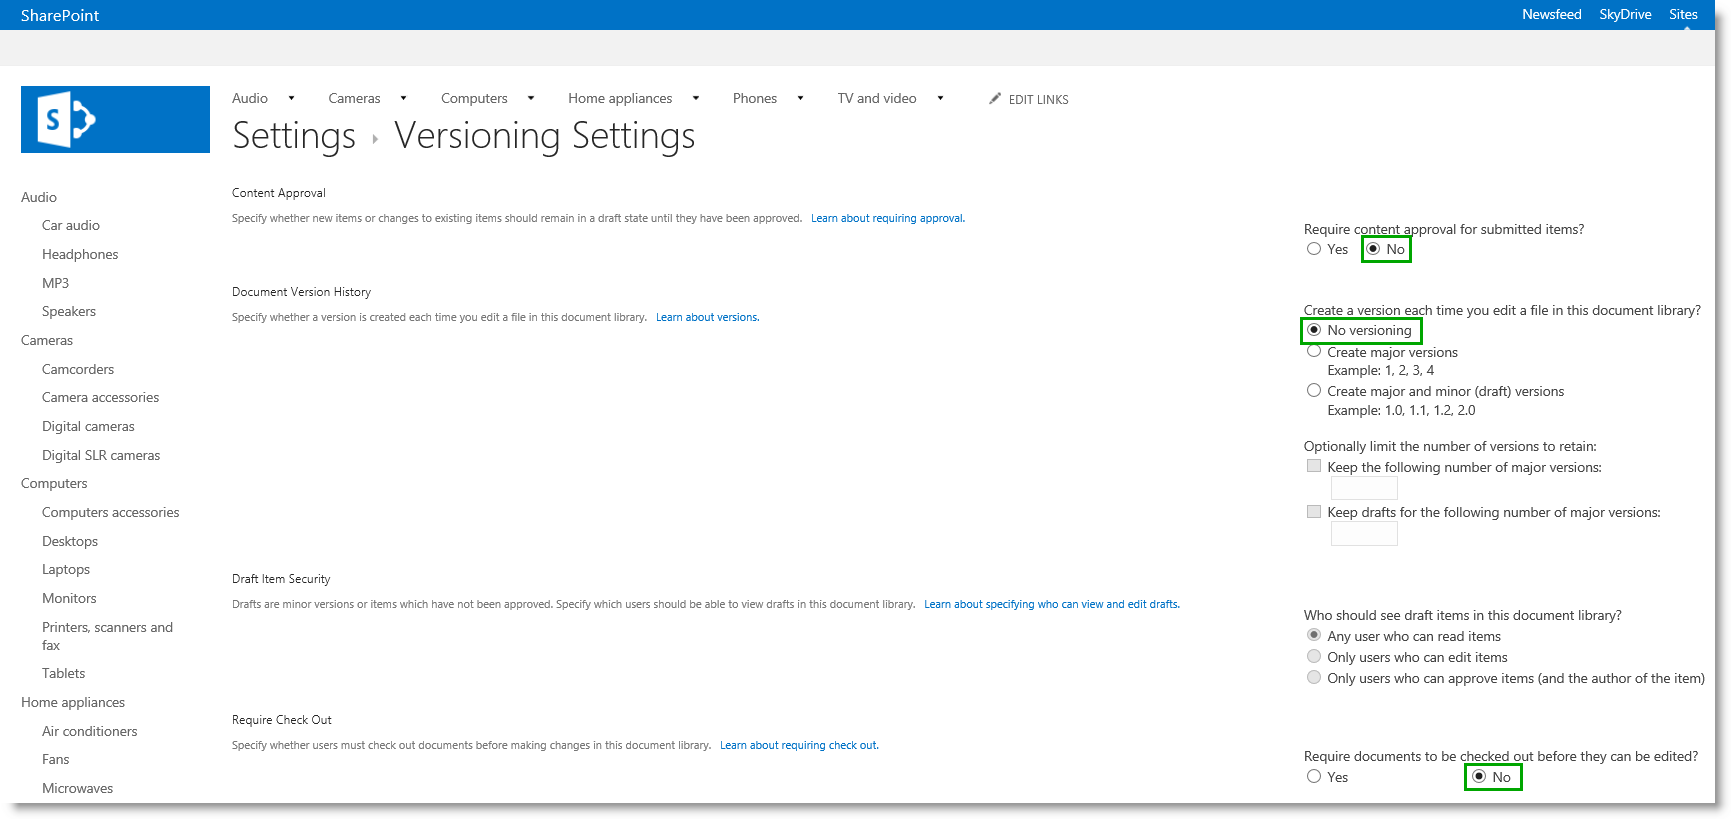
- On the Versioning Settings page, in the Content Approval section, for Require content approval for submitted items, select No.
- In the Document Version History section, for Create a version each time you edit a file in this document library, select No versioning.
- In the Require Check Out section, for Require documents to be checked out before they can be edited, select No.
Now we're ready to upload a new master page.
How to upload a new master page
Because we have mapped our network drive, uploading a new master page becomes extremely easy. Simply drag and drop the file into your Master Page Gallery.
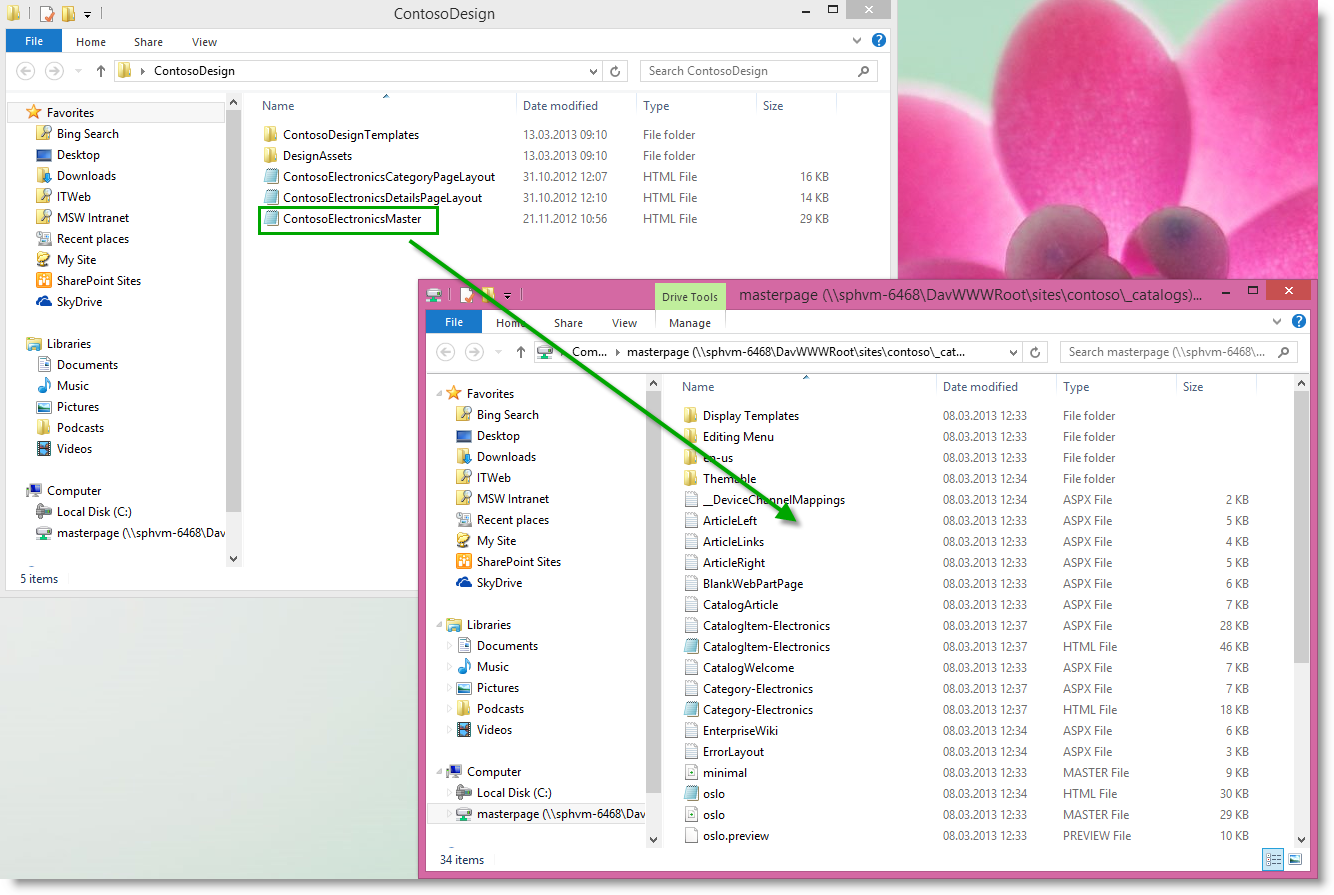
If you have any associated design files, such as CSS files or images, you can drag and drop these into the Master Page Gallery as well.
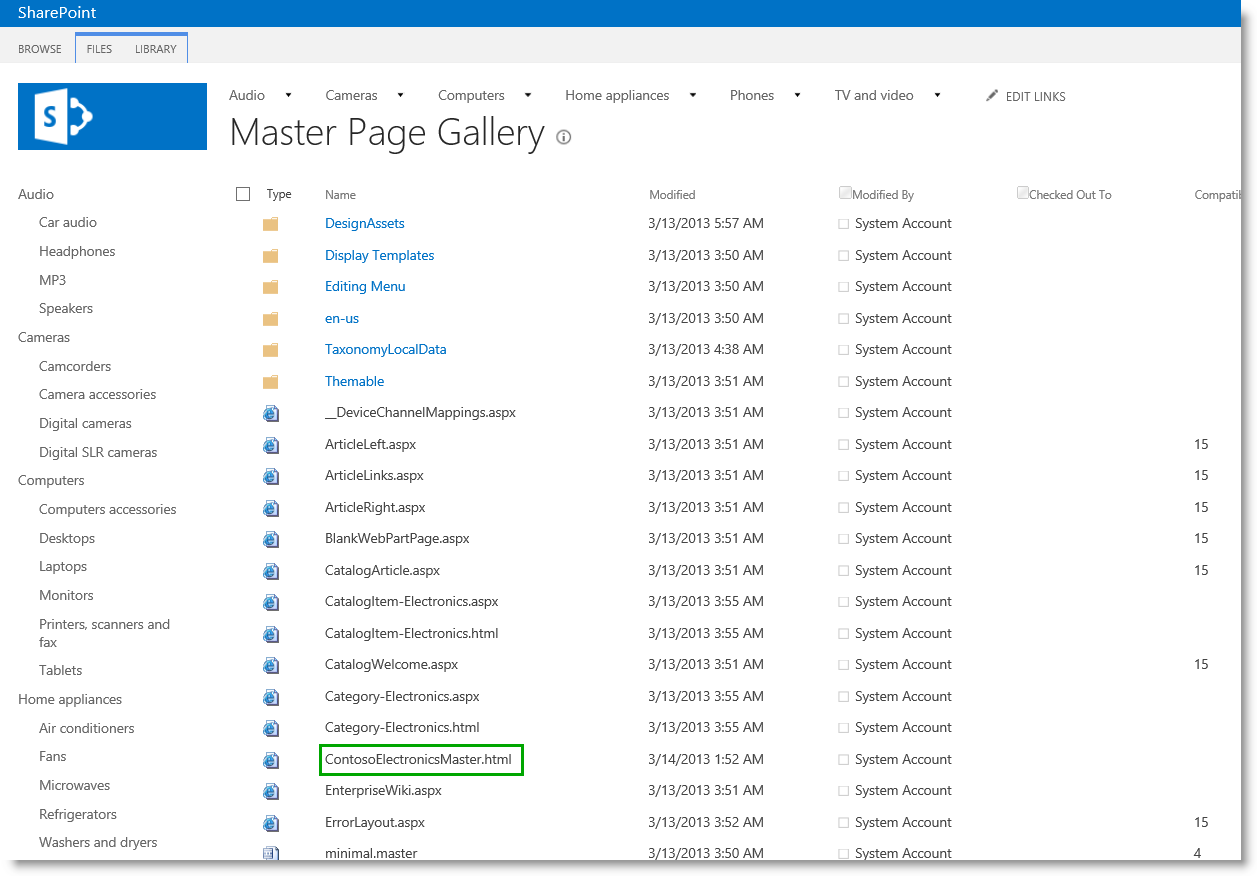
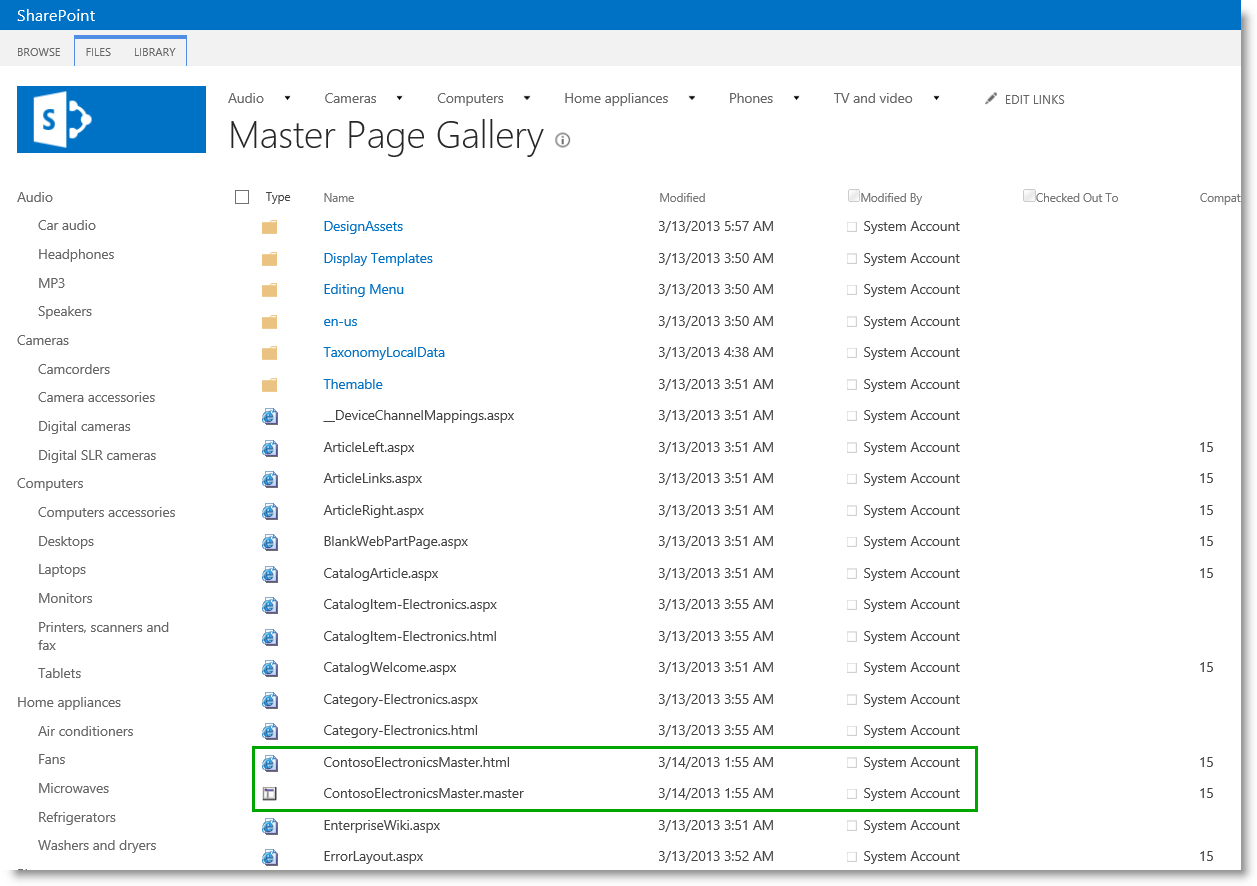
In SharePoint, refresh the Master Page Gallery page to see that the new HTML master page has been added. However, note that an associated ASP.NET master page has not yet been created.
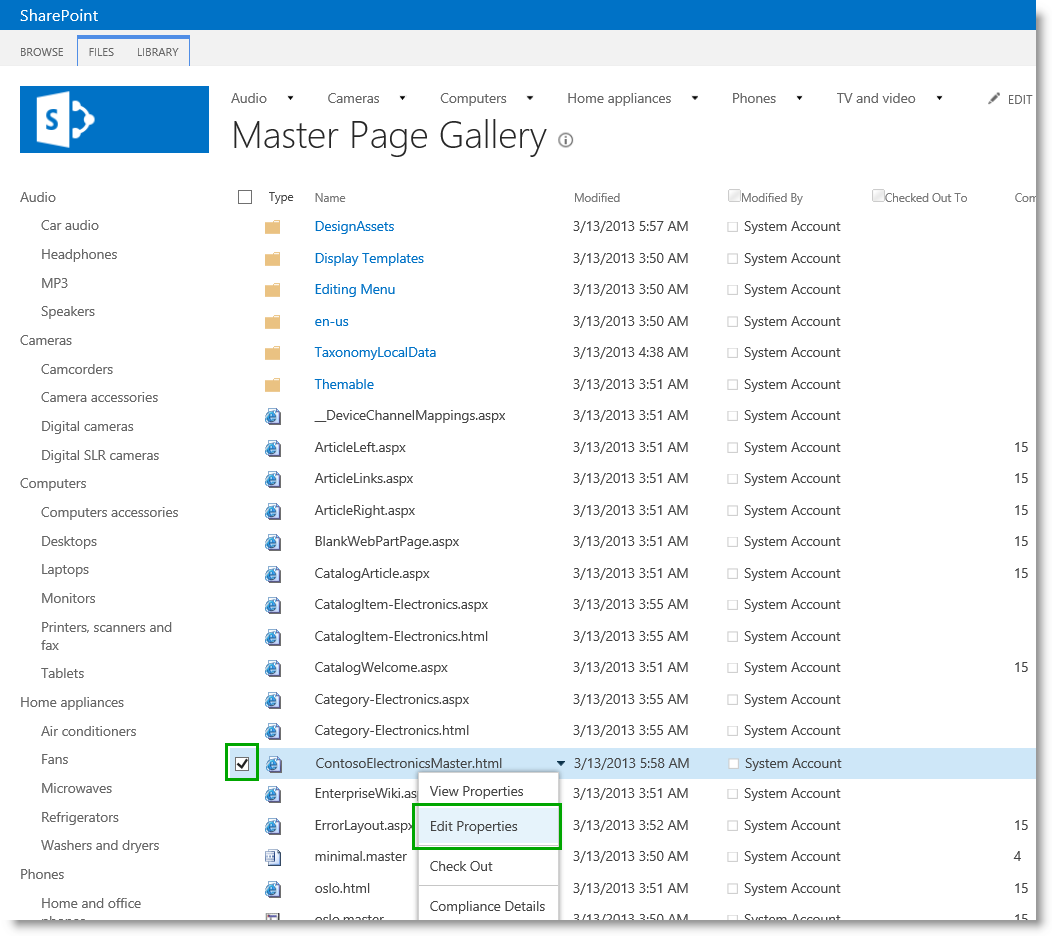
Because we dragged and dropped the HTML master page into the Master Page Galley, the content type associated with the file is Design File. For SharePoint Server 2013 to create an associated ASP.NET master page, we have to change the content type for the newly uploaded HTML master file. This is done by changing the file properties.
To change the file properties:
- On the Master Page Gallery page, select the newly uploaded master page, and then click Edit Properties.
- In the Content Type section, select HTML Master Page.
- In the Compatible UI Version(s) section, select 15.
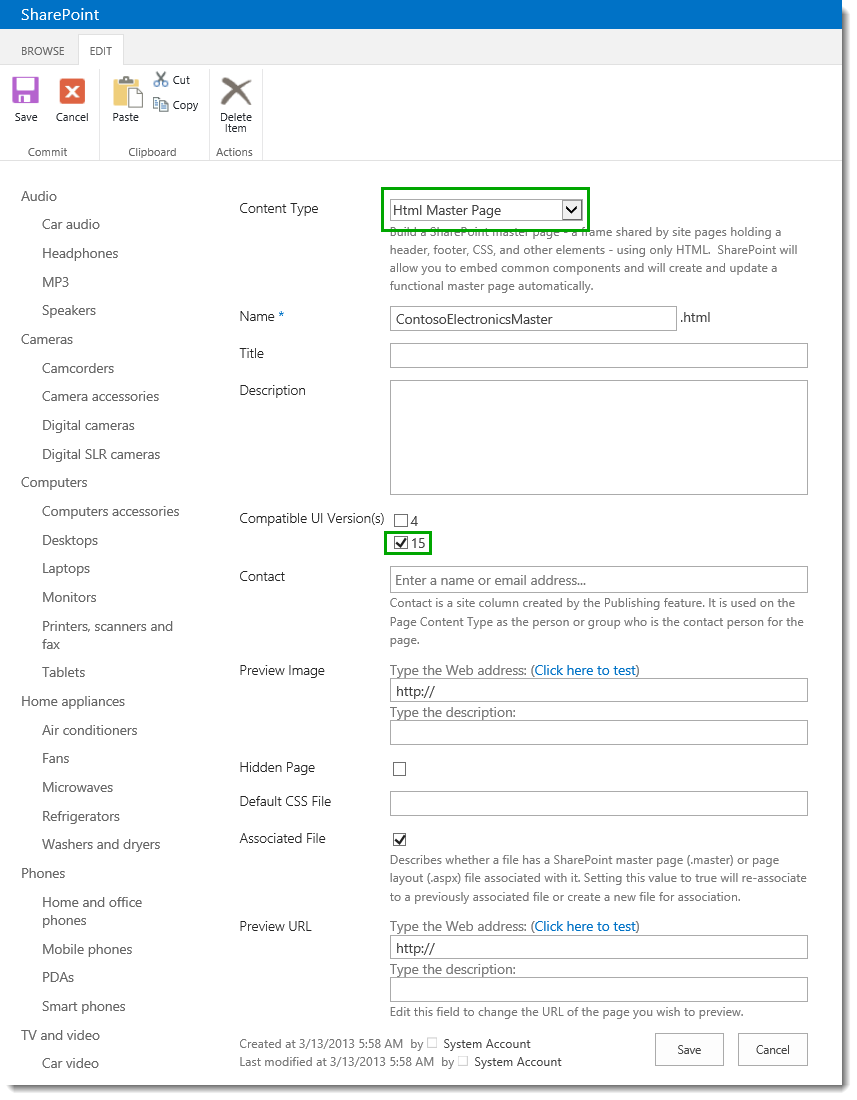
On the Master Page Gallery page, we can see that an associated ASP.NET master page has been created.
We are now ready to apply our new master page.
How to apply a new master page
To apply a new master page:
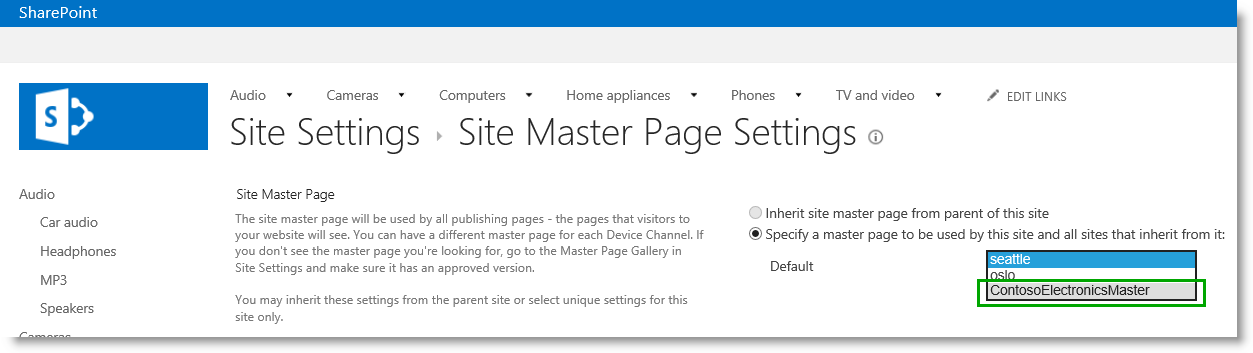
- From the Site Settings page, click Master page (under Look and Feel).
- From the Site Master Page section, from the Specify a master page to be used by this site and all sites that inherit from it, select the newly uploaded master page. In our scenario, this is ContosoElectronicsMaster.
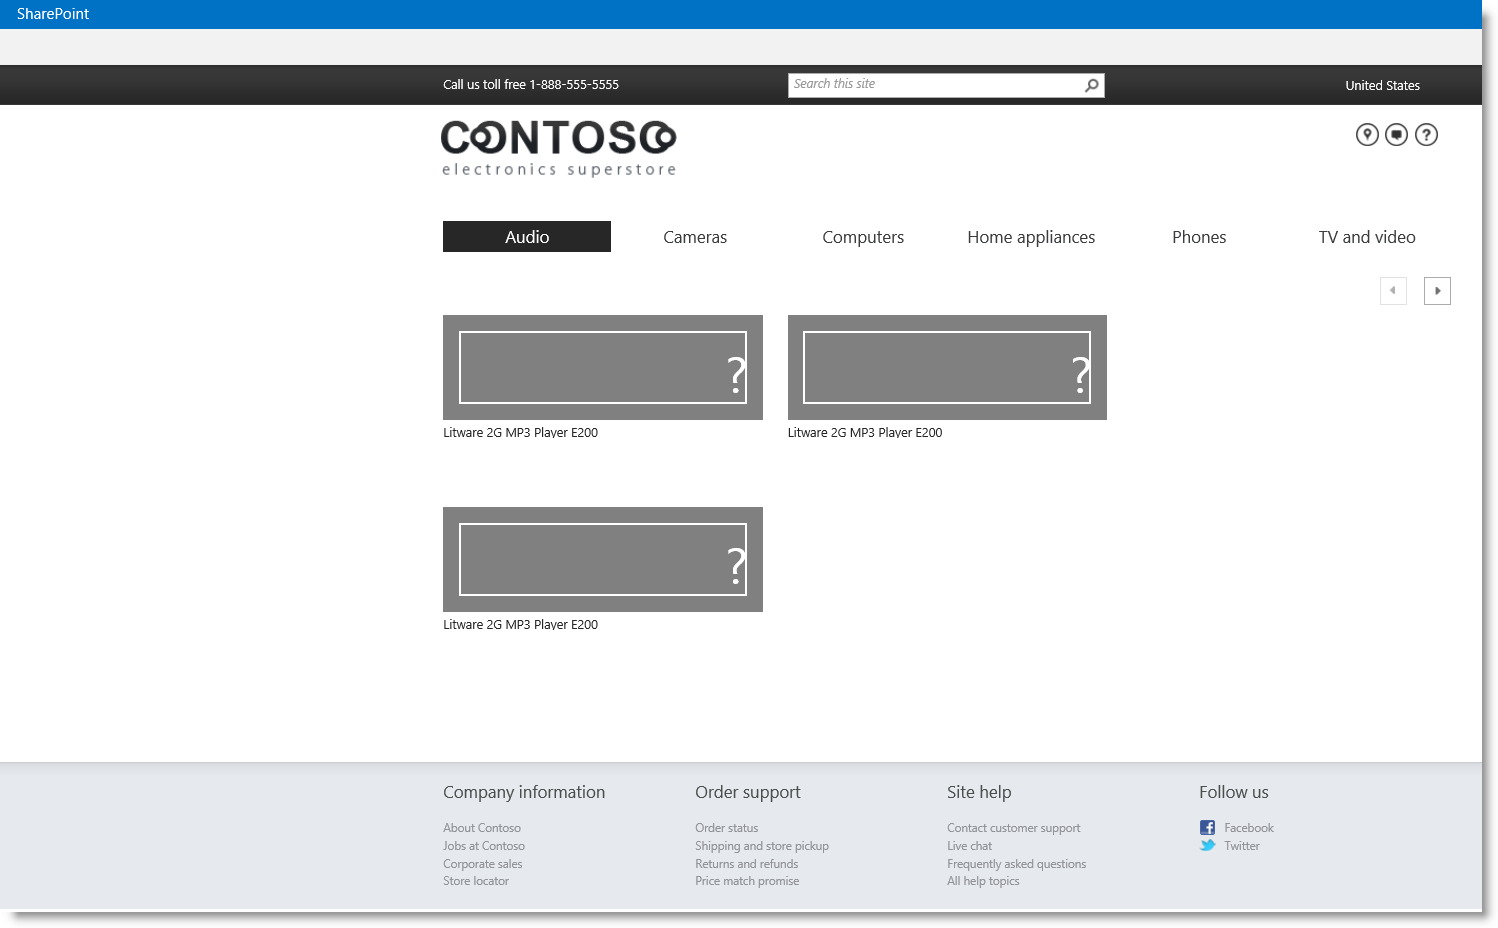
By clicking on the Audio page, we verify that our new master page is now being used.
The next step is to start working on the page layouts.
Next blog article in this series Stage 7: Upload page layouts and create new pages in a publishing site
Additional Resources
- For more information about cross-site Publishing, see the TechNet scenario page Create SharePoint sites by using cross-site publishing in SharePoint Server 2013.
- Overview of the SharePoint 2013 page model
- How to: Map a network drive to the SharePoint 2013 Master Page Gallery
- Overview of Design Manager in SharePoint 2013
- How to: Convert an HTML file into a master page in SharePoint Server 2013
- How to: Apply a master page to a site in SharePoint Server 2013