Stage 3: How to enable a list as a catalog
This is a blog post in the series “How to set up a product-centric website in SharePoint Server 2013”. In this series, I'll use data from a fictitious company called "Contoso" to show you how to use search features to set up a website based on product catalog data.
Note: Most of the features described in this series are not available in SharePoint 2013 Online.
For an overview of the blog posts in this series, go to How to set up a product-centric website in SharePoint Server 2013.
Quick overview
As described in Stage 2: Import list content into the Product Catalog Site Collection, we've imported content about Contoso's product line into the Products list. To display this product information in our Publishing Portal (the Contoso website), we now have to enable the Products list as a catalog.
These are the steps we'll take to enable a list as a catalog:
- Go to catalog settings page.
- Enable catalog sharing.
- Enable anonymous access.
- Define website navigation hierarchy.
- Define values to use in the URL to an individual product.
Start stage 3
1. On the Products list, from the LIST tab, click List Settings.
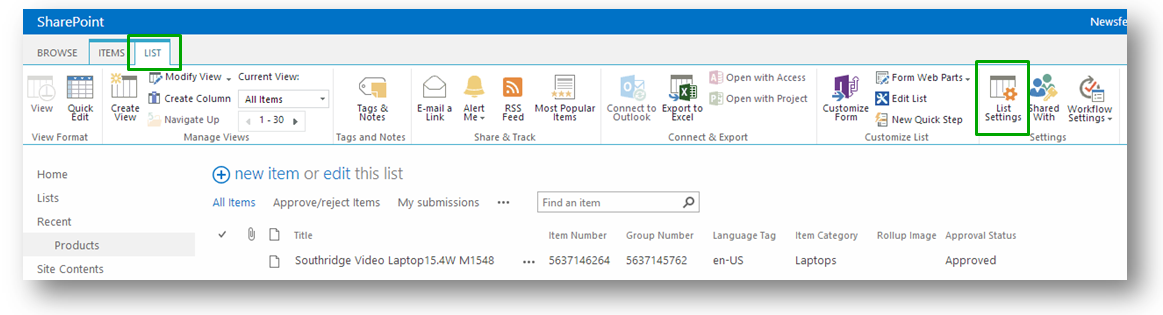
On the Settings page, click Catalog Settings.

We'll define several things on the Catalog Settings page. I'm going to break all of this down into individual chunks.
2. For Catalog Sharing Select Enable this Library as a catalog.
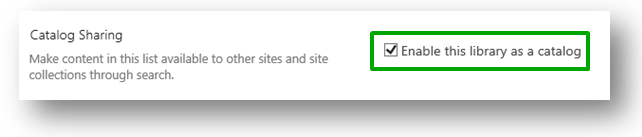
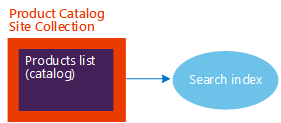
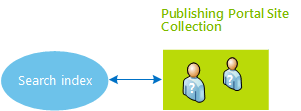
By selecting this, we'll be confirming that content from the Products list should be added to the search index.
3. For Anonymous Access, click Enable anonymous access, and then click Make Anonymous.
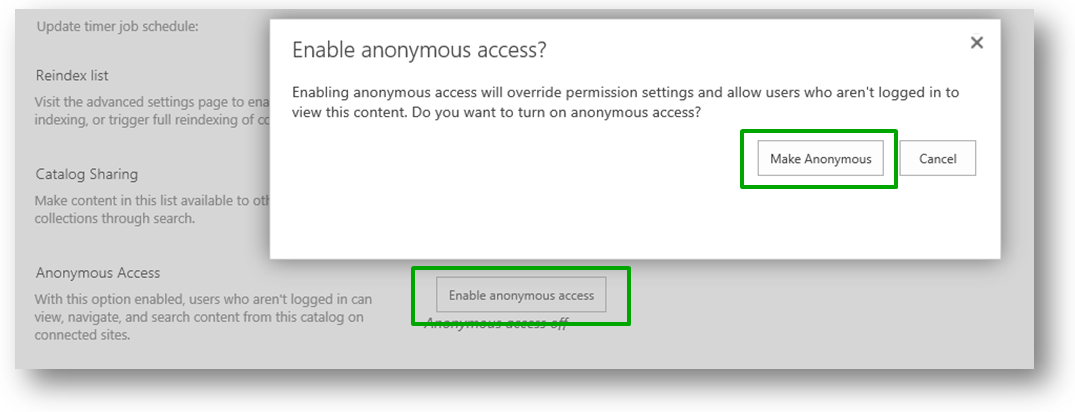
By doing this, we'll be granting anonymous visitors, that is, visitors who aren't logged on to Contoso's website, access to view content from this list.
Note that we're not granting visitors access to the list itself. All we're doing is granting anonymous visitors access to view the catalog content from the search index. Anonymous visitors will never be able to see the actual Products list.
 4. For Navigation Hierarchy (this section shows up after Catalog Item URL in the UI, but I prefer to tell you about this one first), select Item Category.

In my previous blog post, Stage 2: Import list content into the Product Catalog Site Collection, I showed you how the managed metadata column Item Category is tied to the Product Hierarchy term set.
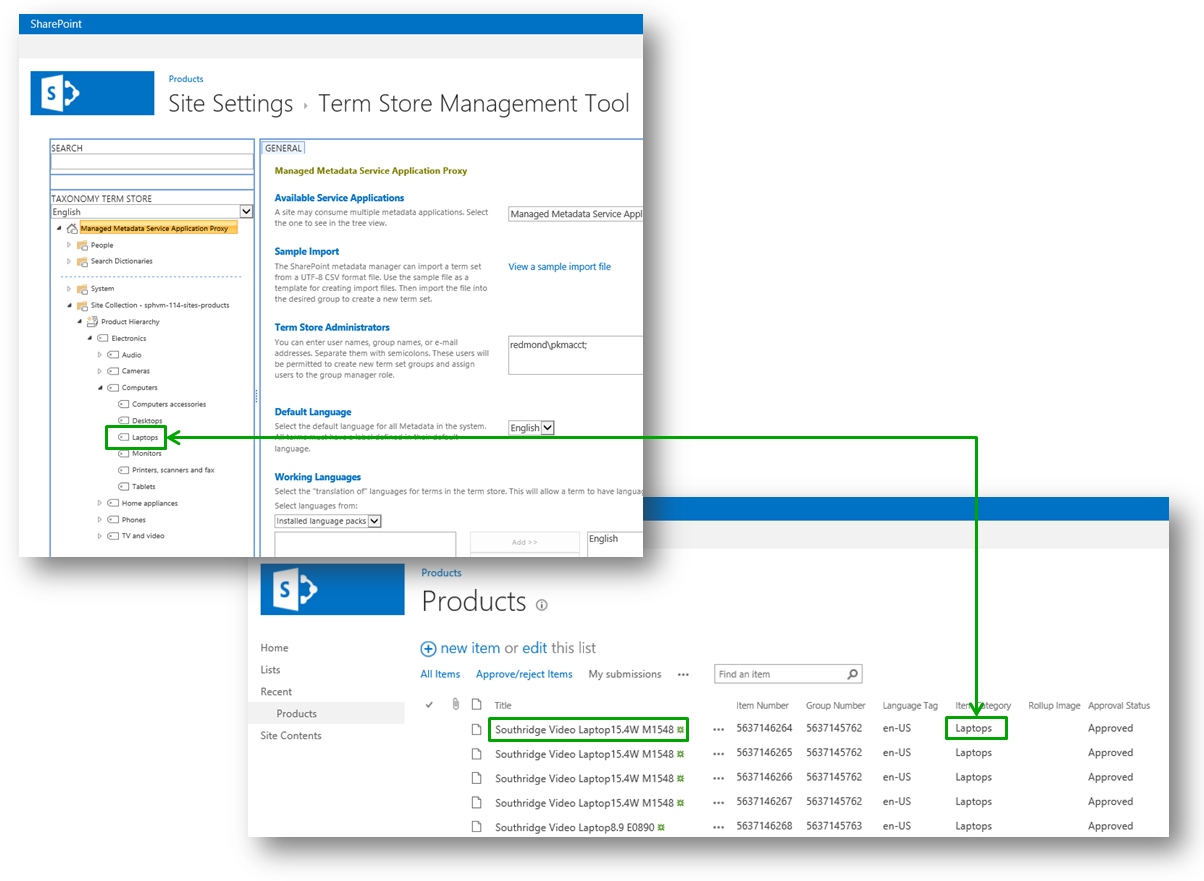
By selecting Item Category here, we're in fact specifying that the navigation on our publishing site (the Contoso website) will be determined by the structure in the Product Hierarchy term set.
In the next screenshot, notice that the structure in the Product Hierarchy term set, matches the navigation on the Contoso website.
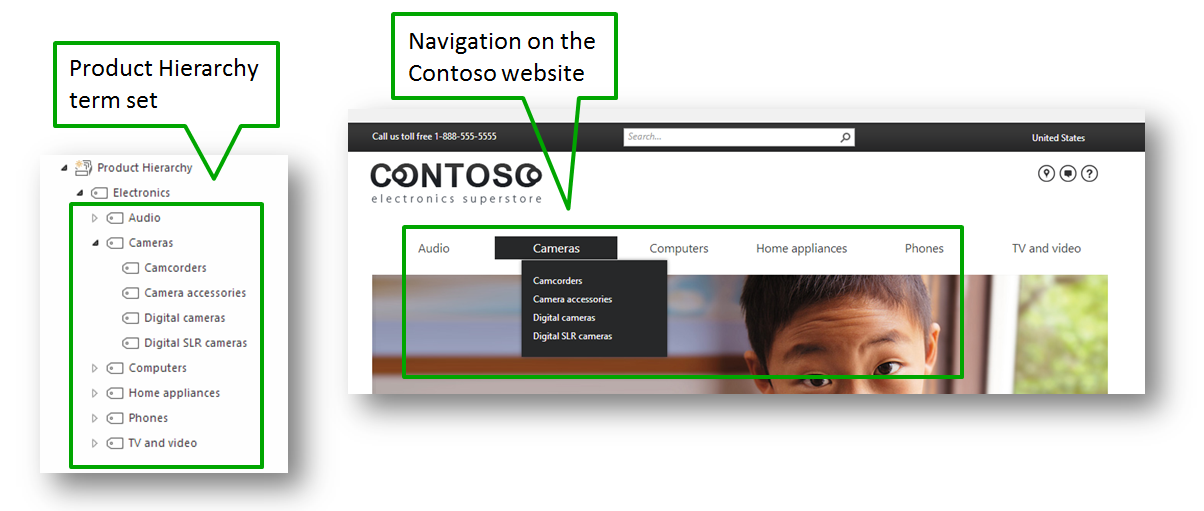
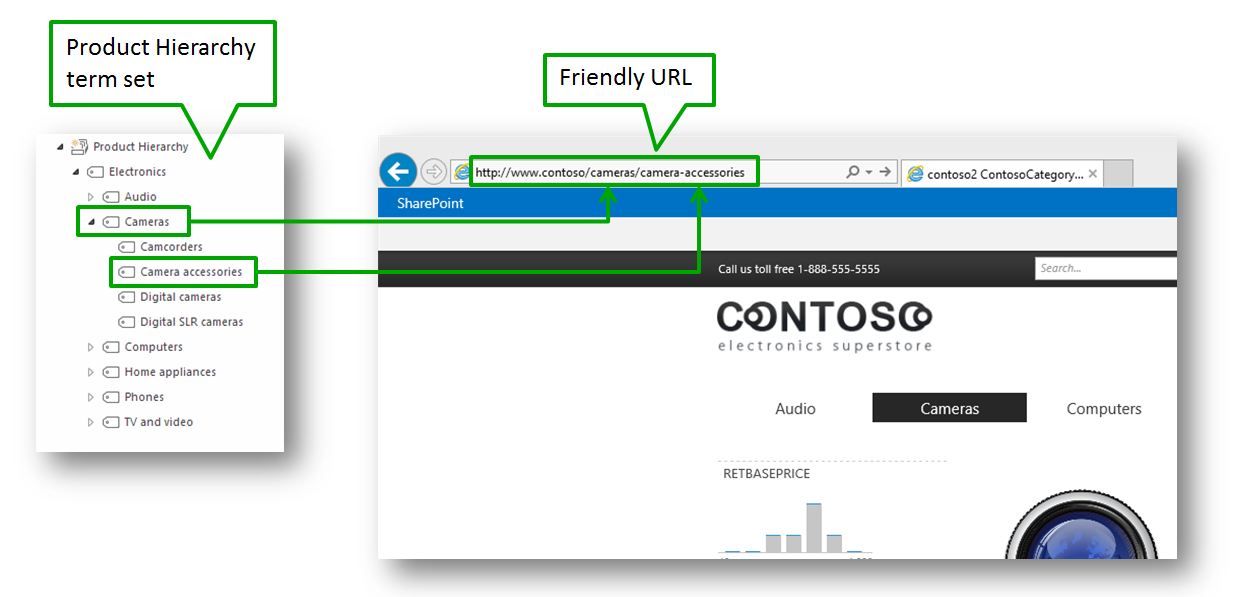
The terms from the Product Hierarchy term set will also be used to create a friendly URL for our category pages on the publishing site (the Contoso website). For example, the URL to the page displaying camcorders is https://www.contoso/cameras/camcorders, and the URL to the page displaying camera accessories is https://www.contoso/cameras/camera-accessories.
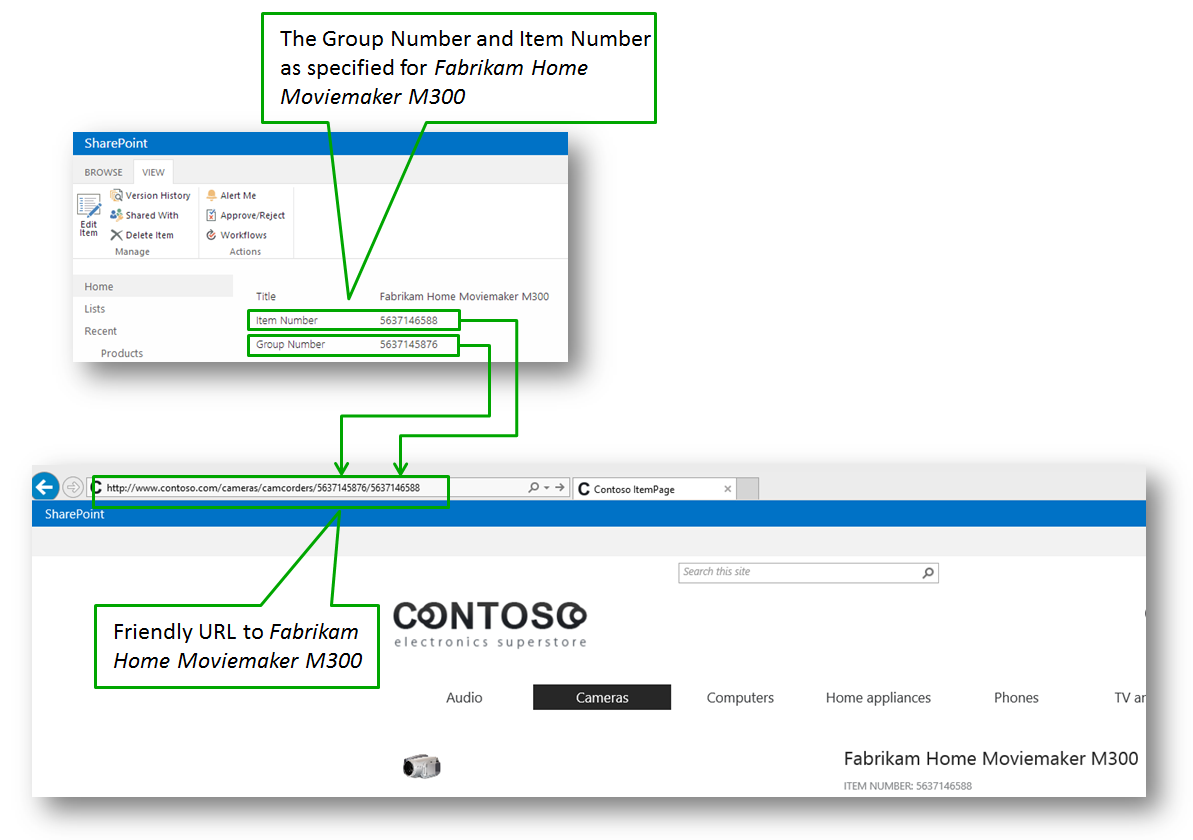
5. For Catalog Item URL Fields, select the list columns that should be used to create a unique URL to a product. For Contoso, we'll use Group Number and Item Number.
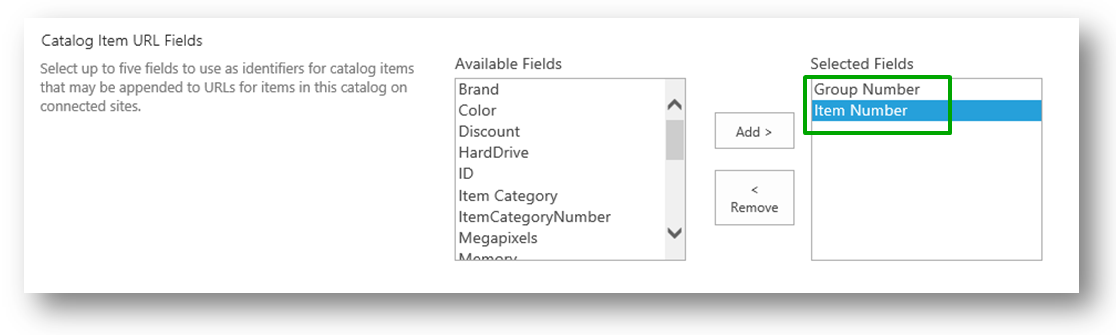
The URL to an individual product will be composed of the terms that we specify in Navigation Hierarchy (previous step), and the values from the fields we specify as Catalog Item URL Fields. When selecting these fields, we should use at least one field that contains a product unique value, because we want to use this unique value in the product URL. By doing this, the URL to the product Fabricam Home Movimaker M300 will be different from the URL to the product Fabricam Home Movimaker M400.
For Contoso, the unique identifier of a product is the value in the Item Number column. We also want to use the value of the Group Number column, so we'll add them both (I'll explain why I also want to use Group Number in a later post).
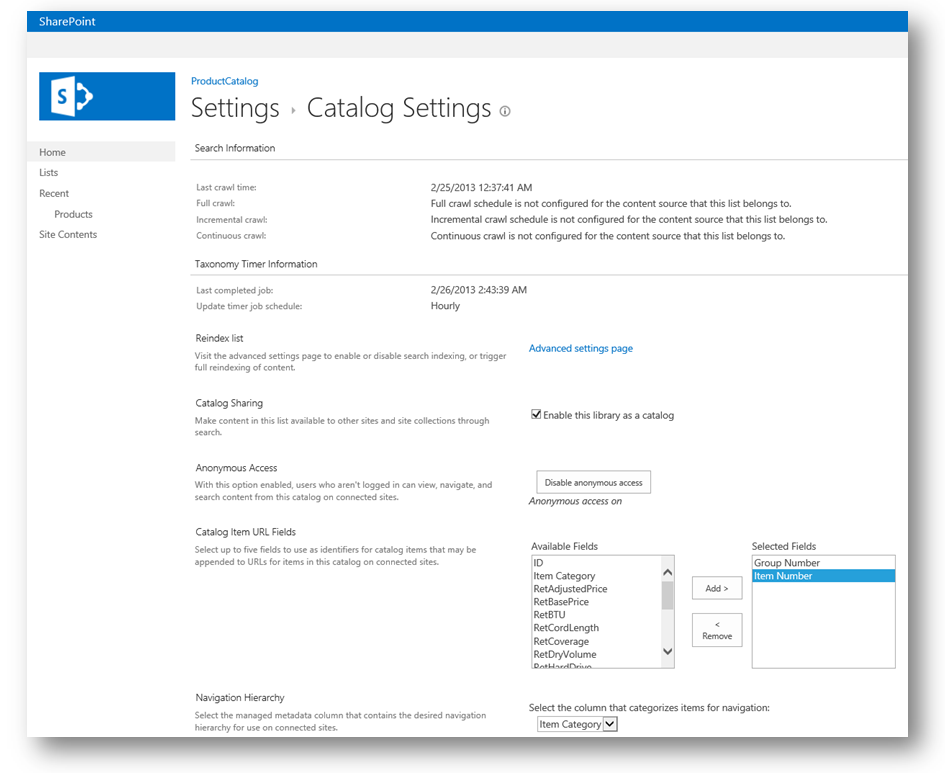
Our final Catalog Settings page looks like this:
So now that we have set all these specifications, it's time to crawl the catalog.
Next blog article in this series Stage 4: Set up search and enable crawling of your catalog content
Additional resources
- For more information about enabling a list as a catalog, see Share a Library or list as a catalog on TechNet.
- For more information about cross-site Publishing, see the TechNet scenario page Create SharePoint sites by using cross-site publishing in SharePoint Server 2013.