Installing Windows Server 2012 in Core Mode - Step by Step - Part III - Active Directory Installation
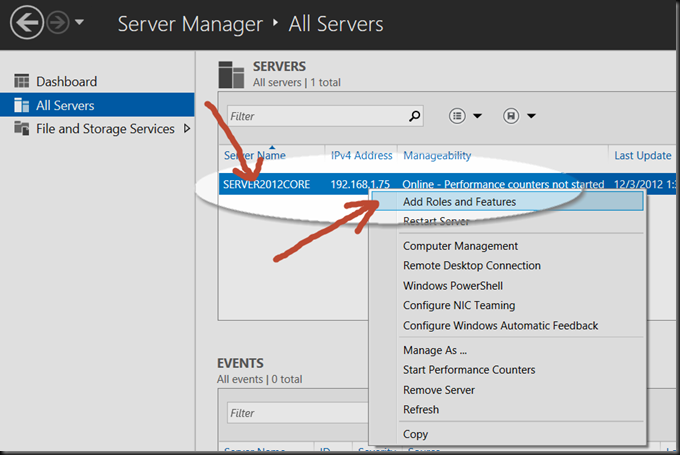
We finished up part II of the lab by focusing on how to connect to the new Core server with the graphical interface provided in the Remote Server Administration Tool. Now we will dig into adding some functionality to the newly created server. There are many options here to choose from as this is Windows Server the new Cloud OS. I will provide as example in this lab: adding the domain controller role to the server. So let’s jump back in to the RSAT tool and right click on the server, then choose “Add Roles and Features”:
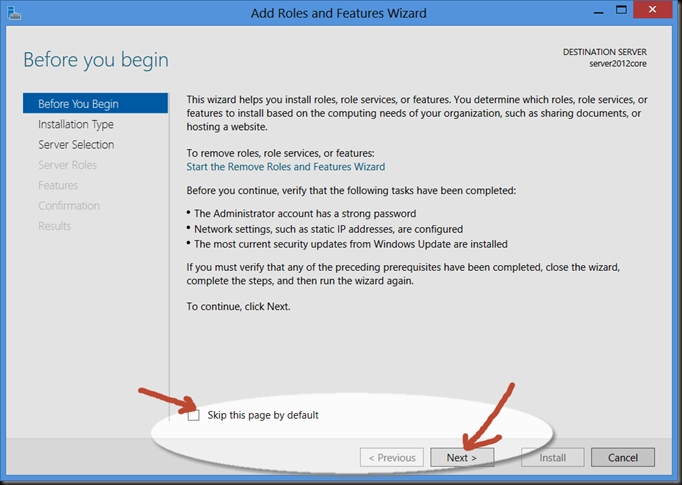
You will first be presented with a Wizard displaying recommendations to tighten the server security and make sure that a static IP is set if so desired. You can choose to no longer see this screen by selecting the “Skip this page by default” radio button and then click on “Next”:
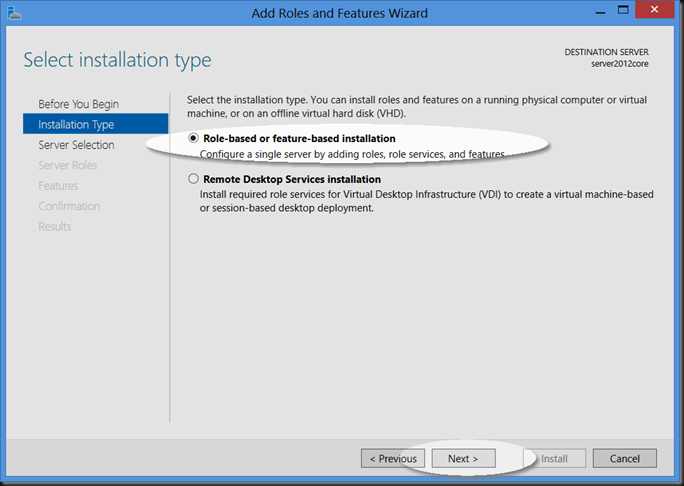
For this lab we will be installing a Role or Feature, however take note that this is the initial screen for also setting Remote Desktop Services(aka VDI, Terminal Server, etc..). Click “Next”:
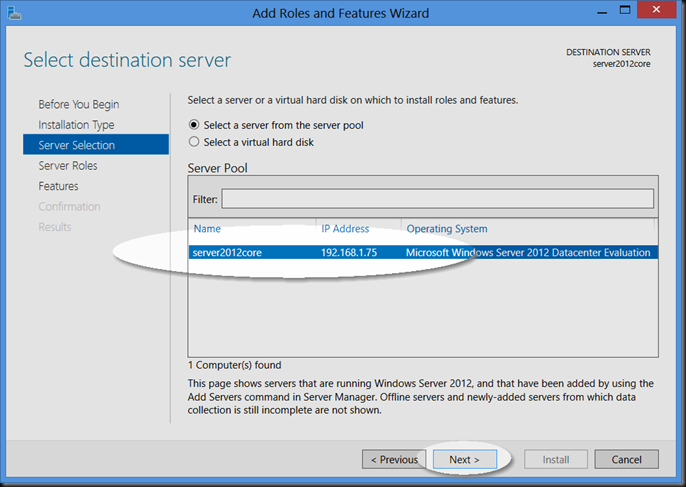
Now we need to make sure that the server we are installing the Role on is selected then click “Next.”. (Notice you could select multiple servers here for managing tasks. You could also slip a Role into a VHD(Virtual Hard Disk) for a non-powered up server as well.)
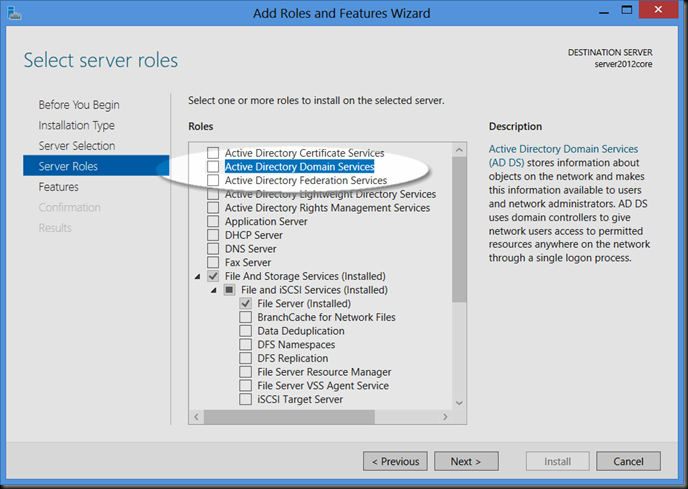
We are ready to choose our Role from the list, so lets explore that a little bit. Active Directory has several components. Notice that “File and Storage Services” shows as already installed. However if you dig into the dropdown menu you will notice that only a partial install has taken place. There are more options available. Scroll back up and let’s choose “Active Directory Domain Services.”
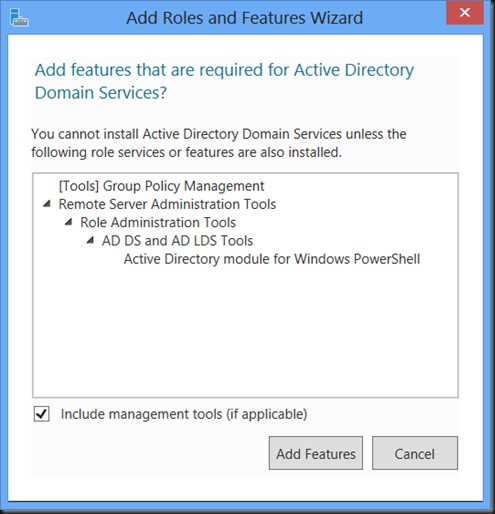
Notice that a window will pop up before you can click “Next”, we will need to add some Features before proceeding. The wizard will automatically does this for you by clicking on “Add Features”:
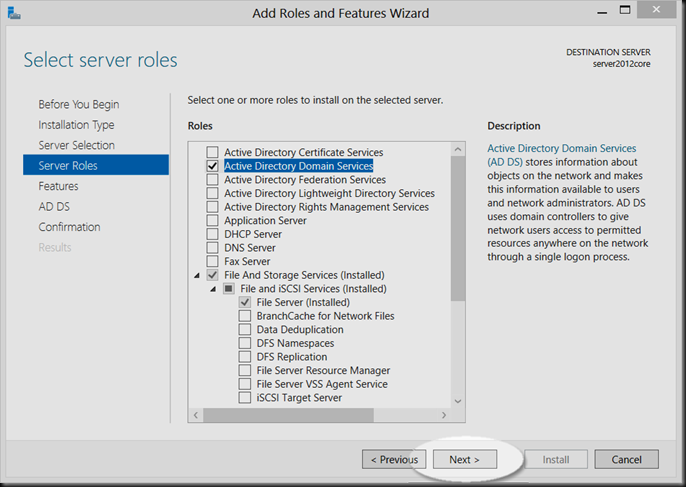
Now click “Next”:
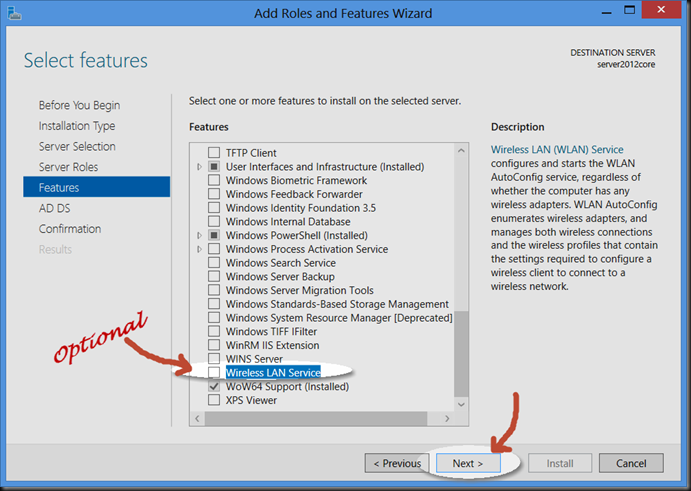
If the server you are installing on is a laptop or only has wireless connectivity you will want to select the option for “Wireless LAN Service” before proceeding to the next step. Then Click “Next.” (Note: The Wireless LAN Service is disabled by default for security/stability reasons, also if proper drivers are not automatically located for the wireless device then network connectivity may still be down. To rectify this, install proper drivers. As a tip, drivers for Windows 8 generally work for this if you cannot find Windows Server 2012 drivers.)
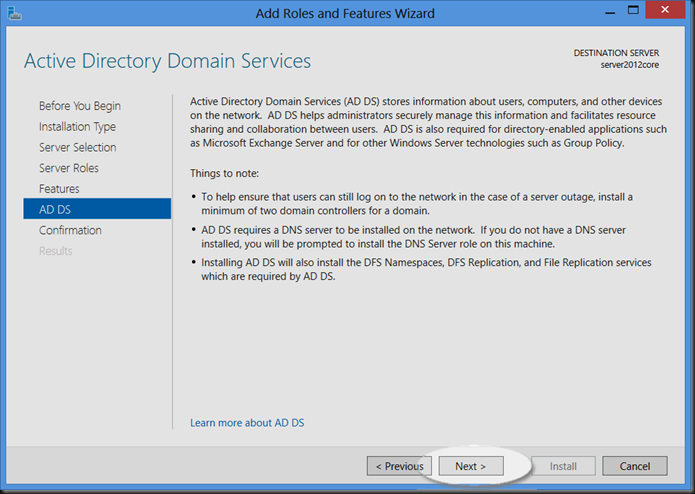
Active Directory requires a DNS Server on the network, however I did not select the DNS Server role during the wizard. Not a problem, the wizard figures this out for me later. Click “Next”:
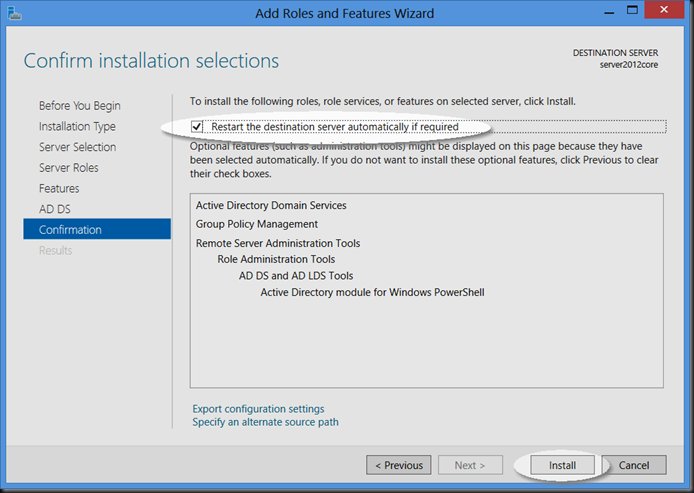
Since the installation of “roles” generally requires a reboot of the system, go ahead and select the option to “Restart the destination server automatically if required” then click “Install”:
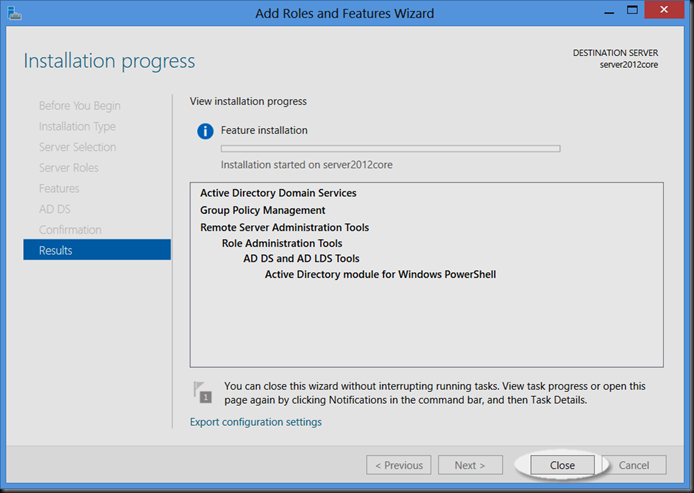
The installation will continue. You can click “Close” if you like. If there are any messages they will show up at the Flag in the top right corner of the RSAT Tool.
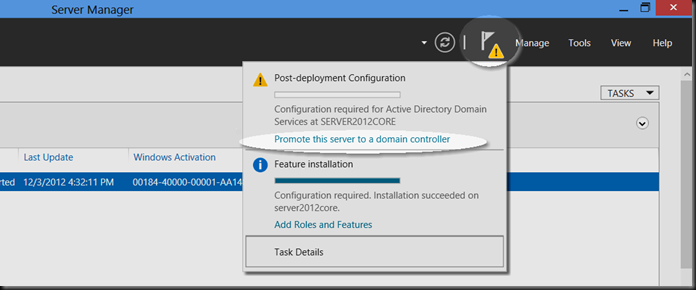
Notice the flag is illuminated with a yellow exclamation warning, click on the flag to see what else is required for the installation to continue, here you will notice that the server has installed the role however we now need to click on “Promote the server to a domain controller” (Important note, if you are joining this server to an existing domain, then you will need to make sure you have delegated rights for the client machine, otherwise the wizard will not allow you to proceed):
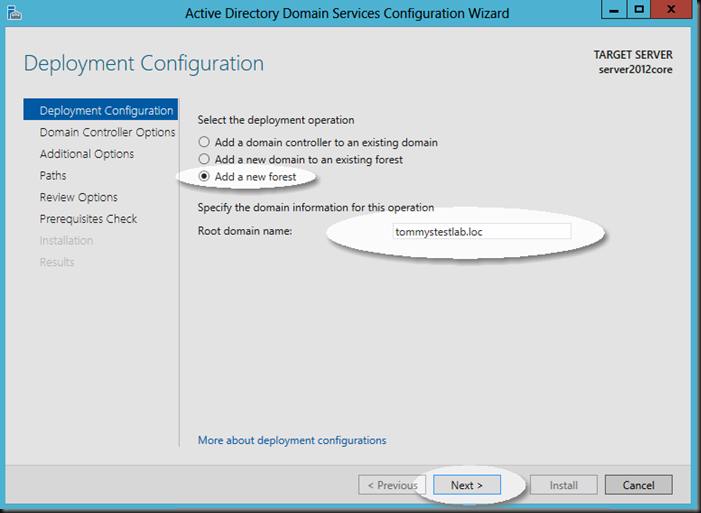
Now we have choices. If this is a server going into a current forest or domain then you will choose the appropriate option. For the sake of this lab however, I am creating a new forest and domain. You must fill in a qualified domain entry for instance (tommytestlab.loc or my2012playground.org) then click “Next”:
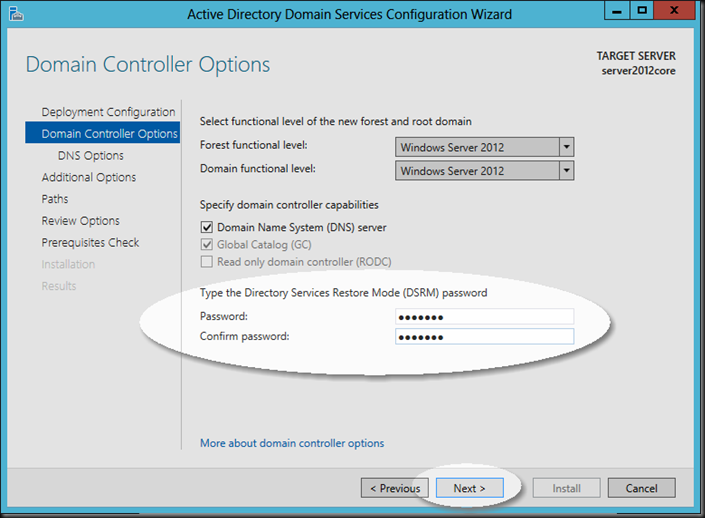
We will stick to the defaults for the Forest functional level and Domain functional level in this lab. Provide a Restore Mode password and continue by clicking “Next”:
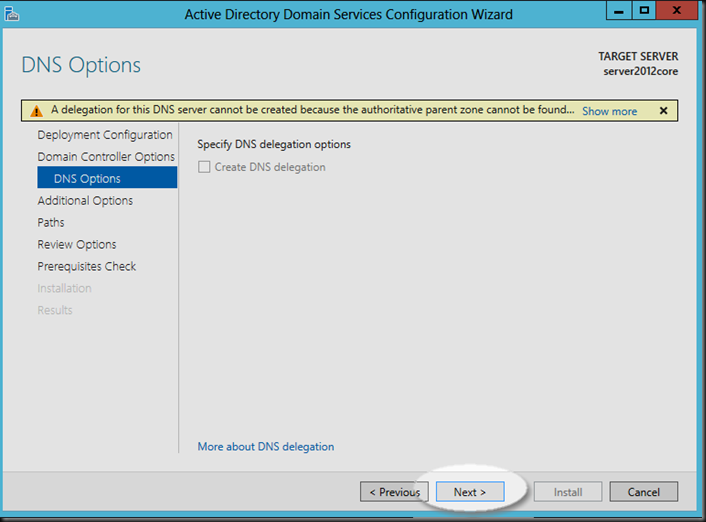
This screen is asking for DNS delegation options, since we have no existing DNS servers to point to, we will be skipping this step by pressing “Next”:
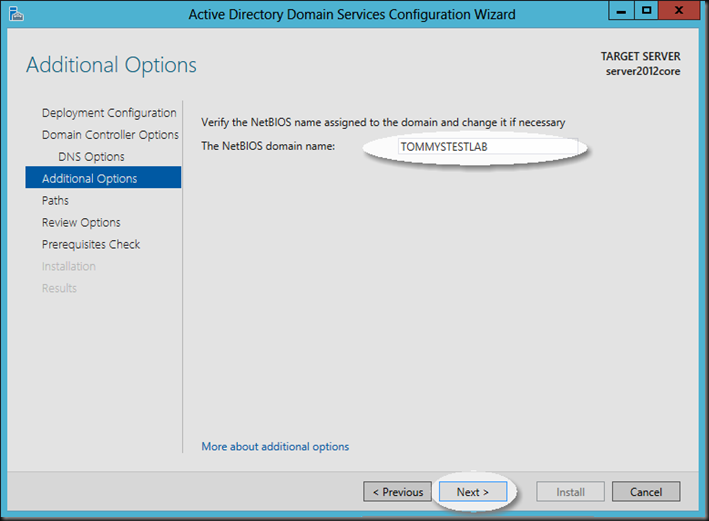
Verify the NETBIOS version of the domain name looks correct and then click “Next”:
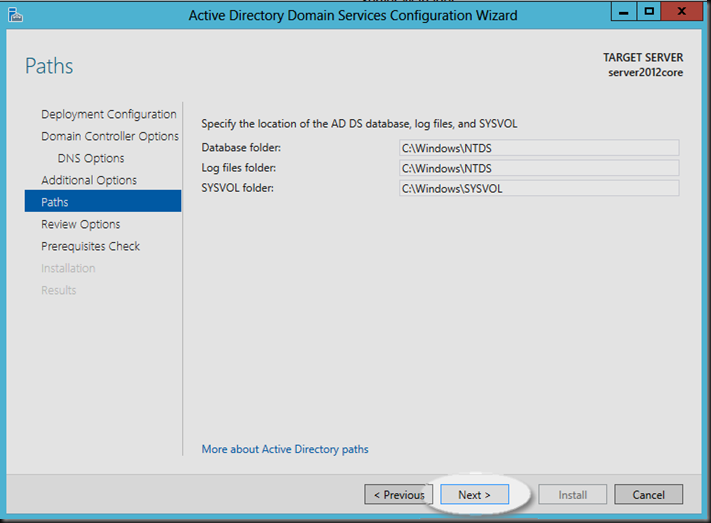
You can change the location of the database, log files, and SYSVOL folder if you would like, otherwise click “Next”:
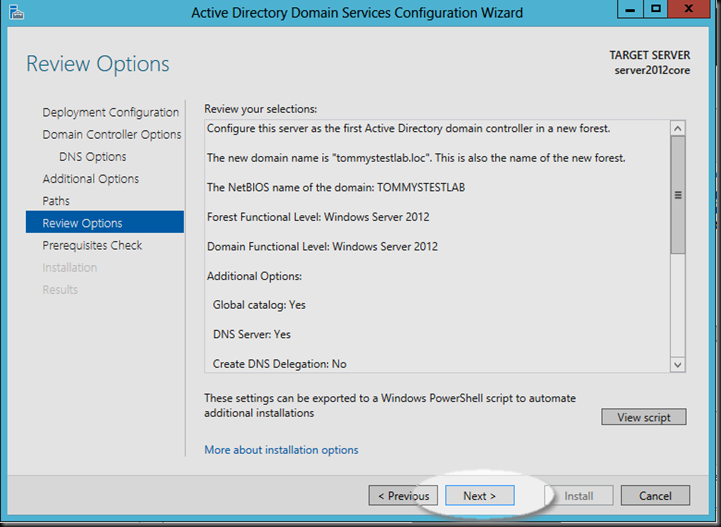
This next screen just validates the options we have chosen. Click “Next”:
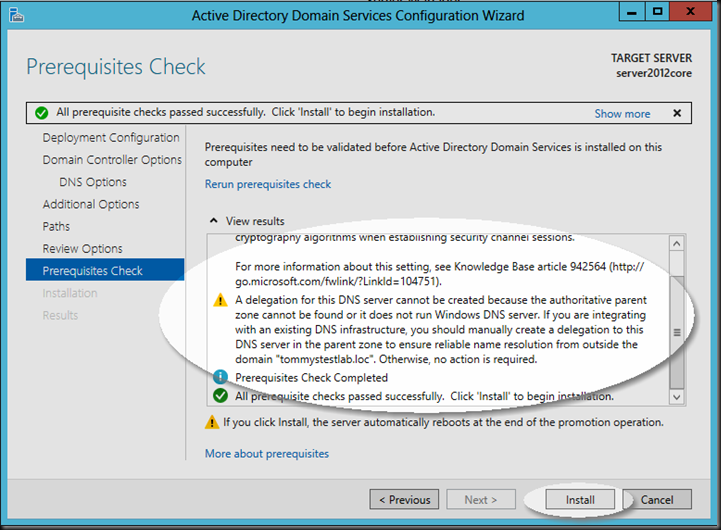
A prerequisites check is performed and we proceed on by clicking “Next”:
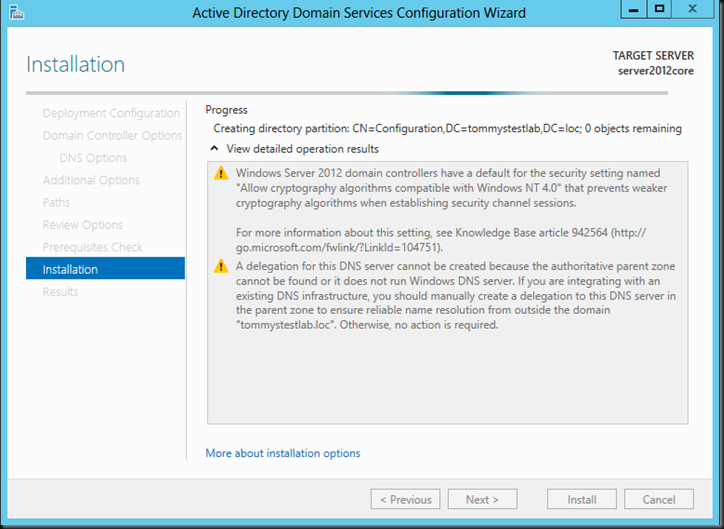
Now we can watch to see how things proceed, you may notice the DNS alarms, but the installation or promotion will proceed as planned:
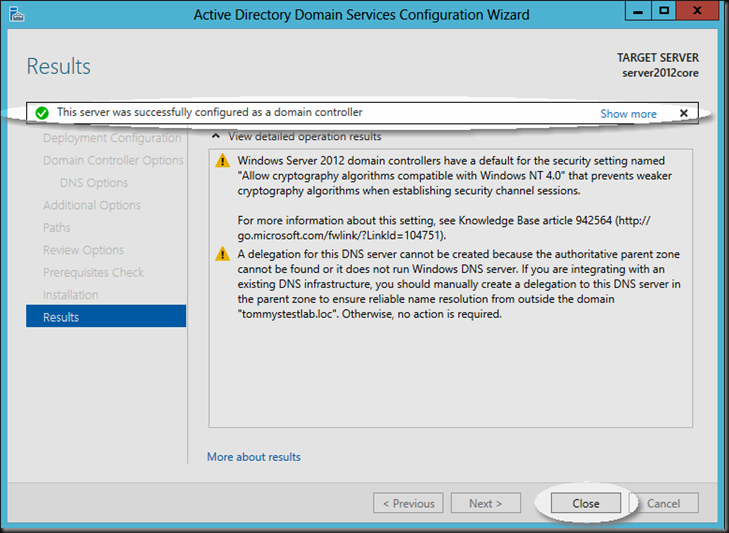
Upon completion you should see a screen similar to this, click “Close”:
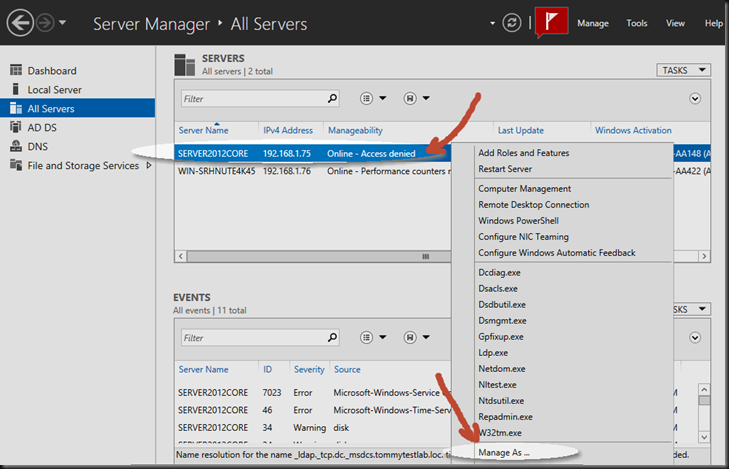
First thing you will notice is a big red flag! This is by design, we were managing this server with local credentials, however now that it is a Domain Controller, the domain credentials kick in, so we will need to provide new credentials. Right click the server and choose “Manage As …”
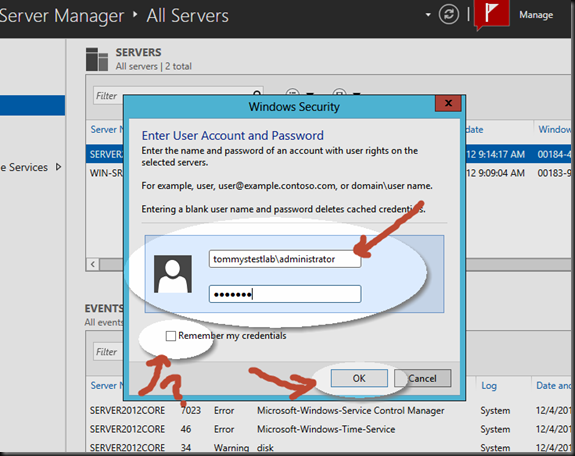
Enter in the new domain name and user name followed by the password, then if you want the system to remember your credentials check the box next to “Remember my credentials” otherwise click “OK”:
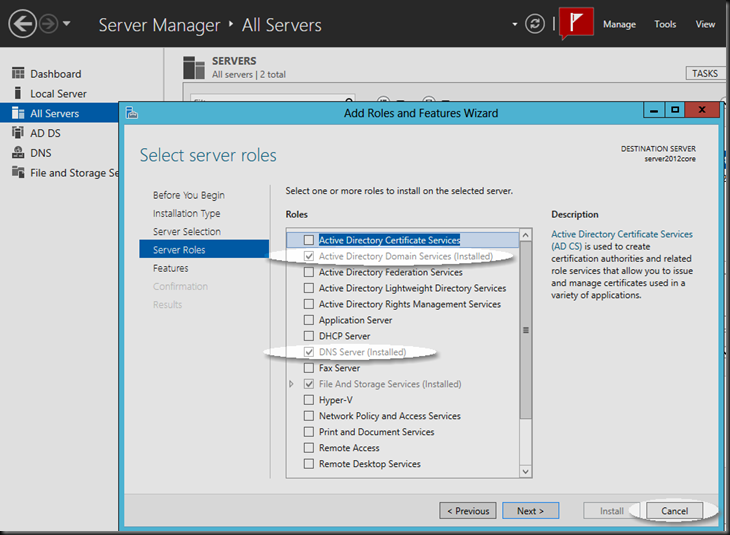
Now lets take a look at what has changed on the server. if you will notice there is a DNS management section as well as AD DS on the left hand menu. You can manage everything from here that has just been installed. Right click the server and select “Add Roles and Features” then click “Next” until you see the “Server Roles” screen, notice DNS did get installed along with Active Directory. Click “Cancel”:
This concludes this lab segment. Stay tuned as we continue to build out the server core lab with more labs soon!
