(Cloud) Tip of the Day: IdFix
Today’s Tip…
There are a number of object synchronization errors that slow down onboarding on-premise identities to AAD.
The office 365 customer experience team wrote a tool called IDFix which reduces the time involved in remediating the Active Directory errors reported by the directory synchronization tools. It finds and fixes the majority of the object synchronization errors. Analysis shows roughly 60% of all errors seen daily fall into duplicate or malformed proxyAddress and userPrincipalName attribute values.
Version 1.09 of IdFix which adds scoped searches can be downloaded from Microsoft connect here: https://connect.microsoft.com/site1164/Downloads/DownloadDetails.aspx?DownloadID=58225 .
The zip file contains a document which describes the tool in detail, but let’s walk through a sample run here:
First extract the zip file onto a workstation in the forest that has access to a GC (Global Catalog).
Login to the workstation using a domain account that can read and, if needed, write changes to your AD objects.
Run the executable IDFix.exe
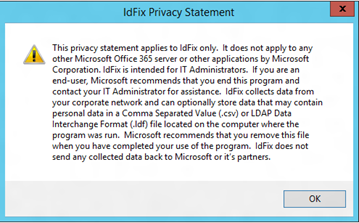
Click OK on the privacy statement.
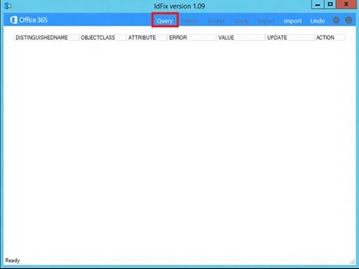
If the current user running the tool has the rights to connect to the directory, you can hit Query at this step.
Otherwise, you can change the credentials used by following these steps…
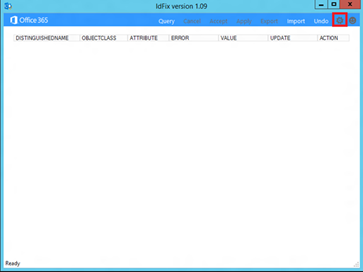
Click the settings button as shown below.
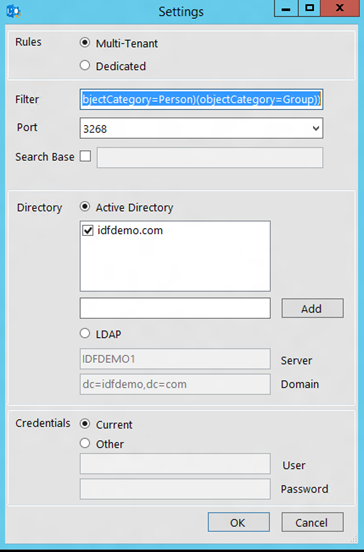
This brings up the settings dialog.
Here, the Directory to connect, credentials etc. can be specified. As you can see the default rules that are used are for the Multi-tenant configuration. It should work for most customers. The Dedicated ruleset is used for O365 Dedicated or ITAR customers.
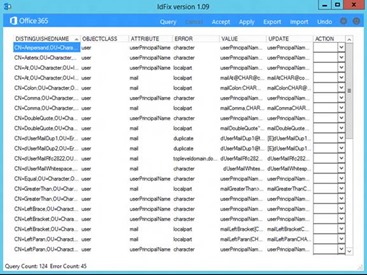
Click OK, and once back at the main UI, click the Query button. This should run the query and find all the objects with errors. Each error is displayed in a separate row. The total number of objects searched as well as the number of errors are at shown at the bottom.
The tool suggests fixes for the errors. The UPDATE column has the suggested fix and it is up to the user to decide whether or not the update makes sense in a particular environment. If you want to edit the attribute to use the value in the UPDATE column, select EDIT in the ACTION column. Also note that the UPDATE column is editable. So if you want to use another value than the suggested one, you can change it there.
If you want the attribute to be removed, select REMOVE in the ACTION column. If you would like the attribute untouched, select COMPLETE in the ACTION column. In the case of an attribute that is duplicated across multiple objects, select COMPLETE on the row of the object on which you want the attribute preserved, and EDIT on the row of the object where you want it edited.
Note The various options are documented in detail in the help document that accompanies the tool.
Once you are ready with one or more updates, you can click Apply to make those changes to the directory.
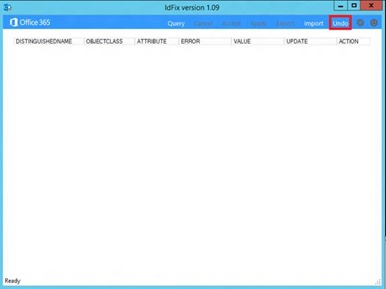
Note IDFix maintains multiple logs. It maintains a verbose log which documents all the operations in any particular run. IDFix also maintains a separate update files that can be used to undo the changes in case a mistake is made. These are created every time the Apply button is clicked. These LDF files are in the same folder as where you ran the tool from. In case you want to revert your changes, you can click the Undo Button.
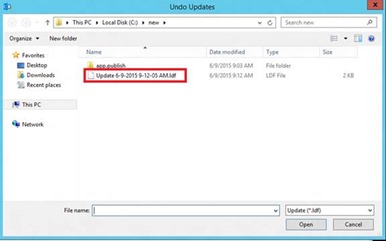
This opens up the dialog where you can select the LDF file which you want to use to revert.
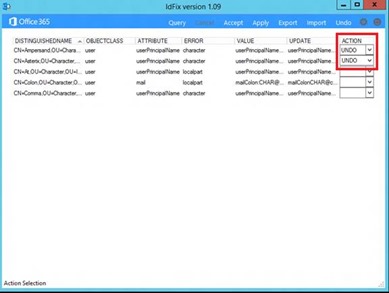
Pick the LDF file and click Open. The changes are listed in rows, and you can select the changes you want reverted by selecting UNDO in the ACTION column.
Click Apply to make those changes.
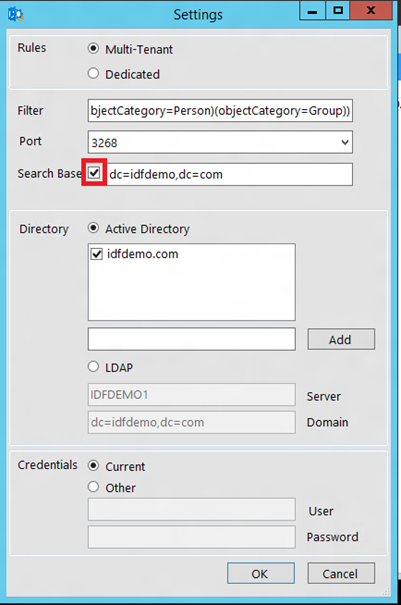
Version 1.09 of the tool adds the ability to limit the searches to specific containers. For specifying a Search Base, check the Search Base checkbox.
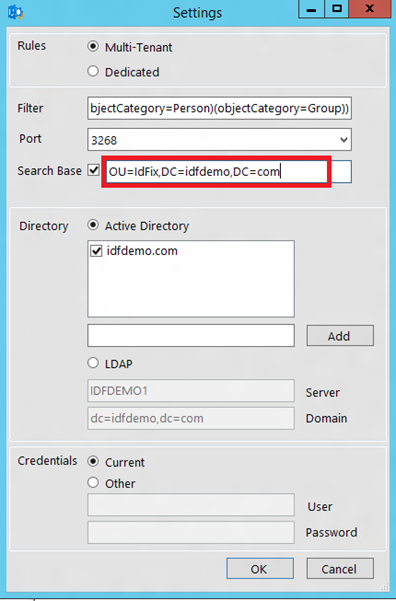
This auto-populates the default root domain DN for the selected forest. The text box can be now edited to point to a container that can serve as the Search Base.
Hit OK, come back to the main window, and Hit Query to search starting at the specified Search Base.
Note If multiple forests are selected, the Search Base is ignored, and hence the checkbox & textbox are cleared.
