Tip of the Day: Replacing a disk
Today’s Tip…
Over the last couple of days I’ve talked about the NumberOfColumns and NumberOfDataCopies for Storage spaces in Windows Server 2012 (and it works the same in 2012 R2).
One last thing to take into account when adding disks is how to replace disks. Assuming you created a virtual disk that has redundancy, either a parity set or a mirror set, if a physical disk is damaged, the virtual disk will remain working and the lost disk can be replaced.
There is a gotcha her that you might run into if you aren’t careful. The disk that you use to replace the lost disk must NOT already be part of the virtual disk already.
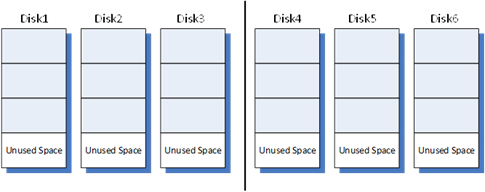
Here is an example. You have six disks and create a mirror set. But unlike our the examples from the last couple of days, you decide to not use all the space available. Your physical disks would look like this…
And your columns would look like this…
Later, you lose Disk3. You still have your data, because of redundancy, but you are now no longer fault tolerant.
So you decide to replace the lost disk with the unused space that you didn’t use when the virtual disk was created. In your mind, you see the following…
The problem is that will not actually work. First of all, Windows won’t let you do it. Which is a good thing too. Let’s say for a moment that Windows DID allow it, and at some later point in time you were to lose disk4.
Then you would be losing data from two columns….and your redundancy can only survive the loss of one column. In this case you would lose the entire data set.
To make a long story short, if you lose a physical disk, you have to replace it with another physical disk. The good news is that Windows won’t let you make this mistake. But without understanding the WHY, it could be a little confusing.


