All you need to know to create a Windows 8 App! - Part 2
For the second blog post in this series I will focus on Extending Windows Search to your app as promised. I will use the project we created ealier on part one for this blog post and until the end of the series.
- Create a Windows 8 App based on the Visual Studio 2012 Templates
- Extending Windows 8 functionalities
- Search
- Share
- User Data
- Local Data
- Roaming Data
- Tiles
- Notifications
- App Bar
- Integration with Azure Mobile Services
- Tables
- Authentication
- Push Notifications
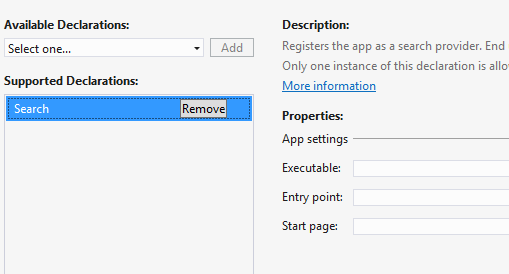
If you remember from the first post you will have to declare the search capability for your App in order to integrate it with the App but...If you do it the right way Visual Studio 2012 will do it for you. :)
Instead of opening the App manifest in Visual Studio and adding the Search declaration manually...
...you may create a new Search Contract and all of this will be automatically created for you. This and a bunch of code that you would have to create by yourself.
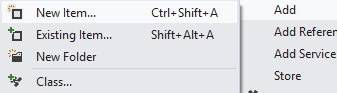
So, for doing it the easy way just right click your project and Add a new Item. In the Wizard select Windows Store on the left side of the screen and scroll down until you find Search Contract. When you do select it and add this new item to your project
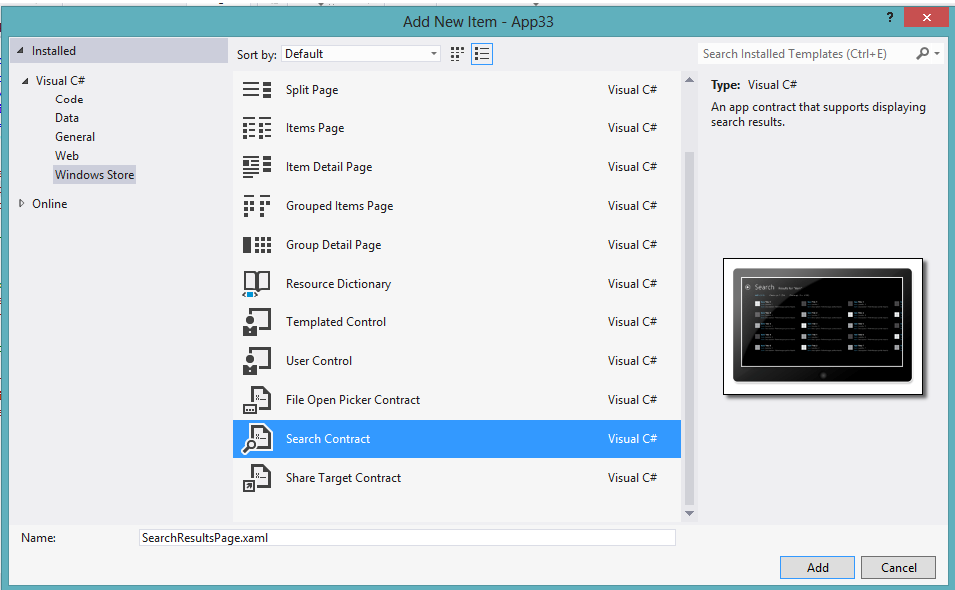
When you do this you'll have:
- SearchResultsPage.xaml in your project
- Search declaration enabled in the App manifest
- Code in App.xaml.cs that will allow your App to know when the Search charm is being called
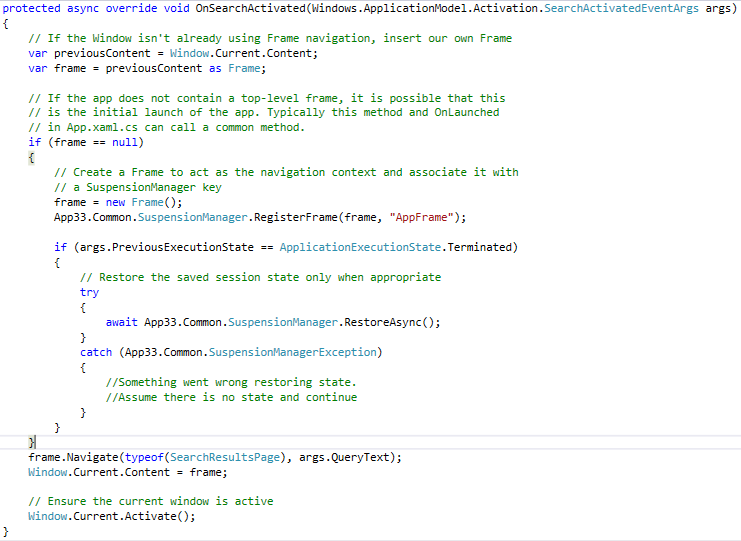
The first two points have nothing much to explain but the third point is very important. There are basically two ways in which your App can be warned that there is Search request: with App running or with App closed. This is what is handled for you in the OnSearchActivated method below. You should look at this method with more attention but for the purpose of this blog post I'll explain it very lightly. What this method does is check what was the state of your App previsouly to the running state. So if your App was terminated it will try to load state using SuspensionManager (class that allows you to store and restore App state seen on the first post). Otherwise, if your App is already running it will navigate to the SearchResultsPage passing the query as a parameter.
So you have a class that will handled Search activation and navigation for you but will it handle data loading?! The answer is not really but it makes your job a lot easier!
In order to handle data loading you have two separate methods in SearchResultsPage.xaml.cs ( LoadState and Filter_SelectionChanged). This is done in two steps:
- When you navigate to the SearchResultsPage the LoadState method is called. In this method you should load the search filters and the number of results for each feature.
- When you change the selected filter you should load the right results to the result pane
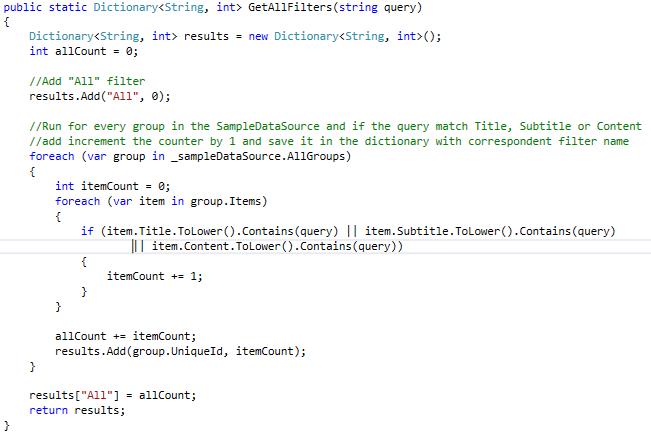
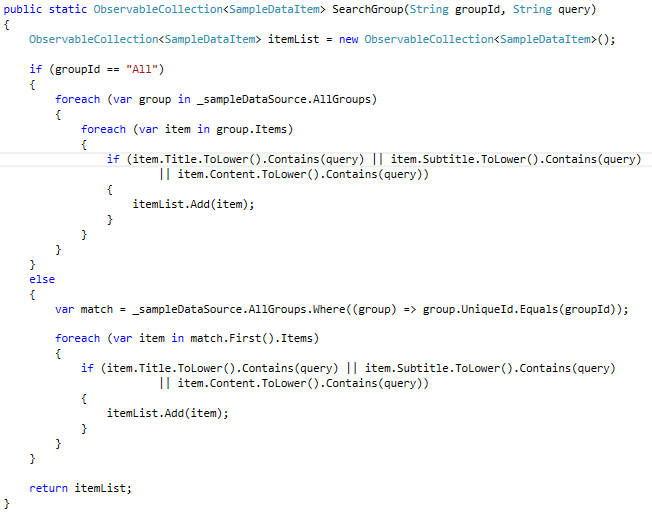
As I wanted to keep our App working with SampleData and still prepare to receive real data I created two methods in the SampleDataSource class. One that will return a dictionary with the filter name and the number of results in that filter and the second one that will return my results knowing which filter was selected.So you should add to the SampleDataSource class the following methods.
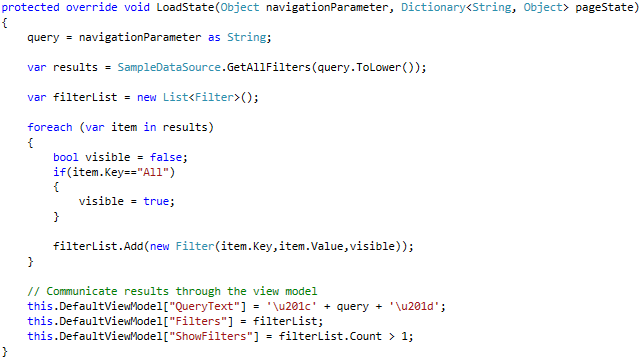
Of course the search system is pretty basic but you can always improve it. I'm only explaining you the basic steps so you can work your magic in it! Now that we have all the helper methods we need the only thing that we are lacking is integrating this in the SearchResultsPage. So if you go to the SearchResultsPage and navigate to the LoadState method just replace your existing code for this one. Be aware that I changed the query variable in order to be global since I'll need it later when I get the results for the selected filter. This code will add the filters returned by the SampleDataSource into the SearchResultsPage.
Now that we have the filters in-place the last thing we need to do is to react to the filter selection changing. Remember that we previously created a method that will help us do this so just add this line of code to the TODO section in your existing code.

So, with this you're good to go. Just press F5, cross your fingers and use search that Windows 8 provides right in your App!
Just one last thing...you will notice that when you click your results nothing happens, right? That's because you haven't enabled it to do so. Go to SearchResultsPage.xaml and find resultsGridView. You need to had the ItemClickEvent to this GridView.
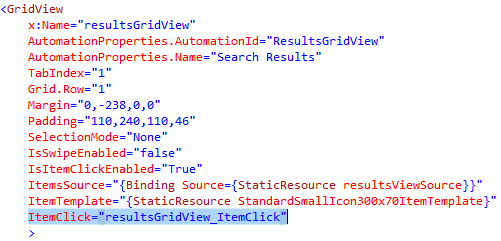
This will create a method in the code-behind and all you need to do in order to navigate to the result's content is the following:

And that's it!! Hope you found this interesting. Glad to have your feedback on this one and see you on the third blog post about integrating your App with Sharing capabilities.