Add an application to Azure Active Directory so your application can gain access to resources through APIs.
In this post we are going to add an application to Azure Active Directory and our purpose here is simply to let a PowerShell application access resources through REST APIs (same process for all languages, PowerShell app post coming next). This is quite simple and this post will stay strictly to this task.
First, go to "Azure Active Directory", next click on "App registrations", then click on "New application registration". 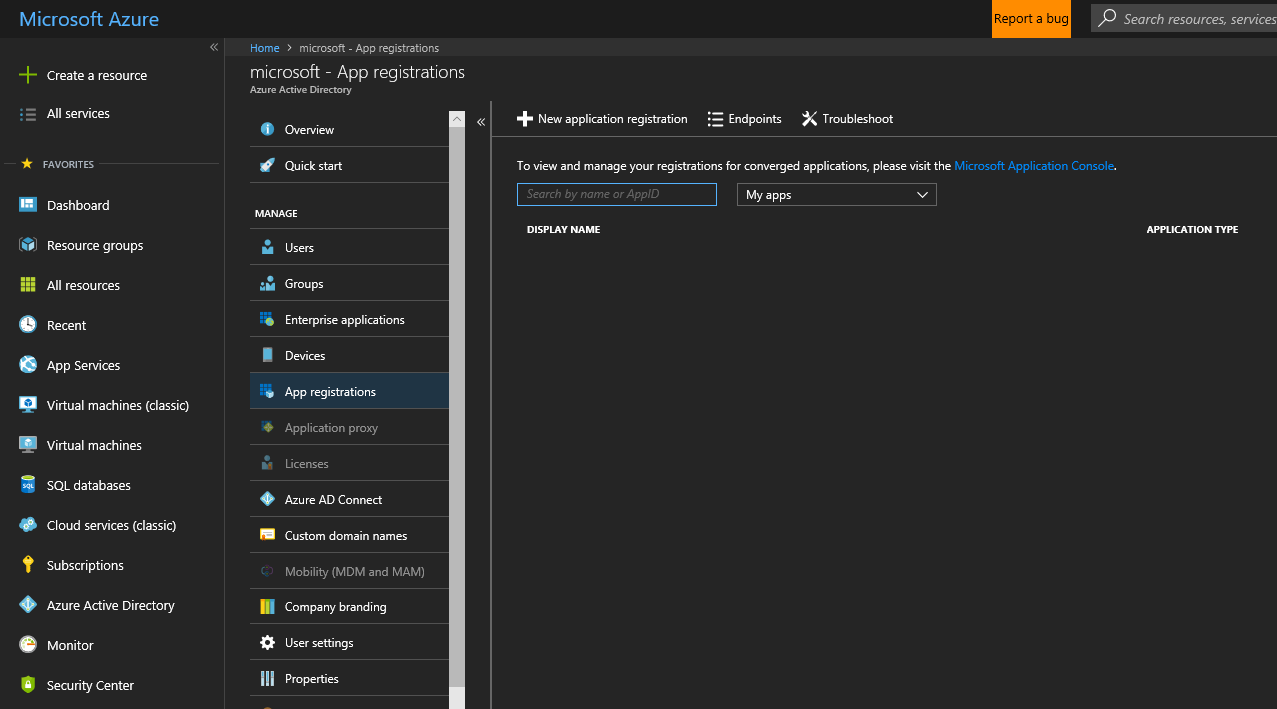
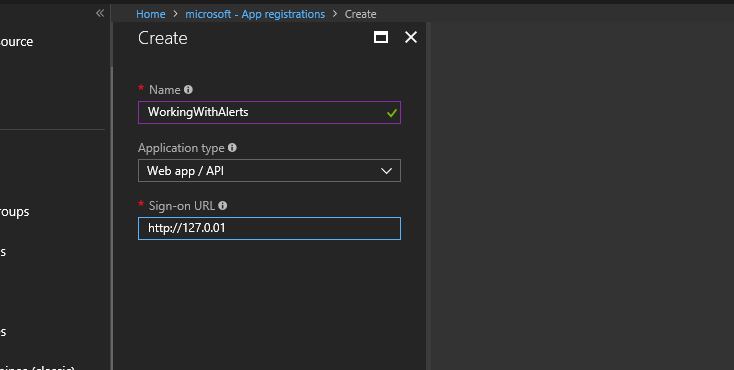
That will get us to the below screen. Name your app something descriptive (this is completely cosmetic), choose "Web app / API" for application type and for the Sign-on URL if you have one put it here but f not, put anything here, just needs to be populated. Next click the "Create" button at the bottom.
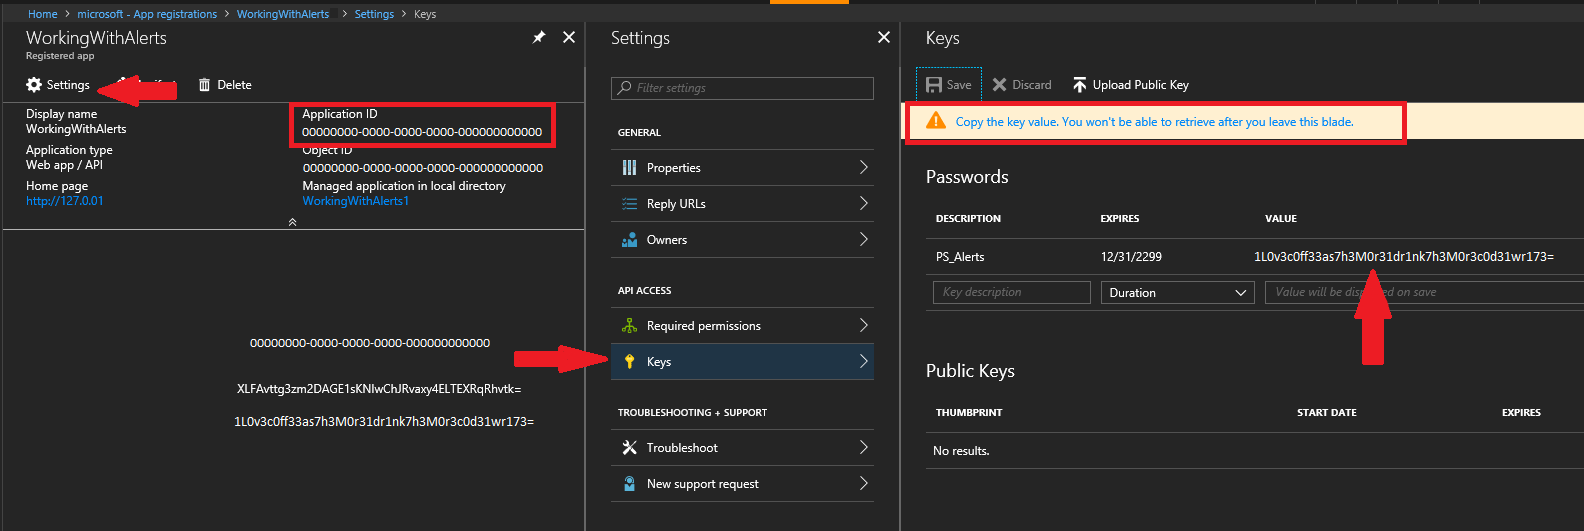
Now that will put you on the Registered app blade and you will need two things here, copy the ApplicationId (also known as the ClientId) and to create an access key. The first one is right there for you to copy, for the second (key) click on settings then Keys. Once the Keys blade pops up choose a name for your key (again cosmetic), choose the duration you want the key to last and then click save. Once you do, the key will be visible and you need to copy it right then, if you click off the blade you will no longer be able to copy the key and will need to create another.
You have a app registration and you now have the ApplicationId (ClientId) and a Access Key. Now you just need to give your app permissions to whatever API you want it to be able to work with. In my next blog I am going to show you how to use PowerShell to manipulate Azure Alert Rules so we will give our app access to do that. For Alert rules that is the Windows Azure Service Management API. So once again under settings choose "Required Permissions", next click Add, then 1 Select API, click on the API you want, and last click select.
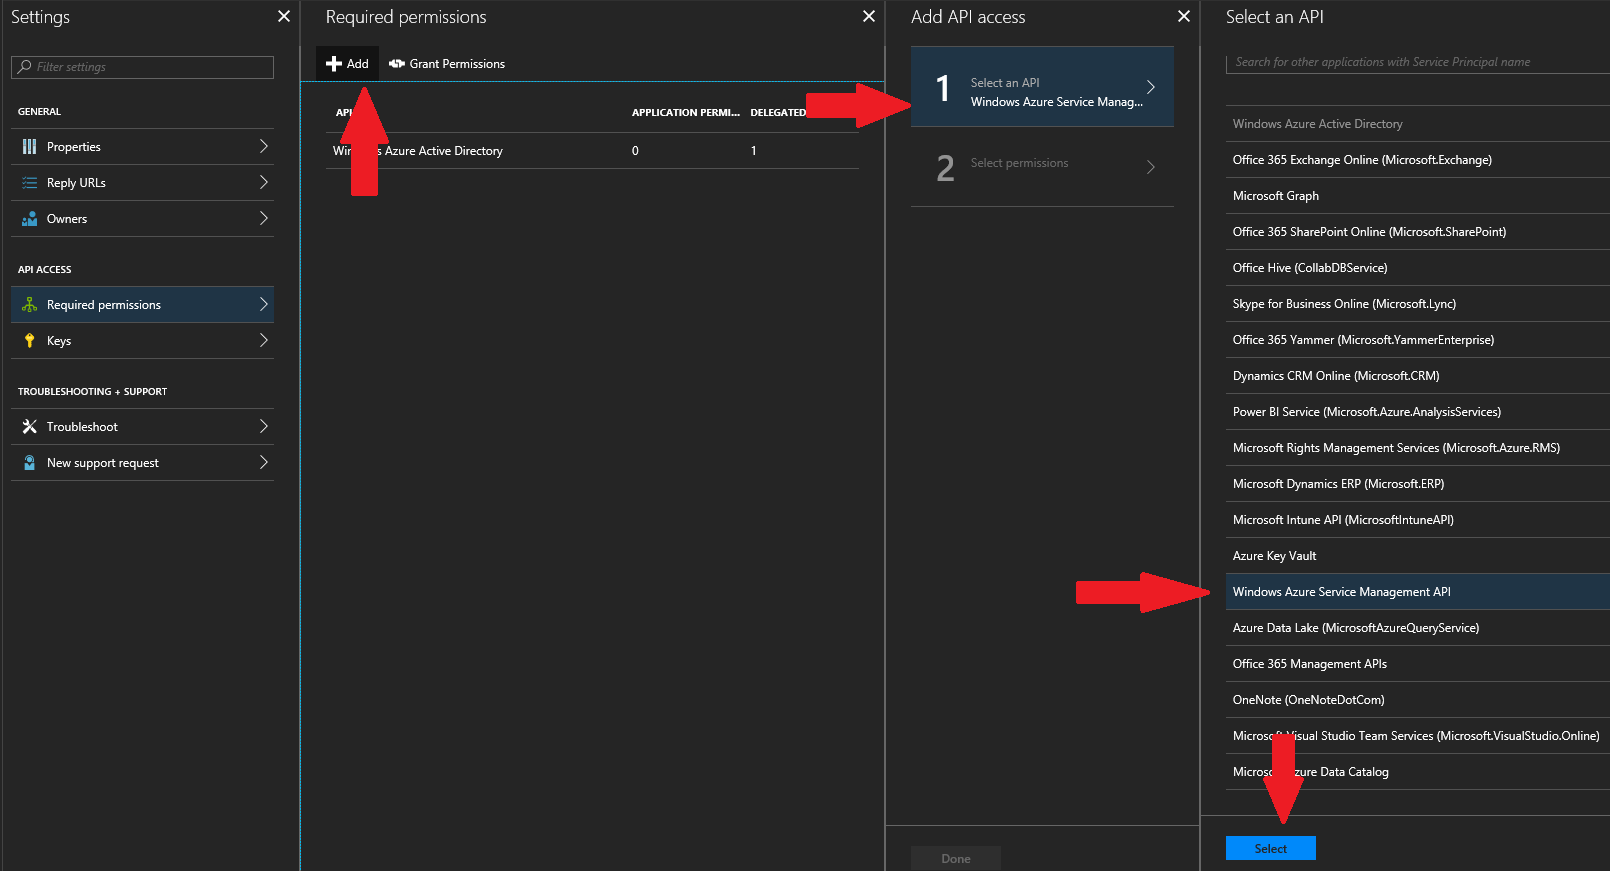
Final step we need to grant the API the permissions we want it to have. In this case that will be delegated permissions (there can be many permissions depending on the API) so we tick the box and click select at the bottom. That will close the blade for selection and then click Done at the bottom, you will then see the notification that permissions are being added, ta-da you are done. Well kind of, now you have to go write your code, remember to keep that ApplicationId/ClientId and Key that you copied in this process as you will need it in your app! 
Happy coding!
~Theo
References:
- Register your application with your Azure Active Directory tenant