Setting up DHCP Policies for Virtual Machines
Introduction
With the trend towards private cloud and hosted cloud deployments, the use of virtualization is ubiquitous. This has also increased the need for better control of these virtualized environments with respect to IP address and network configuration provisioning. DHCP policies, a new feature in DHCP server in Windows Server 2012, enables flexibility and granular control for the virtualization scenarios. A data center network employs virtualization for different workloads and applications. Virtual machines are added and removed dynamically depending upon load requirements at a given time. Depending on the needs of the deployment, an administrator may want to –
- Configure a different – possibly shorter - lease duration for virtual machines on a network.
- Configure different default gateway to route traffic from virtual machines differently.
- Configure different values for other DHCP options such as DNS domain suffix, DNS server etc.
- Ration the number of IP addresses for virtual machines on a network.
An administrator can accomplish this by creating a DHCP policy based on MAC address prefix to assign IP addresses from a specific IP address range, short lease duration and different default gateway and other DHCP options.
With Hyper-V server, you can configure a virtual machine to use a dynamic or a static MAC address. The default option is to use a dynamic MAC address – which means that Hyper-V will generate a MAC address for the network adapter. If you use static MAC addresses you need to manually specify the MAC address to use which remains unchanged by Hyper-V server. Each Hyper-V server has a MAC address range that it uses for generating new dynamic MAC addresses. You can configure this range yourself if you want to. This kind of support is provided by all the virtualization platforms.
To group virtual machines in a DHCP policy, an admin can create a policy with conditions based on MAC address or MAC Address prefix. With conditions based on MAC address prefix, the admin can group the set of virtual machines that have the same host or belong to the same host group or even all virtual machines on the subnet. The DHCP policy can then be configured to provide specific settings to the virtual machines.
For example, if the host is configured to assign MC addresses from the specific pool 00-15-5D-32-64-00 to 00-15-5D-32-64-FF, then policy can be created based on the MAC address prefix 00-15-5D-32-64. If you would like the policy to cater to all virtual machines regardless of the host or host group, you can use the MAC address prefix 00-15-5D followed by wildcard. Hyper-V uses 00-15-5D as the MAC address prefix for any virtual machine.
Steps to configure policy for VMs
Let us go through the steps of setting up a policy for virtual machines using the DHCP MMC.
1. Right Click on Policies node under the scope 192.168.1.0 and select “New Policy”.
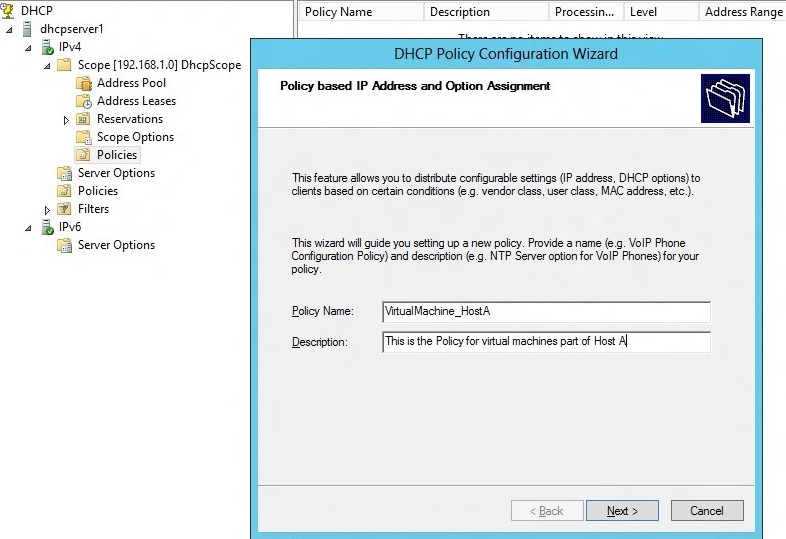
2. The DHCP Policy Configuration Wizard is launched. Enter the “Policy Name” and “Description” for this policy.
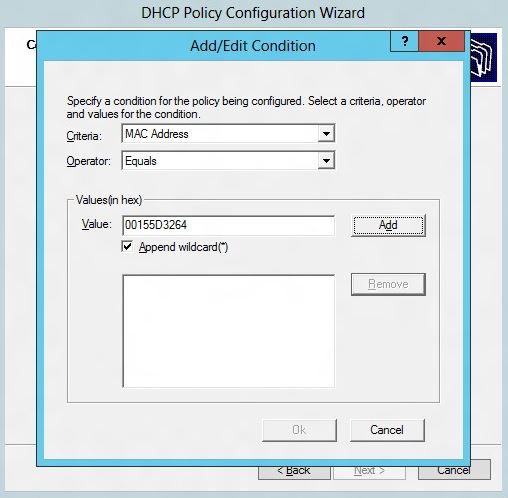
3. After clicking next and moving to the conditions page, click on ‘Add’ and in the dialog that pops up, choose the MAC address as the criteria and make sure that the operator chosen is “Equals”. Now enter the MAC-address prefix 00-15-5d-32-64 and check the ‘Append Wild Card’ checkbox. Add the MAC address to the list box for values.
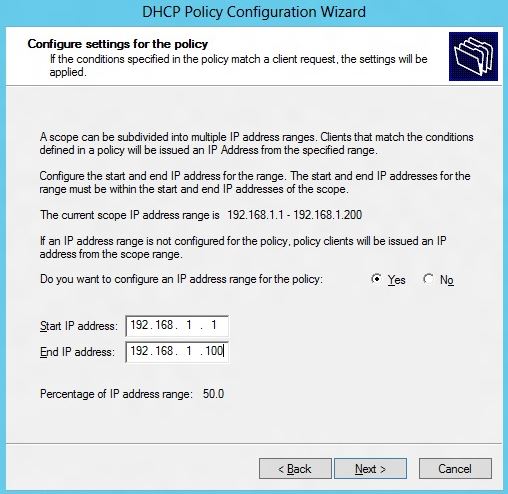
4. On the next page, you can choose the start and end IP address of the range to be used for leasing IP addresses to the virtual machines which match the condition. The specified policy IP range should be a subset of the IP address range of the scope. Doing this will ensure that virtual machines only get the IP address from this sub-range.
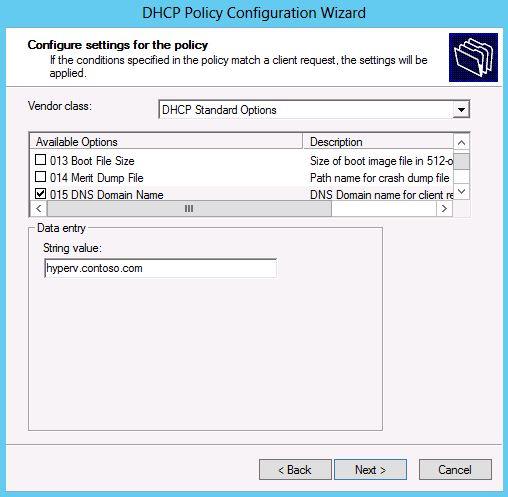
5. The subsequent page of the wizard allows you to configure specific options values to be given to these virtual machine clients.
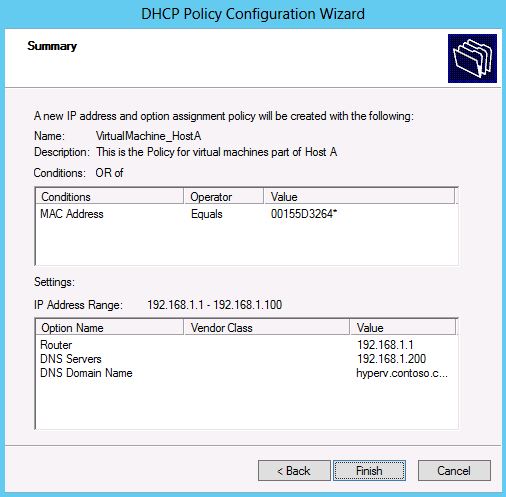
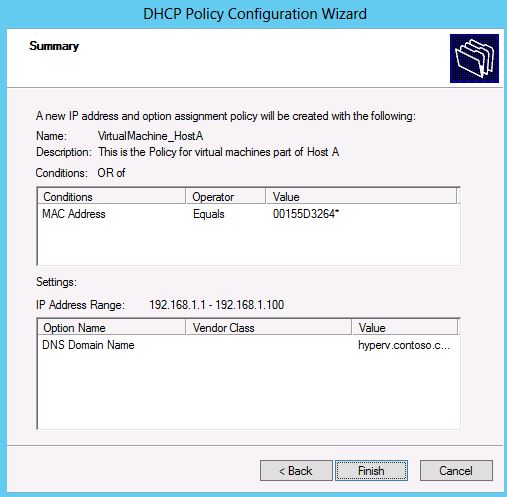
6. After this, the summary page shows the configuration parameters for this policy. Clicking on Finish will create the policy under the scope.
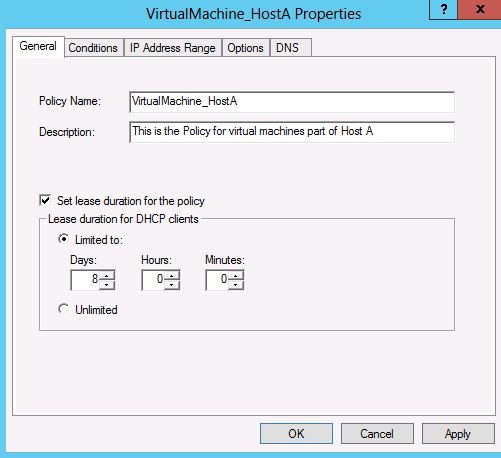
7. You can configure the lease duration for the virtual machines by going to the properties of the policy. The general tab in the properties page allows you to set the lease duration.
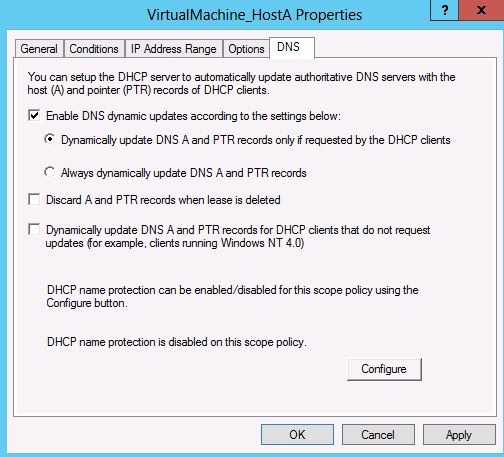
8. You can also specify the DNS registration properties by going to the DNS tab of the policy properties.
Once the policy is configured, any new DHCP request from the virtual machines with the specified MAC address prefix, will get an IP address and options as per the policy defined.
Conclusion
As trend towards virtualization continues, we hope the administrators find the DHCP policies a handy lever to manage IP address and network configuration provisioning in their virtualization efforts. As always, we would love to hear your feedback.
Other Links
- About DHCP policies
- Step-by-step to configure DHCP policies
- Scope-level Link Layer filtering using DHCP policies
- Set different lease durations for different device types
Team DHCP