Trying and Buying BPOS - It couldn't be easier!
After reading my previous post, I know you're all super excited about BPOS and want to start using it as soon as possible! Well, great news - signing up for BPOS is a very straightforward process. You can either start a 30-day trial, or buy BPOS right from your web browser!
Below is a (long but very straightforward!) step by step guide to signing up for a BPOS trial and basic configuration of your BPOS environment.
Signing Up for BPOS
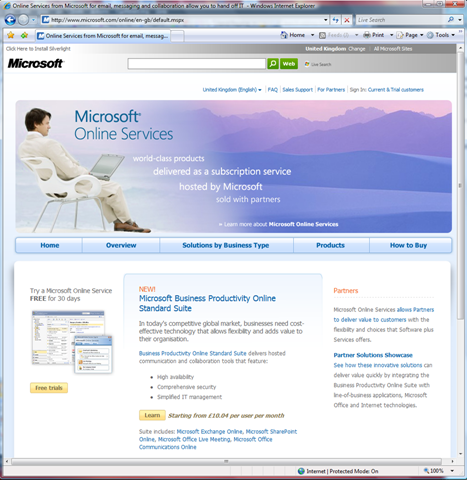
Step 1 - go to www.microsoft.com/online and click on 'Free Trials' on the left hand side of the page
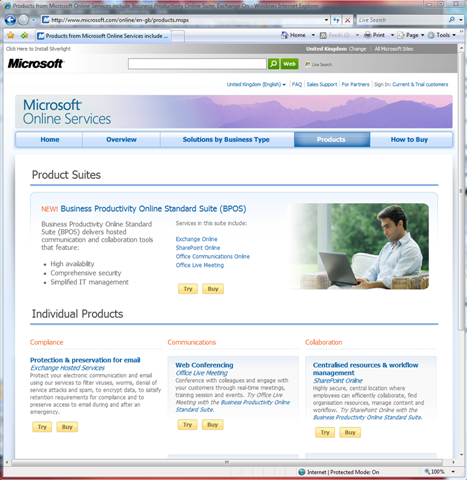
Step 2 - Click on 'Try' under the Business Productivity Online Standard Suite (If you haven't already signed in to Windows Live, sign in now)
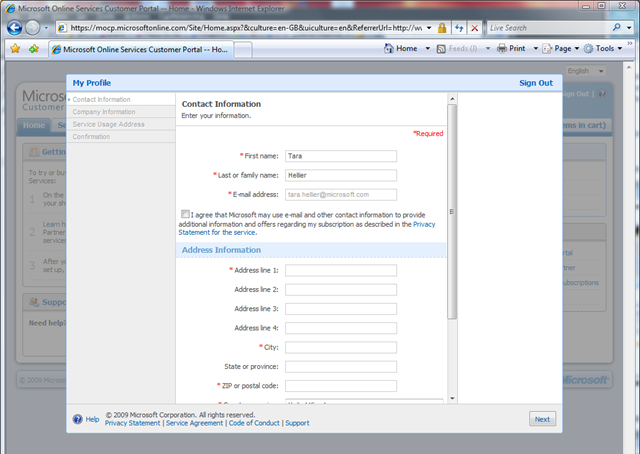
Step 3 - Complete the contact information form
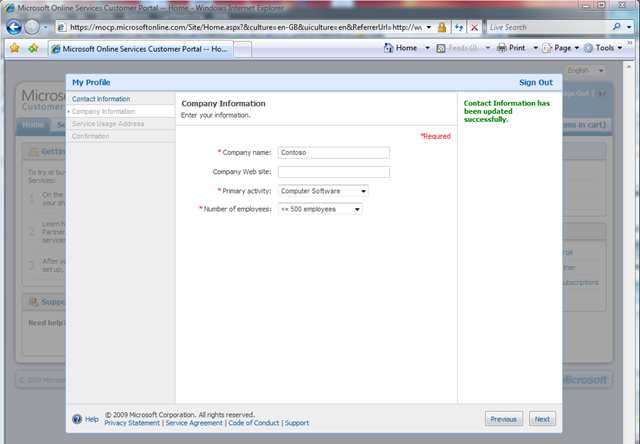
Step 4 - Complete the company information form
Step 5 - Complete service usage address form (this determines the services available and tax calculations)

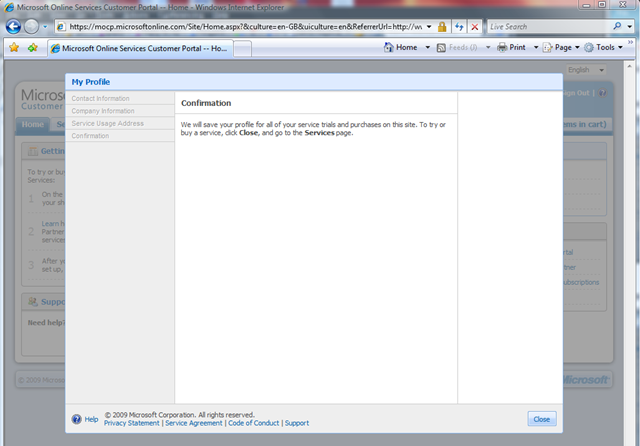
Step 6 - Read the confirmation and click 'close'
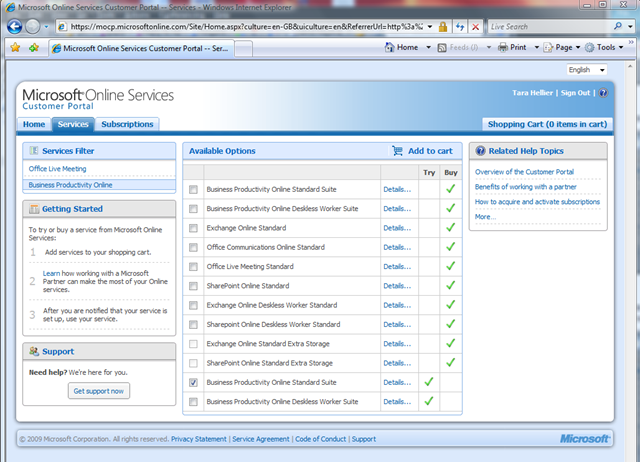
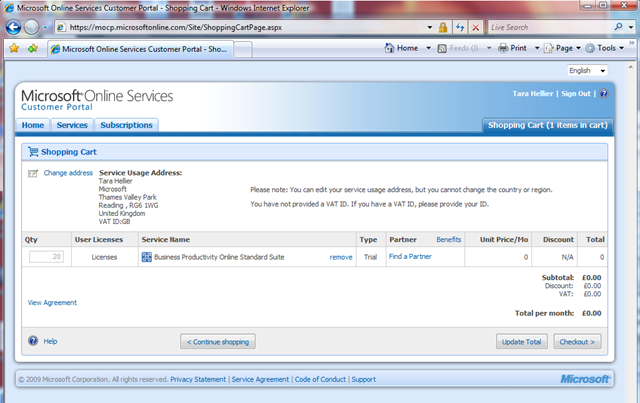
Step 7 - On the Services page, select the Business Productivity Online Standard Suite trial and click 'Add to cart'
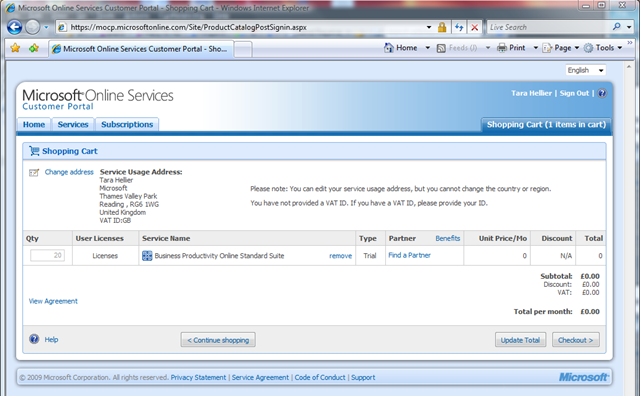
Step 8 - If you have been working with a Microsoft partner, select 'Find a Partner' on the Checkout page
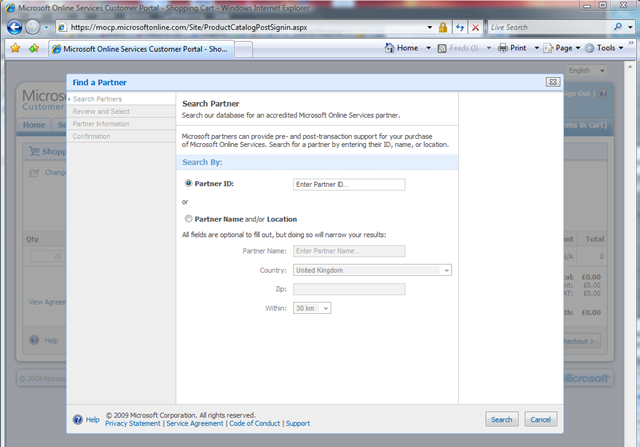
Step 9 - Find the partner you've been working with by entering their Microsoft partner ID, or by searching for them
Step 10 - Review the information on the Checkout page and if everything is correct, click 'Checkout'
(For the BPOS trial, you are assigned 20 licences)
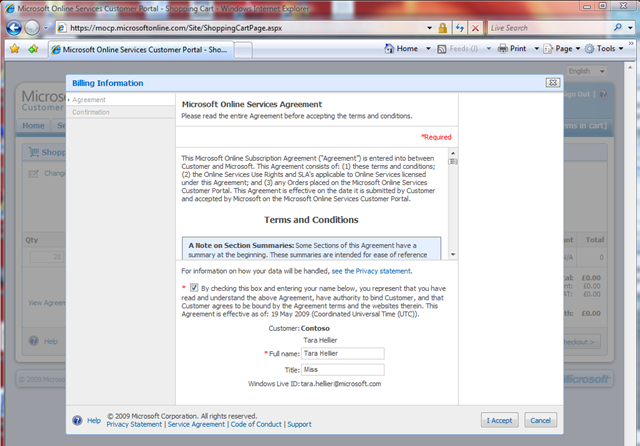
Step 11 - Read the Microsoft Online Services Agreement and if you agree to everything, enter your name, title and click 'I Accept', read the confirmation screen, then click 'Proceed to Activation'
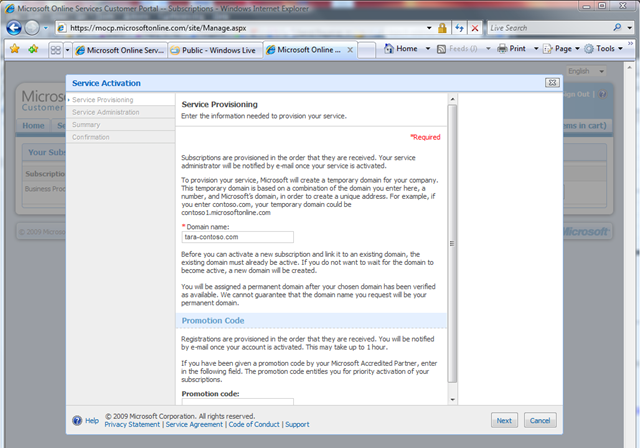
Step 12 - Read the Service Provisioning information, enter your domain name and any promotional code, then click 'Next'
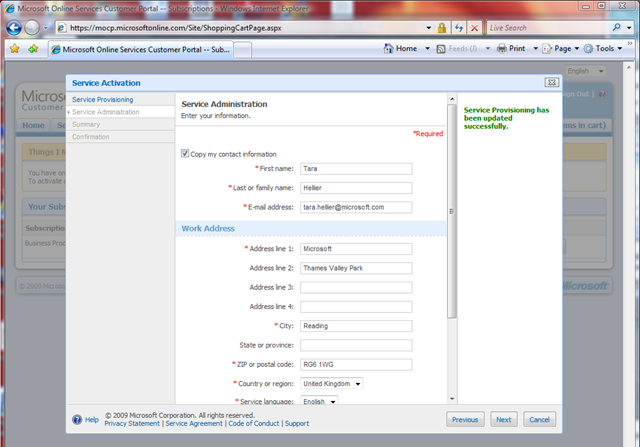
Step 13 - Complete the Service Administration with your administrator's information
(The administrator also needs a Windows Live ID and will be responsible for adding and removing users, configuring the service, accessing service management tools and receiving a notification when the service is provisioned)
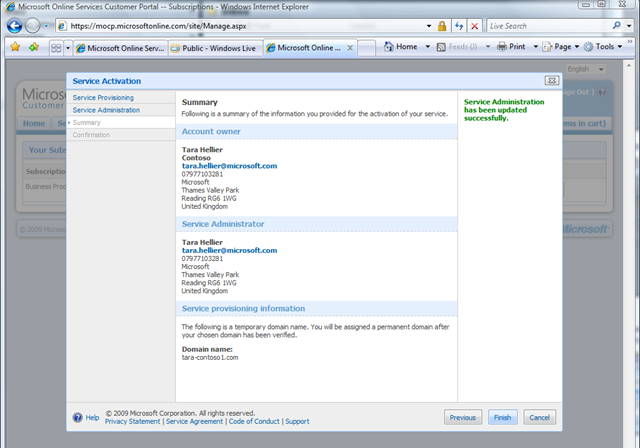
Step 14 - Check that the summary information is correct and click 'Finish'
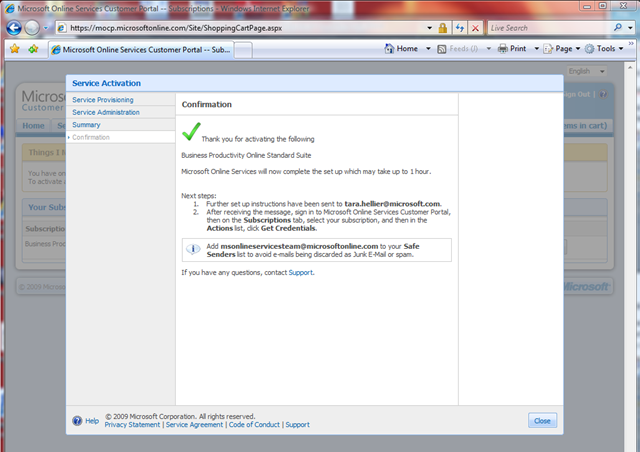
Step 15 - Read the confirmation screen and click 'Close'
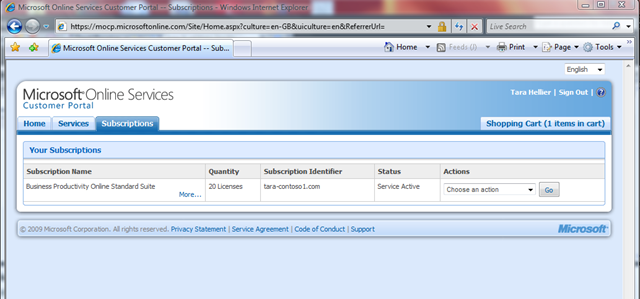
From here, you'll be directed to the Subscriptions page, where you can see your BPOS trial account activation is in progress.
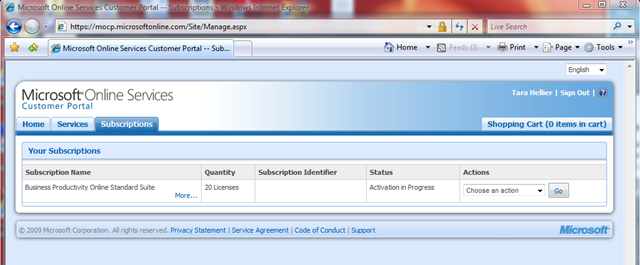
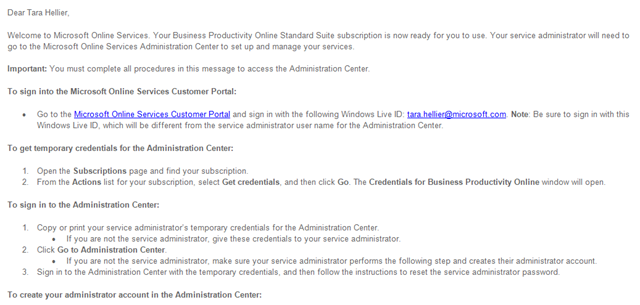
Provisioning the service can take up to 1 hour. When your BPOS account is ready, your administrator will receive an email with instructions on how to access the Administration Centre.
Administering BPOS
Step 16 - Sign into the Microsoft Online Services Customer Portal, and from the Actions box on the Subscriptions tab, click 'Get Credentials' and then click 'Go'
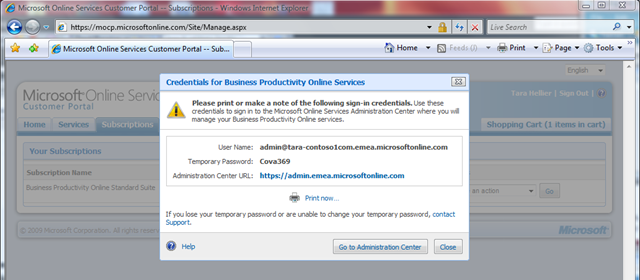
Step 17 - Note your temporary administrator credentials and click 'Go to Administration Centre'
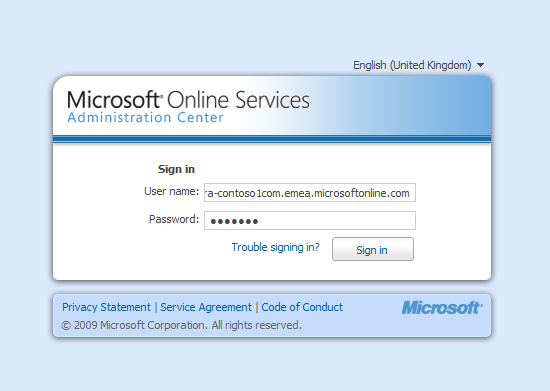
Step 18 (to be completed by service administrator) - Sign in to your account using the temporary administrator credentials
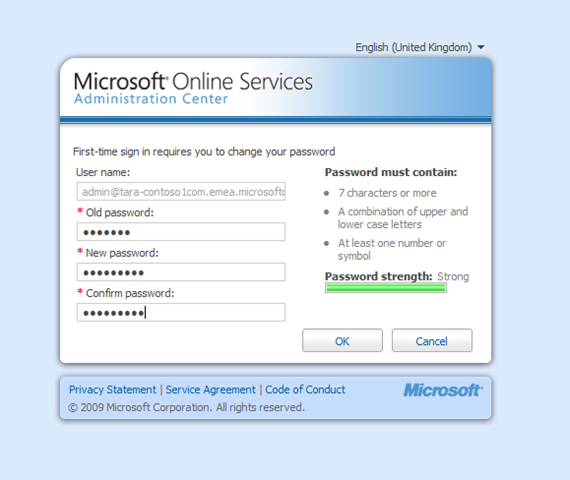
Step 19 - Choose a new, strong password and click 'Ok'. On the following confirmation screen, click 'Continue'
Configuring BPOS
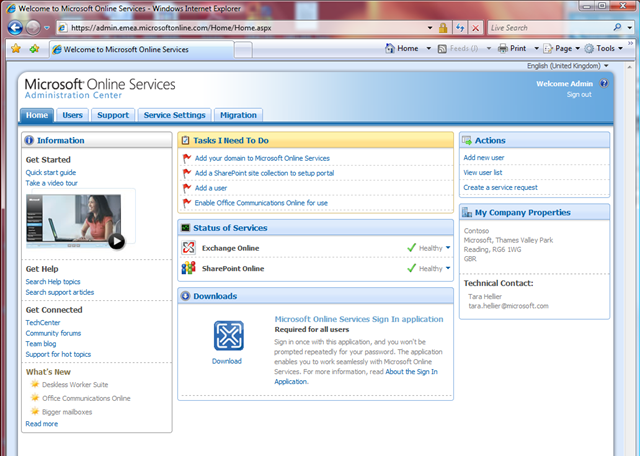
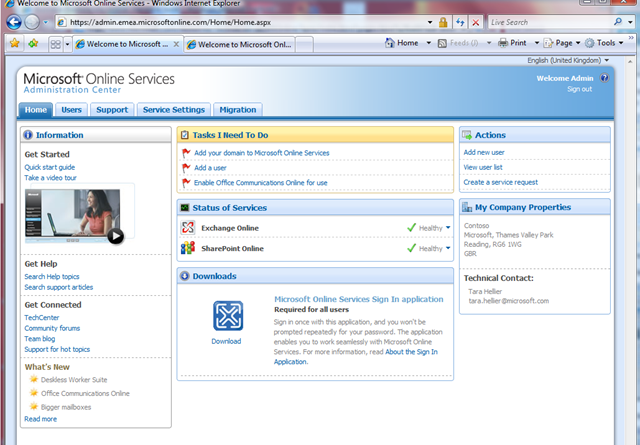
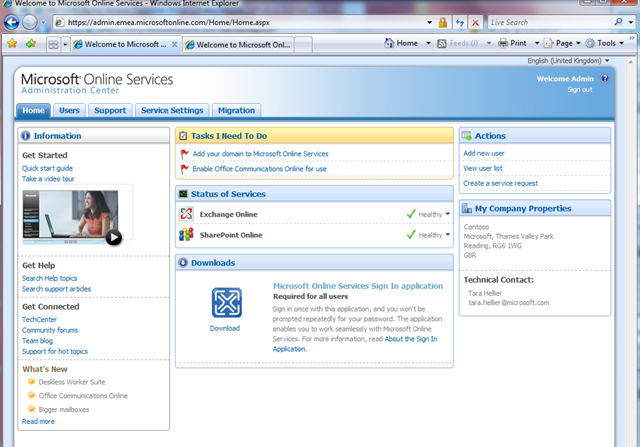
Step 20 - A list of 'Tasks I Need To Do' is available in the centre of the Microsoft Online Services Administration Centre. Click on 'Add your domain to Microsoft Online Services'
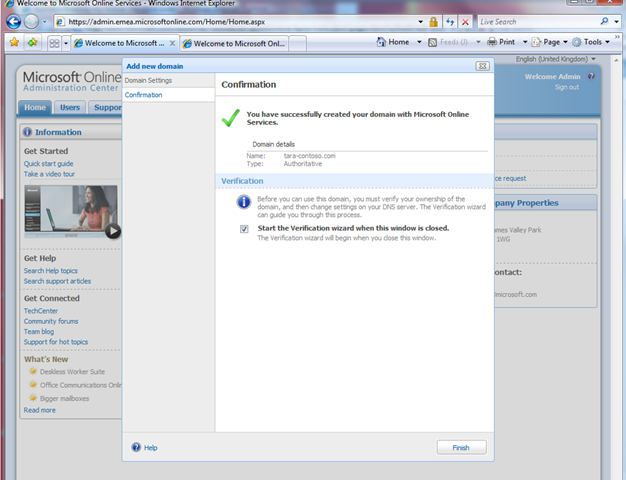
Step 21 - Enter your domain information, and select 'Authoritative' or 'External Relay' depending on whether or not Exchange Online will host all mailboxes for this domain.

Step 22 - Click 'Close' on the confirmation screen. You can also choose to run the Verification wizard to guide you through the process of altering DNS settings (not shown here).
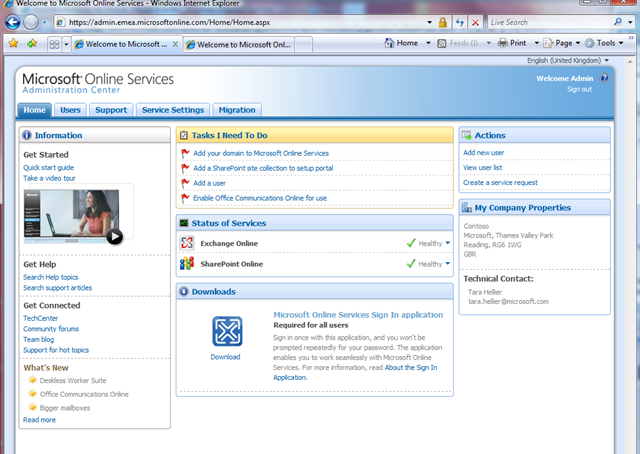
Step 23 - From the Administration Centre, click on the second task - 'Add a SharePoint site collection to setup portal'
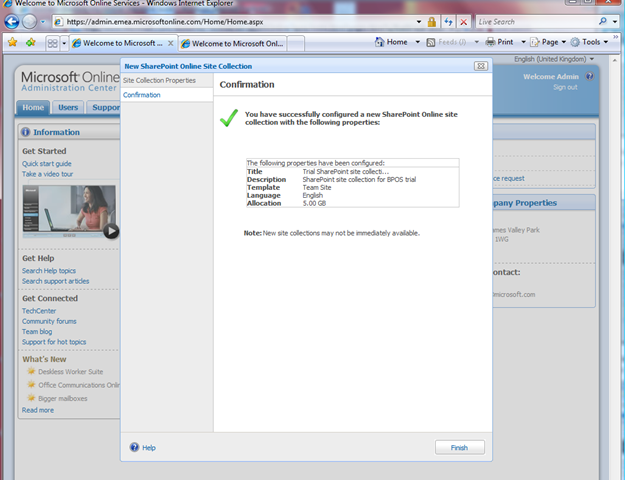
Step 24 - Compete the site collection information and click 'Create'
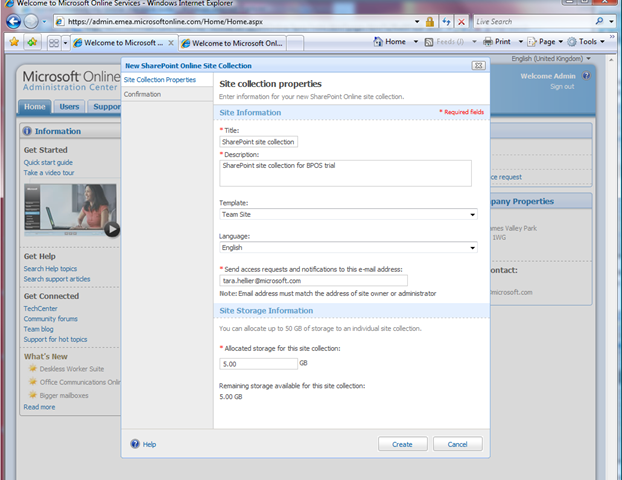
Step 25 - Click 'Finish' on the confirmation screen
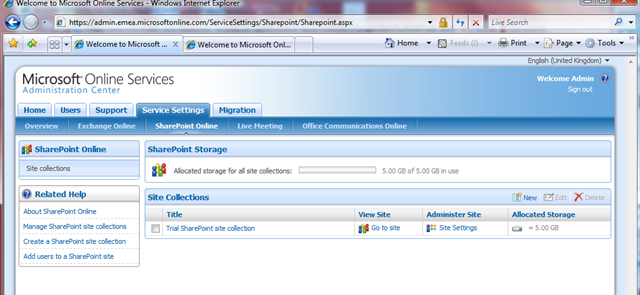
You will then see your site collection listed in the SharePoint Online Service Settings tab
Step 26 - From the Administration Centre, click on the next task - 'Add a user'
Step 27 - Complete user information and click 'Next'

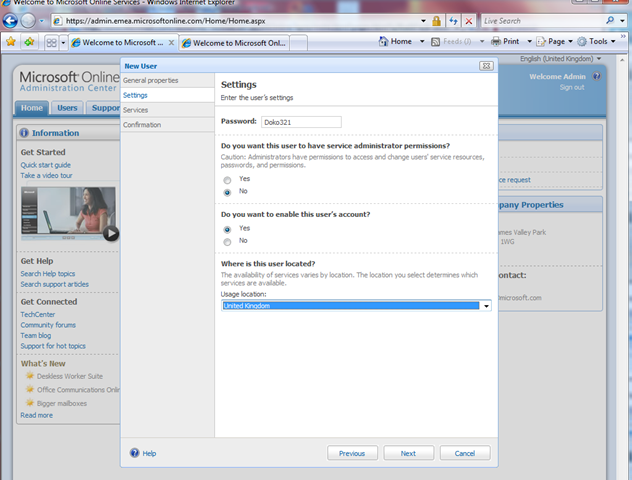
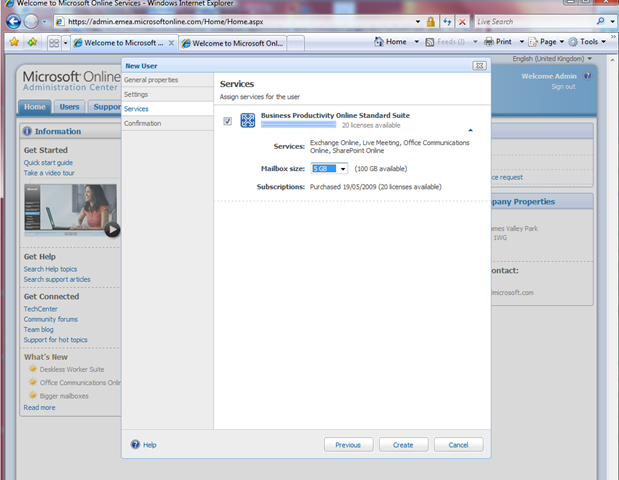
Step 28 - Select the appropriate settings for the user
Step 29 - Select the appropriate services for the user and click 'Create'
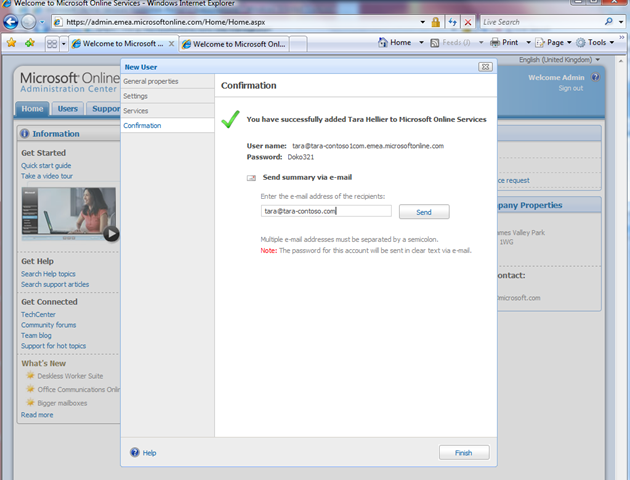
Step 30 - Enter the user's email address if you would like a summary email to be sent to them, click 'Send' then click 'Finish'
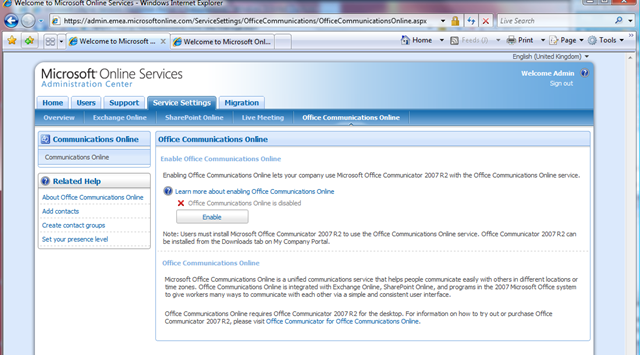
Step 31 - In the Administration Centre, click the final task - 'Enable Office Communications Online for use'
Step 32 - Click 'Enable' on the Office Communications Online Service Settings tab (further steps not shown here)
(Note - users must install Microsoft Office Communicator 2007 R2 to use Office Communications Online)
So there you have it - signing up for the BPOS trial, setting up an administrator for BPOS and the first steps to configure the BPOS solution in 32 very easy to follow steps.
Whether you're a Microsoft partner or a customer, I suggest you sign up for the BPOS trial and spend some time exploring the solution to see how Software plus Services works, and to help you understand where BPOS may be suitable within your own and others' organisations.
You can download this step by step guide from my SkyDrive.