RMS Analyzer Tool for Azure Admins
I try to blog on what I do for my customers. Since the last blog https://aka.ms/AzureRMSlinks was a collection of Azure RMS resources for my last customer, it made sense to also share a related source of information. We tested and have recommended the Azure Rights Management tool for the Azure RMS Administrators. While this tool can also be used for users and on-premises RMS, this document and blog are focused only on the admin experience. So there is more to explore with this tool! But this will give you a taste of how simple and useful it is! Special thanks to Enrique in the RMS team for reviewing this document :)
The initial configuration of Azure Rights Management occurs within the Azure Administration Portal. This must be enabled within your Microsoft Online Services tenant before anything else can occur. See Requirements for Azure Rights Management to understand what prerequisites were put in place to enable this at BCBS MN. This has been completed at BCBS MN and validated as well. Step-by-step of that procedure is documented in TechNet at Activating and configuring Rights Management.
To validate many aspects of the Azure RMS installation, it is most useful to download and install the Rights Management Services Analyzer Tool for the administrator of Azure AD. Before installing the Rights Management Services Analyzer Tool, validate that all prerequisites have been configured. See “System Requirements”.
After downloading and uncompressing the RMS Analyzer tool package, note the location where you extracted the files. This is where you will find the RmsAnalizer.exe to run. For simplicity in the future, right-click on the executable to pin it to your Start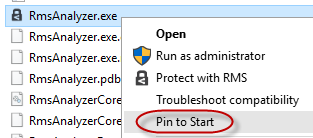 menu. Helpdesk personnel may want to have this in a network share and download it to a location where they have permissions, This walkthrough will only cover the admin experience to get information about the overall Azure RMS health in the event there are issues.
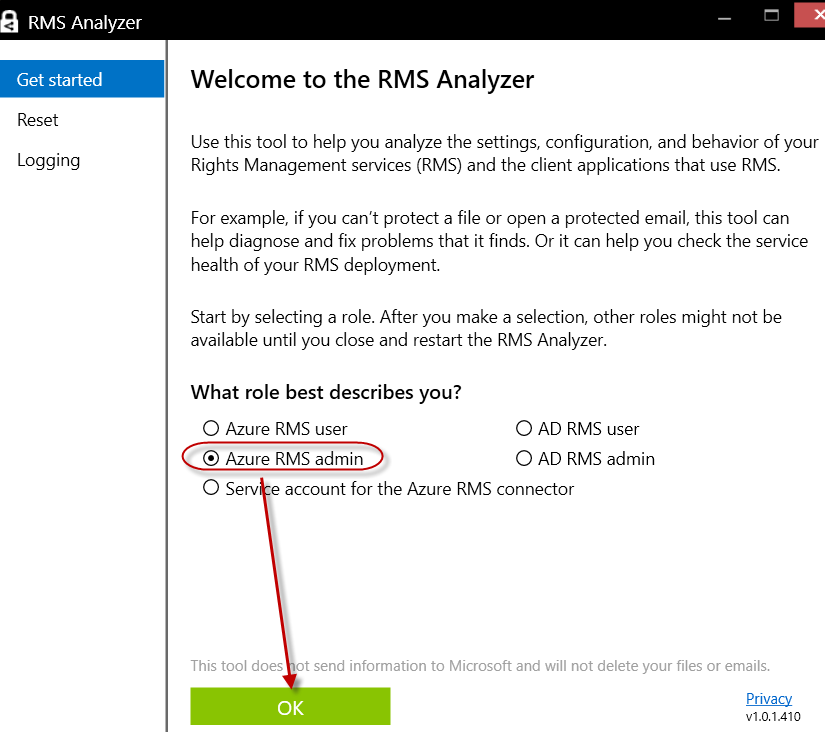
1. Run the RMS Analyzer and select the Azure RMS admin role. Then click OK.
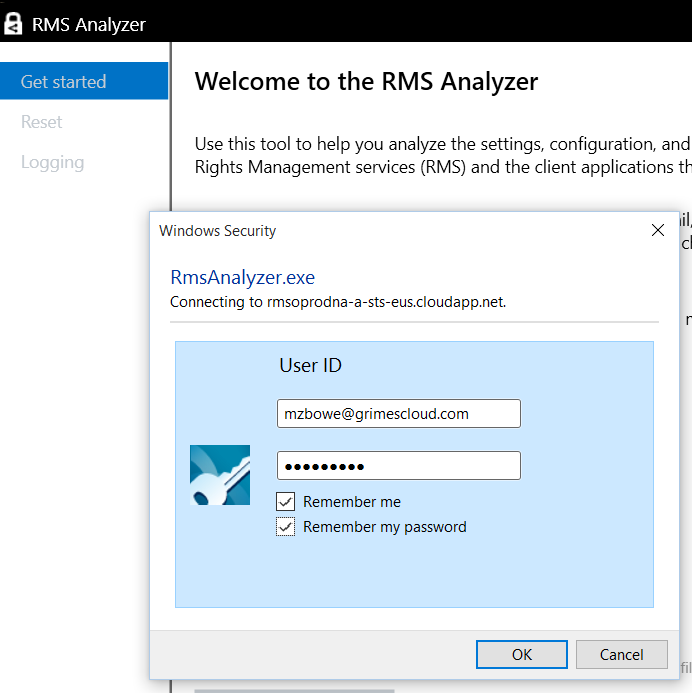
2. Enter your Azure RMS administrator or tenant global administrator account and select the remember me check boxes if desired.
3. Once you successfully login, you will have many pieces of information to review:
-
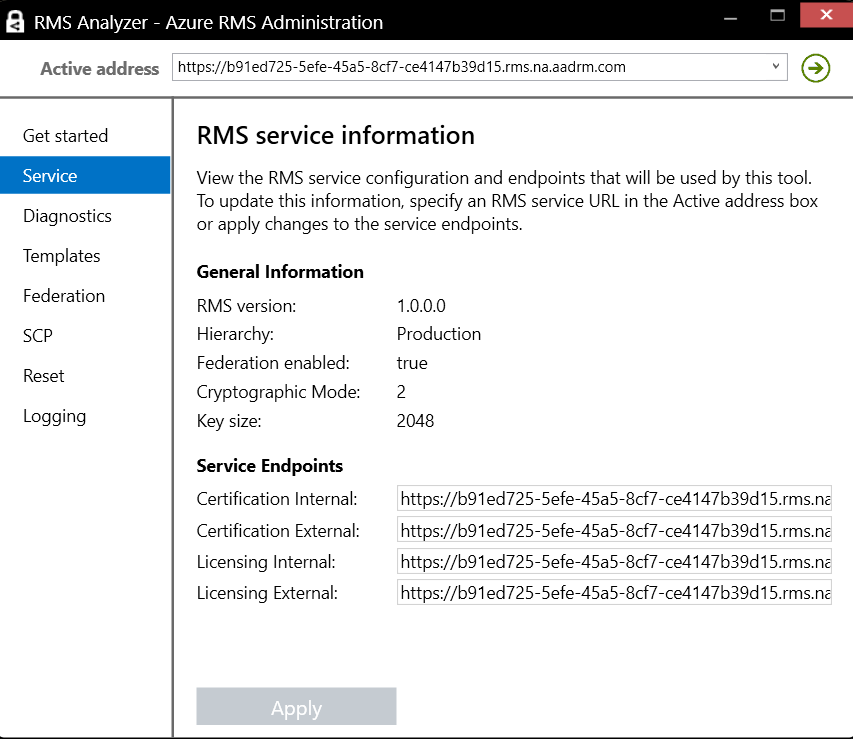
RMS Service Information
RMS Version Information. This is not relevant for Azure RMS tenants as they always run on the same version.
Hierarchy
Can be Production or ISV for AD RMS but Azure RMS always runs in Production Hierarchy
Federation with the on-premises directory enabled for the organization
Cryptographic Mode
Default value will be 2
This would be 1 if an AD RMS Mode 1 key was migrated to Azure RMS
Cryptographic Key size
2048 is the latest and recommended by NIST 800-57
1024 supported in Mode 1 above
Service Endpoints
These are automatically detected and returned by a SOAP call
You can’t change these URLs for your tenant. Changing the values in this application will tell the application which endpoints to test.
Changing the endpoints to test is generally more useful in AD RMS scenarios
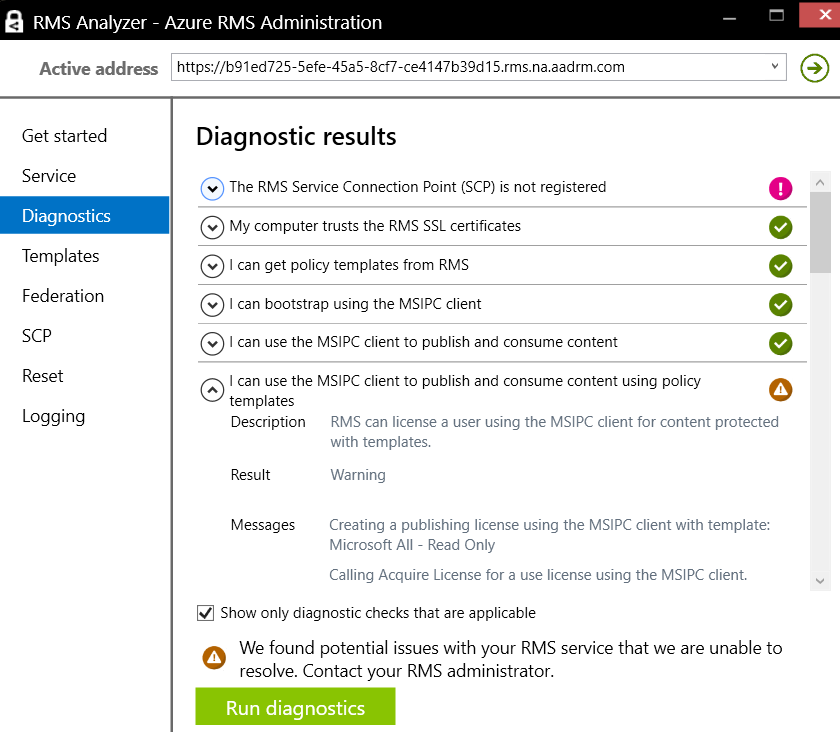
Run Diagnostics
-
Each of the lines will reveal more details by clicking on the to the left of each result.
Once this is run, all details and exceptions will be recorded in RmsAnalyzer.log.
Please note that the first result, the SCP registration, a warning indicates that the SCP IS registered for AD RMS, which is not compatible with Azure RMS in most cases. A properly configured environment for Azure RMS will not have an SCP registered and will be flagged as a successful result in this test.
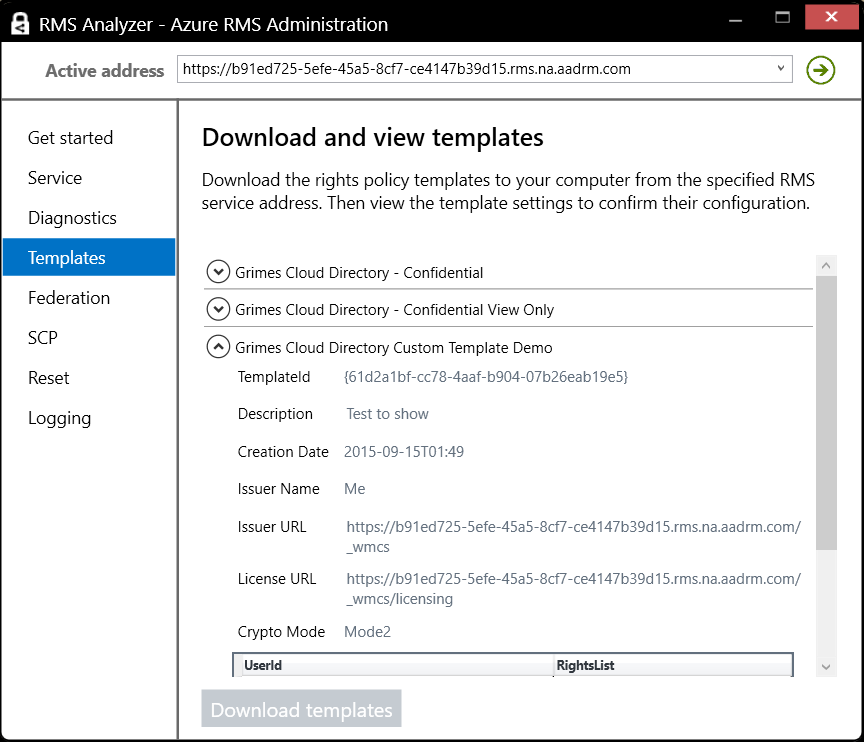
c. Templates
-
-
-
You can download the templates published in the organization to confirm their configuration
Detailed information about each template will also show each UserID and their associated rights list
-
-
4. Federation Services will confirm your federation is configured correctly for Azure RMS. You will need to enter
-
Federation Service name
User Name in domain\username format, of an AD FS administrator account and their password
5. Service Connection Point allows you to get, update or unregister a Service Connection Point for the selected forest. If the admin is using Azure RMS on domain-joined machines, a registered SCP could cause RMS clients to go to AD RMS rather than Azure RMS. This page allows an Azure RMS to unregister the SCP if it is interfering with Azure RMS.
6. Reset Configuration will remove all certificates, policy templates and reset registry keys from the client. Resetting the client returns the client to its default state. In many cases this may fix client issues, without affecting client functionality.
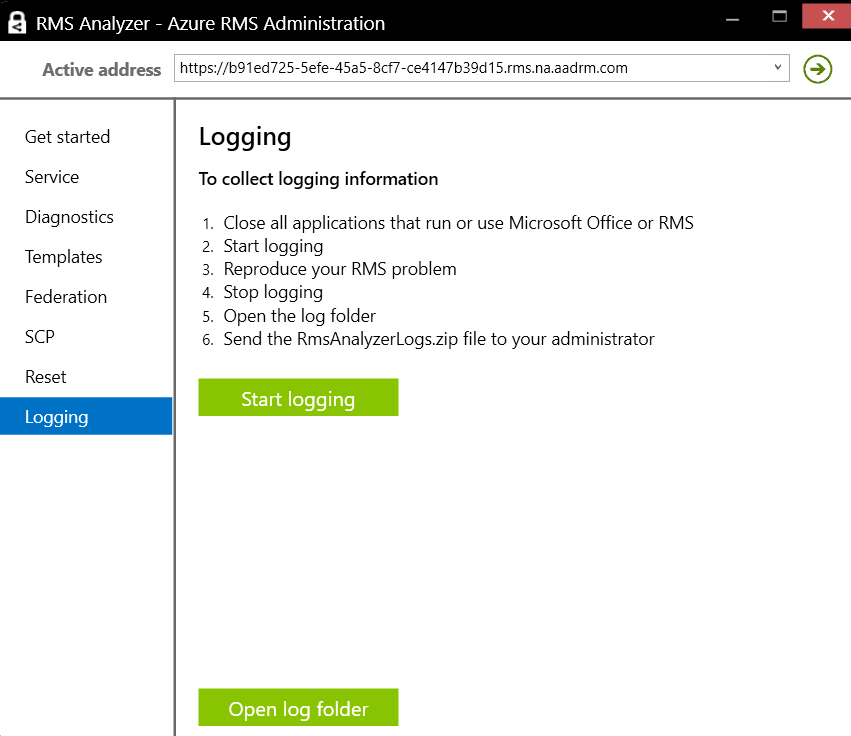
7. Logging will collect information in the event you have problems with RMS.
-
This will require opening the RMS Analyzer with the “Run as administrator” option. Once you do that, the Start Logging option will function.
Click on Start Logging and then reproduce the issue at hand while logging is running. Once the issue has been reproduced, click Stop Logging, and then select Open log folder to explore the issues. The folder will contain detailed traces from the RMS client during the logging period, as well as additional configuration files and other relevant application logs. You can then send the logs to a support or help-desk specialist for in-depth troubleshooting.