How do I move from SCE2007 on x86 to SCE2010 on x64
With the release of System Center Essentials 2010 and the general excitement around some of the new features like virtualization, some customers are asking about our upgrade/migration story from the previous version.
SCENARIO
You read about the 2010 release and are excited about the virtualization features in the new version. You purchase the 2010 version of SCE and run back to your office to do the install. When you launch the install, you see the support for upgrading your existing Essentials 2007 sp1 install. You starting the upgrade process and before long, you have deployed the new version of Essentials.
You go to add the virtualization component and get a message telling you that your x86 system does not support this component. Luckily you have another server that does meet the system requirements for the Essentials 2010 virtualization component… but you don’t want to lose all the data you have on your existing Essentials server… you just need better hardware and a newer OS.
We have anticipated this scenario and have provided a solution in the resource kit that can be leveraged to solve this issue. In the resource kit, there is a tool called MigrationAdvisor.exe. The migration advisor is a wizard which will allow you to migrate your existing Essentials 2010 data from one server to another server with the same FQDN. Here is how it works.
Things You will need
- Existing Essentials 2010 Server that you wish to migrate from
- Another server you wish to migrate to
- A network location to store the migration data (you will need to grant read/write access to this share for both the account you are running as and the account the SQL server is running as)
First you install the resource kit on your existing server. The steps for that are:
- Download the SCE 2010 ResKit from https://www.microsoft.com/downloads/details.aspx?displaylang=en&FamilyID=32b2872a-a31d-4db1-abe8-018d91bf3942
- Run the MSI on your server box by double clicking it.
- Once the install is complete, go to the folder where your SCE server is installed (the default location is in a sub folder under %programfiles%).
- Find and launch the MigrationAdvisor.exe
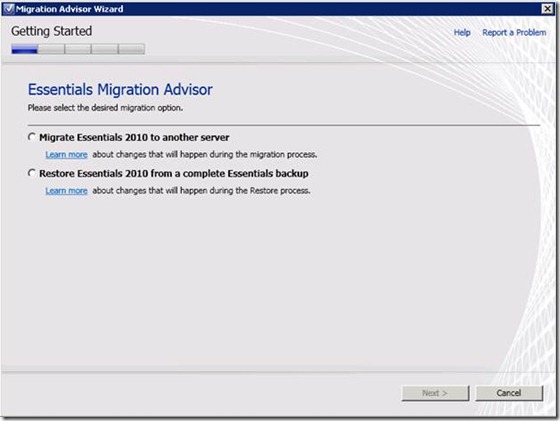
Now that you have the migration advisor up and running, you will see the following screen:
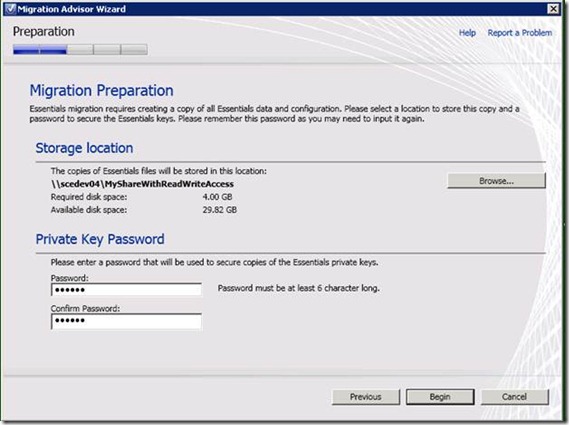
Choose the “Migrate Essentials 2010 to another server” radio button. On the next screen, you will need to provide a location for the backup files and a password used to secure your rmsbackup and certs.
Make sure the location has plenty of free space as all your Sce data will be stored there. I would suggest using a Network location as you will not have access to the old Sce server during the migration restore phase (hit the browse button to change the location). Make sure you have write access to the location you select.
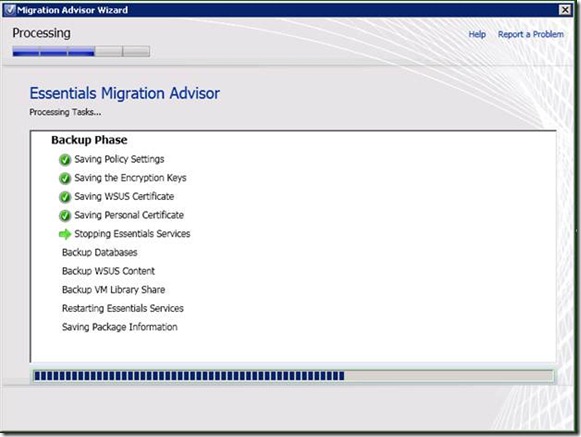
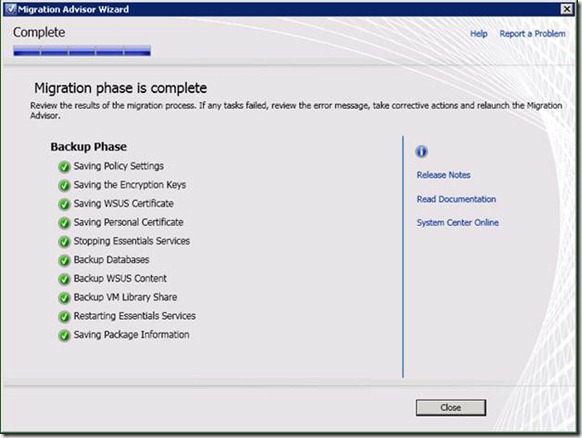
Now your ready to start the backup. Hit the begin button and wait for successful completion of the backup as seen below. (This will take a few min. depending on the amount of data on your server.)
Congrats, your halfway through the process…
The Tricky Part
The next thing you need to do is decommission your existing server. Since the migration of essentials is ONLY supported onto another server with EXACTLY the same FQDN, you have a couple of choices.
You could:
A. Uninstall Essentials from your existing server and then change that servers FQDN to another name so that it will not conflict with the new Essentials server.
Or
B. Shut the Essentials server down and then format the disk and use the hardware to create a different machine on your network later.
Once the old Essentials server has been removed from the domain, you will need to add a new server to your domain with EXACTLY the same name as your original Essentials server. This is the server with the hardware and OS that can support the Virtualization component of Essentials 2010.
Important Note
Having EXACTLY the same FQDN is important… if the FQDN is not the same as the previous machine, you will not be able to successfully migrate your previous Essentials data to this machine using the MigrationAdvisor.exe.
The next step is to install Essentials 2010, using the same settings components and account information as your previous install
Important Note
Selecting the same components it very important as the MigrationAdvisor will not allow you to migrate your data to the new machine if the component settings do not match. For example, if you do not have Virtualization on the box you are migrating from, don’t install it on the new box (you will add it using the ARP after the migration is complete).
Once the install is complete you will need to close the installation wizard. Do not run the configuration wizard as your settings will be configured by the migrationadvisor as it restores your existing data.
Now you need to install the resource kit tools on this server and launch the migrationadvisor. This can be done following the same steps you did to install the resource kit tools on your previous Essentials server (see the top of this document).
Now you need to choose the “Restore Essentials 2010 from a complete Essentials backup” option then hit next.
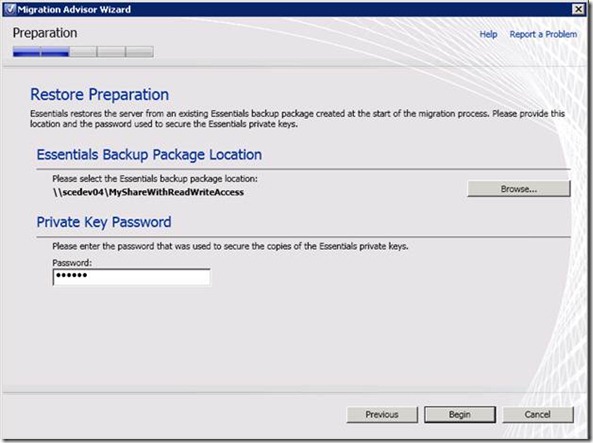
Then you need to provide the storage location you used during the migration step and the password you used during the backup, and hit begin.
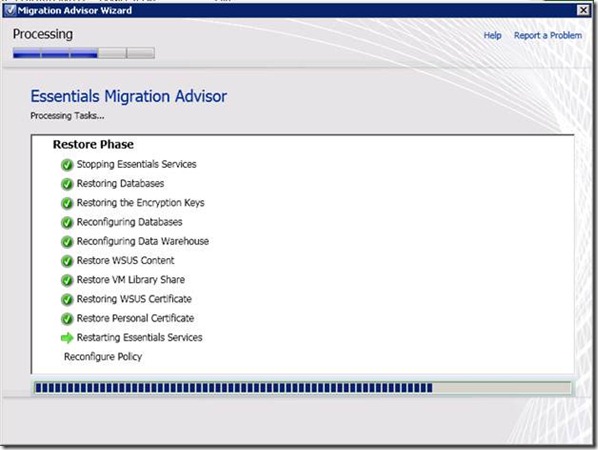
The Migration Advisor will begin processing….
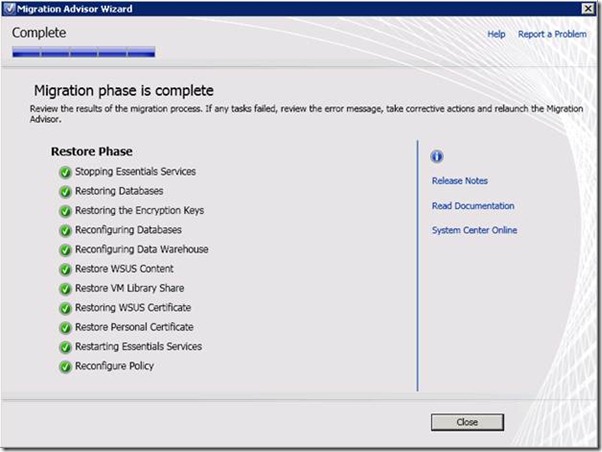
A few minutes later (on my server which had very little data, the restore took about 10 minutes to finish), the wizard will finish.
Now you should have a working Sce server with your original data.
Important Note
AEM settings are not preserved so if you were using AEM, you will need to go into the console and enable it again.
At this point, if you want the virtualization component, you will be able to install it by running the setup wizard again and choosing to add the Virtualization component. Then you can begin deploying and managing your virtual machines. Enjoy.
![clip_image002[1] clip_image002[1]](https://msdntnarchive.blob.core.windows.net/media/TNBlogsFS/prod.evol.blogs.technet.com/CommunityServer.Blogs.Components.WeblogFiles/00/00/00/57/04/metablogapi/0564.clip_image0021_thumb_73E36E1E.jpg)
