WSUS: How to Backup and Restore WSUS using the Wizard Mode
We get quite a few questions on this so I thought I'd put together a quick step-by-step with screen shots and all that. This is documented on TechNet but with this you can actually see what it all looks like before actually doing it.
========
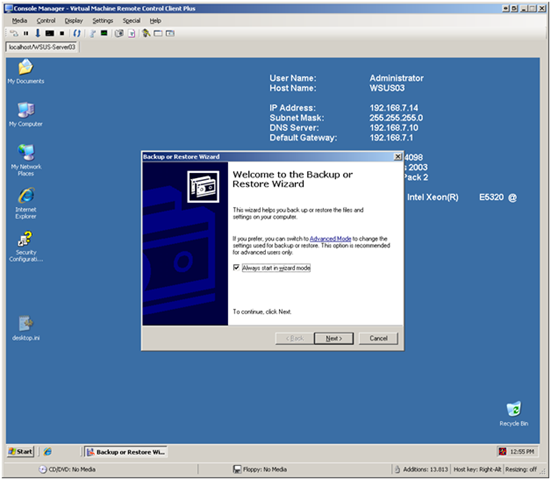
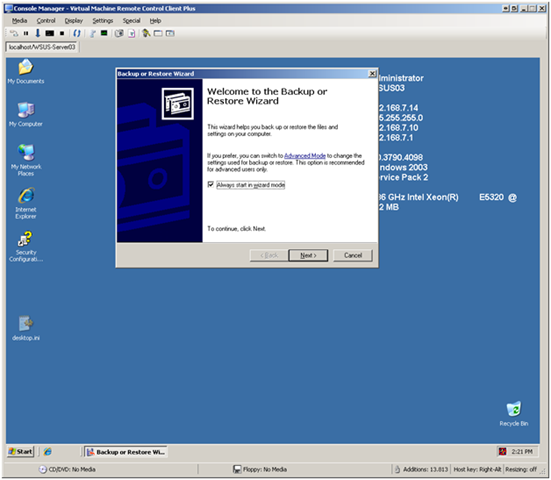
1. Launch the NT Backup using the wizard mode. Click Next:
2. Select Backup Files and Settings, click next:

3. Select Let me choose what to backup, click next:

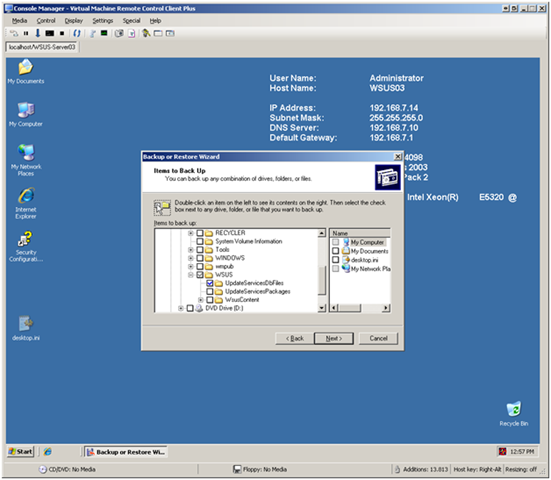
4. Choose what you want to back up. To maintain the settings choose the directory containing the WSUS database files and click next.
Note: For non-default installs you will need to find the correct directory holding the WSUS database. You can also backup the WSUSContent although that can always be replaced by re-downloading the content from Microsoft Update by running wsusutil reset.
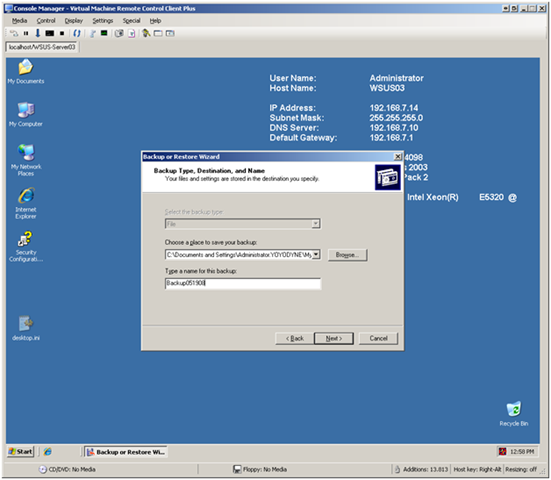
5. Choose the location of your backup file and give it a name, click next.
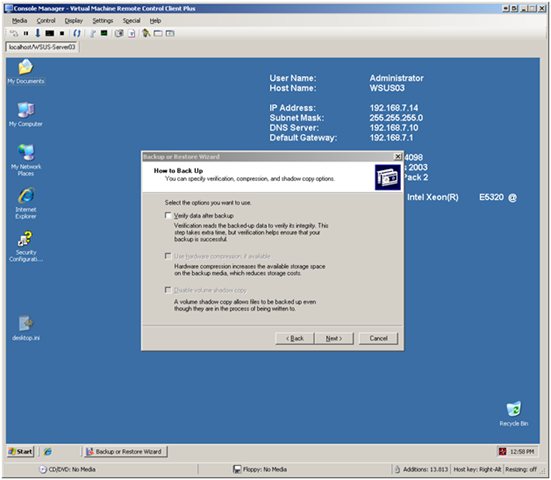
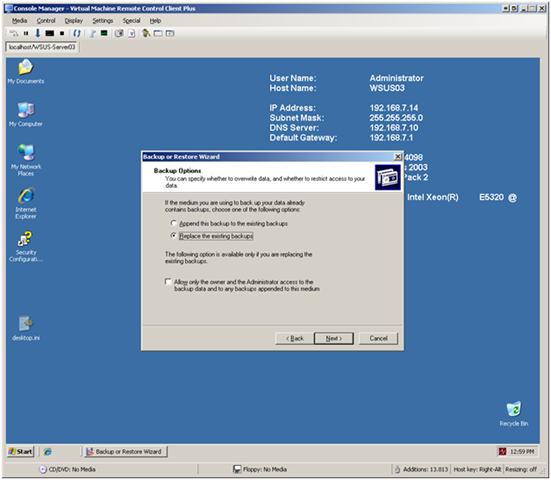
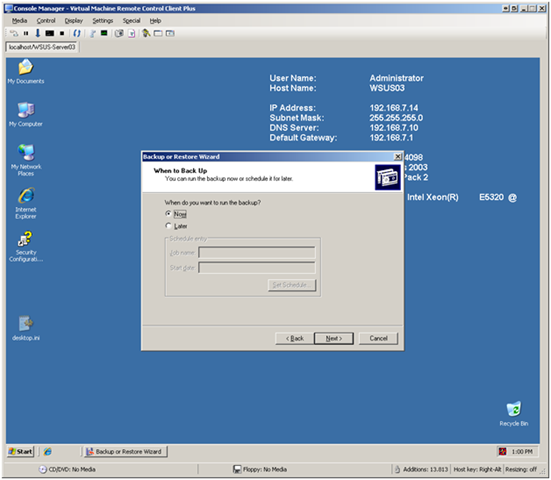
6. When you reach this screen, click Advanced and specify any other options for your backup:


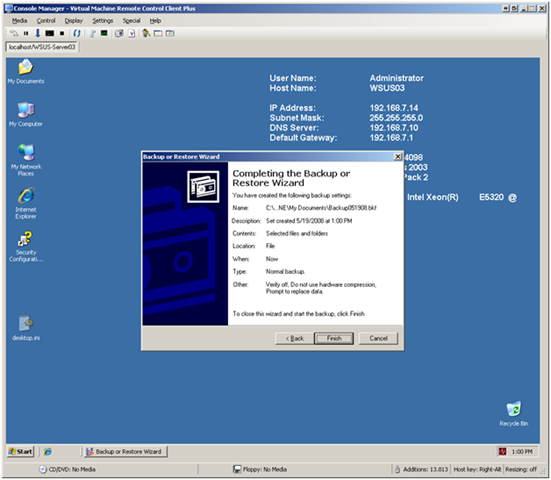
7. When you're all set, click Finish:
So now that you have your WSUS data backed up, here's how to restore it.
1. Again, start in wizard mode and click next:
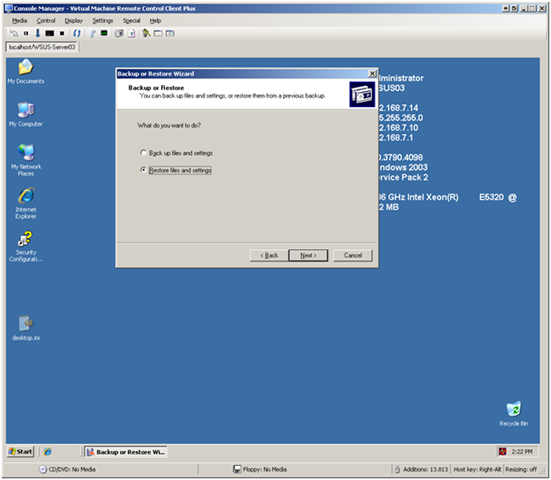
2. Choose Restore files and settings, click next.
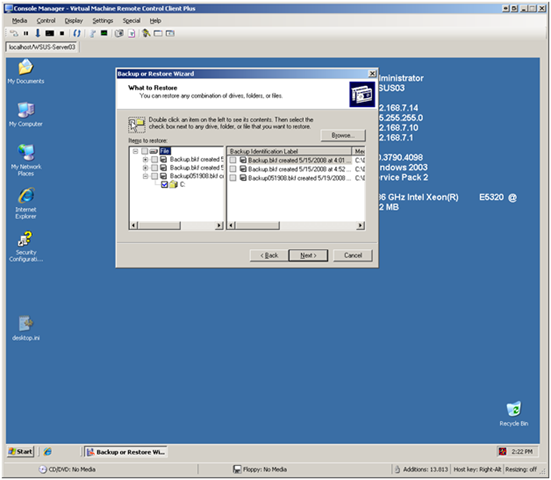
3. Choose your backup and what you are restoring, then click next:
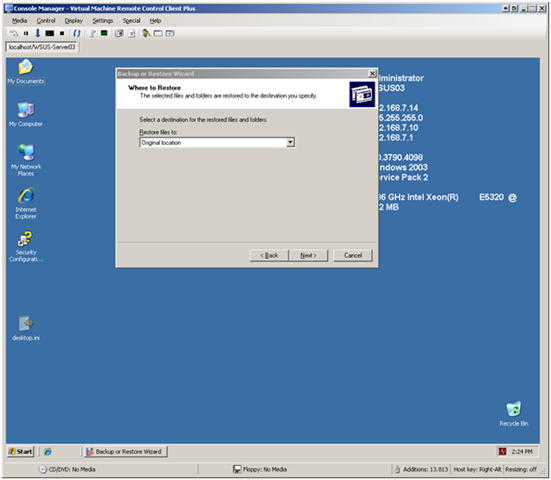
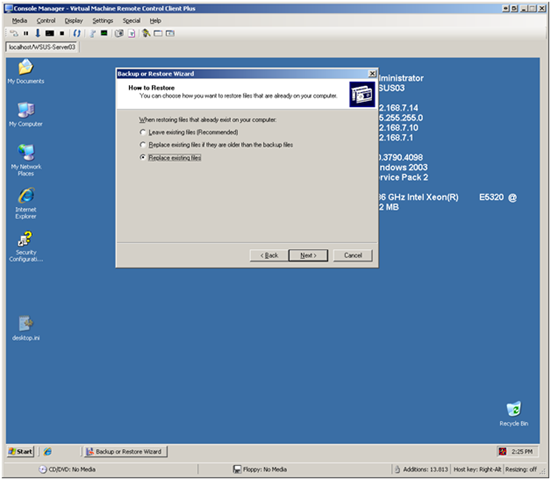
4. Click Advanced to change your options. Note that you must change the options here to successfully restore. Also, if you are in a non-default install of WSUS you will need to choose what and where to restore.
Original location works great if the WSUS install is a default install or if you previously backed up from the non-default install locations:
Choose Replace Existing Files. Note that other choices will result in the Database not being restored. Also note that this option is not the same as the option during back up to replace existing backup file:
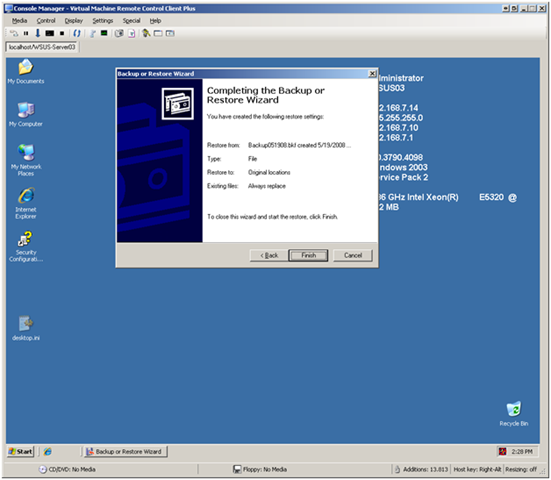
5. Check all three available boxes if they are not checked (they should be checked by default) and click next:

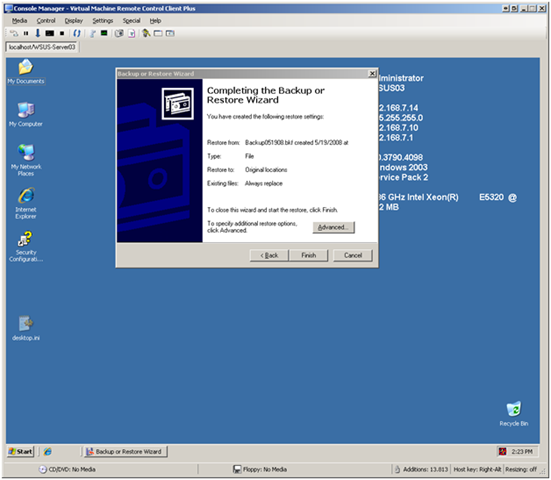
6. Lastly, click finish to restore your data:
For more information see Backing Up Windows Server Update Services 3.0 at https://technet2.microsoft.com/windowsserver/en/library/0f0b7103-052e-481e-9efb-be7ab06fbd181033.mspx?mfr=true.
Ellis George | WSUS Support Engineer