Recovering Azure VM by attaching OS disk to another Azure VM
If you are unable to administer an Azure VM because of RDP or SSH failures, in many cases rebooting or resizing the VM may resolve the issue.
You can troubleshoot the VM by attaching the OS disk as a data disk to a different Azure VM using the steps below.
First make sure you have a working VM in the same location (region) that you can use to attach the OS disk of the problem VM. If you don’t have one in the same region, you can create one temporarily.
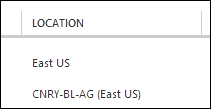
To verify the location, click Virtual Machines and look at the Location column. As long as the second VM has the same location, whether in parenthesis or not (i.e. East US or <affinity group> (East US)), you can use it for this process.
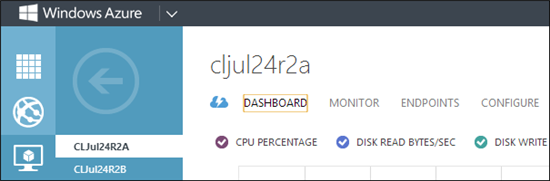
After creating a new VM in the same location or confirming a second VM already exists in that location, select Virtual Machines on the left, click the problem VM on the right, then click Dashboard.
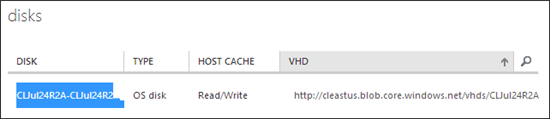
Make note of the OS disk name in the Disks section at the bottom of the dashboard, since you will be using it later to redeploy the VM. The disk name is under the Disk column on the far left.
Click Delete at the bottom right of the page to delete the VM. This is necessary so the OS disk is not in use and can be attached to another VM.
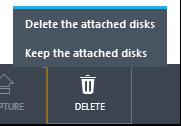
Note Deleting the VM does not delete the VHD file. The VHD remains as-is in your storage account.
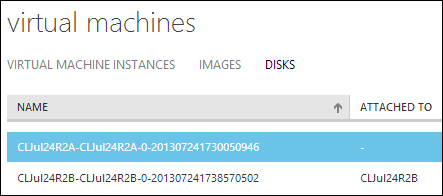
Click Virtual Machines on the left, and click the Disks tab at the top right.
Find the disk name from Step 2, and wait for the Attached To column to be blank. This can take up to 5 minutes after deleting the VM.
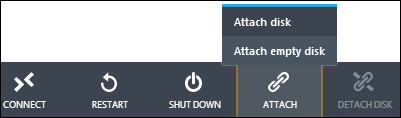
Click Virtual Machines on the left, and select the second VM that you will use to attach the OS disk of the problem VM, select Dashboard, then select Attach and then Attach Disk at the bottom of the dashboard.
In the Attach a disk to the virtual machine dialog, select Available Disks and choose the disk from the problem VM (you made note of the disk name in Step 2). Leave the Host Cache Preference on the default setting of None, and click OK.
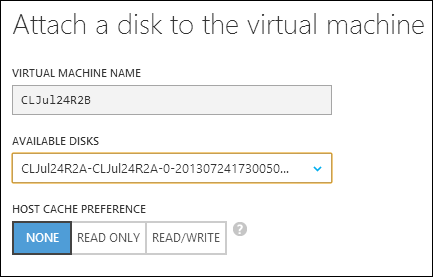
If you do not see the disk here, either this second VM is in a different location than the problem VM (i.e. in West US and the problem VM is in East US), or the disk has not yet been freed up for reuse and the Attached To column still shows the problem VM name instead of being blank.
When the disk is attached to the second VM you will see a message in the portal Successfully attached disk <disk name> to virtual machine <name of second VM> .
Click Connect to make an RDP connection to the second VM.
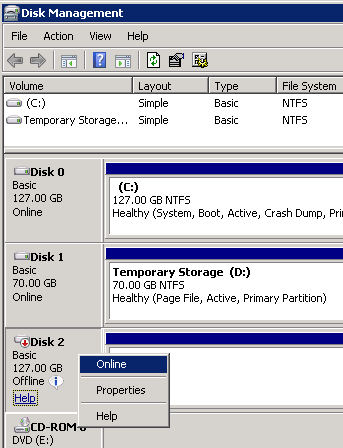
In the second VM, go to Start, Search, type diskmgmt.msc <enter> to bring up the Disk Management tool.
The disk you just added should show up as Offline, so right-click it and select Online.
If your OS Disk has only 1 partition then follow step 13. If the Disk has 2 partition then follow step 14.
Disk with 1 partition:
Assuming that the partition got G: drive (please note the drive letter may be different in the VM that you are working on) Open an elevated command prompt and run the following commands:
chkdsk G: /F
bcdedit /store G:\boot\bcd /set {default} recoveryenabled Off (disables the recovery mode)
bcdedit /store G:\boot\bcd /enum (to confirm recoveryenabled is set to No)
move G:\windows\system32\config\system G:\windows\system32\config\system_org (saves current system registry hive)
copy G:\windows\system32\config\Regback\system G:\windows\system32\config\system (replaces system registry hive with the backup)
Disk with 2 partition:
Assuming that the partition with boot manager (~100 MB size) got G: drive and the OS partition got H: drive (please note the drive letter may be different in the VM that you are working on) Open an elevated command prompt and run the following commands:
chkdsk H: /F
bcdedit /store G:\boot\bcd /set {default} recoveryenabled Off (disables the recovery mode)
bcdedit /store G:\boot\bcd /enum (to confirm recoveryenabled is set to No)move H:\windows\system32\config\system H:\windows\system32\config\system_org (saves the current system registry hive)
copy H:\windows\system32\config\Regback\system H:\windows\system32\config\system (replaces system registry hive with the backup)
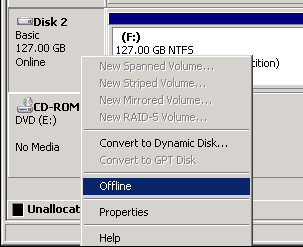
Back in Disk Management, right-click the disk from the problem VM and select Offline.
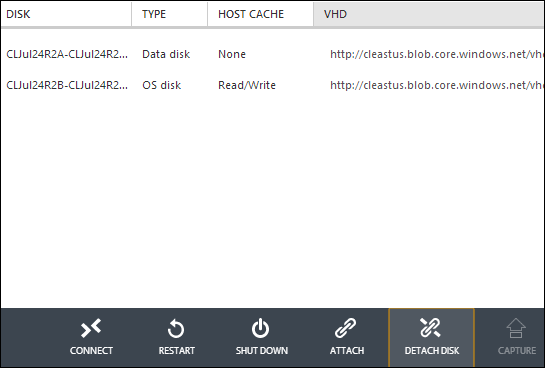
Back in the portal, on the dashboard for the second VM, select Detach to detach the disk from the VM.
Create a new VM with this OS disk that you just repaired. Start the VM and RDP the VM.
If your VM is still not recovered, you will have to rebuild your VM and import your application specific data (if any) into the new VM by following these steps:
Follow steps from 1 to 11 and get the old OS disk attached as a data disk to a new VM.
Copy all your application specific data from the old OS disk to the new VM.