Just when you thought… (Part 2)
In Part 1, I covered configuring the Hyper-V Failover Cluster and the Scale-Out File Server solution. In Part two, I will cover:
- Creating the file shares in the Scale-Out File Server
- Creating a virtual machine to use the SMB3.0 shares in the Scale-Out File Server
- Verifying we can Live Migrate the virtual machines in the Hyper-V Failover Cluster
Creating the File Share
Execute the following steps to create a file share in the Scale-Out File Server
- In Failover Cluster Manager, right-click on the Scale-Out File Server role in the center pane and choose Add File Share. This starts the New Share Wizard
- In the Select Profile screen, choose SMB Share - Applications and click Next
- For the Share Location, choose one of the CSV Volumes and click Next
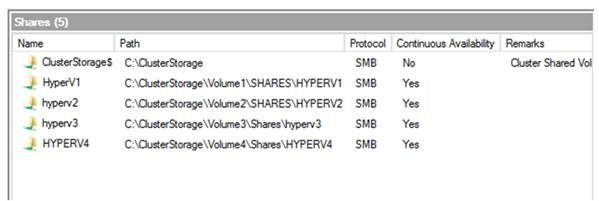
- Provide a Share Name, verify the path information and click Next
- In the Other Settings screen, Enable Continuous Availability is checked by default. Click Next
Note: Some selections are greyed-out. This is because they are not supported for this share profile in a Failover Cluster - In the Permissions screen, click Customize Permissions. In the Advanced Security Settings screen, note the default NTFS and Share permissions and then proceed to add the Hyper-V Failover Cluster Nodes Computer Accounts to the NTFS permissions for the share and ensure they have Full Control. If the permissions listing does not include the cluster administrator(s), add it and give the account (or Security Group) Full Control. Click Apply when finished
Complete configuring the file shares.

As a test, connect to each of the shares from the Hyper-V Failover Cluster and verify you can write to each location before proceeding to the next step.
Creating a Virtual Machine to use an SMB 3.0 Share
Execute the following steps to create a new virtual machine
On one of the nodes in the Hyper-V Cluster, open Failover Cluster Manager
In the left-hand pane, click on Roles and then in the right-hand Actions pane click on Virtual Machines and choose New Virtual Machine
Choose one of the cluster nodes to be the target for the virtual machine and click OK
This starts the New Virtual Machine Wizard. Review the Before You Begin screen and click Next
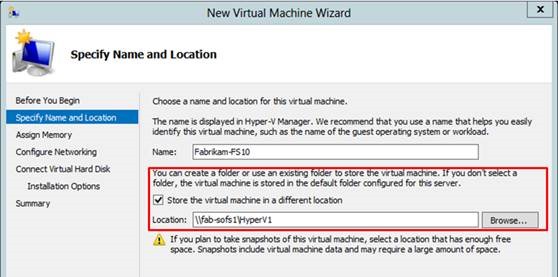
In the Specify Name and Location screen, provide a name for the virtual machine and enter an UNC path to a share on the Scale-Out File Server and then click Next
Configure memory settings and click Next
Configure network settings and click Next
In the Connect Virtual Hard Disk screen, make a selection and click Next
Review the Summary screen and click Finish
Verify the process completes successfully and click Finish

Testing Live Migration
Once all the virtual machines are created, you may want to test Live Migration. Depending on how many simultaneous live migrations you want to support, you may have to modify the Live Migration settings on each of the Hyper-V Failover Cluster nodes. The default is to allow two simultaneous live migrations. Here is a little PowerShell script you can run to take care of the settings for all the nodes in the cluster -
$Cred = Get-Credential Invoke-Command -Computername Fabrikam-N21,Fabrikam-N22,Fabrikam-N23 -Credential $Cred -scriptblock {Set-VMHost -MaximumVirtualMachineMigrations 6} |
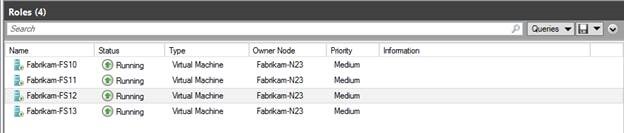
In my cluster, I have all the virtual machines running on the same node -

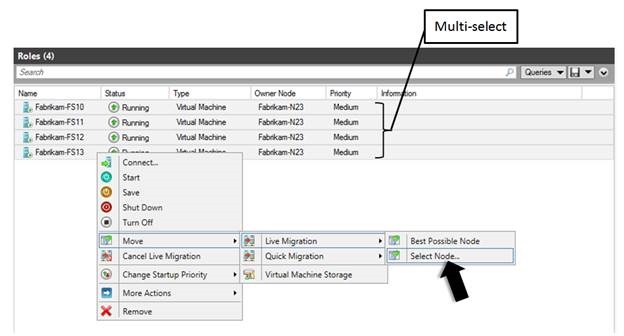
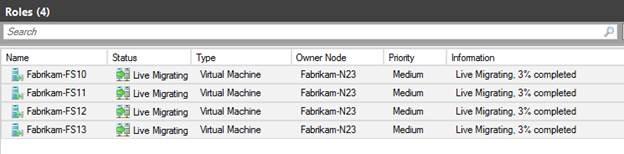
I will use a new feature in Windows Server 2012 Failover Clusters, multi-select, and select all of the virtual machines and live migrate them to another node in the cluster -

Since there are only four virtual machines and the maximum number of live migrations is equal to six, all will migrate.

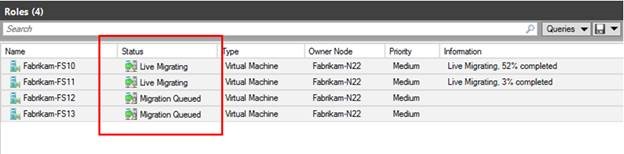
If I were to rerun my script and make a change back to two, then two migrations will be queued until at least one of the in progress migrations completes.

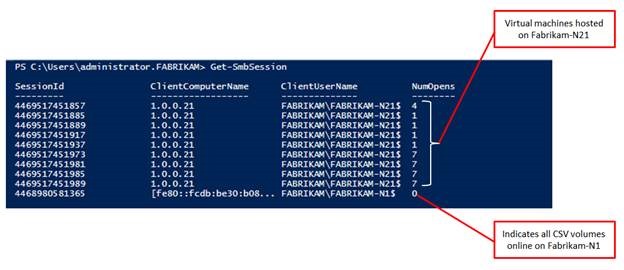
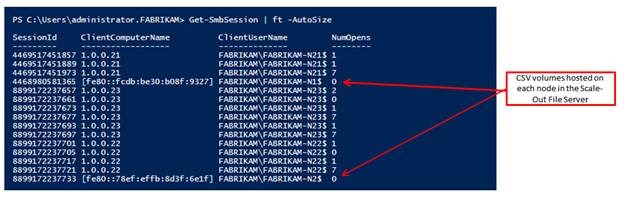
You can use the Get-SmbSession PowerShell cmdlet on any node in the Scale-Out File Server to determine the number of sessions. For illustration purposes, I have all virtual machines running on the same Hyper-V Failover Cluster node (Fabrikam-N21) and the CSV volumes are running on the same node in the Scale-Out File Server (Fabrikam-N1) -

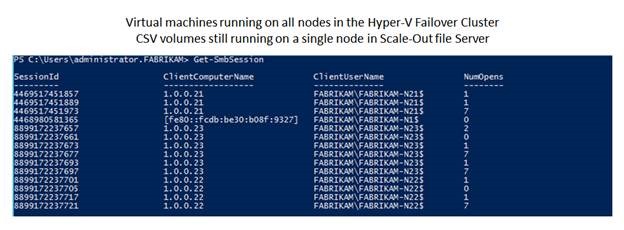
Distributing the virtual machines across the multi-node Hyper-V Failover Cluster (Fabrilam-N21, Fabrikam-N22, and Fabrikam-N23) is reflected on the Scale-Out File Server -

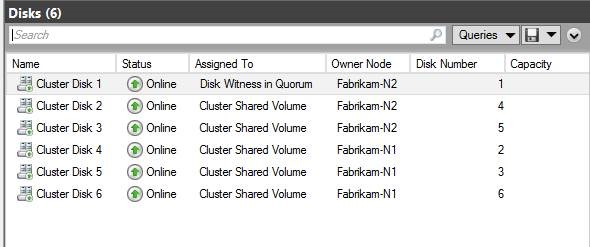
Finally, I re-distribute the CSV volumes across the Scale-Out File Server nodes as shown here -

This is reflected in the Get-SmbSession PowerShell cmdlet output -

Thanks, and come back again soon.
Chuck Timon
Senior Support Escalation Engineer
Microsoft Enterprise Platforms Support
High Availability\Virtualization Team