Windows 8 / Windows Server 2012: Start Screen and User Interface Part 2
Welcome to day 3 of our Launch Series. This is part two of the new Start Screen and User Interface in Windows 8. In part one, we covered tiles and groups. Today, we will look into switching between applications, the Snap feature, and charms.
The corners of the Start screen are “hot” and are the best way to perform some of the most commonly used actions in Windows 8.
- Upper-left corner –Switch between apps.
- Lower-left corner – Toggle between the Start screen and your app
- Upper and lower right corners – Displays the Charms Bar. The Charm Bar will disappear after a few seconds if you do not move towards a charm. If moved towards a charm, the Charms Bar will remain visible and allow you to select a charm.
Switching Between Apps
Apps enter from the left side of the screen. If you are running multiple apps, you can switch between apps several ways.
Using Touch
The gesture begins with a swipe from the left edge of the screen. Thumbnails are displayed on the left side for apps that are running. As you swipe from the left to finish the gesture, the thumbnail will expand to fill the screen. Repeat this gesture to cycle through the currently running apps. To switch to a specific app, swipe the left edge without lifting your finger, you will see a list of your recent apps. Select the app you want to run and swipe it in from the left.
Using the Mouse
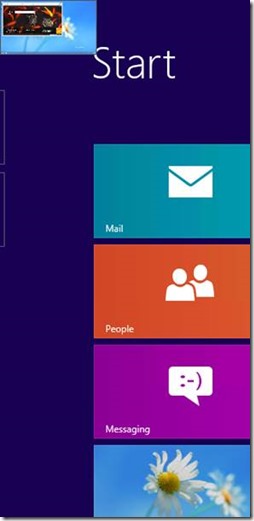
Move the mouse pointer to the upper-left corner and click. This will bring in the next app. If there is more than one app running, you will notice the other app outlines if you do not click.
Figure 1: Switch to next app
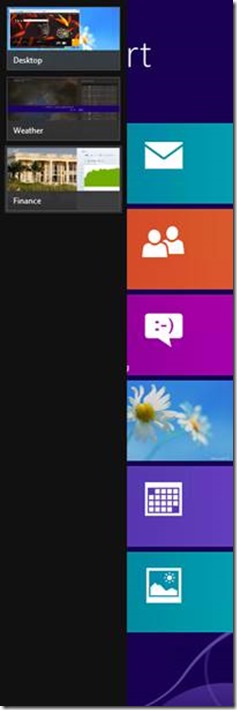
If you move your pointer to the upper-left corner and move down the edge, the App Switching bar shows up. Point to and click the app you want to run.
Figure 2: App Switching Bar
Using the Keyboard
If using the keyboard, pressing the Windows and Tab keys will switch between the current and last used app. If you press and hold the Windows key and tap the Tab key, the App Switching bar is displayed. Keep tapping the Tab key until you switch to the app you want to run.
Note Desktop applications are not shown individually, but rather as one Desktop app.
Pressing the Alt + Tab keys will show a pane in the center of the screen, similar to what you may be familiar with in previous versions of Windows. Desktop apps are shown individually in this view.
Figure 3: Pressing Al+Tab will bring up this pane
Snap
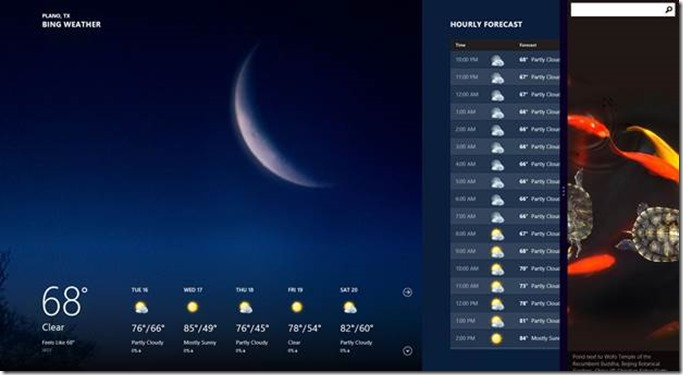
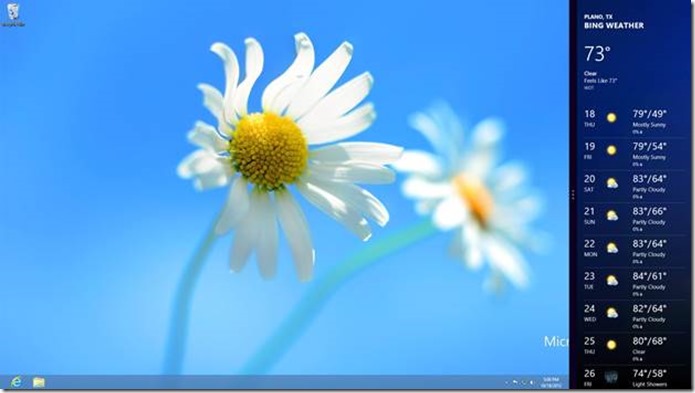
The Snap feature allows for two applications to share the screen. An app can use one third of the screen, while the second will take up the remaining two-thirds. You can keep an app at one-third, two-thirds, or expand to full screen. Two Windows Store apps can be run side-by-side or one Windows Store app and the Desktop using this feature.
Note In order to use the Windows 8 Snap feature, your display must support a minimum resolution of 1366 x 768.
To snap an app, both applications must already be running. Swipe or move your mouse pointer to the left side of the screen until you see the app you want to snap. Drag the app until a divider appears and release.
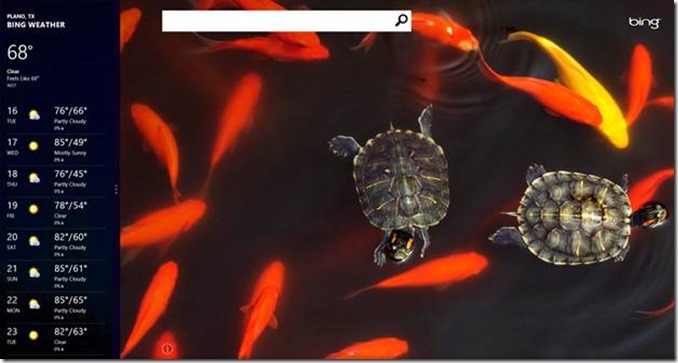
Figure 4: Weather and Bing app using the Snap feature
Figure 5: Move the divider to make the Weather app larger
Figure 6: You can also snap the Desktop and a Windows Store app
Charms
The Charms Bar provides several actions that you can apply against an app that is currently running or get back to the Start screen. It is accessible no matter which app you are in and will appear as a vertical bar on the right side of the screen. If using a touch display, you can swipe in from the right side of the screen to activate the Charms bar or use the keyboard or mouse to activate. To activate with the keyboard, press the Windows + C keys. To activate with a mouse, hover over the top or bottom edge of the right screen and move the pointer towards the center until the background turns a solid black.
Figure 7: The Charms Bar background turns black when activated
The charms available are:
- Search
- Share
- Start
- Devices
- Settings
Search Charm
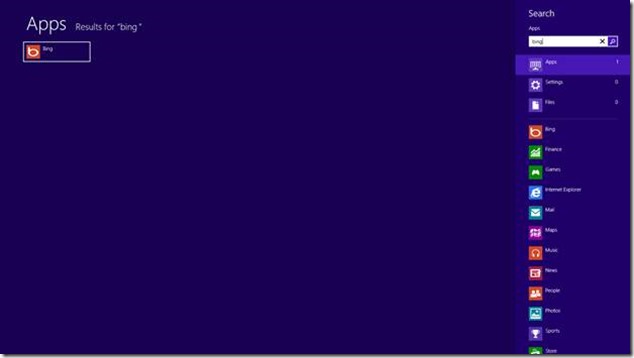
The Search Charm allows you to quickly find items and the results returned depend on the scope you define. By default, the Apps scope will be selected unless you are in a Windows Store app that has registered with the Search service. In that case, the scope will be within that app.
Scopes you can select are:
- Apps – Search for apps by name
- Settings – Search for all settings across the Start screen settings or the desktop Control Panel
- Files – This will use the Windows Search service to find items in your search index. You can use the desktop Control Panel to add additional folders to include.
- Individual Apps – If an app has registered with the Search charm, you can search for your item against the application without having to open it first.
Figure 8: Using Search Charm to find the Bing app
Share Charm
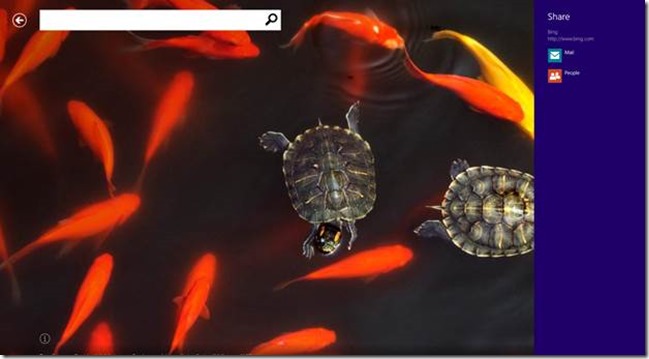
The Share Charm can be used to quickly share content. Applications can register with this charm and allow content to be shared quickly. What is shared depends on the app. For applications that run on the desktop, sharing a screenshot may be the only option. If you are using the Bing app, you can select the Share Charm and will see the following options.
Figure 9: Using the Search Charm with Bing
Start Charm
The Start Charm will open the Start screen from whatever app you are in. Selecting it again will take you back to the app you were previously using. This is identical to pressing the Windows key shortcut.
Devices Charm
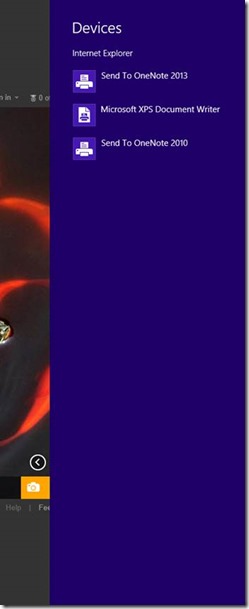
The Device Charm allows you to send content from the app you are in to an attached device such as a printer or share with another device using Near Field Communication (NFC). For instance, if you are in Internet Explorer 10 and select the Device Charm, you will be able to print to an attached printer:
Figure 10: IE 10 Devices Charm
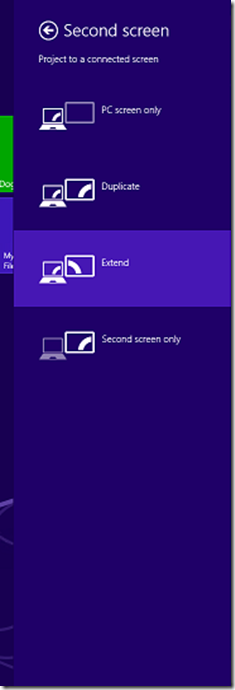
The Device Charm can also be used to configure your multiple monitor configurations.
Figure 11: Devices Charm multi-screen options
Setting Charm
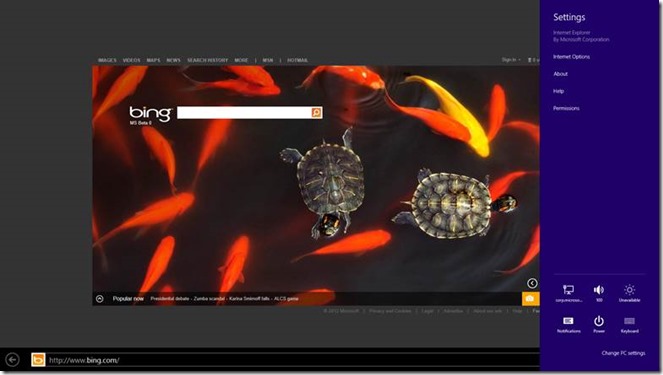
What you see in the Setting Charm will depend on the current app. This charm is where Windows Store apps make their configurable options available to the user. You will also see the “Change PC settings” and a few Windows related options at the bottom right of the charm.
For instance, if you are running the Internet Explorer 10 app, you will see a page similar to the one below.
Figure 12: IE 10 Settings Charm
The Windows settings will persist no matter which app you are currently using. They consist of:
- Name and state of the network you are connected to
- Volume control
- Brightness control
- Notification control
- Power button (you can Sleep, Shut Down, or Restart)
- Keyboard control to switch between different languages
- The Change PC settings
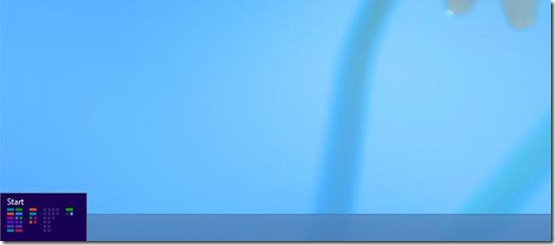
One last item I would like to cover is the handy Quick Links menu. If you move towards the lower-left part of the screen, the Start screen overlay shows up. This will allow you to quickly switch to the Start screen or toggle back to the previous app you were in.
Figure 13: Start screen overlay
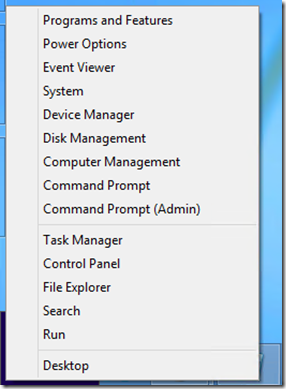
If you right-click the Start screen overly or press the Windows + X keys, it will bring up the Quick Links menu. This is a quick way to bring up the most common admin tools and settings.
Figure 14: Quick Links menu
This concludes part two of the first look at the new Windows 8 Start screen. Tomorrow we will be going over the new Faster Boot Process.
-AskPerf blog Team
