Installing Linux packages on an Azure VM using PowerShell DSC
I’m currently working at a customer who is moving to our Azure Cloud and wants to deploy their Azure Resources as much as possible automated. We are using Visual Studio Team Services for the Release Pipeline, Operations Management Suite to gain visibility and control. Part of the Automation and Control Solution of OMS is Configuration Management.
In this blog I will explain how to use Desired State Configuration for Linux to install software on an Linux VM deployed in Azure.
| Note: The current version of the Azure DSCForLinux extension (DSC package version 1.1.1.70) has a bug that prevents the installation of packages via the nxPackage resource that is why we have to upgrade the OMI and DSC packages to the latest version. In the future this would probably not be needed for Linux VMs with a DSCForLinux Extension. |
Scenario:
In this blog post we are going to deploy the Cowsay package (configurable talking cow) on an already deployed Ubuntu VM in Azure using PowerShell Desired State Configuration for Linux.
Pre-requisites:
- Azure Subscription
- Ubuntu VM deployed in Azure
- PowerShell Posh-SSH module installed on Windows machine
High-Level steps for applying DSC Configuration to Linux VM
- Connect to Azure
- Create Storage Account for hosting the DSC Configuration
- Create a Container within the Storage Account
- Create first DSC Configuration for Linux
- Add DSC Configuration to Container in Storage Account
- Create SAS Token
- List Storage Keys
- Deploy DSC Configuration and enable DSC For Linux
- Upgrade de OMI Server and DSC Packages (probably not needed in future releases of the DSCForLinux Extension)
- Create new DSC Configuration with nxPackage DSC resource
- Deploy new DSC Configuration to target node
Pre-requisite step 2. Deploy simple Ubuntu VM in Azure
You can easily install an Ubuntu VM using the following ARM Template Deploy to Azure button.
Pre-requisite step 3. PowerShell Posh-SSH module installed on Windows machine
You can find the Posh-SSH module in the PowerShell Gallery. You can install the module with the following PowerShell commando:
Install-Module -Name Posh-SSH
We are going to use this PowerShell module to communicate from PowerShell via SSH with the Ubuntu VM deployed in VM. Thank you Carlo Perez for creating this great PowerShell module.
Step 1. Connect to Azure.
 #region 1. Connect to Azure
Add-AzureRmAccount

#Select Azure Subscription
$subscription =
    (Get-AzureRmSubscription |
        Out-GridView `
        -Title 'Select an Azure Subscription ...' `
    -PassThru)

Set-AzureRmContext -SubscriptionId $subscription.subscriptionId -TenantId $subscription.TenantID
#endregion
Step 2. Create Storage Account for hosting the DSC Configuration
Remark: make sure you have created the following variables (ResourceGroup, StorageAccountName) before running below PowerShell code.
 #region 2. create storage account if not created yet
New-AzureRmStorageAccount -ResourceGroupName $ResourceGroupName -Name $storageaccountName -Type Standard_LRS -Location $Location
Get-AzureRmStorageAccount -ResourceGroupName $ResourceGroupName -Name $storageaccountName -OutVariable storageaccount
#endregion
Step 3. Create a Container within the Storage Account
This container will host the initial DSC Configuration for the Linux VM.
 #region region 3. Create a container. The permission is set to Off which means the container is only accessible to the owner.
Set-AzureRmCurrentStorageAccount -ResourceGroupName $ResourceGroupName -Name $storageaccountName
New-AzureStorageContainer -Name dscforlinux -Permission Off #lowercase!!
#endregion
Step 4. Create first DSC Configuration for Linux
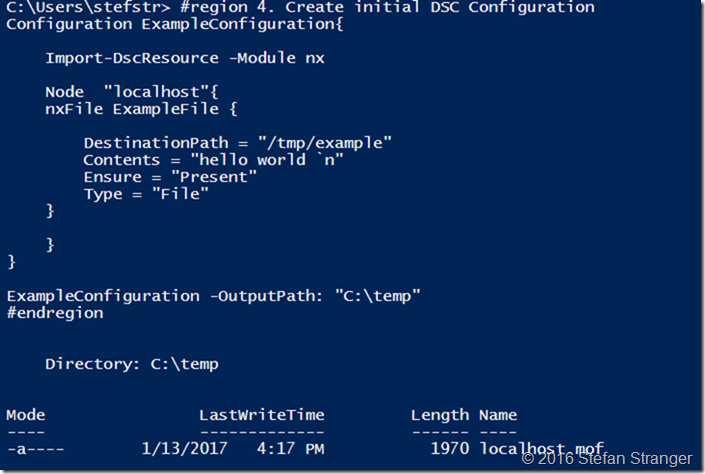
This DSC Configuration will create a file called example in the /tmp folder on the Linux VM with the text ‘Hello World’. Make sure you have installed the nx DSC Resource Module on your Windows machine. (Install-Module –name nx)
 #region 4. Create initial DSC Configuration
Configuration ExampleConfiguration{

    Import-DscResource -Module nx

    Node  "localhost"{
    nxFile ExampleFile {

        DestinationPath = "/tmp/example"
        Contents = "hello world `n"
        Ensure = "Present"
        Type = "File"
    }

    }
}

ExampleConfiguration -OutputPath: "C:\temp"
#endregion
Output:
Step 5. Add DSC Configiration to Container in Storage Account
Remark: make sure you have created the following variable (DSCForLinxFile) where you have stored the mof file, before running below PowerShell code.
 #region 5. Add your template to the container.
Set-AzureStorageBlobContent -Container dscforlinux -File $DSCForLinuxFile
#endregion
Output:
You can verify in the Azure Portal in de Container from the Storage Account if the mof has been uploaded.
Step 6. Create SAS Token
Shared Access Signatures are an authentication mechanism based on SHA-256 secure hashes or URIs. We are using SAS because we don’t want to publish our mof files to a public URIs.
 #region 6. Create a SAS token with read permissions and an expiry time to limit access. Retrieve the full URI of the template including the SAS token.
$templateuri = New-AzureStorageBlobSASToken -Container dscforlinux -Blob 'localhost.mof' -Permission r -ExpiryTime (Get-Date).AddMonths(6) -FullUri
#endregion
Step 7. List Storage keys
We need this information in the DSCForLinux Configuration settings.
 #region 7. list storage keys
Invoke-AzureRmResourceAction -ResourceGroupName $ResourceGroupName -ResourceType Microsoft.Storage/storageAccounts -ResourceName $StorageAccountname -Action listKeys -ApiVersion 2015-05-01-preview -Force -OutVariable keys
#endregion
Step 7. Deploy DSC Configuration and enable DSC For Linux
Let’s deploy our first DSC Configuration for our Linux Machine using the following PowerShell code.
Remark: make sure you have the values for the StorageAccountName, StorageAccountKey (retrieved in step 7) and FileUri (retrieved in step 6) at hand before running below PowerShell code.
 #region 8. deploy DSC for linux extension

#Check extension
$extensionName = 'DSCForLinux'
$publisher = 'Microsoft.OSTCExtensions'
Get-AzureRmVMExtensionImage -PublisherName Microsoft.OSTCExtensions -Location $location -Type DSCForLinux #Check lastes version
$version = '2.0'

# You need to change the values in the private config according to your own settings.
#StorageAccountKey can be retrieved from region 7.
#run $keys[0].key1 and paste info into StorageAccountKey property.
$privateConfig = '{
  "StorageAccountName": "[enter your storage account name]",
  "StorageAccountKey": "[enter your storage account key]"
}'

#FileUri inf can be retrieved from $templateUri variable
$publicConfig = '{
  "Mode": "Push",
  "FileUri": "[enter output from $templateUri]"
}'

Set-AzureRmVMExtension -ResourceGroupName $ResourceGroupName -VMName $vmName -Location $location `
  -Name $extensionName -Publisher $publisher -ExtensionType $extensionName `
  -TypeHandlerVersion $version -SettingString $publicConfig -ProtectedSettingString $privateConfig
#endregion
Output:
You can verify in the Azure Portal if the DSCForLinux configuration provisioning is succeeded.
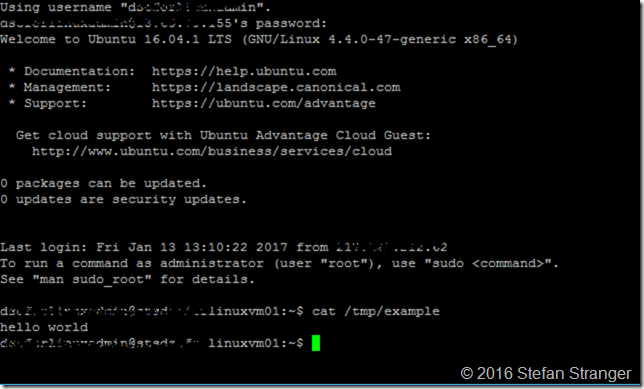
After connecting using Putty or using the Posh-SSH PowerShell Module to your Linux VM you can verify if the DSC Configuration is applied.
The next steps will show how to create a new DSC Configuration which will deploy the cowsay package.
LinuxforDSC and the Posh-SSH Module – Better together
One of the great PowerShell modules on the PowerShell Gallery is the Posh-SSH Module which helps us to connect to our Linux VM and do more activities via SSH.
First we need to connect to our VM in Azure via SSH. Use the same UserAccount and Password you used when creating the Ubuntu VM in Pre-requisite step 2.
 #region retrieve dsc logs remotely via ssh
$credential = Get-Credential
$sshsession = New-SSHSession -ComputerName '[fqdn of ubuntu vm in azure]' -Credential $credential
Invoke-SSHCommand -Command {uname -a} -SSHSession $sshsession | select -ExpandProperty output
#endregion
Output:
We can retrieve all kind of DSC information via the SSH Session.
 #region Get DSC Config
Invoke-SSHCommand -Command {sudo /opt/microsoft/dsc/Scripts/GetDscConfiguration.py} -SSHSession $sshsession | select -ExpandProperty output
#endregion

#region Check DSC version
Invoke-SSHCommand -Command {sudo dpkg -l | grep dsc} -SSHSession $sshsession | select -ExpandProperty output
#endregion

#region check DSC Mof files
Invoke-SSHCommand -Command {sudo ls /opt/microsoft/dsc/mof} -SSHSession $sshsession | select -ExpandProperty output
#endregion


#region check DSC nxPackage Resource info
Invoke-SSHCommand -Command {sudo cat /opt/microsoft/dsc/modules/nx/DSCResources/MSFT_nxPackageResource/MSFT_nxPackageResource.schema.mof} -SSHSession $sshsession | select -ExpandProperty output
#endregion
Output:
If we want to deploy packages on the Linux Machine with the nxPackage DSC resource we need to upgrade the DSC version from 1.1.1.70 (which is default installed by the DSCForLinux Extension). In future editions of the DSCForLinux Extension this step is probably not needed. The current DSC package version has a bug why the nxPackage does not work as expected.
Step 9. Upgrade de OMI Server and DSC Packages
Download the latest OMI package from the Github Repo and store in /tmp folder
 #region update to latest DSC version
#Download the latest omi package from Github and save in /tmp folder
Invoke-SSHCommand -Command {sudo wget https://github.com/Microsoft/omi/releases/download/v1.1.0-0/omi-1.1.0.ssl_100.x64.deb -P /tmp} -SSHSession $sshsession | select -ExpandProperty output
#endregion
Result:
Do the same for DSC package
 #region update to latest DSC version
#Download the latest DSC from Github and save in /tmp folder
Invoke-SSHCommand -Command {sudo wget wget https://github.com/Microsoft/PowerShell-DSC-for-Linux/releases/download/v1.1.1-294/dsc-1.1.1-294.ssl_100.x64.deb -P /tmp} -SSHSession $sshsession | select -ExpandProperty output
#endregion
And finally install both packages.
 #region install OMI and DSC
#Download the latest DSC from Github and save in /tmp folder
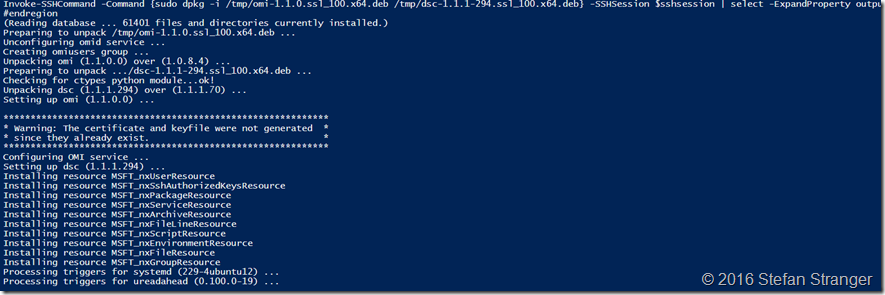
Invoke-SSHCommand -Command {sudo dpkg -i /tmp/omi-1.1.0.ssl_100.x64.deb /tmp/dsc-1.1.1-294.ssl_100.x64.deb} -SSHSession $sshsession | select -ExpandProperty output
#endregion
Output:
If we now verify the DSC version we see it’s upgraded from 1.1.1.70 to 1.1.1.294
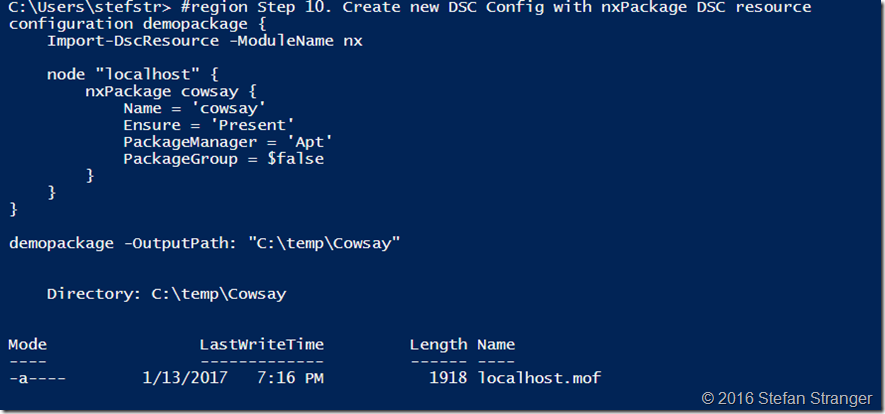
Step 10. Create new DSC Config with nxPackage DSC resource
We are now ready to create a new DSC Package which deploys the Cowsay package.
This how the DSC Configuration should look like: (please ignore below layout)
 #region Step 10. Create new DSC Config with nxPackage DSC resource
configuration demopackage {     Import-DscResource -ModuleName nx     node "localhost" {          nxPackage cowsay {             Name = 'cowsay'
            Ensure = 'Present'
            PackageManager = 'Apt'
            PackageGroup = $false         }     }
}

demopackage -OutputPath: "C:\temp\Cowsay"
#endregion
Output:
Step 11. Deploy new DSC Config to target node
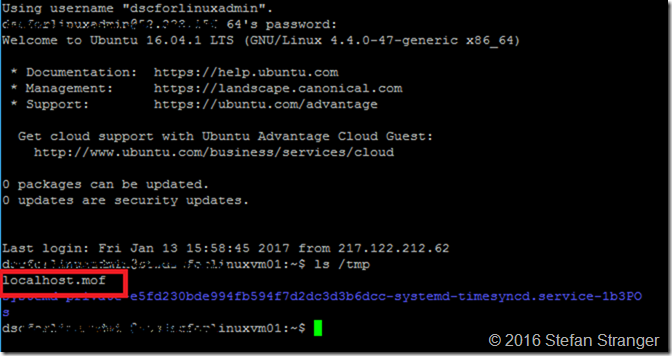
We are going to upload the newly created mof file using the Posh-SSH cmdlet Set-SFTPFile.
 #region 11. Upload DSC Config file using Set-SFTPFile
$SFTPSession = New-SFTPSession -ComputerName 'stsdscforlinuxvm01.westeurope.cloudapp.azure.com' -Credential $credential
Set-SFTPFile -SFTPSession $SFTPSession -LocalFile 'C:\temp\cowsay\localhost.mof' -RemotePath /tmp
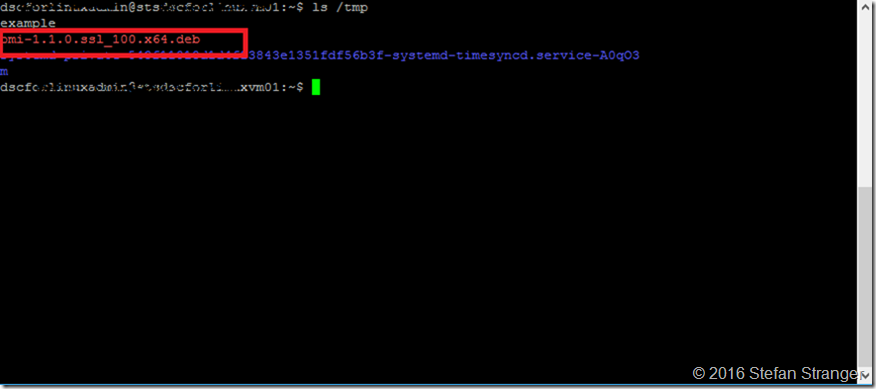
Below you see the localhost.mof file is uploaded the Linux VM using Putty client.
We can now call the StartDscConfiguration.py script to apply the newly created DSC Configuration.
 #region
Start DSC Config Invoke-SSHCommand -Command {sudo /opt/microsoft/dsc/Scripts/StartDscConfiguration.py -configurationmof /tmp/localhost.mof} -SSHSession $sshsession | select -ExpandProperty output

#endregion
Output:
We can also check the configuration with the GetDscConfiguration.py script.
And finally we can check if Cowsay is installed.
 #region
Run Cowsay Invoke-SSHCommand -Command {cowsay "Hello World!"} -SSHSession $sshsession | select -ExpandProperty output

#endregion
You can find the complete PowerShell script and the Ubuntu ARM Template on my Github Repository.
Enjoy!
References:
- Visual Studio Team Services
- Operations Management Suite
- Operations Management Suite – Automation and Control
- Get started with Desired State Configuration (DSC) for Linux
- Cowsay - configurable talking cow
- PowerShell Posh-SSH module
- DSCForLinux extension on a Ubuntu VM
- Azure for Linux Extension
- Github Repository with all ARM Templates and the complete Powershell script

