Creating Microsoft Identity Manager (SP1) Portal Site on SharePoint 2016
Hello all been a busy season for FIM/MIM today I wanted to walk through the steps of installing MIM SP1 on SharePoint 2016. Below are the steps I took to get everything working from service and portal standpoint. As a reminder all accounts were pre-created and service principal names(SPN) were already set. For more information, you can find out how I set this up in my book (https://aka.ms/mimbook) or my go to link: https://setspn.blogspot.com/2011/06/fim-2010-understanding-kerberos.html
- Install SharePoint 2016 (Standard or Enterprise)
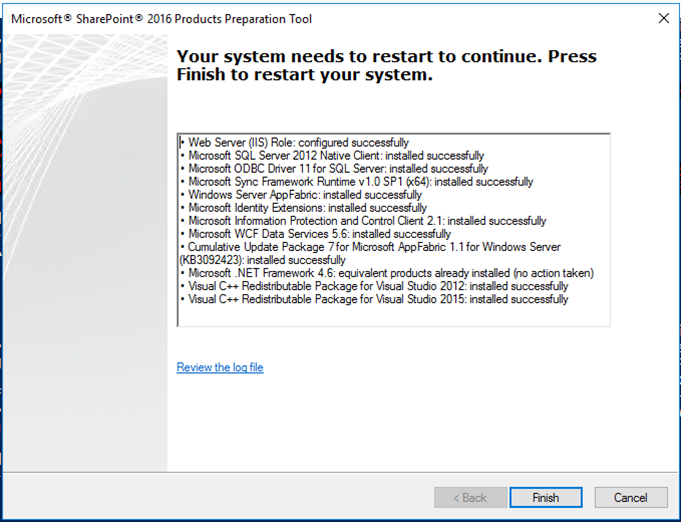
- Install prerequisite for SharePoint 2016
- .\prerequisiteinstaller.exe
- If failed, setup the windows prerequisites manually
- .\prerequisiteinstaller.exe
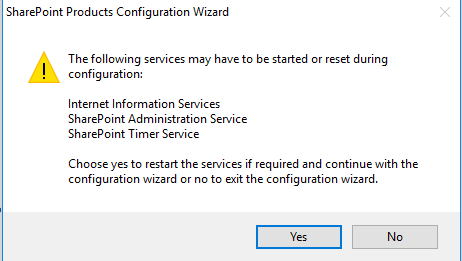
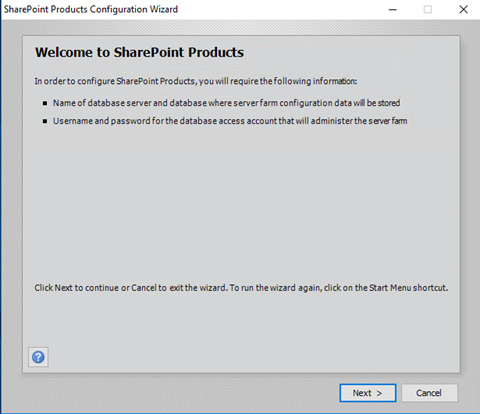
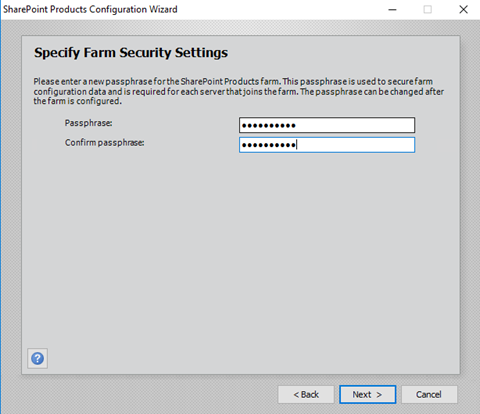
- Run SharePoint Configuration
- I have staged the following accounts
svc-mimsps - MIM SharePoint Configuration Account
svc-mimspspool - MIM Sharepoint Pool Account
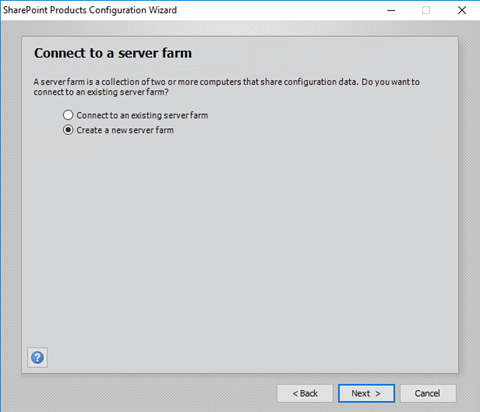
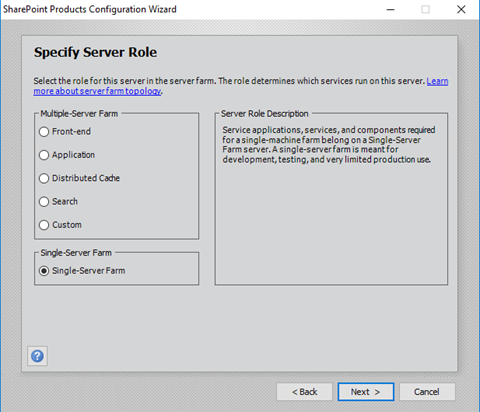
- In our setup we will use the standalone (Single-Server-Farm) as this portal server is dedicated to the MIM SP1 services
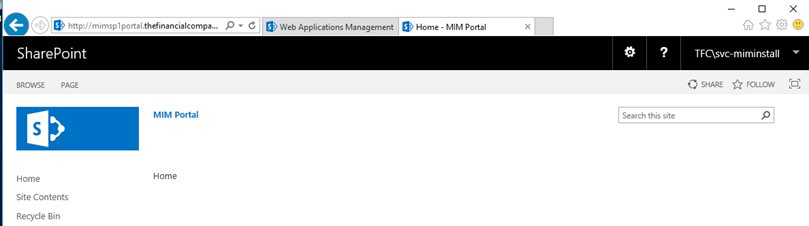
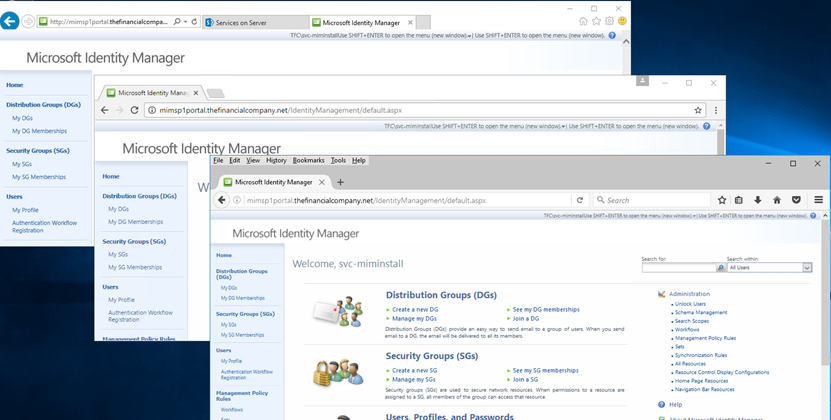
- We will now create the SharePoint application that will host our site by running the following commands below in the SharePoint 2016 Management Shell(Elevated): We will use the mimsp1portal.thefinancialcompany.net as our url as we have MIM (PreSP1) within the environment.
- $dbManagedAccount = Get-SPManagedAccount -Identity TFC\svc-mimsps
New-SpWebApplication -Name "MIM Portal" -ApplicationPool "MIMAPPPool" -ApplicationPoolAccount $dbManagedAccount -AuthenticationMethod "Kerberos" -Port 80 -URL https://mimsp1portal.thefinancialcompany.net
$t = Get-SPWebTemplate -compatibilityLevel 15 -Identity "STS#1"
$w = Get-SPWebApplication https://mimsp1portal.thefinancialcompany.net:80
New-SPSite -Url $w.Url -Template $t -OwnerAlias TFC\svc-miminstall -CompatibilityLevel 15 -Name "MIM Portal" -SecondaryOwnerAlias TFC\administrator
$contentService = [Microsoft.SharePoint.Administration.SPWebService]::ContentService;
$contentService.ViewStateOnServer = $false;
$contentService.Update();
Get-SPTimerJob hourly-all-sptimerservice-health-analysis-job | disable-SPTimerJob 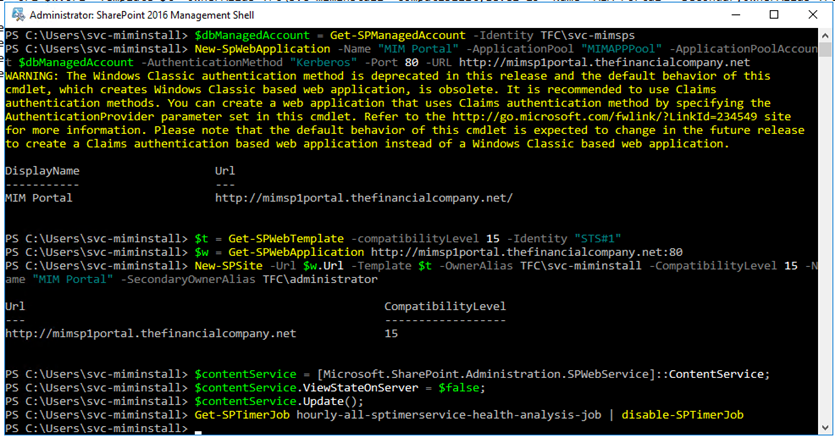
- $dbManagedAccount = Get-SPManagedAccount -Identity TFC\svc-mimsps
- Now we will confirm the site is reachable and ready for install
- Now you're ready to install MIM SP1 Service and Portal (/en-us/microsoft-identity-manager/deploy-use/install-mim-service-portal)
- Now you can navigate using IE, Chrome, Firefox(How Exciting!!)
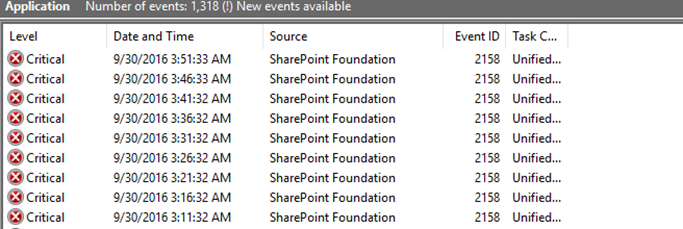
- Once Complete and you can navigate to the MIM Portal you will also notice the Event log filling up with 215X error :(
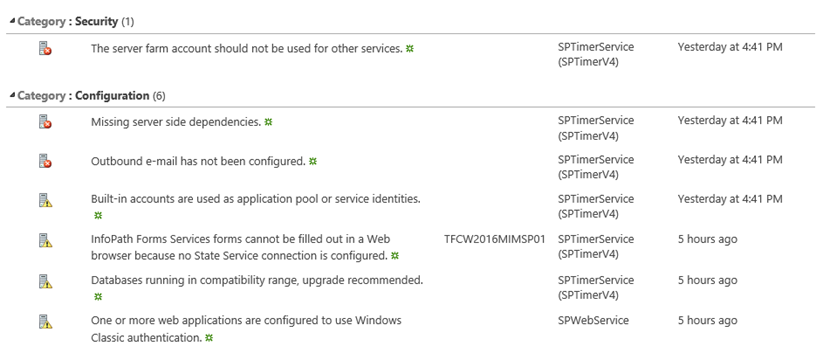
- As we look at the errors we need to evaluate if they are needed within the environment. The rules are helpful to identify performance and issue within the SharePoint farm it is not recommended to disable them all but identify and resolve any issues. To look at the rules
- In central admin you would see this:
- In central admin you would see this:
- To disable the rule within SharePoint we can simply opened the SharePoint 2016 Management Shell(Elevated) and ran Get-SPHealthAnalysisRule with the Identity parameter to get the exact rule. We dumped all the rules by just passing the same commend without the Identity param to notepad and searched for the ones we wanted to possible disable:
- BuiltInAccountsUsedAsProcessIdentities
- ContentDatabaseCorruption
- OutgoingEmailIsNotConfigured
- BuiltInAccountsUsedAsProcessIdentities
- DatabaseUpgradeRecommended
- WindowsClassicTest
- InfoPathStateServiceConfigurationHealthRule
- WindowsClassicTest
- Once we identified the ones that can be disabled we ran the following below
- Get-SPHealthAnalysisRule -Identity OutgoingEmailIsNotConfigured | Disable-SPHealthAnalysisRule