Fundamentals: Cloning a production database to a test server
Recently I had a conversation with someone who maintains an ISV offering. He is the acting SQL Server DBA (for several years now). He described what he did to move a copy of the current production system for a training session on another continent. The steps he took were:
- Take the database off line
- Detach the production database
- Copy the database files to a portable device
- Reattach the production database
- Put the database on line
- Head for the airport..
When he arrived at the training site, he copied the files off the portable device, attached them .... SQL Server complained. He had not copied the transaction log. A few phone calls and a download, and then everything was fine. It worked, but there is an easier way of doing this.
In this post, I will illustrate how to do three actions
Create a copy-only backup of an operational database suitable for use by:
- Training
- Development
- Demonstrations
Install this backup on a different SQL Server as a discardable clone.
Restore the clone to it's original state.
Easy way to make a copy of a database
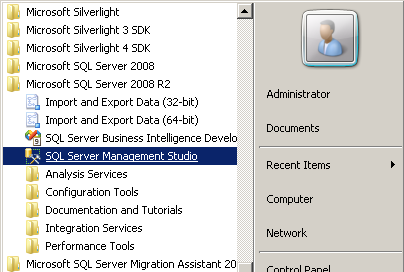
Launch SQL Server Management Studio (SSMS)
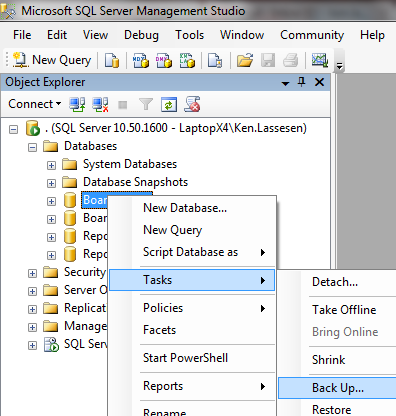
Select the database and right mouse click on it. This will bring up a menu. Click Tasks / Backup as shown below.
 u
uThis will bring up the Back Up Database dialog shown below
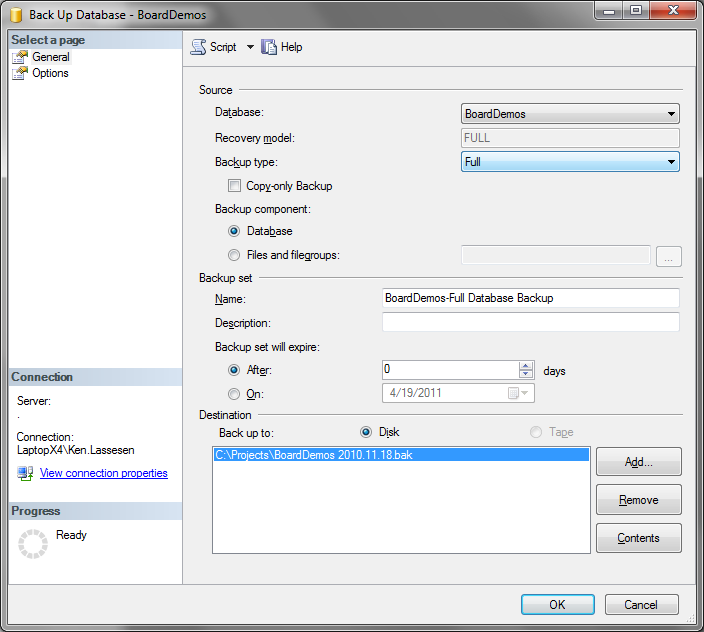 :
: The key is to check Copy-only Backup. This is only available when Backup Type is 'Full'.
 .
. At the bottom, there is a Destination list box. My usual practice is to [Remove] everything listed first (this will not impact scheduled backups).
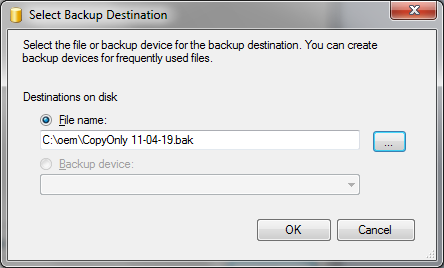
- Next, add a new dated file to the Destination list box by clicking [Add..] Shown below is an example.
- You cannot backup to a network location.
- You can backup to a local drive and then copy to a network location.
- Next, add a new dated file to the Destination list box by clicking [Add..] Shown below is an example.
One word of warning, if there are two or more files listed, the backup will be split over each file.
- If you have one 'selected', it does NOT mean that this is the file that will be used. The select applies only to the [Remove]. In the example below:
.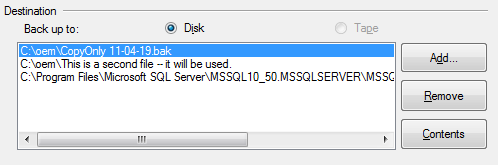
With the three files listed above, 1/3 of the database will be put on each file (which may be good if you have a huge database that will not fit on one portable device). To further illustrate this point:
- With three files listed you would see in C:\oem

- With just one file listed, you would see in C:\oem, approximately 3 times the size of above.

- CAUTION: If a file has been used as a part of a previous backup, you cannot re-use the file in a backup with a different number for destination files. You will get an error message such as:
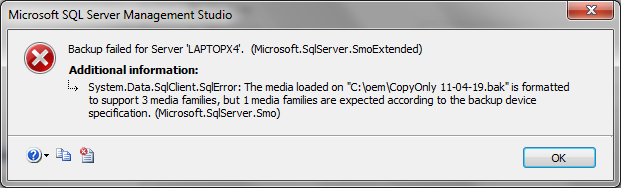
To reuse the name for a different number of backup destinations, you will need to delete the file first.
- With three files listed you would see in C:\oem
- You will need to have ALL of the destination files to do a restore.
- If you have one 'selected', it does NOT mean that this is the file that will be used. The select applies only to the [Remove]. In the example below:
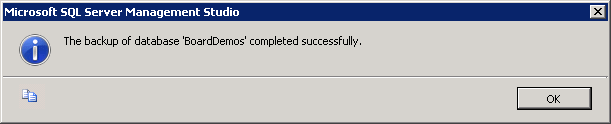
Clicking OK will create the backup (or display an error message - for example, not enough disk space) and display a completion message.
That's it -- there is no need to copy transaction logs, detach databases, etc -- a standalone backup as a file has been created.
Easy way to create a copy on a different machine
On the machine that you wish to place a clone on, do the following steps.
Launch SQL Server Management Studio (SSMS)
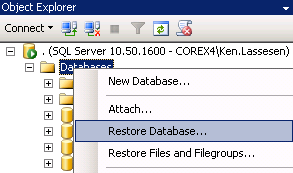
Right mouse click on Databases, then click on Restore Database...
An empty Restore Database dialog will appear as shown below.
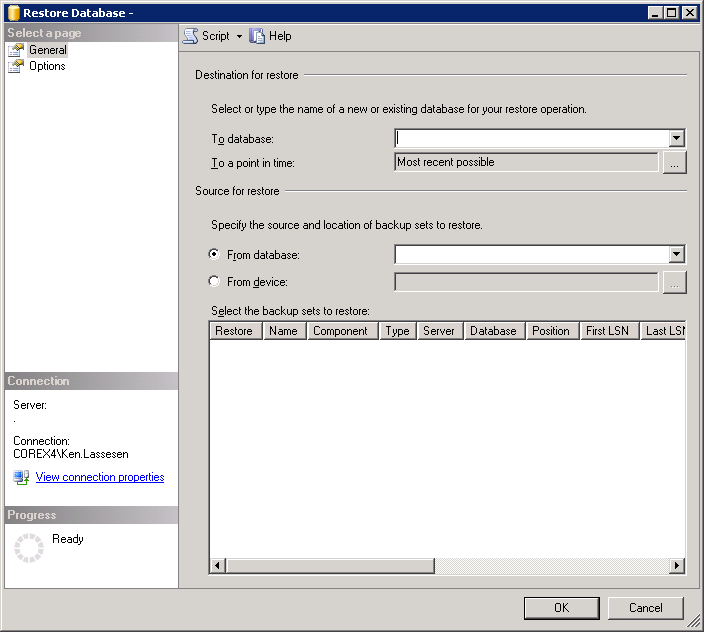
First select on From Device, then click on the [....] to its right
.
This will open the Specify Backup dialog
.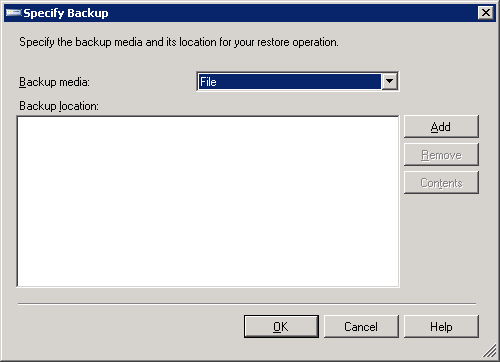
Click on [Add] . The Locate Backup File dialog will appear. Locate and select your backup and then click [OK].
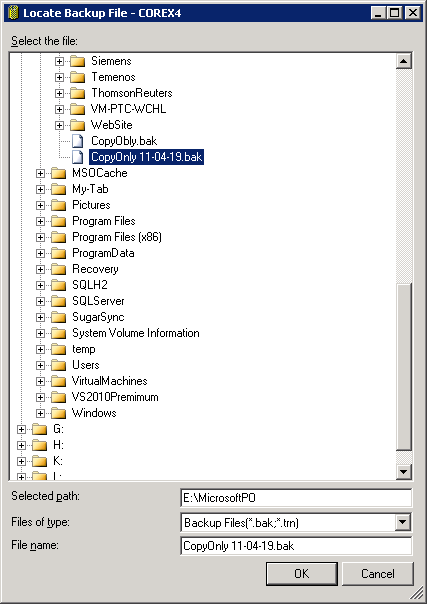
If you cannot see your backup file where you expect it, the file may not have a .bak or a .trn extension. There are two solutions:
- Rename the file to have a .bak extension
- Change the Files of type to 'All files(*)'
This dialog will close and you will see the file listed in the Backup location list box. Click [OK]
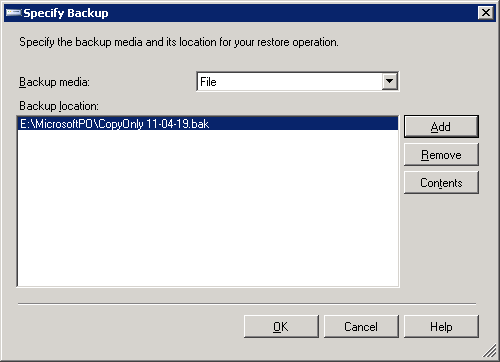
- If you have multiple files, just keep adding them until all are listed in the Backup location list box.
This dialog will reappear with the file(s) listed in the bottom right list box.
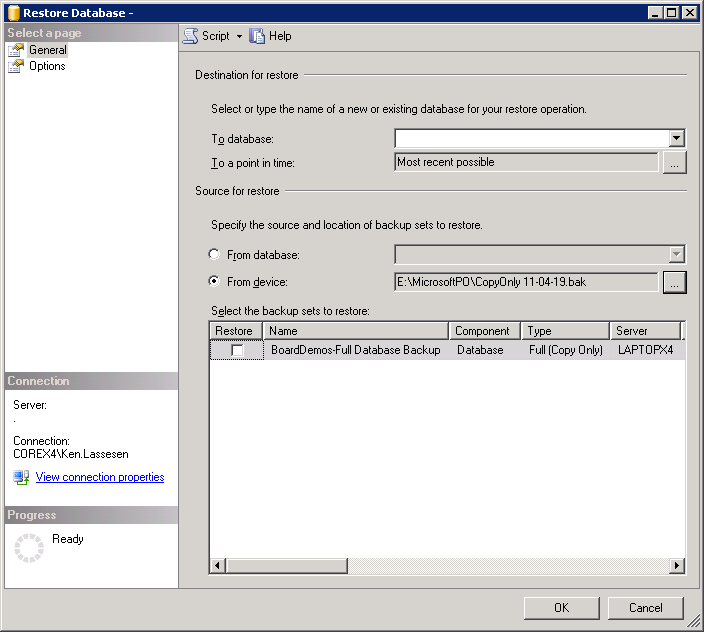
- Unlike the backup dialog, you must select the backup set to use by checking it
.
- You will see under Type, that the backup is identified as a Full(Copy Only)
- Unlike the backup dialog, you must select the backup set to use by checking it
You need to enter the name of the database -- it should not be the same name as any existing databases on this SQL Server. I picked 'MyClone' for purposes of illustration

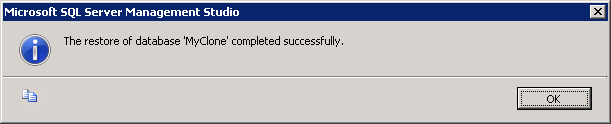
Clicking [OK] is the last step. There's an Options Page (see next section) that can be used to customize the restore, but the defaults are usually sufficient. A dialog will appear after the restore is completed.
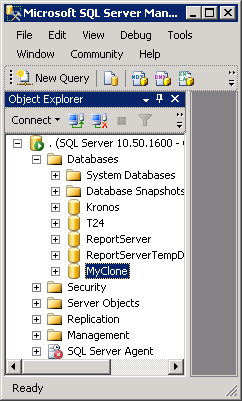
You will now see the database listed in SSMS
.
Restoring a Copy Database
Once the database has been cloned it is easy to restore it back to its original state. Why would you do this?
- If you are using the database for training, then you can remove all of the changes done by students and have the database in a known state for the next class.
- If you are doing development and making changes to be applied to the production database, then you can roll back the database to the original state and test your change scripts.
The steps are similar to the last section.
Launch SQL Server Management Studio
Right mouse click on the database (MyClone in this case) and click Tasks / Restore / Database...
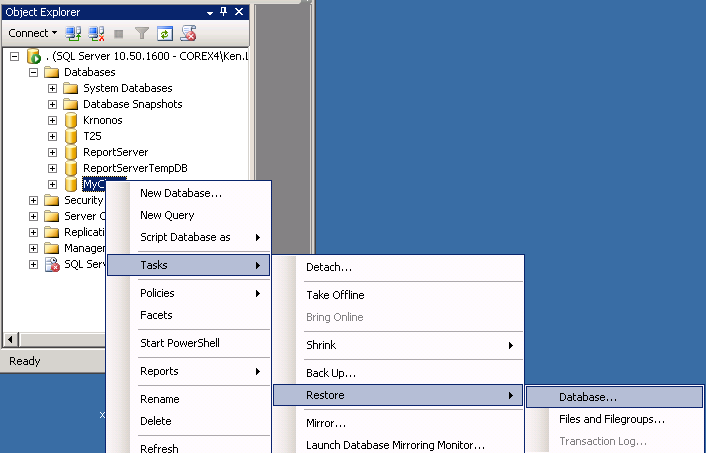
The Restore Database dialog will appear. As above, select From device, then the [...] to select the database backup file we used above.
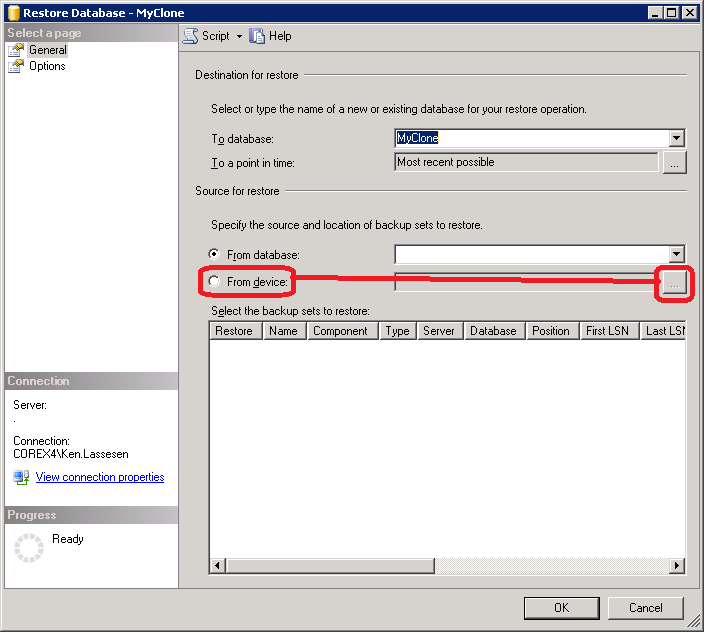
- As above, remember to check the desired item in the bottom right list box before proceeding.
For restores, we need to go to the Option Page listed on the left. After clicking on Options, the page below will appear
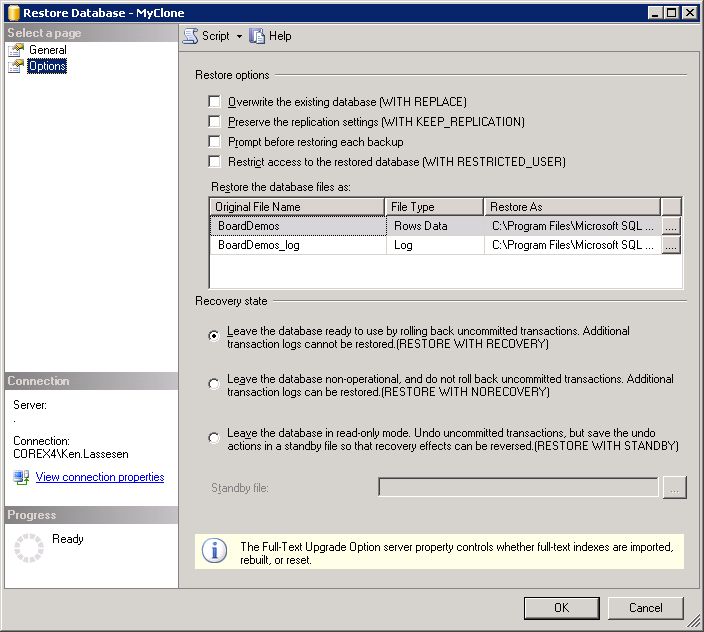
- Now check Overwrite the existing database [WITH REPLACE]

- Now check Overwrite the existing database [WITH REPLACE]
Click [OK] and the backup is stored over the existing database, losing all changes made to it since you installed. A message will appear indicating successful completion as shown in our prior section.
Bottom Line
Moving a database is not a daily or even monthly activity for many people that administer an ISV database as part of their other duties. The above guide should make it easy to do the next time you need to move or copy your production database for testings or training purposes.