Discovery and Risk Assessment Server 2013 - Discovery File Configuration
The following instructions will help you configure options in the Discovery file of Microsoft Discovery and Risk Assessment Server 2013.
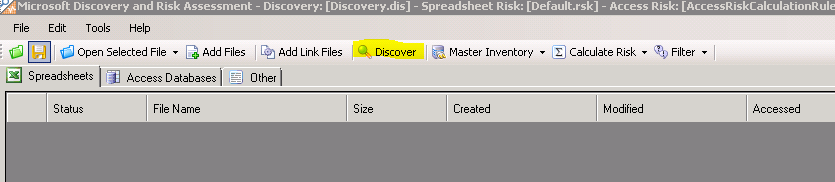
- Open Discovery and Risk Assessment Server.
- Click the Discover button.
- Configure the Discover options:
-
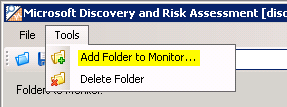
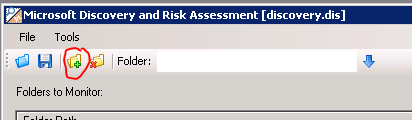
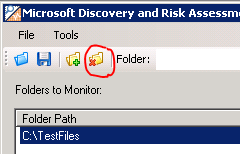
- Click the Tools menu and click Add Folder to Monitor to browse to a folder where you want to discover. Or you can select the Browse Add Folder button
-
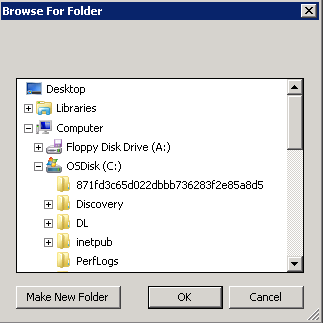
- Select the folder and click OK.
-
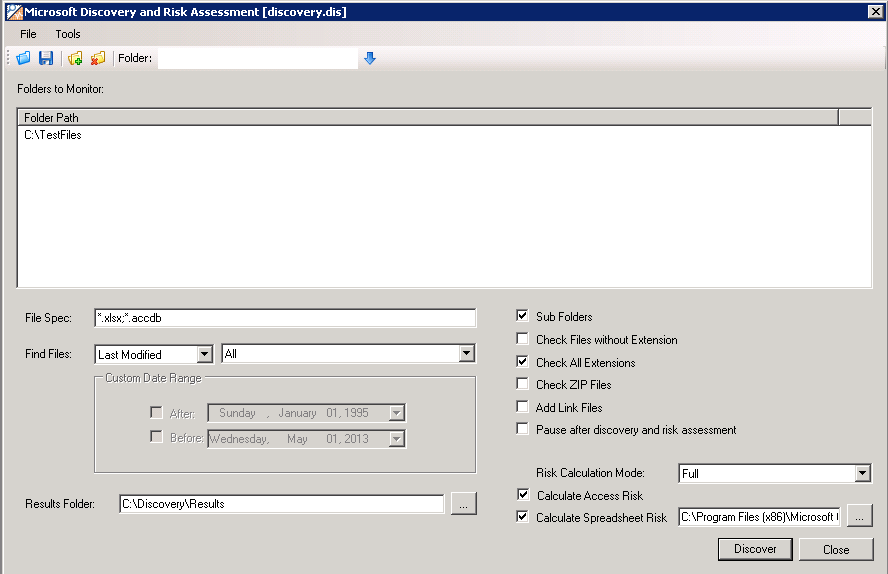
- You may also type a folder name in the Folder field and click the Add Folder button to add the folder to the list of folders to monitor. Repeat this step for as many folders as you want to add. You may add a local folder, a network share, or a SharePoint document library. Here are some examples:
C:\Files
\\server\share\documents
https://sharepointserver/site/Shared Documents
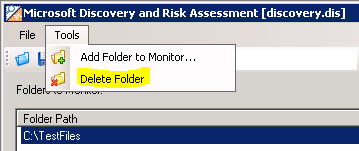
- To delete a folder from the list, select it and go to Tools > Delete Folder, or click the Delete Folder button.
- File Spec: Enter search criteria in the File Spec field. For example, enter *.xls;*.mdb to find all files with either XLS or MDB file extensions. Separate each file spec by a semi-colon.
- Find Files: Specify a date range to narrow the file search.
-
- Choose which date property of the files should be used. Choose either Last Modified, Created, or Last Accessed.
-
- Select the date range from the dropdown list. The default is All. You can choose Custom and specify the start and end dates of the range. For subsequent discoveries, you can choose Since Last Discovery to only discover new files that were not found in previous discovery processes.
- Results Folder: Browse to a folder where you want the discovery results to be saved.
- Choose the discovery options by checking or unchecking the desired options described below:
o Sub Folders: check this box to include subfolders of the folders to be monitored.
o Check Files without Extensions: check this box if you want Discovery to analyze files that have no file extension.
o Check All Extensions: check this box if you want Discovery to analyze all files to determine whether they are Excel files.
o Check ZIP Files: check this box if you want Discovery to search in ZIP files.
o Add Link Files: check this box to search for files linked to the discovered workbooks by Excel links. Adding linked files can significantly slow down the discovery process, because Discovery will need to open a copy of each workbook to determine whether there are any external links to be added to the list of discovered files.
o Pause after Discovery & Risk Processing: Check this box to pause the processing in order to allow values to be entered into UDK fields.
o Risk Calculation Mode: Choose Incremental or Full as the calculation method. Incremental calculation means that the risk calculation will only be performed for files which are new to the Master Inventory list, or files that have changed since the last risk calculation, or if the user-defined key (UDK) configuration has been changed since the last risk calculation was performed. Use the Incremental calculation method for the fastest performance when calculating risk.
o Calculate Access Risk: check this box to calculate risk for MS Access databases after discovery.
o Calculate Spreadsheet Risk: check this box to calculate risk for spreadsheets after discovery. You may also specify a Spreadsheet Risk file to be used when calculating the risk values by browsing to a risk settings file and selecting it.
- To save your discovery configuration, click File > Save, or Save As... , then browse to the desired folder and save the settings as a Discovery (.dis) file.

- Click the Discover button to run the discovery process.
