Validate QoS for Skype for Business Online
In this post we will look at how to validate Quality of Service (QoS) tagging in your on-premises network for Skype for Business Online. This procedure is useful for testing your changes, after configuring the environment for QoS to ensure it is working as designed.
Note: This article will not discuss how to configure your on-premises network for Quality of Service for Skype for Business Online, as this will be addressed in a future article.
Please reference the following article for additional information on QoS and Skype for Business Online: Media Quality and Network Connectivity Performance in Skype for Business Online
Prerequisites:
- QoS is configured in your on-premises network to tag packets with the appropriate DSCP markings (i.e. EF46 for voice, AF41 for video,etc) at the network based on port ranges for Skype for Business Online (best to accommodate all devices such as BYOD, Mac, smartphones, Windows, etc), or use Active Directory Group Policy Object (Windows only). (If using GPO, the network must trust DSCP markings from the clients, however this will only mark DSCP packets outbound from the PC and will not mark inbound packets)
- Skype for Business desktop client is installed on the computer where you will perform the validation.
Tools Required:
- Microsoft Message Analyzer available for download here
Instructions:
- Login to Skype for Business on the computer where Microsoft Message Analyzer is installed.
- Launch Microsoft Message Analyzer as an Administrator
- From within Microsoft Message Analyzer, click the Start Local Trace button:

- Open Skype for Business, and place an outbound audio call to the PSTN using PSTN Calling.
Note: Alternatively you can call another Skype for Business client (Peer to Peer) or join a Skype Online Meeting.
- On the Skype for Business end, generate audio traffic by speaking into the microphone for 30 seconds.
- On the far-end (i.e. the PSTN) generate audio traffic by speaking into the microphone for 10 seconds.
- When finished, hang up the call.
- Return to Microsoft Message Analyzer and click the Stop button on the top toolbar:

- In the filter box at the top of the window, remove all text and type RTP and press Enter, then click Apply.

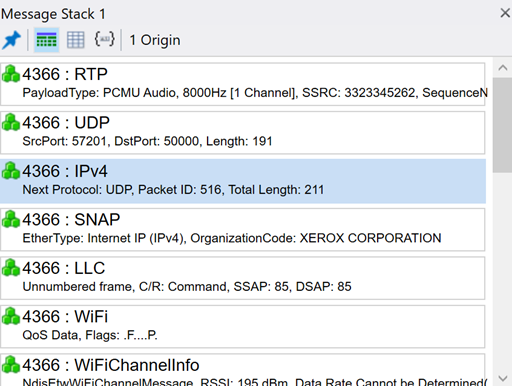
10. This will filter only Real-Time Protocol (RTP) packets, the voice packets sent/received by Skype for Business:
11. Find a packet that has a source from Office365 (in this case 131.253.133.18) and single click to highlight it:

Note: If the test call was to another Skype for Business client (Peer to Peer), find the IP Address of that computer.
12. In the lower left pane of the window under Message Stack, click IPv4
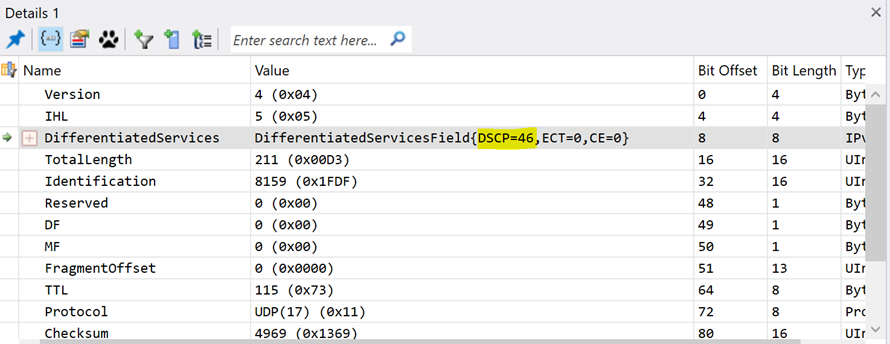
13. To the right, in the Details pane, click the line Differentiated Services to highlight it. (Note, you may need to expand the Name and Value columns)
14. In the Value column of the Differentiated Services line, validate the DifferentiatedServicesField reads DSCP=46. Indicating the RTP packet coming from Office365, traversing your network to your PC using the port range 50,000-50,019 was tagged with Expedited Forwarding (EF) 46.
This same procedure can be used to validate QoS markings for other Skype for Business traffic, such as video.
Important: If ExpressRoute is deployed and correctly configured with the carrier partner, packets over ExpressRoute will also be tagged. See ExpressRoute and QoS in Skype for Business Online for more information.
Congratulations! It is that easy to validate QoS on your network for Skype for Business Online!
(Stay tuned for a future additions to this article on information for validating QoS over a wireless network.)