How to create a folder in document library or a list item in a list utilizing REST API in SharePoint 2013 workflows
This post is a contribution from Kevin Jacob Kurian, an engineer with the SharePoint Developer Support team
We come across this requirement wherein we would need to utilize REST API calls in SharePoint 2013 workflows. Using the new “Call HTTP web-service action” in SharePoint 2013, we can achieve the same. We could utilized any of the available REST APIs to meet our requirement but in this example, I will show how to create a folder (in a document library) and a list item (in a list) using REST API.
1. I created a Site workflow (even a List workflow should work out)
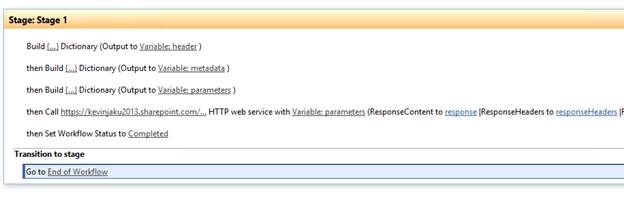
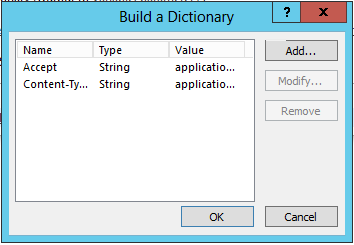
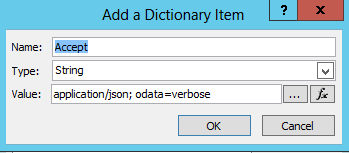
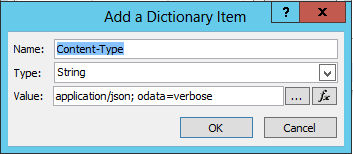
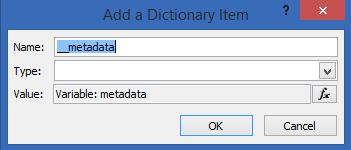
2. The first Dictionary is the header (Output variable) with the following key/value pairs.
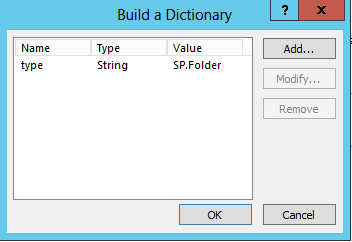
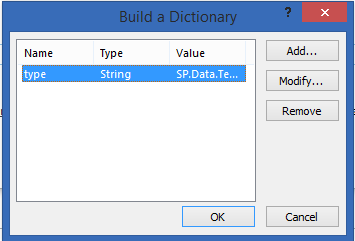
3. Then I created the second Dictionary which is metadata (Output Variable). The SP.Folder type specifies that we are creating a SPFolder utilizing the REST call.
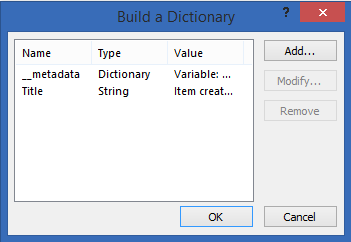
4. The last Dictionary is the parameters (Output variable)
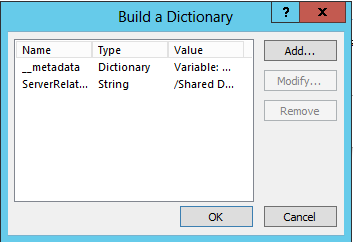
5. The above Server Relative URL gives the relative URL for the document library (“Shared Documents”) along with the new folder name (“Test 2”). In this example, I am creating the folder in a sub-site (“sub”) which requires setting up Workflow elevated privileges shown in Steps 10-13. If we are creating the folder in the same site, then we can avoid setting up the Workflow elevated privileges and by Step 9, our workflow setup is complete.
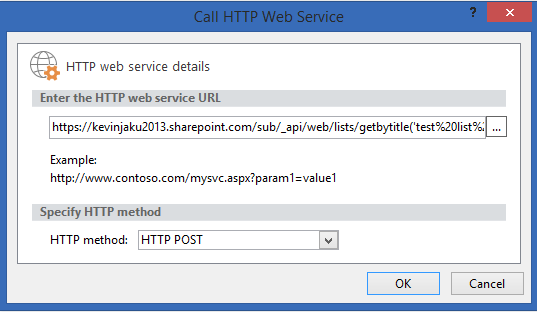
6. Then we add the Call HTTP web-service with the following details.
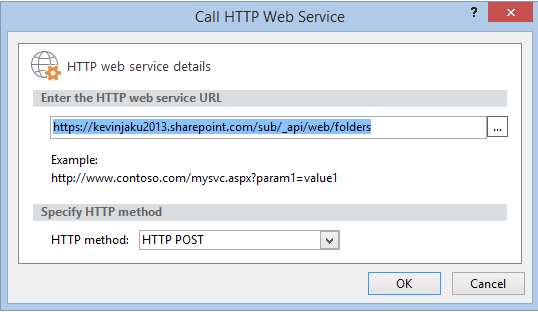
7. The REST API call should contain the name of the sub-site, “sub”.
8. Set the RequestHeaders to Variable header.
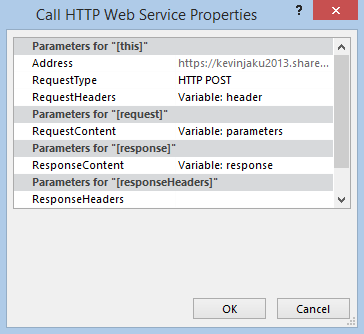
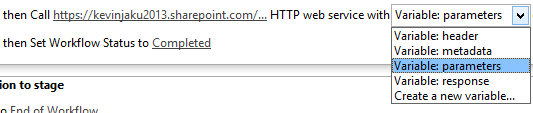
9. Also set the Request parameters to variable:Parameters.
10. Now we need to set the workflow to run in elevated privileges.
11. Please follow this walk-through blog to set the Workflow elevated privileges, https://msdn.microsoft.com/en-us/library/jj822159.aspx
12. The only place where we will differ is the Permissions Request
<AppPermissionRequests>
<AppPermissionRequest Scope="https://sharepoint/content/sitecollection" Right="FullControl" />
</AppPermissionRequests>
13. Don’t change the above Scope value and keep it the same.
14. The above scopes gives workflow with App Steps privileges at a site-collection level.
15. Once the above steps are completed, our workflow should work fine and we should be able to create the folder in sub-site.
Add-On
a) For creating a list item using the same approach, we need some slight changes.
b) In Step 3 (above), the type of the list item should be specified like:-

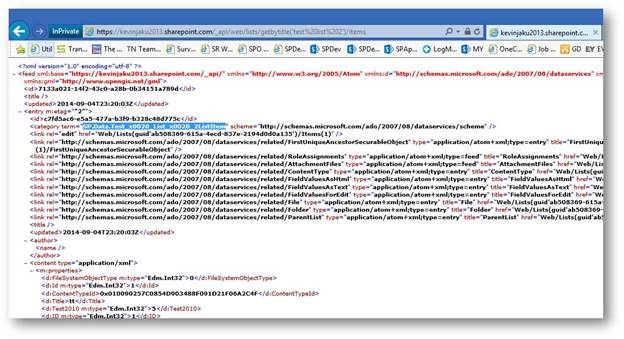
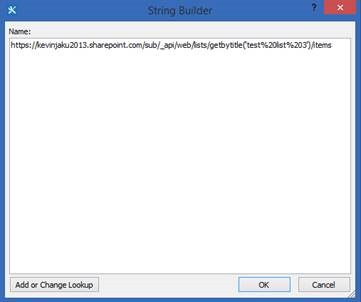
c) The type of the List item varies from each list in the site and to get the type value for your list, you would need to browse to this REST url (https://<site-name>/_api/web/lists/getbytitle(‘<listname>’)/items) and get the <category> tag’s term attribute. The below snippet shows my example SPList type:-
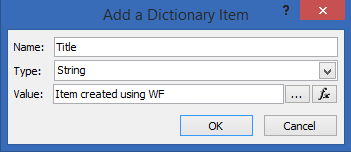
d) In Step 4 (above), instead of the ‘ServerRelativeURL’ , we would need to specify the list fields and list field values. Since I am targeting a simple list, I just have a ‘Title’ field. The below entries should replace the ‘ServerRelativeURL’.
e) In Step 6 (above), we would need to utilize this particular REST API call:-
f) The remaining steps would be the same for the create folder workflow.
Hope this helps in understanding how REST API calls happen from a SharePoint 2013 workflow.